 Welcome to day 3 of the Valentine’s Day Showcase – today I have Vicki from Sassy Blog for you! Vicki and her daughter Jennifer own and operate Sassy Packs – one of the sponsors for the Valentine’s Day Showcase. They are very talented have a lot to offer both new and experienced quilters alike! Please take a few moments to check out their blog and shop.
1. What got you hooked on your craft of choice? I was looking for a winter hobby a few years ago after I quit working. Most of my time was focused on golf, but there were a few months when it was just too cold. So I took a beginning quilting class. I didn’t expect it to hook me as much as it did, but I just loved it! First I joined a small quilting group and then a guild, which helped expand my knowledge – not my skill so much (haha!), just my knowledge! The groups really showed me how big the world of quilting is and much there is to learn!
2. What lights your crafting fire (ie. what keeps you crafting, why do you do it?)? The idea that my quilting interests are always changing. I’ve learned to never say I don’t like this style or that block, because as soon as I do I see it done in new fabrics or a layout that makes me fall in love with it. And then I want to make one! I guess in a way, it’s like golf – you never really master it; you just keep learning and improving.
3. What is your favorite Valentine’s themed junk food? Cinnamon candy!! Red hots, cinnamon hearts, cinnamon Jolly Ranchers and hot tamales (but those are a year round fav!).
______________________________________________________________________________________________________
Hi Melissa and friends! Thanks for having me be a part of your Valentine's Day Showcase. I have a super quick placemat and napkin tutorial. (It'll probably take longer to read the tutorial than it will to actually make the placemats!)
I'm using a striped border print for the body and red Kona for the binding. I also used the same red Kona for the napkins with a light-weight white batiste on the back. I'm sure you could use white Kona also - I just wanted to make them a little lighter in weight.
I used a yard of the border print and had plenty left over - I could easily make 2 more.
The napkins and binding will use about 5/8 yard of red Kona.
The white on the back of the napkins will take less than 1/2 yard.
You'll also need 1/2 yard of backing for the placemats.
Cut a strip of border print 7-1/2" wide by the length of the fabric (I used scissors to follow the lines).
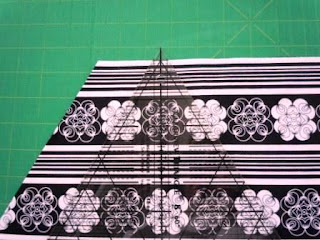
You can cut the wedges with either a 60 degree ruler, or your regular quilting ruler with marked angle lines. I'll do the 60 degree ruler first. Place the ruler near the left edge, making sure you're all the way on the fabric:
Be sure the top line is straight with the fabric's cut edge:
Cut the left side with your rotary cutter (you may have to go to the other side of your table). Don't move the ruler. Cut along the right side of the ruler:
Now lift the ruler, turn it upside down and place it for the next cut:
Cut along the right edge, flip the ruler and cut again. Continue until you have 8 wedges - you may have to cut another strip of fabric.
Note: if your lines are perfectly symmetrical, you can just pile these up. If the stripes are different (like mine), you have to keep the "up" and "down" triangles separate. Otherwise, the lines won't match up when you sew them together.
Finally, we need to cut the long wedges. Mark a spot 2" over from the top of your last cut and lay the ruler's left edge on that spot. Cut 2 long wedges from each direction (total of 4):
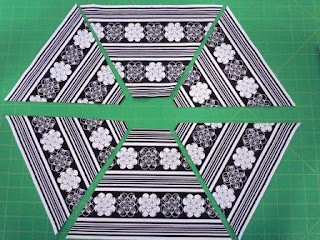
Lay out 4 triangle and 2 long wedges (from the same matching piles) as shown below:
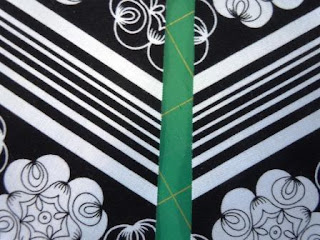
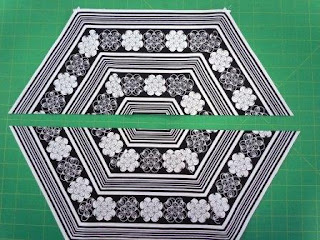
Sew the top three together and then the bottom three together, matching the lines along the seams:
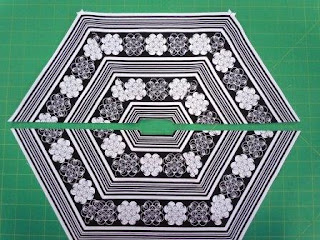
Notice that the center is notched out - lay a ruler along that edge and trim both side even:
Sew these two pieces together!
Add batting and backing; quilt and bind!
*******
BINDING TIP: If you sometimes get those nasty little "peaks" when turning 60 degree corners with binding, click here to see how I solved that problem!
Now, if you don't have a 60 degree ruler:
Most quilting rulers have angle lines marked on them. Find the 60 degree line and lay it even with the bottom edge of your fabric, as shown below. The edge along the left is now a 60 degree line - cut there:
Continue cutting pieces as outlined above. When you are ready to cut the long wedge, mark a spot 2-1/2" from the previous cut and line the right side up with that mark.
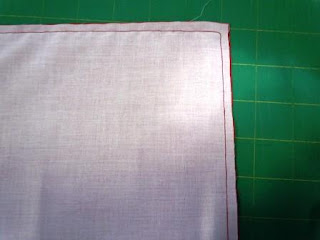
To make coordinating napkins, cut (2) 13-1/2" squares from the red and 2 from the white. Place them right sides together and stitch 1/4" from the edge all the way around, leaving a couple inches open on one side to turn.
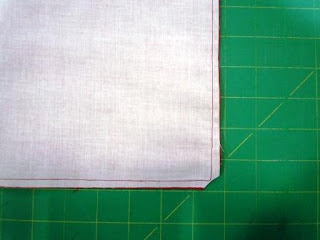
Trim the corners:
Turn and topstitch close to the edge:
Ugh! That last picture was taken at a different time than the others! It really is red, not pink!
And we're all finished!!:
Oh - I need a white tablecloth on that table (and some wine in that glass!)!
Thanks everyone! We blog at http://www.sassypacks.blogspot.com/. We'd love to have you come over for a visit and follow us! :) Happy Valentine's Day!
_________________________________________________________________________
Thank you Vicki for showing us not only how to use a 60 degree ruler - but also how to do this project with our standard quilting rulers! Come back on Monday for a project from Kris over at I don’t have a problem, I have a well-rounded fabric stash!
Will you be spending your weekend whipping up a Valentine's Day Project to enter into the showcase? Get cracking!
![]() NOTE: Don’t forget, I am one of the bloggers who is going to lose Google Friend Connect in March 2012, please take a moment and follow me via Bloglovin’, Facebook, RSS or networked blogs. You are important to me and I want to be able to stay in contact with you! Check my side bar for all the best ways to stay in touch after GFC goes bye bye!
NOTE: Don’t forget, I am one of the bloggers who is going to lose Google Friend Connect in March 2012, please take a moment and follow me via Bloglovin’, Facebook, RSS or networked blogs. You are important to me and I want to be able to stay in contact with you! Check my side bar for all the best ways to stay in touch after GFC goes bye bye!





WOW is this cute !! and the red napkin sets it off ! You make this look real simple ; thanks so much !!!!
Those are beautiful Vicki.
How beautiful! We always need more placemats and these are so neat! Thanks for sharing!
SUCH A GOOD TUTORIAL-THANKS!
Beautiful place mat! Love the way the stripes all line up in this print! 🙂
very cute!! thanks for sharing
After watching this i feel cnoifdent in attempting this (although I NEVER thought I ever could do something like this before). I am making wall hangings for the mommies in my life for mothers’ day. Thanks MSQC for squashing my inhibitions.
a quickie project! thanx! never know when you need a great looking gift.
You always make projects look so easy. I might try this one! Oh, and I love red hots!
Thank you so much for this tutorial! I love it 🙂
Vicki, those are gorgeous! I usually avoid stripes, but now I know just what to do with them! 🙂 Thanks for a great tutorial!
Love the shape of these place mats and your fabric choice!!! TFS
~Terry~
Love it!
Thanks for the tutorial. This looks great with the white table setting.
Oh I love your placemats! Thank you for showing both ways with the two different rulers and how to cut the material. Love your fabric and color choices. This is on my to-do list for sure!