Welcome to Day 10 of the Valentine’s Day Showcase! We are wrapping things up with Michele from Quilting Gallery – she has a gorgeous wall hanging tutorial for all of us. I met Michele this summer when I submitted my Cobblestone Roads quilt to one of the weekly quilting contests that Michele hosts over on quilting gallery. Michele has been a wonderful friend the past few months and I’m so happy to feature her here!
What got you hooked on your craft of choice?
Initially, it was quilts in the local quilt store’s window that caught my eye and drew me into their store. I was fascinated with the fabulous colours and the intricate designs. After a few years, I took a long hiatus from quilting to start my own business, but returned four years ago. Now, it is the fabulous blogs, tutorials, videos and most of all the friendships, that keep me hooked. Oh, and the lovely fabrics and colours that I get to play with every day.
What lights your crafting fire (ie. what keeps you crafting, why do you do it?)?
Ooops, I think I answered that above already. I keep at it to challenge myself to be better, to learn new things, to experiment, to play and most of all to have FUN. Quilting feeds my soul and keeps me sane.
What is your favorite Valentine’s themed junk food?
Do jelly beans count?
Take it away Michele!
Hi everyone! Thanks so much to Melissa for organizing this super fun Valentine’s showcase party. I’m thrilled to be a part of it.
I’m Michele Foster and I own and manage the web site, Quilting Gallery. My site is dedicated to bringing quilters together from around the world and inspiring quilters’ creativity.
It includes the quilting bloggers directory, quilt shop locator, quilter’s market and the quilt guilds directory. I host swaps, weekly quilt contests, challenges, guest bloggers and quilt-alongs too. I also have a brand new section that started this month called the Learning Center hosted by Pat Sloan. We are tackling Storage and Organization this month. I hope you’ll drop by for a visit.
Here’s my Love-ly Garden wall hanging (or table runner) that I’ve created for you. It finishes at 22” x 38”.
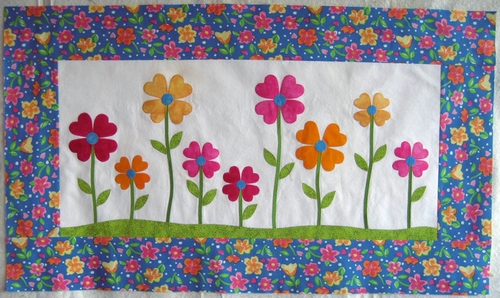
As you can see, it’s not quilted or bound yet. My apologies, but a work crisis came up that I ended up having to deal with this weekend. Thankfully, I had the quilt top completed before.
Let’s get started…
Download a copy of this tutorial and the pattern templates.
Love-ly Garden is a fusible appliqué quilt project. Choose a fabulous piece of fabric for your borders.. this will be your focus fabric. Pull coordinating colours from your focus fabric for your heart-shaped flower petals, centres, grass and leaves.
Requirements:
- 14” x 30” solid for the background
- 2 yards ¼”-wide green bias or ric-rac for stems
- 2.5” x 30” green fabric for the grass
- scraps of fabric that coordinate with your border for the flowers (heart petals & centres) and leaves
- 25” x 40” focus fabric for the border and binding
- 25” x 40”/42” piece backing fabric
- 24” x 40” piece of batting
- ½” yard fusible web
- pattern templates (attached)
- fabric glue stick (optional)
Note: Green fabric shown in the photo below was replaced with another piece.
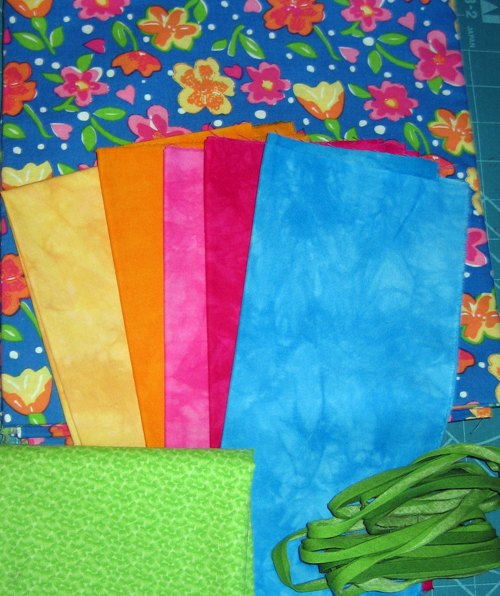
Instructions:
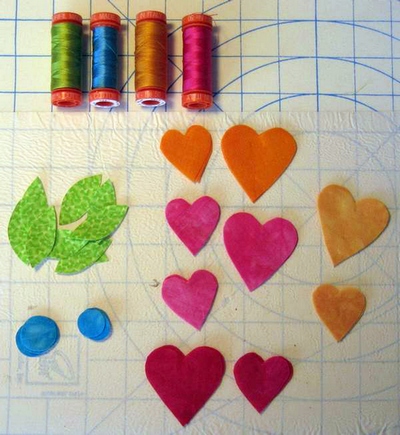
Using the templates in the download, trace the flower hearts, centres and leaves onto your fusible web. Fuse to the back of your fabric scraps and cut out all of your shapes on the traced lines. I used 4 large and 5 small hearts and 15 leaves for my wall hanging.
Using the last page in this file, print and roughly cut out the flower shapes. On your background fabric, place the paper flowers in a layout that is pleasing to you. Cut your bias stems (or ric rac) to the lengths needed.
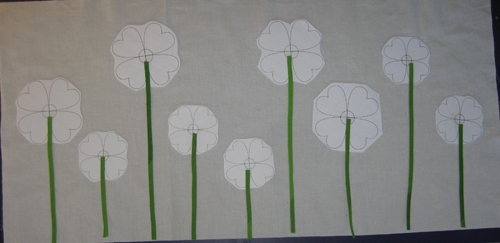
Fuse, or apply with fabric glue, your bias strips to your background fabric. Add some gentle curves or waves when securing your strips for a more whimsical look. Attach the bias pieces to the background using a narrow blanket stitch.
For the grass, use your rotary cutter to cut a gentle curve from your green fabric the length needed (~31”). You don’t need to have fusible web on this piece, but you can if you want. I used a glue stick to attach the grass to my background fabric.

Add your flower petals and leaves to your background piece. Fuse in place.
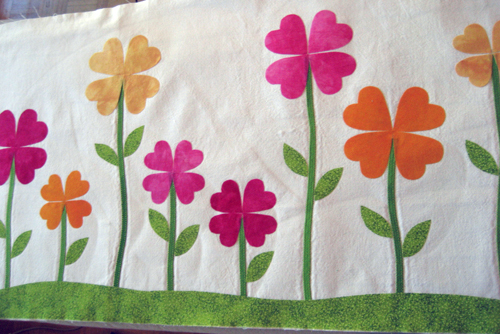
Stitch around all petals and leaves and the along the top edge of the grass with a small blanket stitch. Fuse your flower centers and stitch with a small blanket stitch.
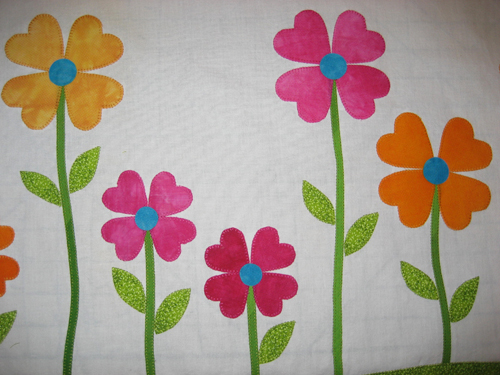
Stand back and admire your pretty garden.
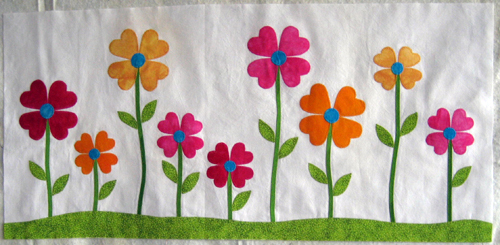
From your border/binding fabric, cut 3 strips 4.5” wide and 4 strips 2.5” wide (or your preferred binding width).
If necessary, square up your background fabric so that it is even. It can become slightly distorted and frayed with all the handling while blanket stitching.
For the side borders, measure and cut two pieces from one of the 4.5” strips the height of your background fabric. Attach your side borders. Press toward the border pieces.
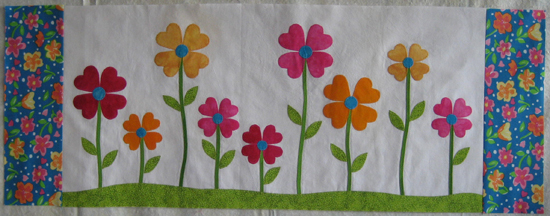
For the top and bottom borders, measure and trim to length the other two 4.5” strips. Attach your top and bottom borders. Press toward the border pieces.

Layer your quilt top, batting and backing fabric. Baste using your favourite method. For the quilting, first I stitched in the ditch between the background and borders. Next, in free-motion mode, I outlined all of the applique shapes. Then I drew some random heart shapes in the white background. These shapes were stitched as I got to them while doing a close stipple in the background. I’m not sure yet what I’ll do for the border. Any ideas?
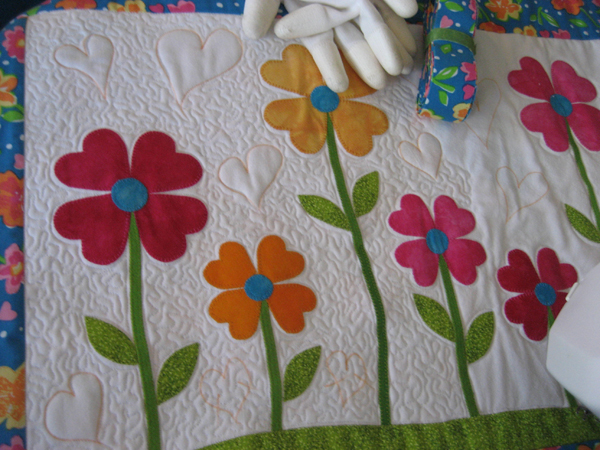
That’s a wrap! I hope you have FUN making this love-ly wall hanging. It’s been very cold here in Ottawa lately, so it was a pleasure to work on this springtime project and dream of the flowers that will soon return to us.
If you make the Love-ly wall hanging, please share the photo in my Flickr group or on Facebook. I’d love to see it.
Each week I host a themed quilting contest on Quilting Gallery. This week, we’re celebrating Today!, with the theme “Be My Valentine”. For this week, you can enter not just quilts, but anything made with fabric. The Fat Quarter Shop have donated a lovely jelly roll to this week’s winner. Enter here!
Happy quilting!
Michele
Quilting Gallery
——————————————————————————————————-
Thank you so much Michele, and thank you to all of the wonderful ladies who contributed tutorials for the Valentine’s Day Showcase. Tomorrow the linky party will open for everyone to enter their wonderful Valentine’s Day projects. Remember, these do not necessarily have to be from one of the tutorials presented (although that would be fabulous!) and you don’t need to have a tutorial to go with them. I can’t wait to see what everyone else has made!
Happy Valentine’s Day!
![]() NOTE: Don’t forget, I am one of the bloggers who is going to lose Google Friend Connect in March 2012, please take a moment and follow me via Bloglovin’, Facebook, RSS or networked blogs. You are important to me and I want to be able to stay in contact with you! Check my side bar for all the best ways to stay in touch after GFC goes bye bye!
NOTE: Don’t forget, I am one of the bloggers who is going to lose Google Friend Connect in March 2012, please take a moment and follow me via Bloglovin’, Facebook, RSS or networked blogs. You are important to me and I want to be able to stay in contact with you! Check my side bar for all the best ways to stay in touch after GFC goes bye bye!


It is just darling and definitely says “spring”!!!!!
MICHELE ! ( I am a 1-L Michele also , by the way !!) This is just so AWESOME ! thanks for the great Tutorial !!!
Michele, Thank you for the great pattern/tutorial! This is a lovely wall hanging and I can’t wait to learn appliqué so I can make it! Happy Valentine’s Day!
Oooohhh – that would put a smile on your face every morning, wouldn’t it! It’s wonderfully happy. 🙂
Ah, this is really spring. And I need it, because it’s cold outside now. But soon…. I’m dreaming. Thank you for all the new patterns. I’ll test out some of them soon.
This is so cute! Love the way you did the grass and the hearts make such cute flowers! Thanks for sharing!
Lovely pattern, thank you so much.
Spring can’t come soon enough for this Southern Belle! LOL Thanks, Michele, for a lovely project. I think your quilting in the final picture is so very nice! Thanks for sharing! 🙂
Spring is just around the corner. Now if I could just figure out Which corner?? Love the wallhanging/table runner 🙂
Oh wow. That’s SOO cute!!! Love it!
How cute!!!!! I love your garden! 🙂
I like using the hearts as flower petals!
Thanks everyone for your lovely comments!!
Michele
Thank you so much for this sweet pattern .and for your generosity sharing it.I love it .
This so so sweet. Thanks for sharring Michele