2012

Home Sweet Home

We are back in the Pacific Northwest and I have to agree with everyone else…there is just no place like home. I did come to realize that a  king size bed is EXTRA large when sleeping in it alone. I have done it a few times throughout the past year, really unavoidable when your spouse is in the military, but for months on end is a whole other story!

Anne was so excited to be home, she immediately ran to her downstairs toy box and yelled “look at all my new toys!” The best thing is that they are all the toys she has always had except she hasn’t seen them in 5 weeks! LOL

Yesterday I unpacked all the sewing stuff that I brought down to CA with and I started reading the pattern and laying out all of the fabric to make a new handbag. I am participating in Purse Palooza over at Sew Sweetness. I will be doing my pattern review on the very last day.  Make sure you go check it out, there are prizes to be won every single day and if you make a purse this month that is one more chance to win! I will start sewing it together today.

While I was gone I received lot’s of squishy packages!  May was my month for Sew Bee Blissful and the blocks have started to roll in. Here are the one’s I have received so far:
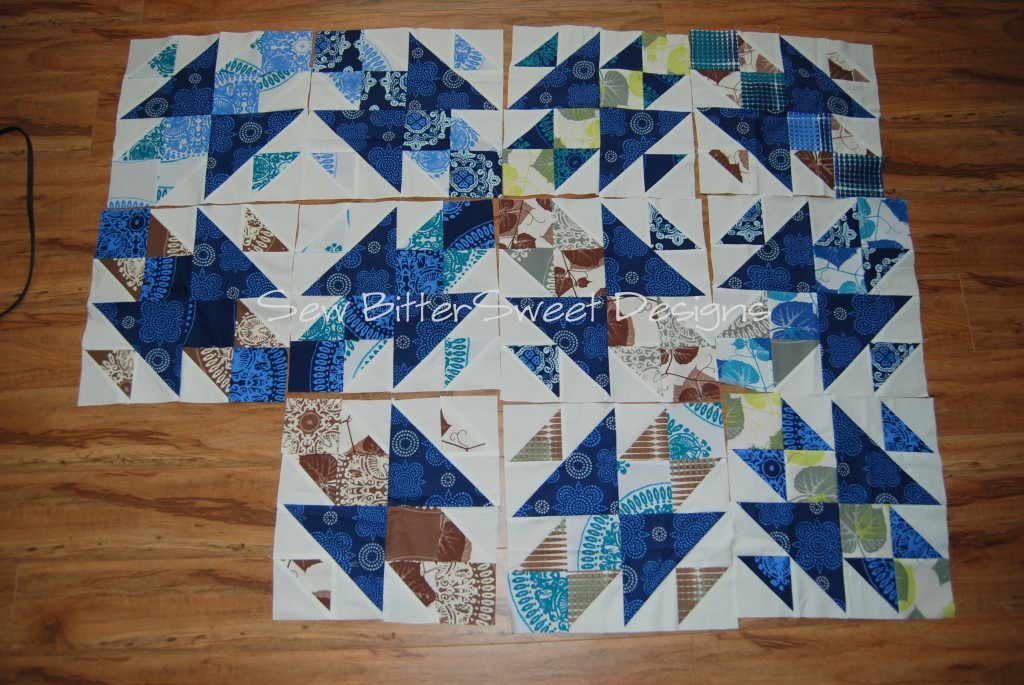
They are all Firefly blocks. My bee mates followed my tutorial from back in January. This is going to be a quilt for my hubs when he comes back from Afghanistan. What do you think? Manly enough so far?  I have a lot more fabric and will hopefully end up with a lot more blocks!

What have you been up to this past weekend?

Winner and a trip

Today Anne and I head back home to Washington. I am excited and nervous at the same time.  I am excited because it will be nice to be in my own bed, have my lovely home, and all of Anne’s toys to play with. Not to mention our wonderful neighbors to hand out with.  I am nervous because we will be very alone and that is never easy.  Luckily my in-laws are coming for a visit in a couple week and after that my bestie will be visiting from Idaho so we can take our kiddos to ride Thomas the Train in the middle of July. Fun times!

So we will be in the car for 13.5 hours today – I know, you’re jealous. 13.5  hours in a car with a toddler, I would be jealous too…NOT!  I will spend the next 13.5 hours doing my best to keep the meltdowns to a minimum – I think there will be lots of singing, coloring and possibly even angry birds in our future!

So now, let’s make sure at least one person has a great day!  The winner of the layer cake of Quilt Blocks from Fat Quarter Shop is….

Carin! Who said “I like the Gumdrop Pattern”

Carin, I will email you on Saturday, as I will be traveling all day today.

Have a wonderful Friday everyone and a relaxing weekend!

A Thank You Note

I have had so many wonderful people in my life come to our side and aid since my hubs deployed to Afghanistan. The support of all my wonderful twitter and facebook friends, all of my wonderful blogging friends, you have all touched my heart in so many ways.

One of my wonderful friends that I met through a group on facebook, Jessica, sent Anne the most touching gift. Jessica owns and operates Noguchi Designs. She makes clothes, dolls, toys and recently got into quilting.  She emailed me right before my hubs left and said that she wanted to send Anne a deployment present. I had no idea what she was going to send and she just blew me away!

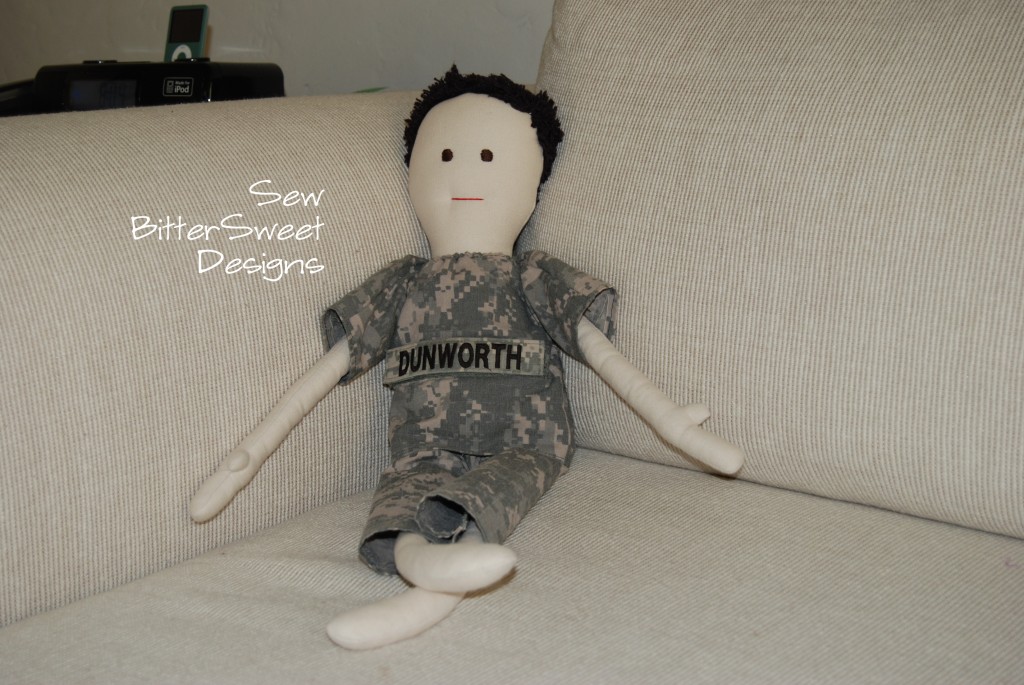
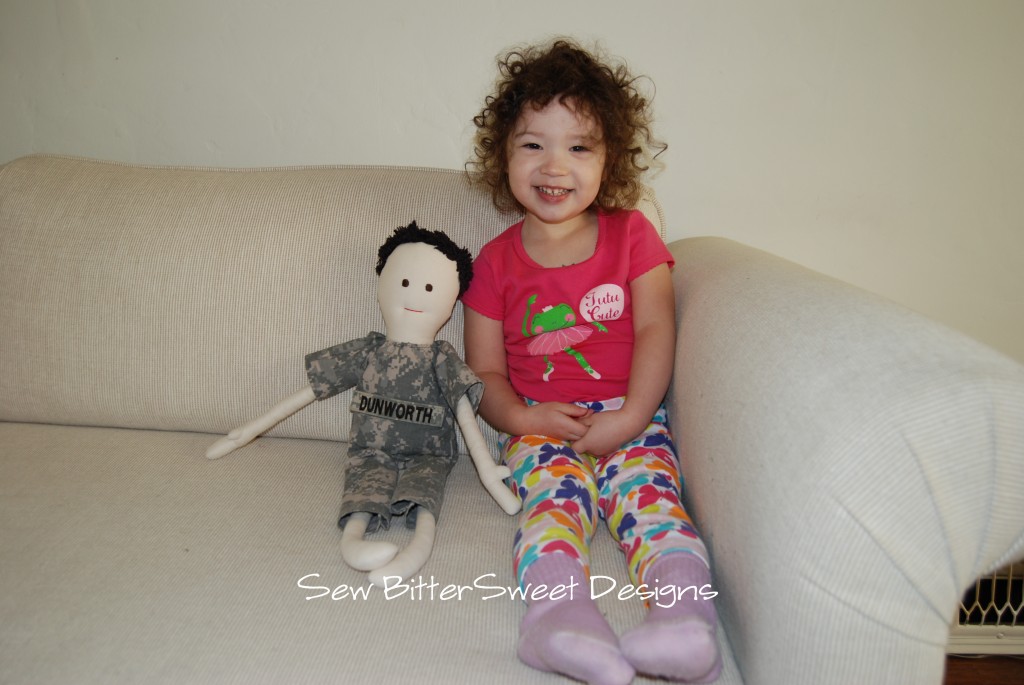
This is a Bubba Doll.  He didn’t come with the name tape – we happened to have an extra one at my parents house (don’t ask me why, I’m not really sure why it was here).  His uniform is made from an actual ACU top and it even has a pocket in the back so you can put a picture of daddy in there.  He came with his own birth certificate and care instructions. All that aside, he just made my baby girl’s day!

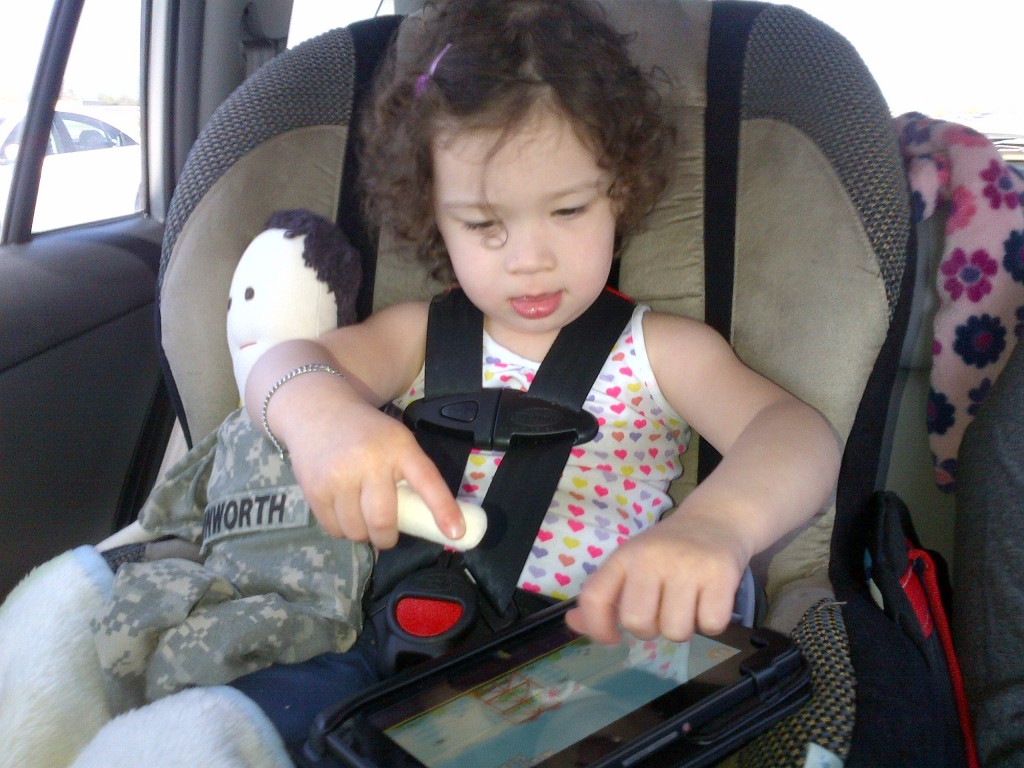
Anne and her bubba doll have been inseparable. Since he arrived. They nap and sleep together.  They even play angry birds together.

Thank you to everyone for all of your support this past month, we are at 34 days and counting.

Today is the last day to enter the Fat Quarter Shop giveaway for a layer cake of Quilt Blocks – make sure you head on over and do that! I will be closing the comments later tonight and announcing a winner tomorrow morning before we head back home to Washington.

Feathered Star Tutorial – Part 2

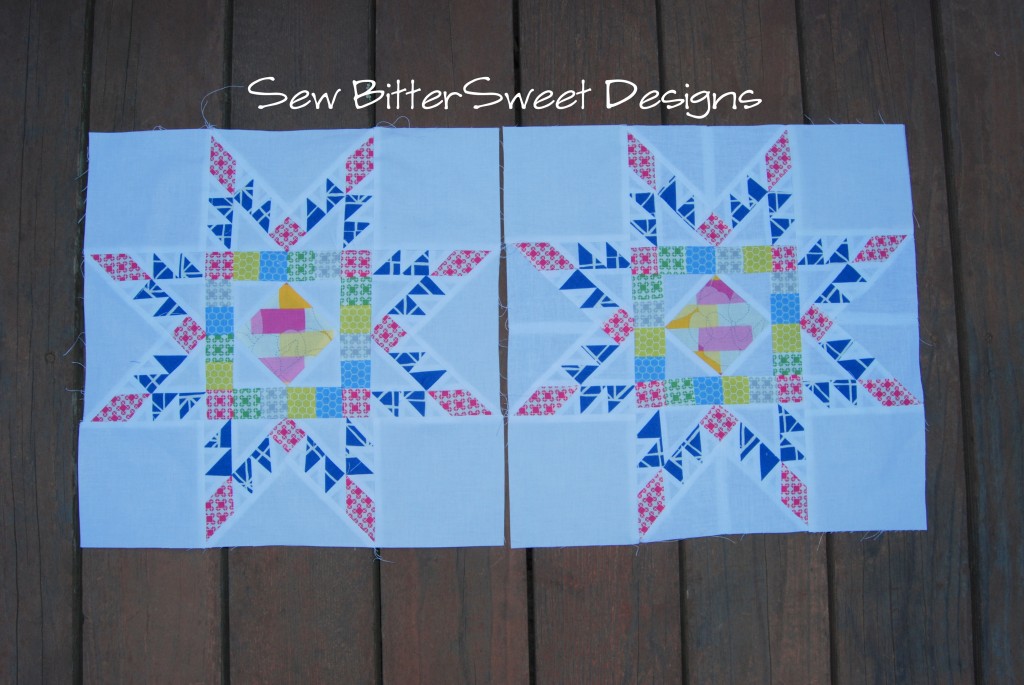
Welcome back for part 2 of the Feathered Star Tutorial – this will be assembly.  I have done an all picture tutorial for you – I am a visual learner and for a technique like this I think it will be really helpful. If you are looking for part one (cutting) – go here.

NOTE: ¼” seams are of vital importance for this block.  Check that you are using an accurate seam allowance BEFORE you start piecing this block. ALSO! Be sure that you do not stretch the triangles when sewing them.

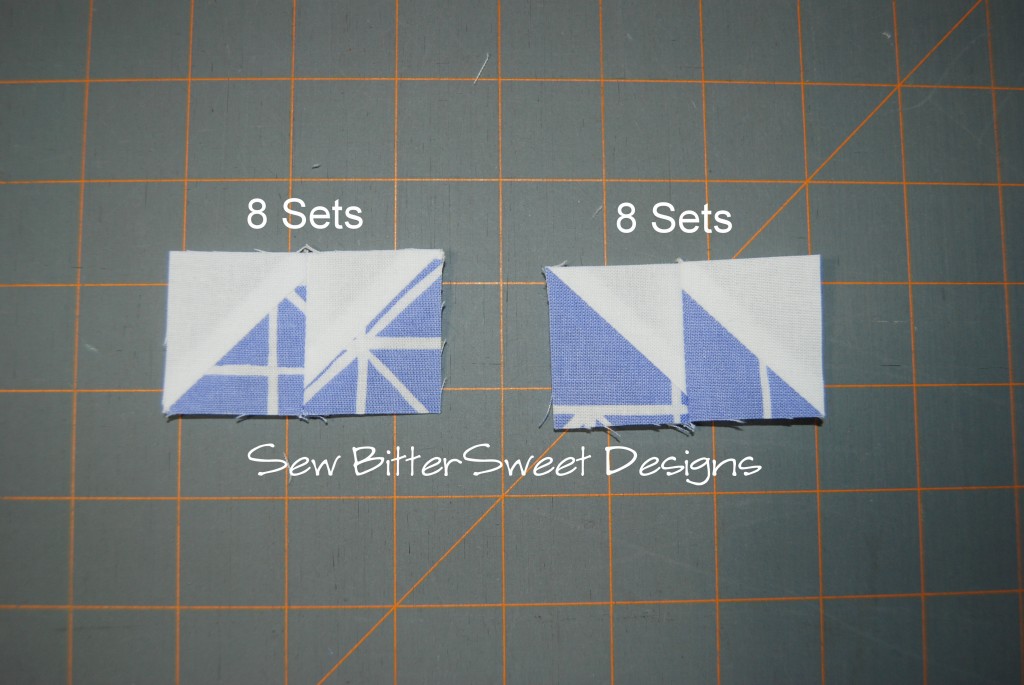
We will start with putting together the HSTs that you made yesterday following the 2 wonderful tutorials I linked to: I recommend chain piecing your pairs together for speed.


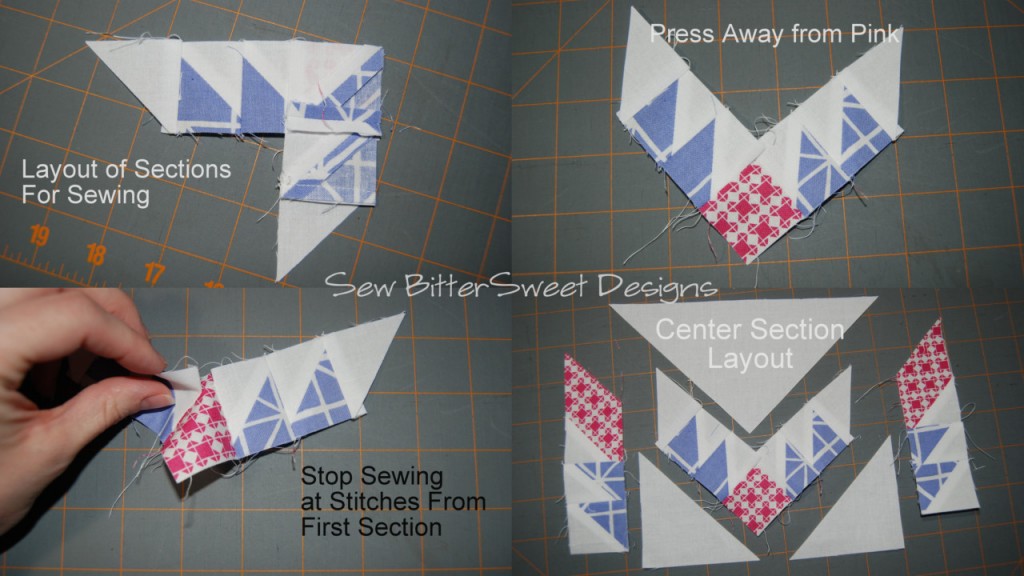
The star points are assembled in pairs. Here is the layout before for each pair, you will make 4 sets.

Starting with the right side point, you will assemble the diamond section first:

Assemble the left section the same way, except you will need to reverse the pieces

Next assemble the right side center section:

Add left side of center section:

Make sure that you stop sewing at where the sections meet (1/4” from end)

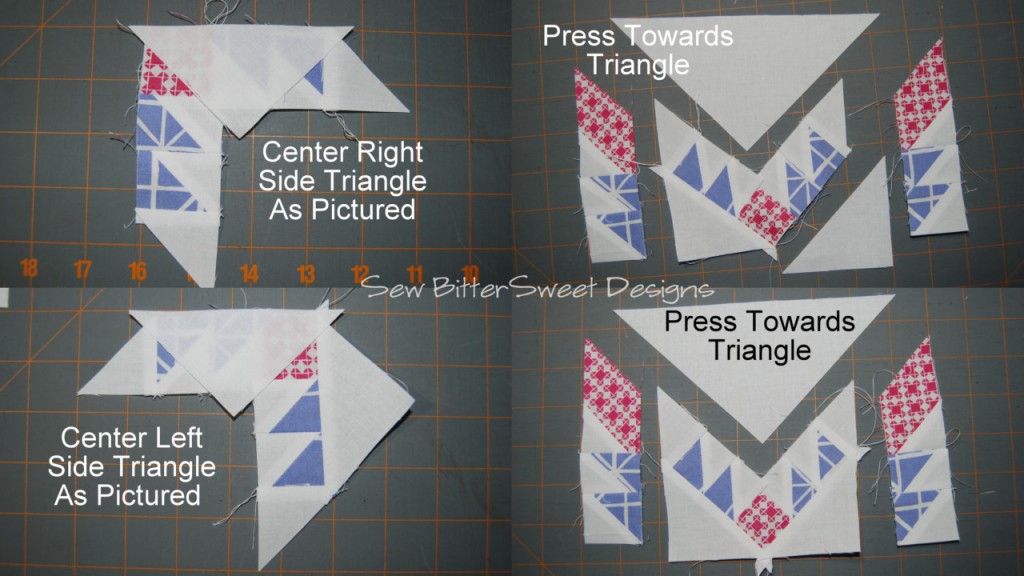
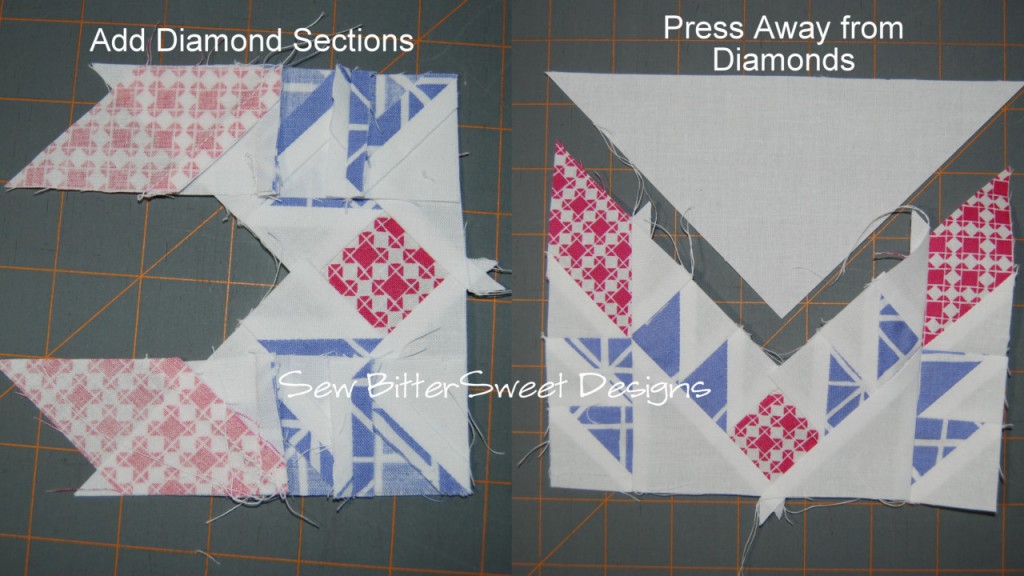
Add inside triangles:

Add diamond sections:

Add top triangle, start with the left side:

Next sew right side:

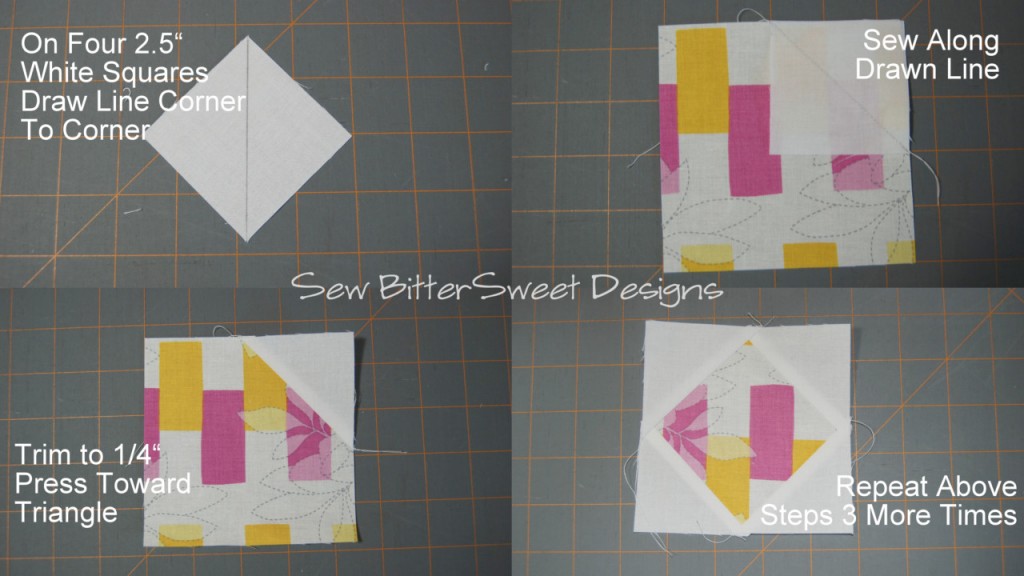
Make center “peekaboo diamond”:

Assemble the border for the center section:

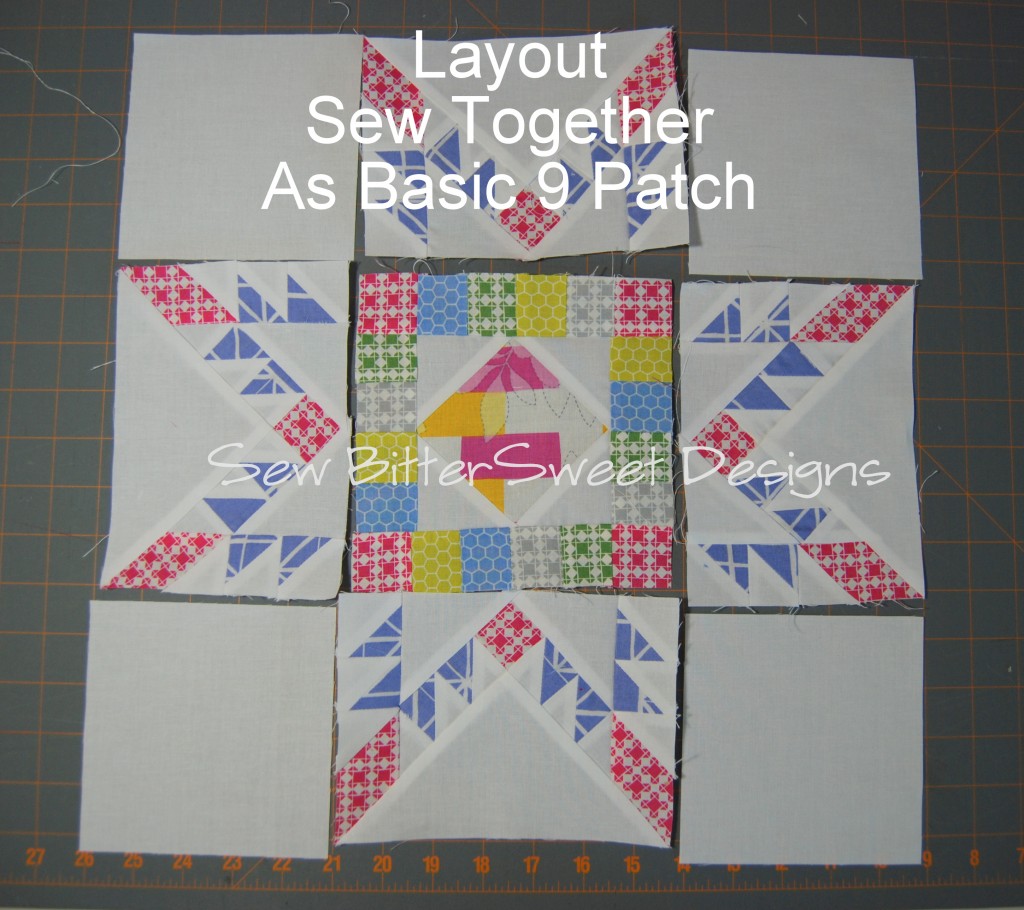
You have now assembled all of the sections – you are ready to layout your block – it is a basic 9 patch now! Sew it up and you are done!!!


The first time I assembled this block it took me 3 days, but keep in mind that I didn’t know what I was doing. I didn’t have a tutorial for the block that I designed, I just went with it.  I have now made 3 of these and the third one took me 2 nap times to assemble (that’s about 4 hours total) – 1 nap time to cut, 1 nap time to sew. I measure all my sewing time in nap times 🙂

Good luck and if you make one of these from my tutorial I would love to see it and if you have any questions, please let me know! And don’t forget to enter the Fat Quarter Shop giveaway for a Layer Cake of Quilt Blocks – which is what I am using to make my feathered stars!

I’m linking up to SewHappyGeek Manic Monday and Quilting by the River Tuesday Linky Party.

Feathered Star Tutorial – Part 1

Let’s start out with a little disclaimer…this block looks intimidating and scary, but once you break it into small sections, it really isn’t that hard. Especially if you use the bias strip piecing method for the HSTs – I am sending you to 2 fabulous tutorials.

I am going to show this tutorial in 2 parts, cutting with links for the HSTs and then assembling on Tuesday. I think that will be a good break, as cutting takes me a good while.

Finished block size – 15.5”x15.5”

You will need:

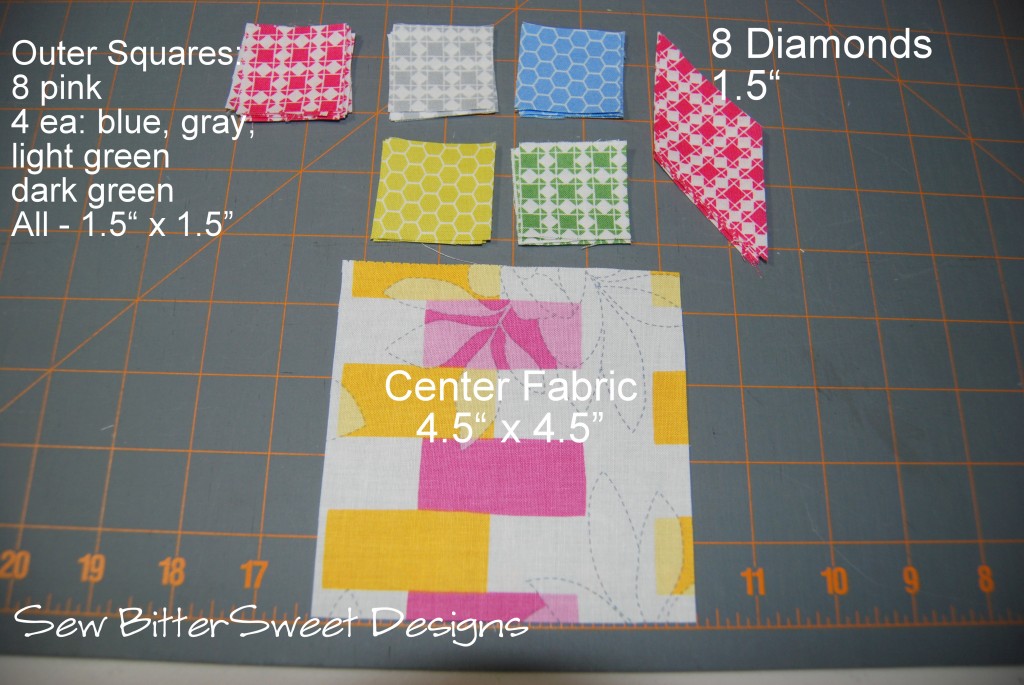
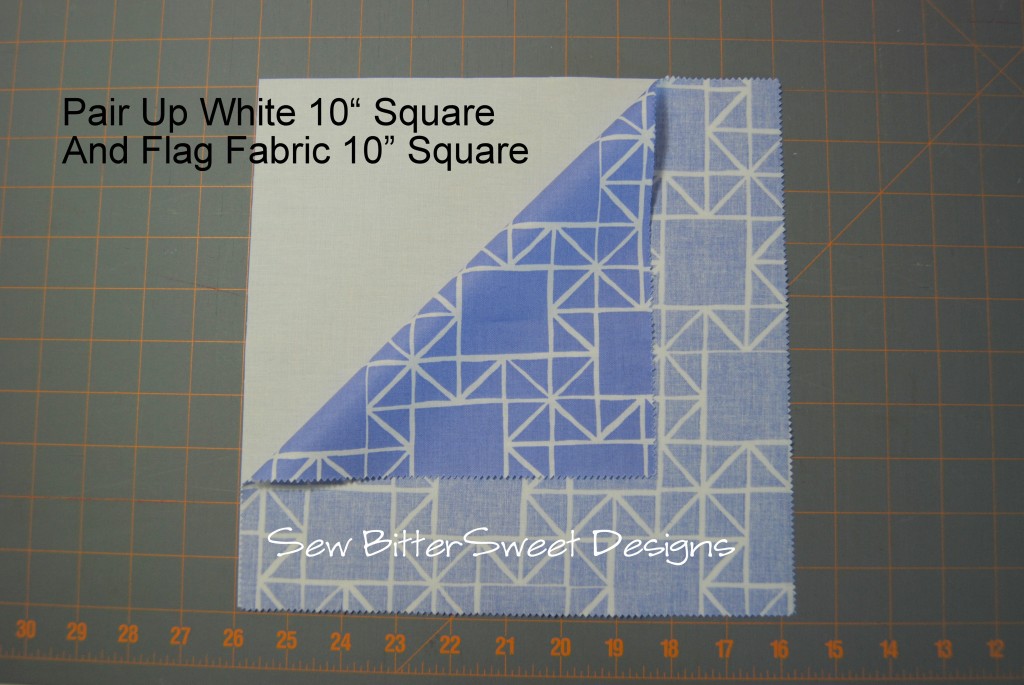
2 Squares: 10×10” of focus fabrics
Scraps from 4 different fabrics
Peekaboo fabric for center – 4.5″ square
White Background fabric
Sewing Machine
10×10 inch quilting ruler
Quilting Ruler with 45⁰ lines on it
Nice to have but not necessary: 45⁰ Ruler by EZ Quilting or Marsha McCloskey Feathered Star Ruler

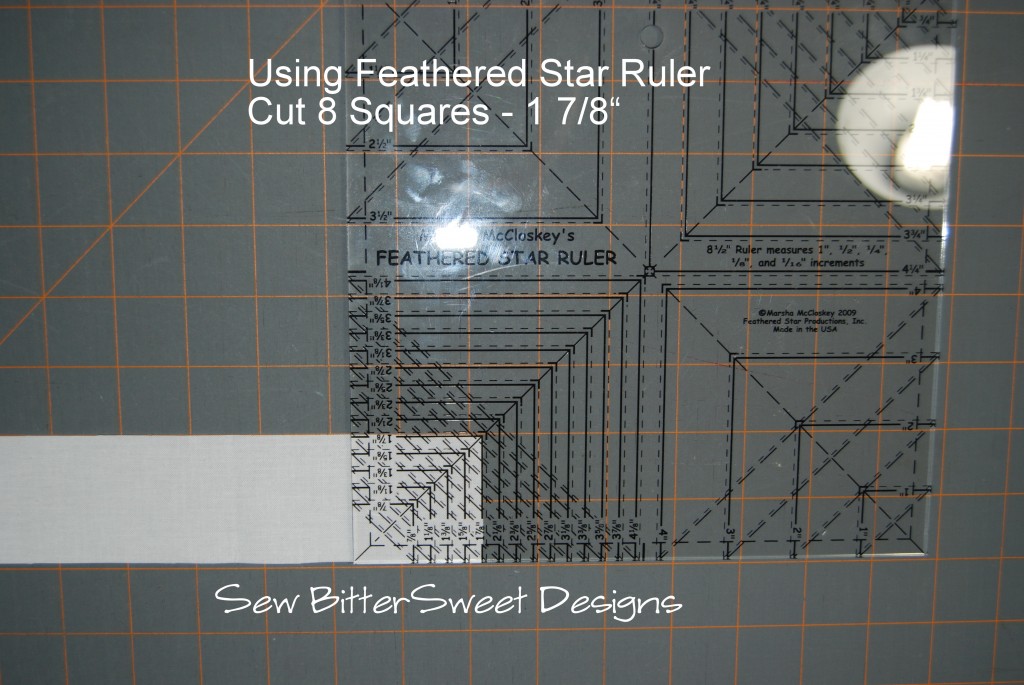
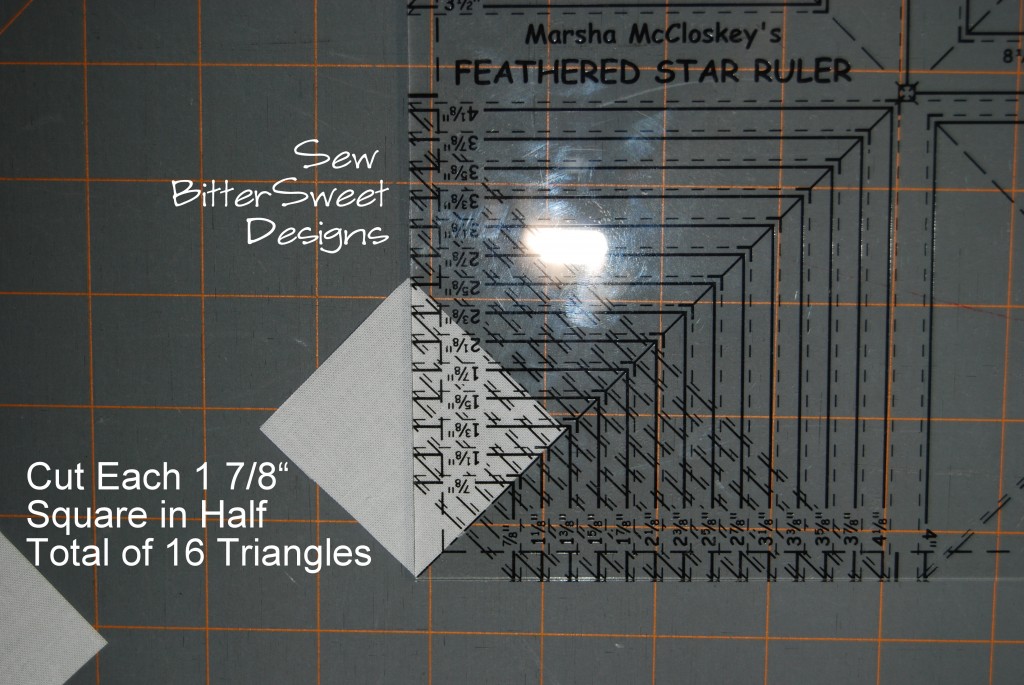
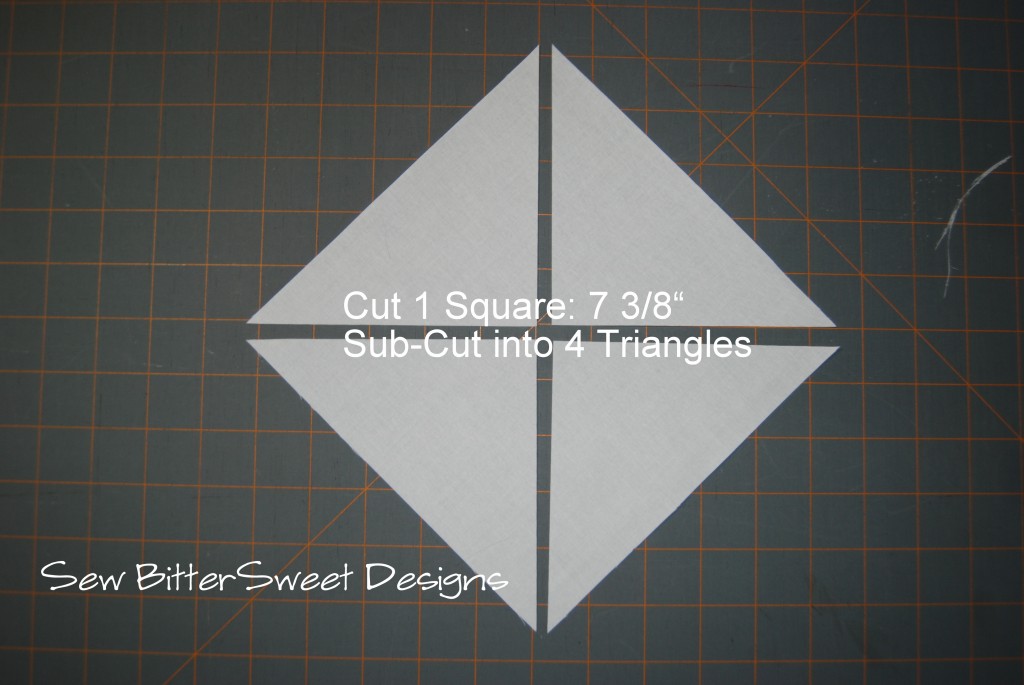
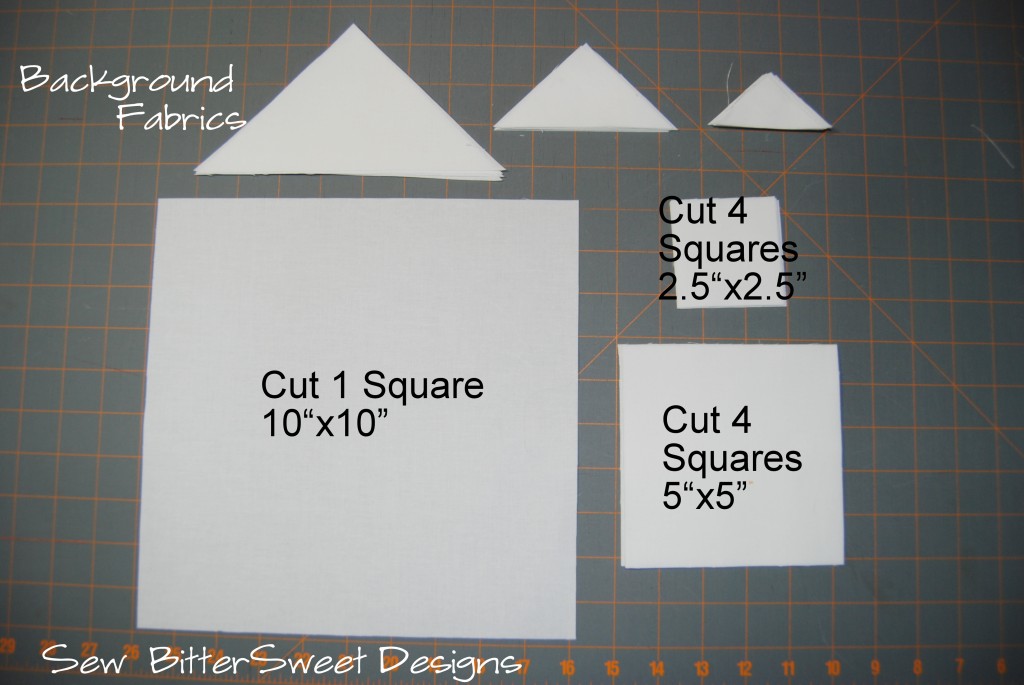
Cutting White Fabrics: Everything is pictured with the Feathered Star Ruler – but you can easily cut these with the 10” ruler listed above.

Using Larger 10×10 ruler to cut next one:

Simple Squares

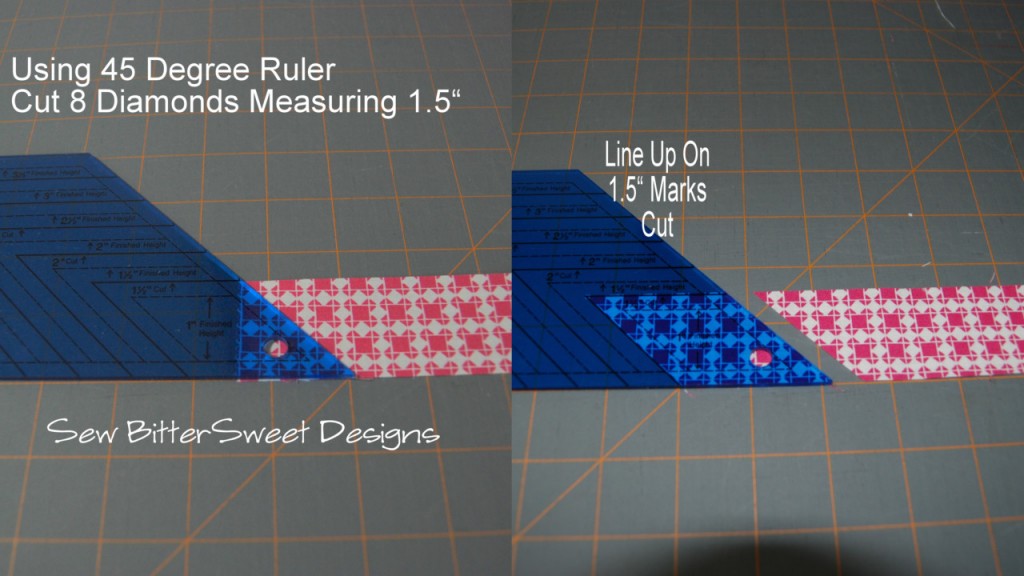
Using 45⁰ Ruler – cut diamond shapes – 8 total

Using standard quilting ruler marked with 45⁰ markings:

Cutting for center square:

Half Square Triangles (HSTs):

I used the Bias Strip Piecing method to assemble my HSTs. I learned this method from 2 fabulous tutorials. One by Erin at One Piece at a Time and the other by Molly at It’s Molly’s Place (you will need to scroll down a bit to get to the triangles).

For this block you will need 32 HSTs measuring 1.5”. You will use the two 10”x10” squares for this – the part that is confusing from both tutorials is how wide to cut your strips – follow their method for cutting and sewing and cut your strips 2” wide.

Come back tomorrow and I will show you how to put it all together! And don’t forget to enter the Fat Quarter Shop giveaway for a Layer Cake of Quilt Blocks – which is what I am using to make my feathered stars!

Scroll to Top