2012

Guest Post – Jessica from Noguchi Designs

Happy Monday everyone! I hope you had a fabulous weekend. I spent mine with Anne and family.  It was very low-key. I made blueberry pancakes on Sunday for breakfast and we BBQ’d pork chops for dinner, YUM!  Today I have my friend Jessica from Noguchi Designs here for you. I first met her through a sewing group on Facebook and we learned that we have a lot in common and have become fast friends. She is sharing a fabulous recipe with you today. Make sure you check out her facebook and blog – she is wonderful, and I will tell you more about that next week!
_________________________________________________________________________

This is really good, not spicy at all, Gluten & Dairy free!
Yum Yum Yum
This feeds my family of 6
Ingredients:
4 Steaks of your choice 1in think
Romain Lettuce
Spring Mix Salad
1 English Cucumber, halved & sliced
6 Cherry Tomatoes, quartered
4 Sweet Mini Peppers, seeded and sliced
1/8 of an Onion of your choice, thinly sliced
4 Big Limes, juice 3, half and slice 1
1pk/cup Fresh Mint Leaves, rough chop
1cup/handful Fresh Cilantro, rough chop
1pk Lemongrass, cut into 1in pieces
1/4 Sugar
1tbs Sweet Chili Sauce
1/3 cup Fish Sauce
1tbs Sesame Oil
1/4 cup Olive/Veggie Oil
PhotobucketPhotobucket
In a large bowl combine-
Cucumber, Tomatoes, Peppers, Onion, Lime, Mint, Cilantro, Lemongrass, Sugar, Chili Sauce, Fish Sauce, Sesame Oil, Olive/Veggie Oil
Let your 3yo daughter stir 😉
Photobucket
In a hot pan-
Cook Steaks until medium, don’t over cook
Slice into thin strips, combine steak and juices into the Veggie/Sauce bowl
Mix well
Cover and refrigerate 3 hours
When it’s time to serve-
Chop Romaine and mix with Spring Greens
Pull out Lime slices and Lemongrass pieces from Steak/Veggie bowl
Mix Steak/Veggie mixture well, serve over lettuce mixture, spoon sauce over as a dressing
Photobucket

_______________________________________________________________________

Doesn’t that just make you hungry!  Have a great day!


Guest Post – Karen from Quilting, Losing and Tea

Today I have Karen from Quilting, Losing and Tea. She has been such a wonderful blogging pal, even helping me proofread my very first pattern. She is quite talented and is here today to share with you her love of charms.
____________________________________________________________________________

I love charms!

Hi everyone!  My name is Karen, and I live in wonderful Minnesota.  I blog at Quilting, Losing and Tea.  I am excited to be visiting Melissa’s place today.  I started following Melissa last year right when she started Sew Bittersweet Designs, soon after I first discovered quilt blogs.
I was honored to be able to help proof her first pattern – Twirling Around. You can find this pattern for sale at The Intrepid Thread.  And the best part?  Melissa is donating the proceeds from the sale of this beautiful pattern to Charity.
Today I want to share the results of my love of charms!  I think these 5 inch squares – called charms or nickels, are magical.  I have only been quilting seriously since last fall.
I had done a couple of simple projects before that.  And through reading all of the blogs and looking at the lines of fabric out there, I discovered charms and charm packs!  I love how versatile they are.  And now I am discovering charm swaps! I thought I would share the projects I have made using charm squares.
My First Quilt Wall Hanging
The pinwheels are made from charms collected during the 2010 Minnesota Shop Hop.
Fabric by Holly Taylor for Moda.
Little Twister in fall colors:
This one now resides in Florida at my Dad’s house to remind him of our beautiful fall weather!
Fabric designed by James Meger – from the 2011 Minnesota Shop Hop.
Christmas wall hanging from a kit I won!
Fabric is Reindeer Games by Sandy Gervais and pattern is Done! by Sandy Gervais
By December of 2011, I had started my blog, and discovered the Schnibbles patterns by Carrie Nelson.  These adorable patterns use 2 charm packs.  Sherri at A Quilting Life and Sinta at Pink Pincushion sponsor a monthly Schnibbles, with a parade of those created at the end of each month.  Carrie herself donates a wonderful prize that is given randomly from the entries each month.   I won the very first month – a fat eighth bundle of Reunion.
January Schnibbles – Full House
Fabric:  Modern Workshop
February Schnibbles – I.S.T.H.
Fabric:  Bed & Breakfast by Connecting Threads and Pure by Sweetwater

March Schnibbles – Bibelot
Fabric:  Storybook Friends by Sandy Klop
(This now has the border added and will be finished up next week – it is a baby quilt for a coworker).
April Schnibble – Summer Days
Fabric:  Strawberry Fields by Fig Tree
I will be receiving a pack of 112 rainbow charms within the next 2 weeks, and my mind is already racing – trying to decide what type of rainbow quilt I can make.
I would love to hear about the quilts you have made using charms – whether an entire line like I used, or random charms you put together.  Are you a Schnibbler?
If you visit my blog, Quilting, Losing and Tea,, you can learn about The Charming Travelers and have a chance at being the next to receive them!
Thanks again, Melissa, for allowing me to visit!
Blessed Sewing, Karen
_____________________________________________________________________________________________

Thank you so much Karen, your quilts are absolutely beautiful and I can’t wait to see what you make with The Charming Travelers!  Now head on over to Karen’s corner of the blogging world, Quilting, Losing  and Tea, to go learn about a chance to receive those traveling charms (and follower her too while you are over there, you won’t be sorry you did!!!).


Guest Post – Sondra from Contemporary Cloth

I met Sondra in December and almost immediately I knew I had met a kindred spirit.  Sondra owns and operates Contemporary Cloth and specializes in fabrics that I have never seen anywhere else.  If you are looking for something truly different and original, often one of a kind, Contemporary Cloth is the place to go. Sondra has a great article on inspirational workshops for you today! We could all use a little more inspiration in our lives.
_____________________________________________________________________

3 Places for Inspirational Workshops

Hello Everyone!

I love being here on Melissa’s blog because she is such a very special person (so talented + kind) and I totally love Anne (the Little Amazon)!

In the past 15 years or so, I have taken several amazing workshops from Jane Dunnewold in my main area of interest: surface design. Here are 3 wonderful places for workshops in quilting, fabric dyeing, surface design, paper + fabric collage, etc.

The Quilt Surface Design Symposium (aka QSDS) – Columbus, Ohio. People come from all over the world to attend these workshops from May 10th to June 28th every year, they are for all levels of experience and all of the details are here.

This quilt is by Sue Benner, an instructor at QSDS.

Nancy Crow’s Timber Frame Barn – Baltimore, Ohio. Nancy Crow has been know internationally for her quilts since the early ’70’s. As in QSDS, the instructors and attendees are from all over the world. The workshops are in the Spring, Fall and now offered in the Summer. See all of the details here.

Nancy Crow's Timber Barn
Fabric dyeing - Nancy Crow Timber Frame Barn

Both workshop facilities provide wonderful experiences with inspiration. You meet people from all over the world and many attendees make lifelong friends. The instructors are incredible. Most of my experience has been with Jane Dunnewold at both facilites.

Art Cloth Studios – Jane Dunnewold – San Antonio, Texas. I have never attended here, but would love to! She is in the process of building a new studio. Jane Dunnewold is the best instructor I have had in my life and the kindest. There is no one like her and many others feel the same. That said, on her website there are not only workshops, but resources, her publications and tutorials. Jane is the creator of the concepts: artcloth and complex cloth. Her work is stunning, see some of it here.

Etude 22: Interlude with Leaf Forms – Jane Dunnewold
Dahlia Tiger - Jane Dunnewold
Art Cloth Studios

Melissa, thanks so much for inviting me to guest post on your fabulous blog! I am honored!

Positive energy to everyone, Sondra
__________________________________________________________________

Are you inspired to go find a workshop in your local area? There are also lots of great online workshops you can take! Thank you so much Sondra for all your help and support!

Guest Post – Susan Schmid – How Does Your Garden Grow

My dear family friend, Susan, is here today. She has a great article for you on gardens and finding inspiration everywhere in your life! You are going to love it!
__________________________________________________________________________

How Does Your Garden Grow?

Creativity comes in many forms and some of the same skills one taps into when designing quilts and sewing projects can be applied to a garden as well. Colors, shapes, patterns, and even a little randomness all come into play.

In sixteenth century England, formal pleasure gardens were just coming into their own, thanks in part to the in-migration of professional gardeners from Italy and France and to social and cultural changes that brought more social order and security and meant that owners of the “big houses” (kings, earls, dukes, and the like) had more time and money to invest in pleasurable pursuits. Gardens thus became status indicators and were often very large and quite complex.

These gardens might include small orchards and all manner of shrubs, flowering plants, and herbs. They often featured walls or hedges enclosing smaller areas or sub-gardens, and gardeners employed walkways, arbors, benches, and even small hills known as “mounts.” Heraldry features and beast sculptures might be used to emphasize some element of family history or status, and sundials, fountains, fishponds, mazes, and topiary all eventually came into use.

The most notable feature of sixteenth-century gardens were knot gardens. These were usually a square composed of four “knots” —plants in an arrangement that resembled a knot—often surrounded by a railing or some other feature to set them off. Knot gardens are still found today, such as this one at St Fagans museum of country life in Wales:

Often gardens were laid out under windows or balconies to provide a vantage point from which to truly appreciate the design of the garden and its features. The value of this was brought home to me late last summer when I was up on a ladder holding something for my husband and happened to have my camera with me.

Photo & Video Sharing by SmugMug

I could see how colors and shapes worked together:

Photo & Video Sharing by SmugMug

And I could appreciate how I, like the Renaissance gardener, had incorporated places to stroll and places to sit and enjoy:

Photo & Video Sharing by SmugMug

In 1577 a practical guide for gardeners appeared called The Gardener’s Labyrinth. Authored by one Thomas Hill, it remained in use for many decades, even in the “colonies.” Among it’s many illustrations is this one:

And another one features the gardener working in his raised beds, so mine are simply part of a tradition hundreds of years old:

Medieval gardens had generally been smaller of scale and used for growing plants and herbs for food and medicinal purposes. Those kinds of gardens certainly continued, as members of the lesser social classes would still have needed the garden’s bounty and would not have had time, money, or need for a formal pleasure garden. However, large or small, formal or not, I suspect that there have always been those who enjoyed the challenge and the beauty of growing things for their own sake. And, I’d like to think that rather than lions sculptured from shrubbery, one might simply have “guarden-cats”—living or not!


________________________________________________________________

Thank you Susan! I find inspiration for my quilts all the time in gardens. There are color combinations in gardens that I never would have thought of, but when I see them in nature I get suddenly inspired.  PS. I love your “guarden cat”!

Guest Post – Robyn from Bolo Heads

Hi everyone! Happy Tuesday! Would you believe I haven’t sewn a stitch in a week?!? I know! Today I have Robyn from Bolo Heads! She has a super adorable bag for you all – so make sure you stick through to the end of this wonderful tutorial!
________________________________________________________________

I am so happy to be here today, and hope all is well with Melissa.
I have a little blog called Bolo Heads.
Bolo is Hawaiian for without hair (meaning bald)
I was born in Hawaii, and had no hair, so that was my nick name growing up.
All of my children had the same condition (bald babies)
So that it explains it.
Today I am going to show you how to make the cutest little stitching bag.
I am an heirloom sewer.

Smocking, embroidery…..

There is always some stitching project following me around.
I used to take it with me in a Ziploc bag, not cute.
Then I used a bag that my daughter’s doll came in.
Still not cute.
Now I have this super cute patchey bag.
I am going to give you a for warning, there are a lot of pictures,
but I don’t want you to get lost along the way.
Also I was making two bags at the same time so some of the pictures don’t match up

Are you ready? Here we go.
You will need.
Bag                             56 – 2 1/2″ squares.
Lining (2)                           10 1/2″ x 12 1/2″
Brim (4)                             2 1/2″ x 12 1/2″
Handles (4)                        2 1/4″ x 12″

Drawstring closer (4)          8 1/2″ x 12 1/2″

Interfacing


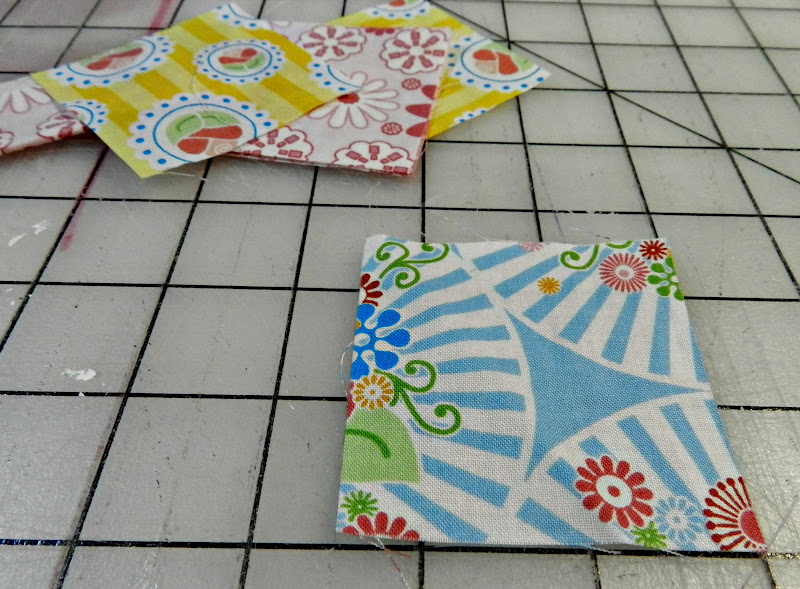
Start with your 2 1/2″ squares.
I was lucky enough to get these super cute Happy Zombie ones.
2 1/2″ square


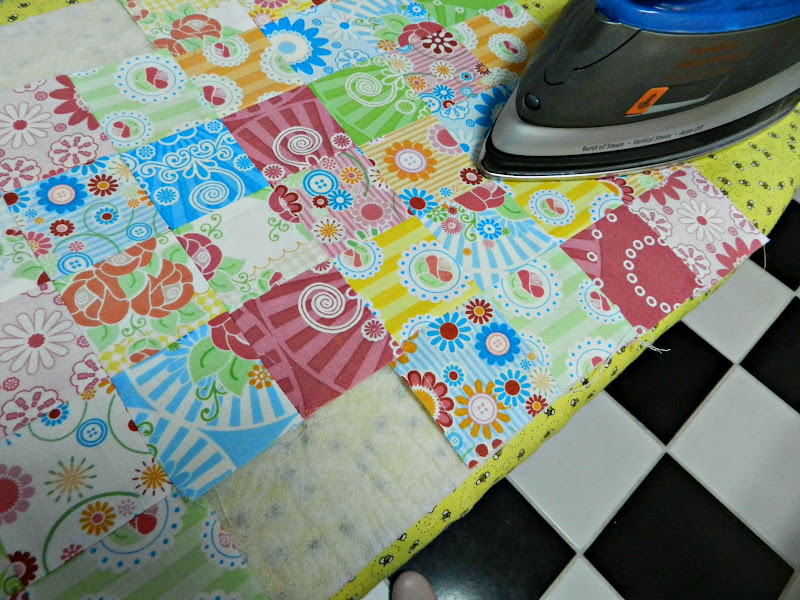
Sew them together, I chained them, and then sewed the two together,
and so on until you have something like this.


Four rows of six and one row of four.
Then sew them together.


Do it twice, so that you have a front and a back.
Then sew them together.


Iron what will be your bottom seam open.


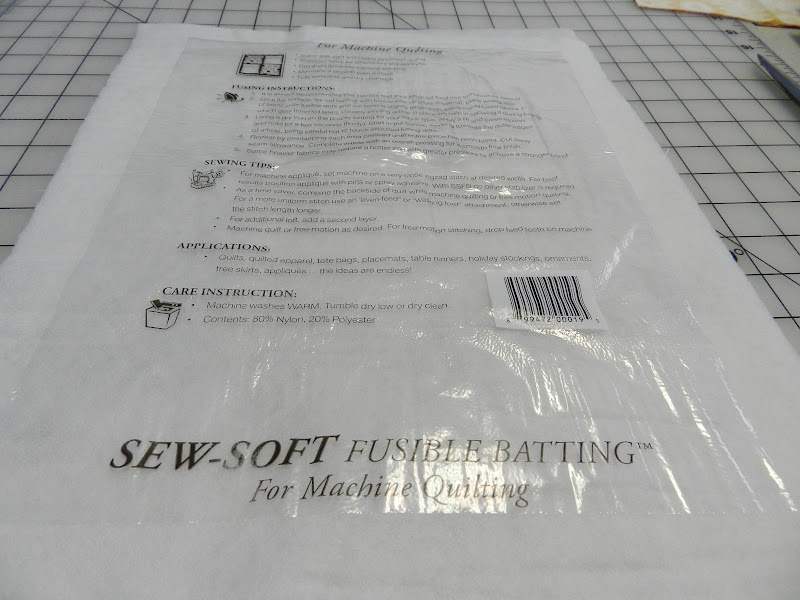
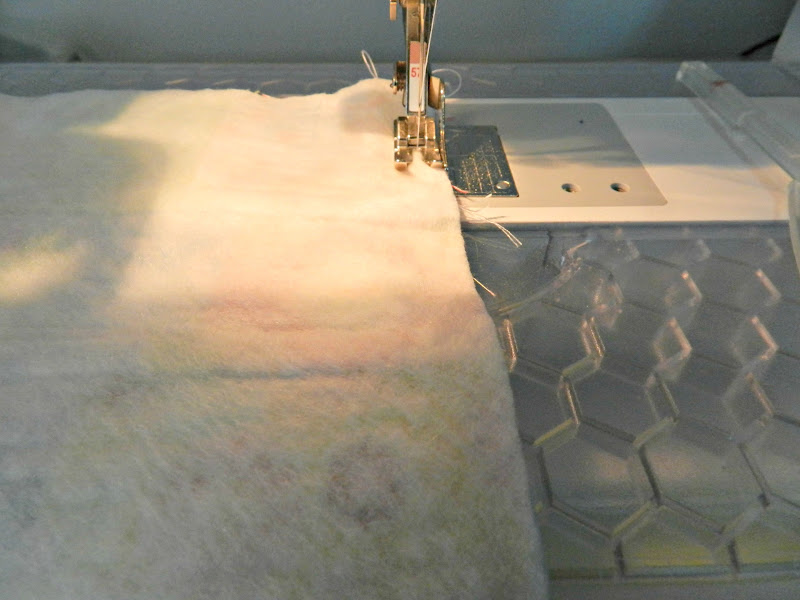
Next iron it on to some interfacing.
You can use what ever is your favorite.
Fusible fleece is nice and soft.
I would like to take a minute to talk about what I used.
My sister gave this to me.
You can only get it at Joann’s in the sewing center.
If you sew bags you know that the best thing to use is fusible fleece.
If you use fusible fleece then you know that it is $7.00 a yard.
This is a little lighter weight then the fusible fleece but is only…
brace your self…
.99 cents a yard.
You can buy a whole bolt for $10.00 the same price as 1 1/2 yards of the fleece stuff.
Your welcome.
Moving on…
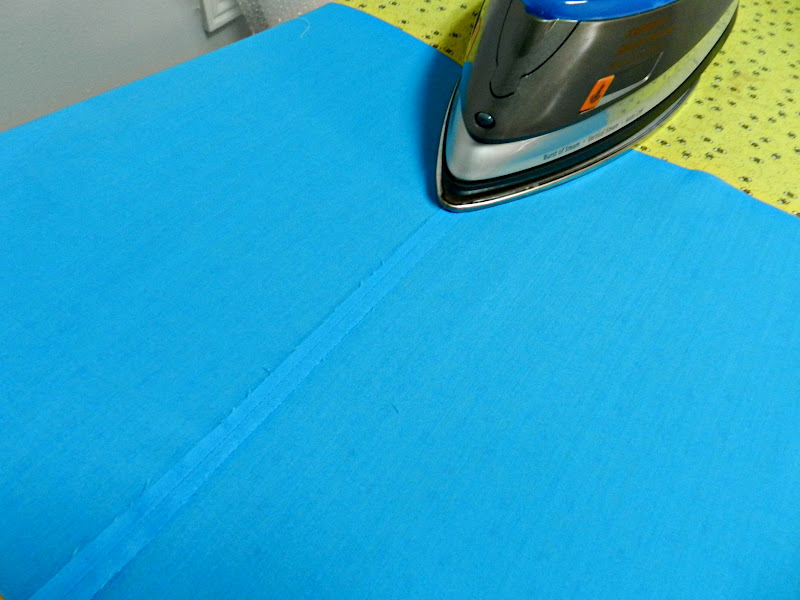
Sew your lining pieces together
then press that bottom seam (12 1/2″) open.
Iron your lining, brim, and handle pieces to the interfacing.


All of your prep work is done, now is a good time to take a break.
I am going to pick up my daughter from preschool I will be right back.


OK I ‘m back,
trim all of your pieces from the interfacing.
Let’s sew the whole thing together shall we.
Sew down the sides.


Press the seam open.


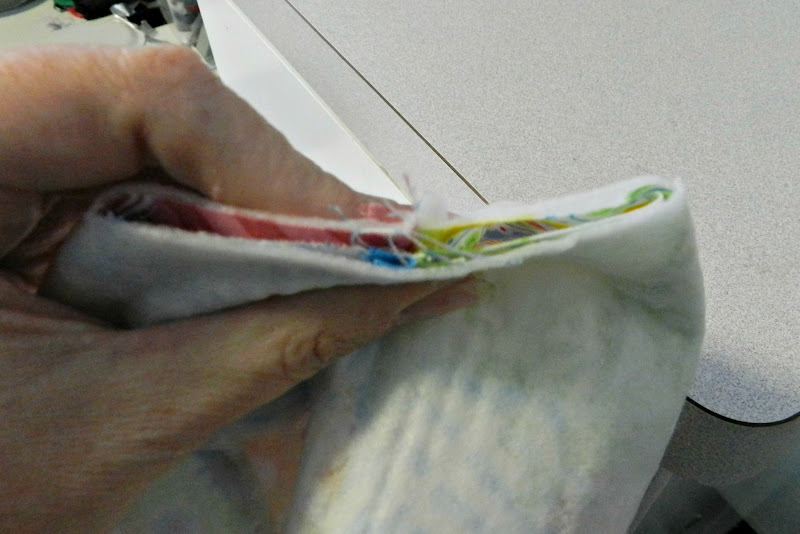
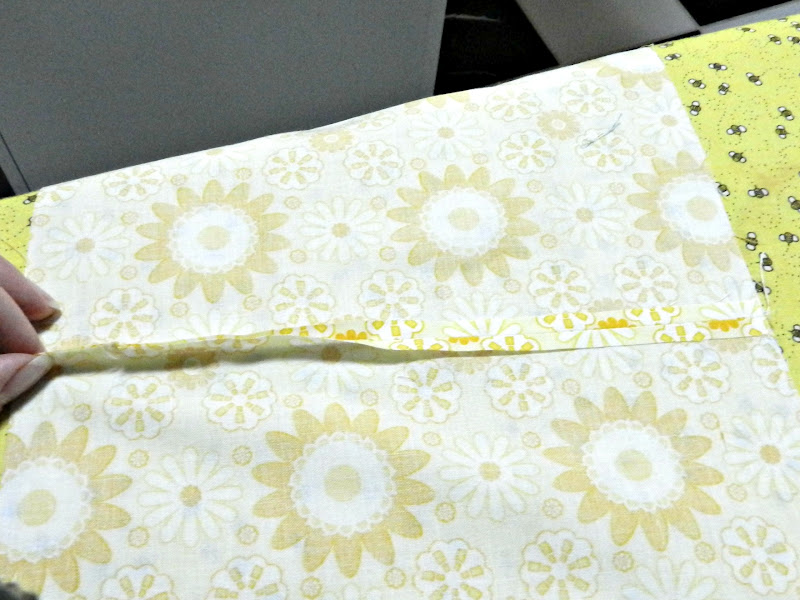
Now you have this funny little chunk missing, this is how we are going to fix it.


Line up the bottom seam with the side seam,


sew it together keeping the seams together.


Turn it inside out and voila a square bottom bag.
Shall we do the lining next, lets go.
Sew the side seams


Line up the side seam with the bottom seam pin (on the other side)


Measure four inches across, like this.


Mark it with a line.


Sew on the line.
Now if you want you can trim off the excess, I didn’t.


Fold the extra toward the center, and put inside the bag,
lining up the side seams.


Baste together.
You are doing great, we are half way.
Now we are going to do the handles and the brim.
Ready or not here we go.
This is a trick I learned and when I first saw it I was like
“How did I not know this!”
Maybe you will be the same, or you will think I am a dork for not knowing.
Anyway put in a safety pin like this with the head pointed in.
Sew down either side.


Start pushing the pin through.


Look at that totally turned inside out.
Awesome!!


Topstitch on both sides.
I like to use my open toe foot for this, it is a nice guide.


For the brim sew all the sides together.


Make a mark four inches from the side, on both sides.
Yes I do do this with a razor blade.
Be careful not to go beyond your seam allowance.


See look at that nice little mark.
Center your handle on the mark, pin in place.


Sew the top closed.


Turn inside out and topstitch the edge, again with the open toe foot.


Look how cute it is.


Now with right sides together, place it on the bag.
Almost done now we just need to make the drawstring closer.
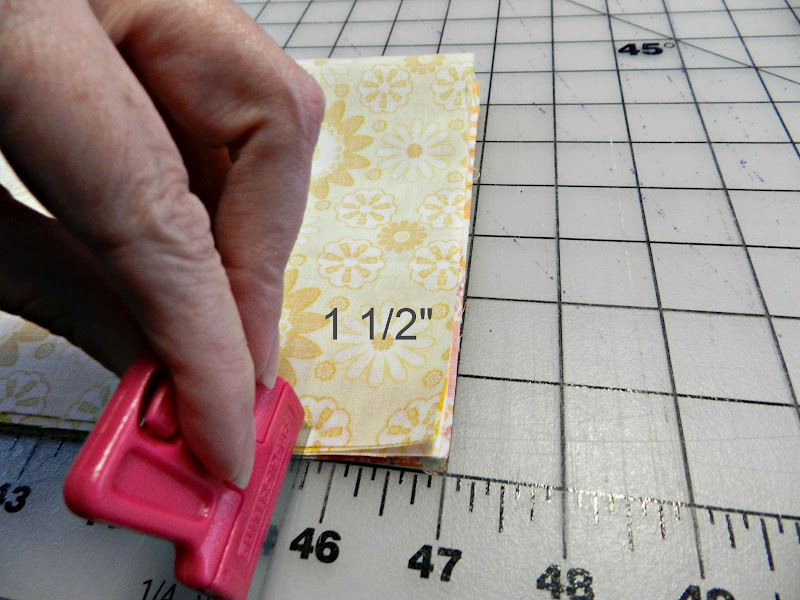
Layer all your drawstring pieces together and on the 8 1/2″ side
make a mark that is 1 1/2″ down from the top.


Cute little mark, that is where we are going to start sewing.
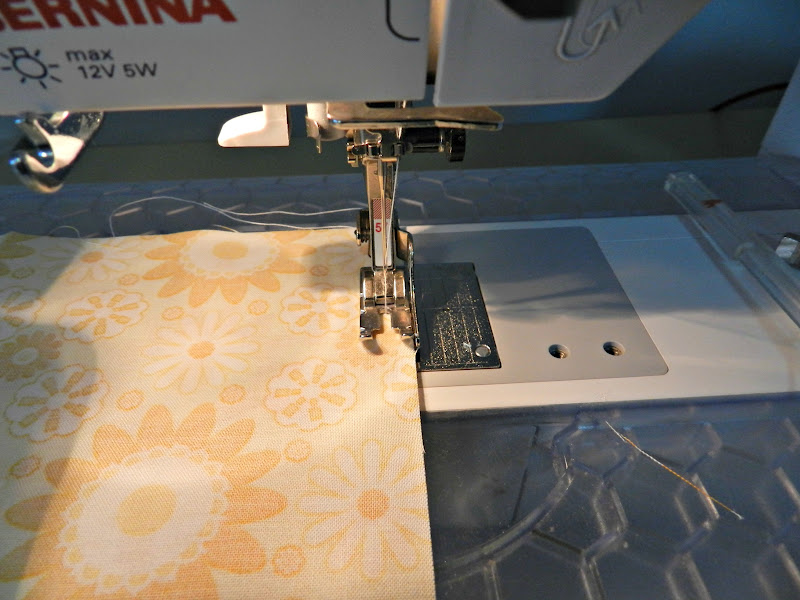
 

Sew your side seam.


Press this seam open, if you hold the unsewn ends just right
They will lay open and let you press them down.


Topstitch down either side of the seam.
Once again using the open toe foot, start where the seam is split open.


Do both sides of both the front and the lining.


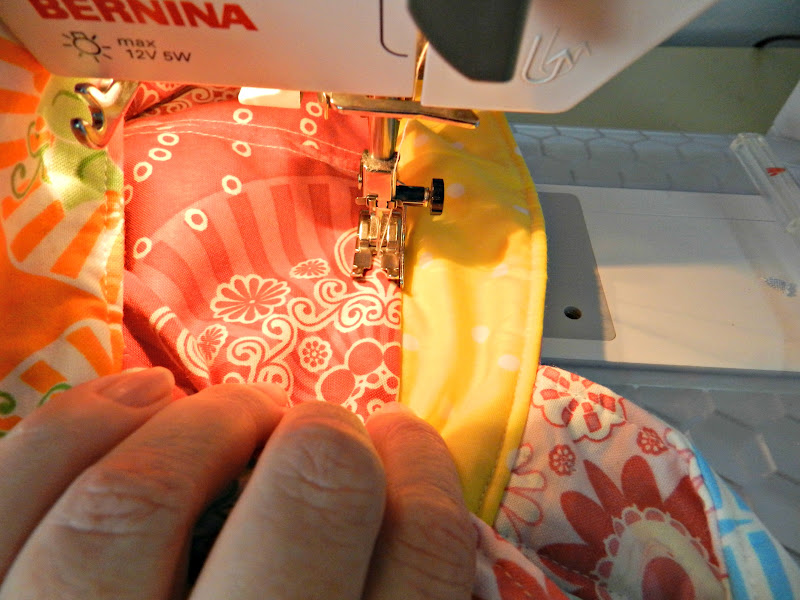
With right sides together, sew the two pieces together.


Turn inside out and topstitch around the top.


Beginning at the point where the slit stops,
topstitch around the top again, making a casing.
We are almost done I promise.
Now we are going to make a sandwich.
Like this bag, brim, and the drawstring top.
Make sure you have the right sides together.


Sew around the top keeping shy of the basting stitches.


All sewn together.


Trim off the excess seam allowance.


Pull up on the draw string part..


and tuck it inside the bag.


Lift up in the brim….


and topstitch with your quilting foot around the bag
make sure to keep it all taut, pull out on the brim and pull back
on the drawstring part as you feed it through.


Look how nice that finishes, the outside…


the inside.


The very last step.
Thread ribbon through the casing on one side…


and then on the other side.
Tie a knot in the ends and burn the edges so that they won’t fray.


Pull them tight and you are
DONE!!!


I knew we could do it.
I hope you like it and I can’t wait to see if you make one.
If you do come on over and let me know.

____________________________________________________________________
Now do yourselves a favor and go follow Robyn! She has a fun blog and I really enjoy reading what she has to say, and I know you will too! Don’t worry, I haven’t fallen off the planet, just trying to get some things in order. I will be back next week!

Scroll to Top