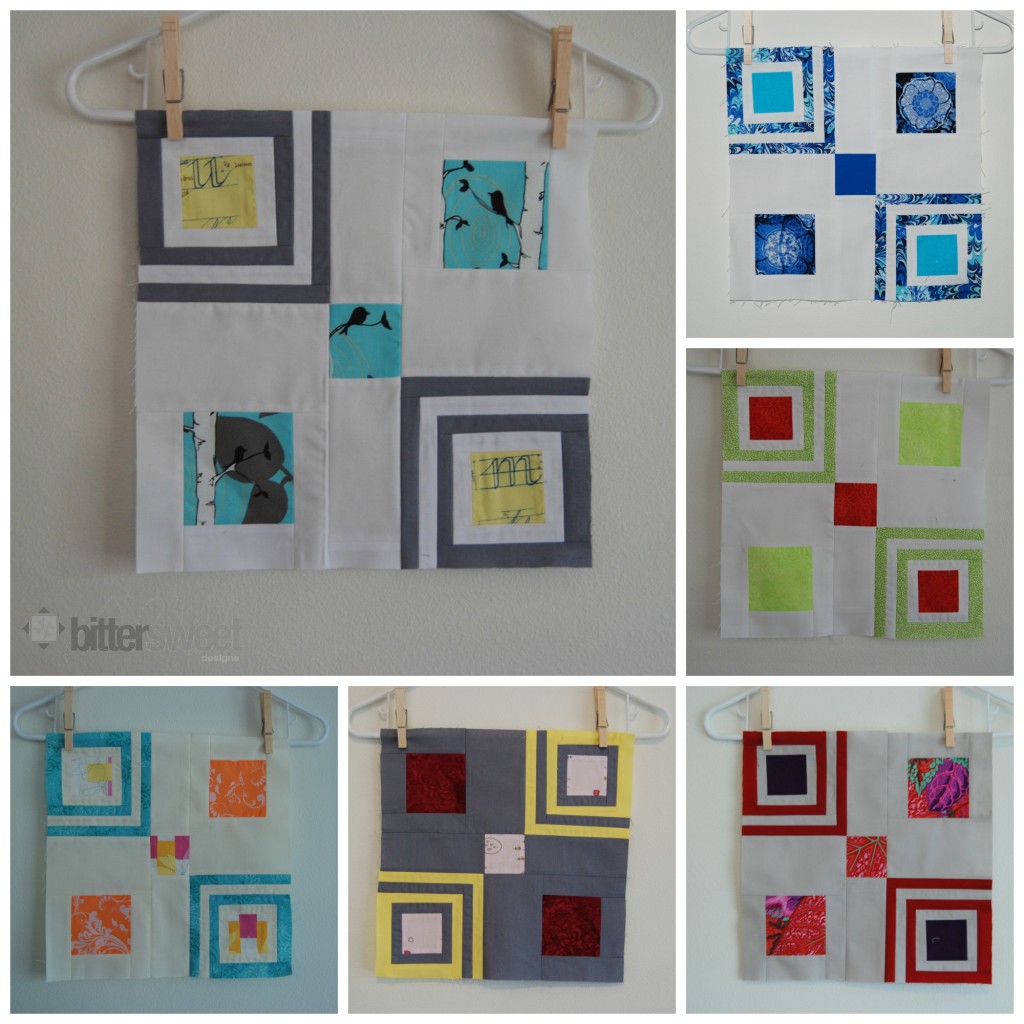
 “Framed”
Quilt Block Design by Melissa Dunworth
Block Size: 12.5″ x 12.5″
Sew BitterSweet Designs
Cutting:
Cut the following:
Background fabrics: Blue Frames:
4 pieces: 2.5” x 1” 4 pieces: 3.5” x 1”
4 pieces: 3.5” x 1” 4 pieces 4.5” x 1”
2 pieces: 4.5” x 1” 2 pieces: 5” x 1”
2 pieces: 5” x 1” 2 pieces: 5.5” x 1”
2 pieces: 5.5” x 2.5”
2 pieces: 5.5” x 3.5”
4 pieces: 4.5” x 1.5”
2 pieces: 3.5” x 1.5”
Orange Squares: Pink/Yellow Squares:
2 Pieces: 3.5” x 3.5” 3 pieces: 2.5” x 2.5”
I realize you just cut a ton of crazy small pieces, do not be intimidated! This block is super easy to put together! Please remember to keep a very accurate ¼” seam!!!
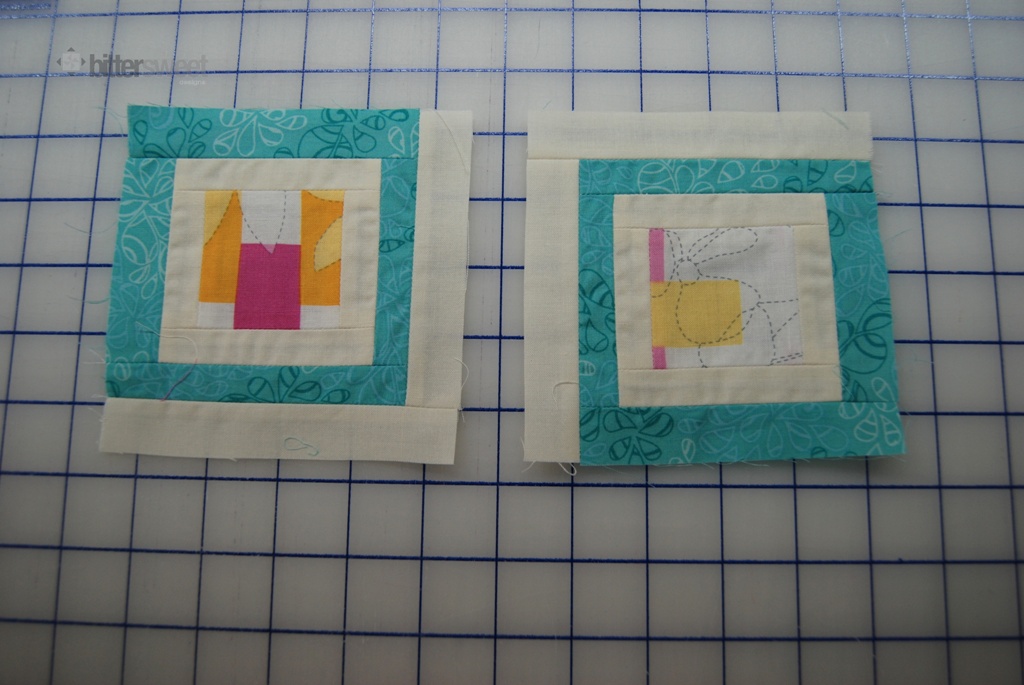
Step 1: Starting with the 2 smallest background fabrics, frame 2 of the pink/yellow squares (see below)
 Step 2: Next use 2 sets of blue fabrics and add to your frame (see below)
Step 3: With the next size of the back ground fabrics add to your frame. Remember if using a directional print to pay close attention to the orientation below. This time you are only adding half of a frame.
Step 4: Using the last sets of blue fabrics, complete your frame, again, pay attention to the orientation of your fabrics if using directional prints. This completes your framed portions.
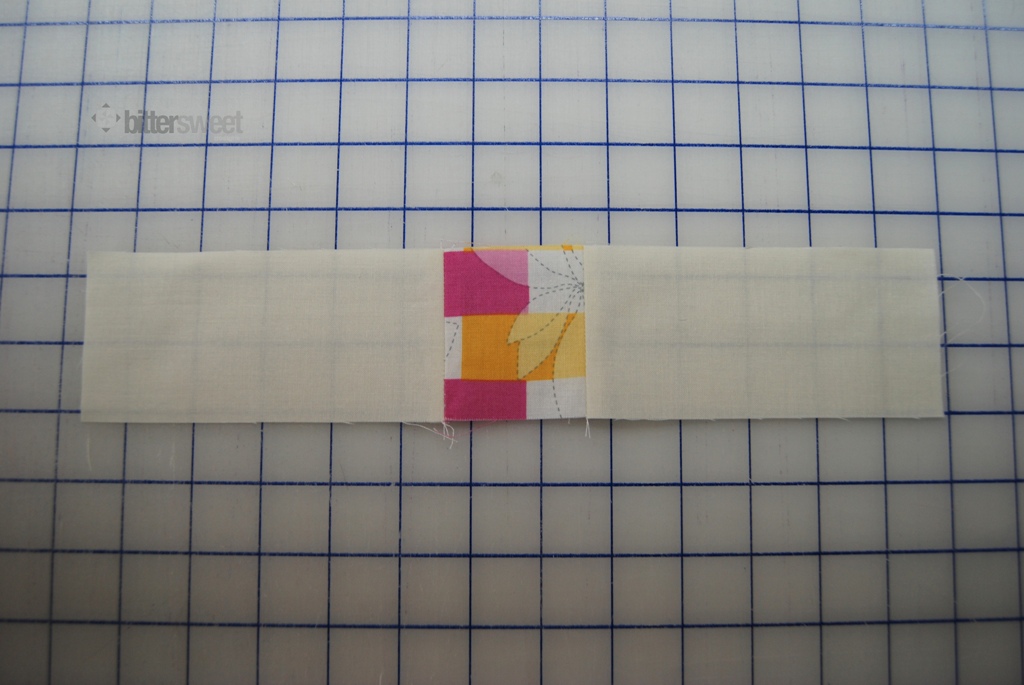
Step 5: Using the last pink and yellow square add the 5.5” x 2.5” strips on either side.
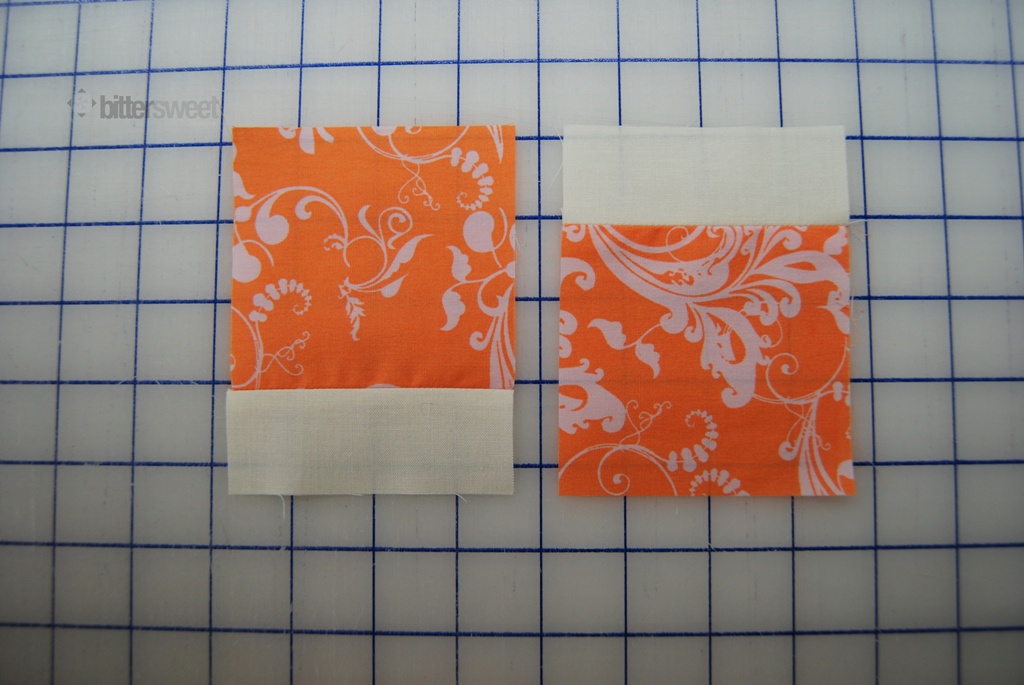
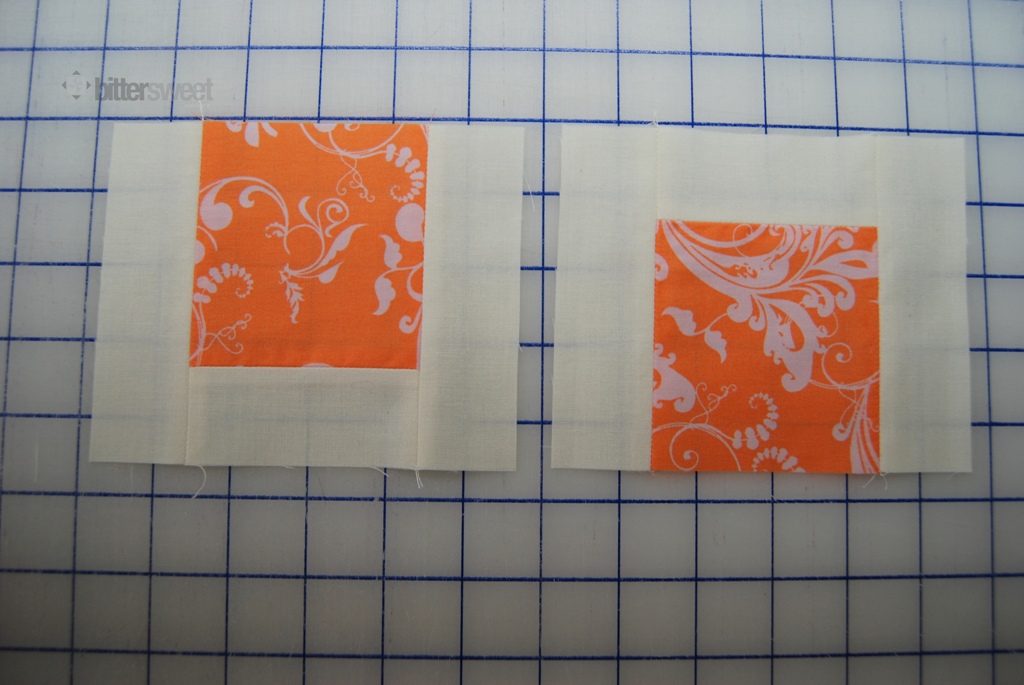
Step 6: Take your orange squares and add the 3.5” x 1.5” strips. Pay attention to the orientation if using directional prints. (how they are in this picture is how they will be in the block)
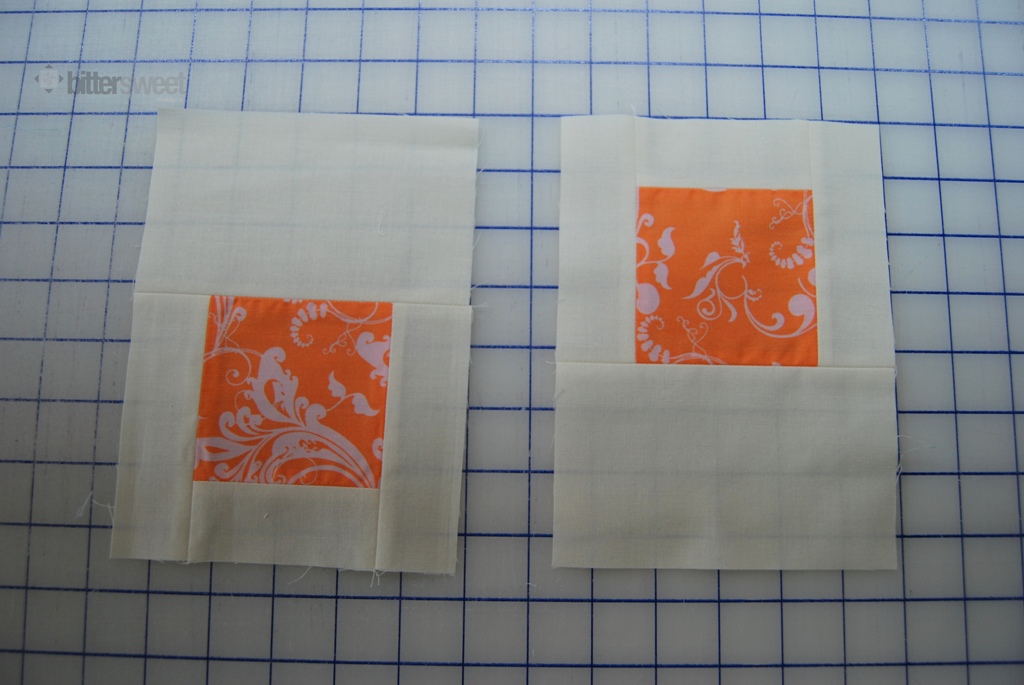
Step 7: Next add the 4.5” x 1.5” strips to either side of the pieces assembled in Step 6.
Step 8: Add the 5.5” x 3.5” strips to the pieces from Step 7.
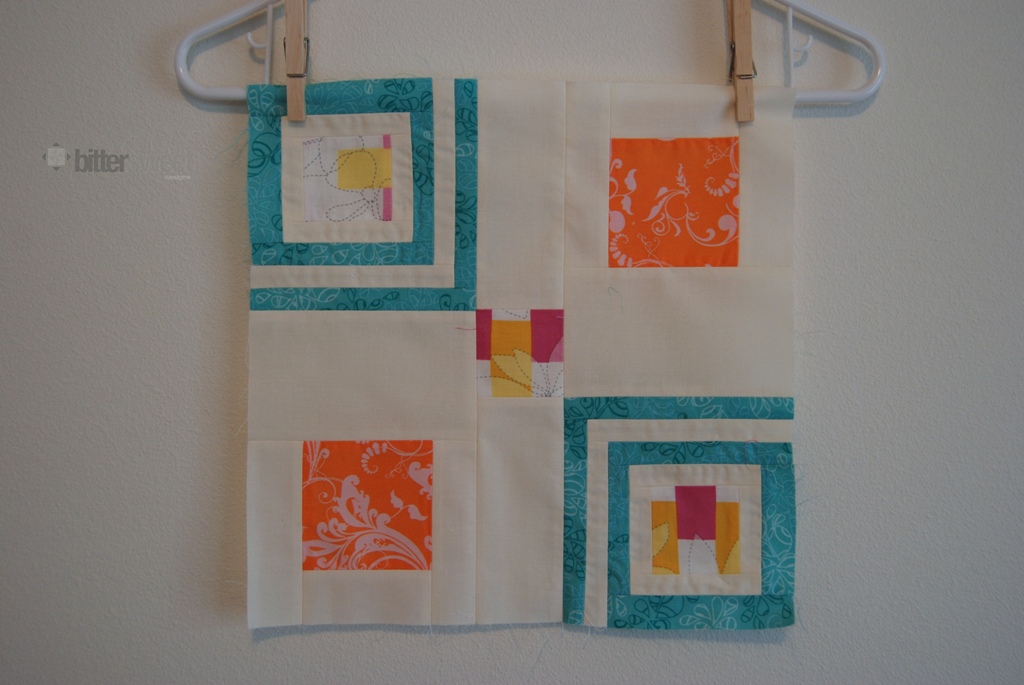
Step 9: Block layout. Sew blue framed pieces to the orange framed pieces to create 3 sections
Step 10: Sew 3 Sections together. You have completed your block!
Framed Block Finished
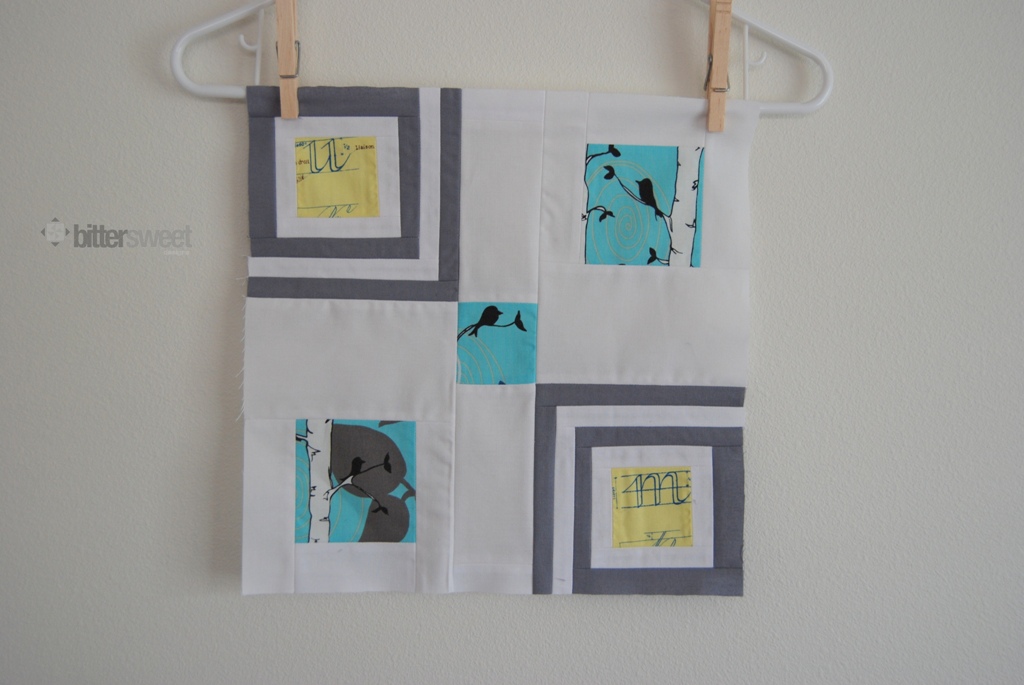
Here’s an example with a direction print:
There you have it! Way easier than it looks! If you make any blocks following this tutorial I would love it if you put them in my flickr group!





Going to try this one out for sure!! I have the perfect quilt for it to be a part of! 🙂
Thanks for the block tutorial! I really like this pattern … 🙂 Pat
Fun block! I will need to add it to my list of blocks to try =)
Love these!!!!!!
So many possibilities with this block! 🙂
Lovely block, thanks for the tutorial, what size does it finish up at? 🙂
Great block Melissa! I love it.
lovely blocks and a great tutorial. I am going to have to pin it for sure!
Oh you make it all look so easy! I just may be able to manage it if I don’t use a directional print 🙂 Thank you for sharing. I found you via Quilting Lodge blog.
Sweet! Looks doable! thanks for the tutorial.
Love it.. I will give it a try. Hope you have been doing good lately. I have chatted with you in awhile, I laid off the blogging a bit, to much going on around my house, had to learn my new machine but I have a few post this week.
Thanks for the tutorial. I’m going to have to give this a try.
What a fantastic design Melissa, thanks for sharing!!