I was so excited when Kim from Kim’s Crafty Apple asked me if I would be interested in doing a tutorial for her Home Sweet Home QAL. I immediately jumped in with both feet and said YES! A couple weeks later PANIC set in – as it always does when I have a deadline and absolutely NO idea what I am going to make. At first I tossed around the idea of a Tree House of some sort – after all Anne is obsessed with Berenstain Bears and as you probably know, they live in a killer tree house. As I played and tooled around, I ended up designing a few blocks in EQ7 of scrappy little trees.
If this is your first time to my blog, WELCOME! Please take a few minutes to look around, I have a tutorials page with over 30 free tutorials for quilts, blocks & techniques and I am hosting a very generous giveaway right now from Fat Quarter Shop.
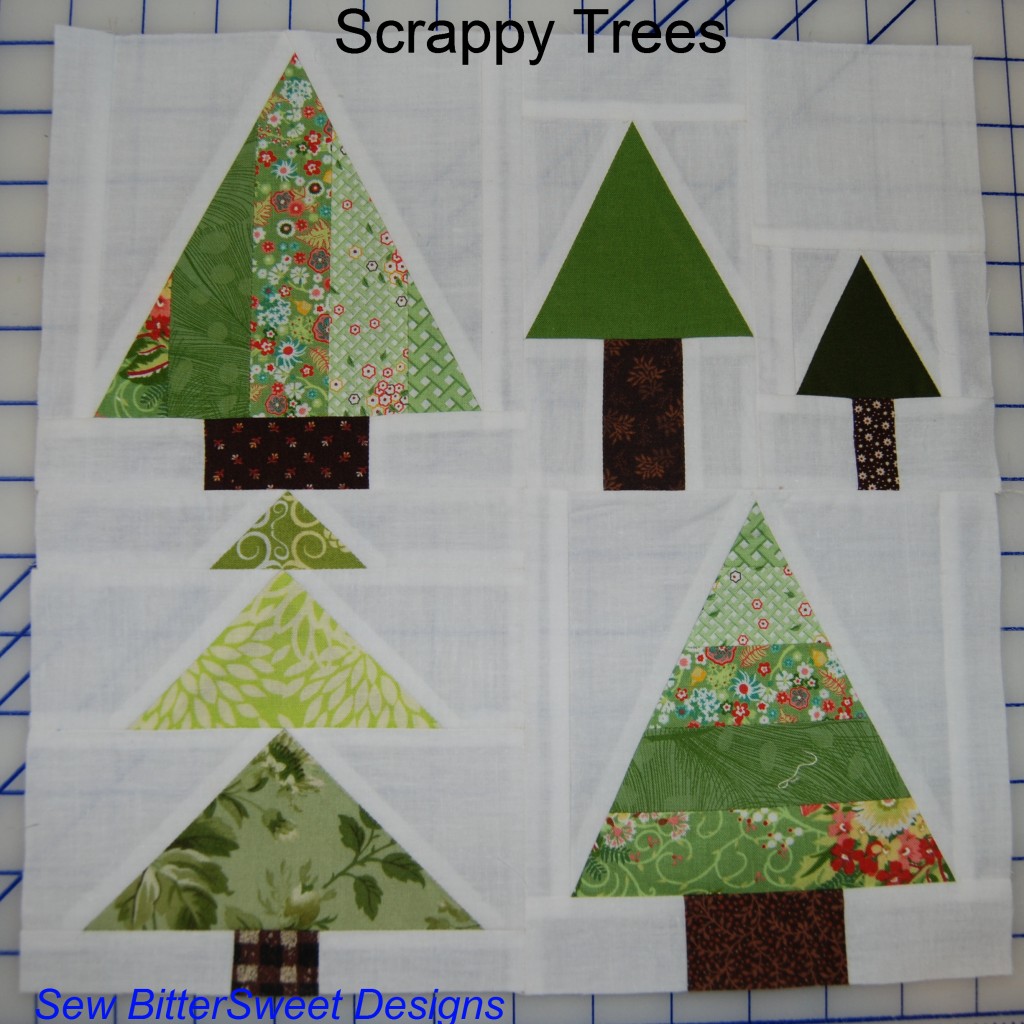
The nice thing is that each individual tree makes a 6.5” (6” finished) block – so if you would like to make 6” blocks from the individual trees you can.
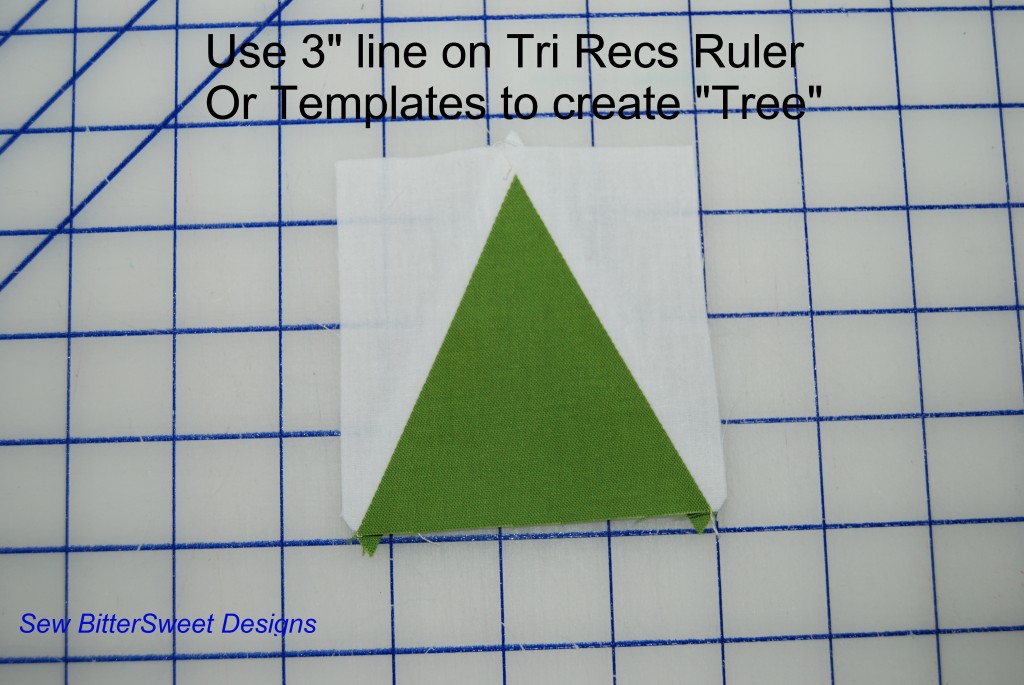
Three of the trees were made using the Tri-Recs ruler – provided to me by Fat Quarter Shop (stop by tomorrow for another tutorial and for a review on it). I have provided PDF downloads of templates for those of you who do not own the Tri-Recs ruler and would like to make this block.
For the Double Tree Block – please go here to download the templates.
For the Pine Tree Blocks – please go here to download the templates.
Each of these blocks was made entirely out of scraps – including the Kona White background – I used 1 strip measuring 3.5” wide for the entire project. All seams are ¼” – you can press open or to the side (whatever is comfortable for you).
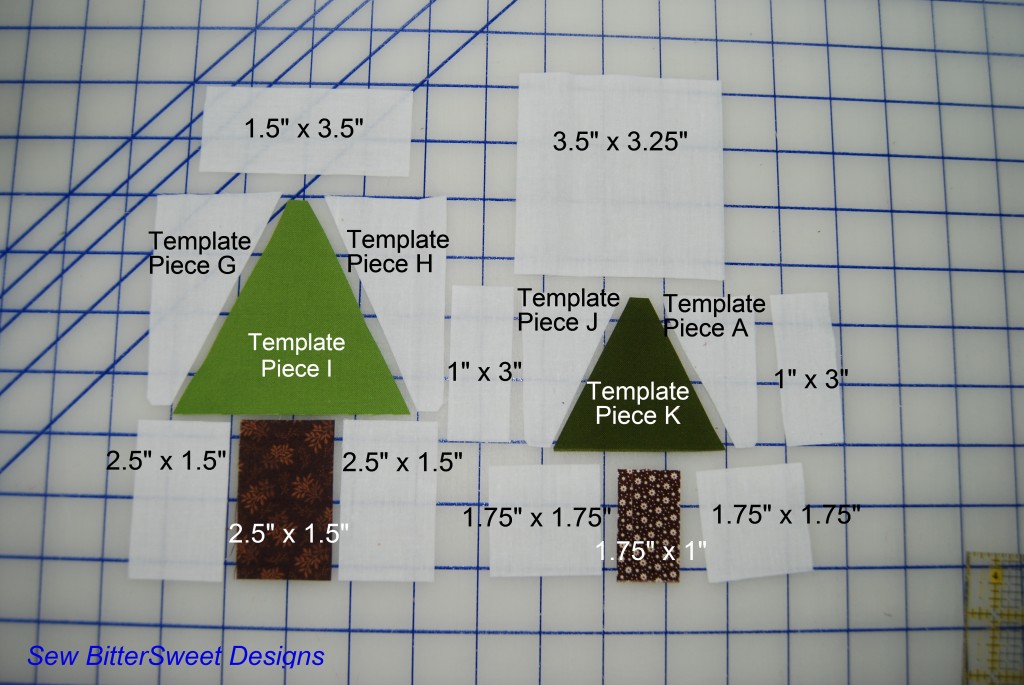
For the Double Pine Tree Block – cut scraps according to image:
First you will want to create your “tree sections”
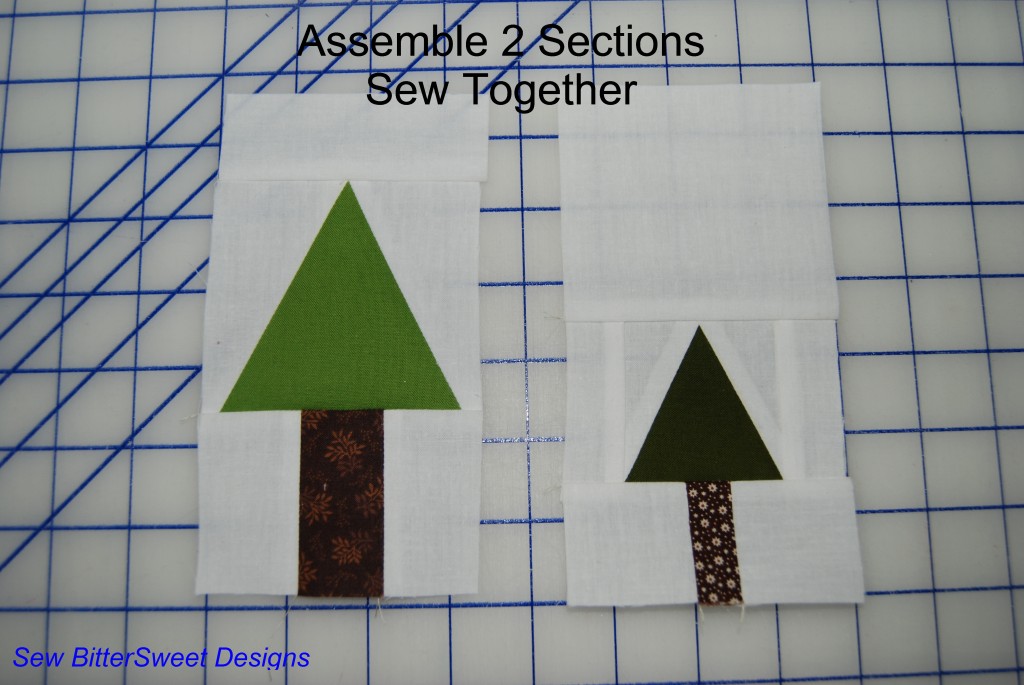
Next you will want to assemble the individual tree sections (effectively splitting the block in half):
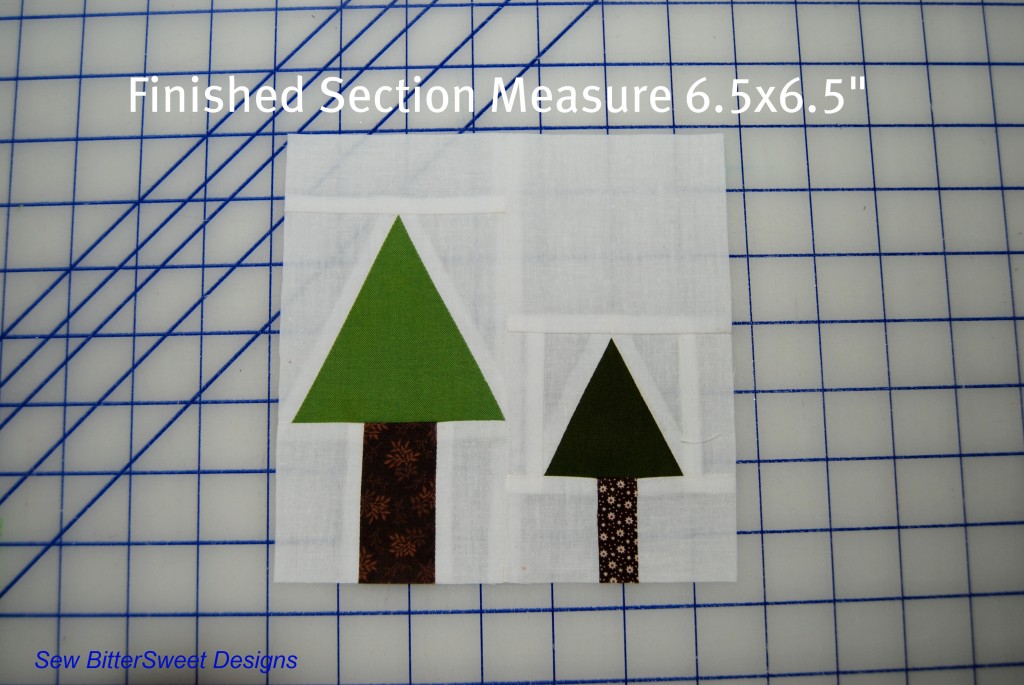
Finished block measures 6.5” Square
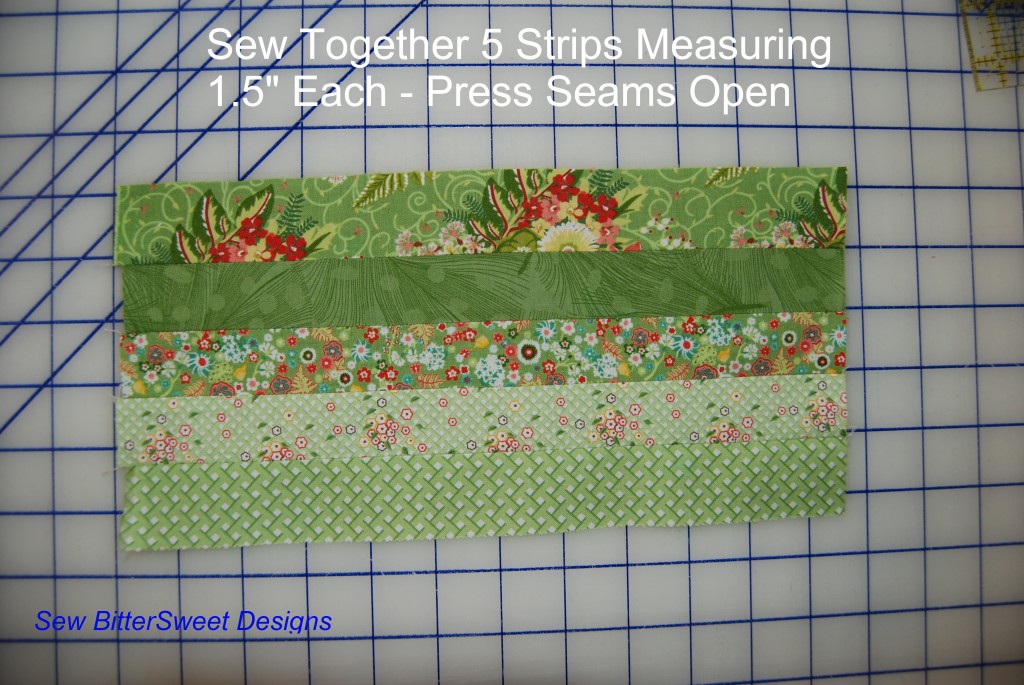
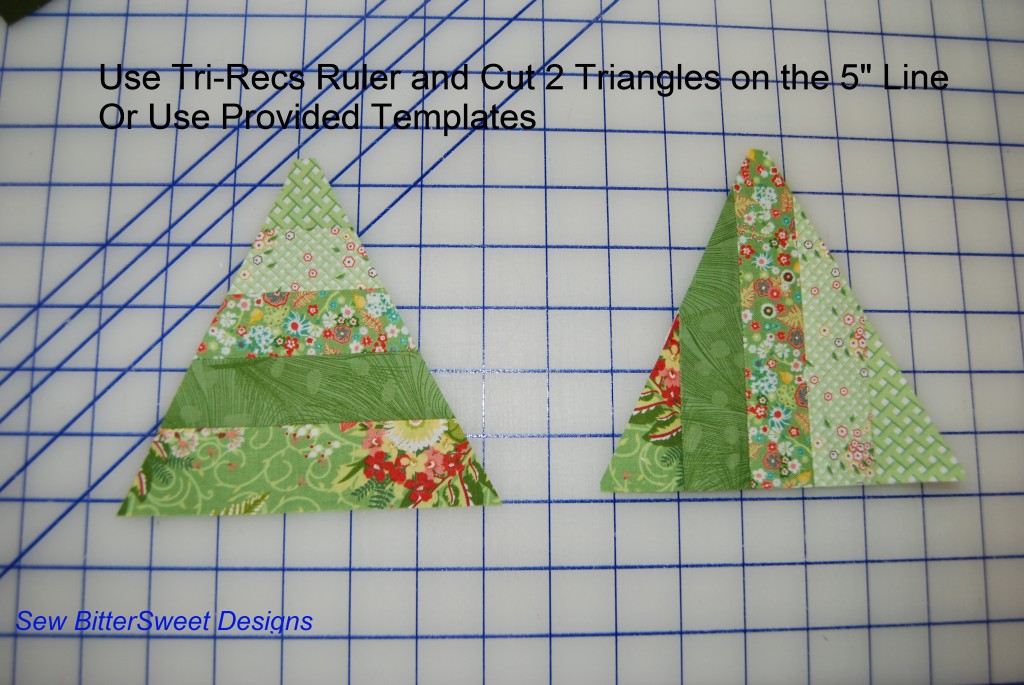
For the two Striped Pine Tree Blocks you will want to start by sewing together 5 strips of fabric measuring 1.5” x 12”
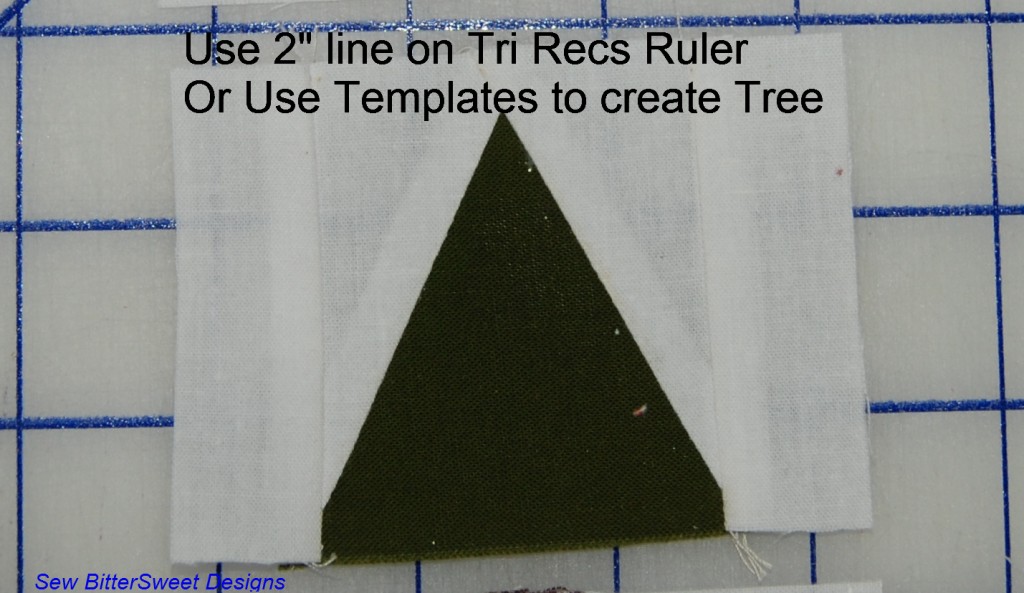
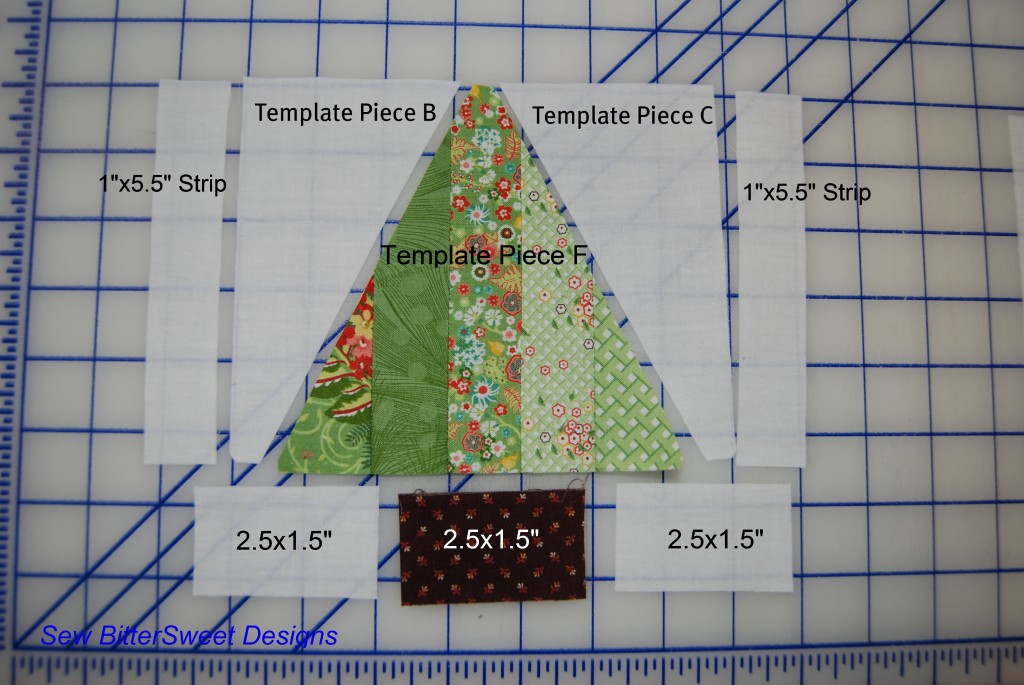
Then using the Tri-Recs ruler or the provided templates – you will want to cut out your tree sections. One will be horizontal stripes, the other will be vertical (simply turn the fabric before cutting):
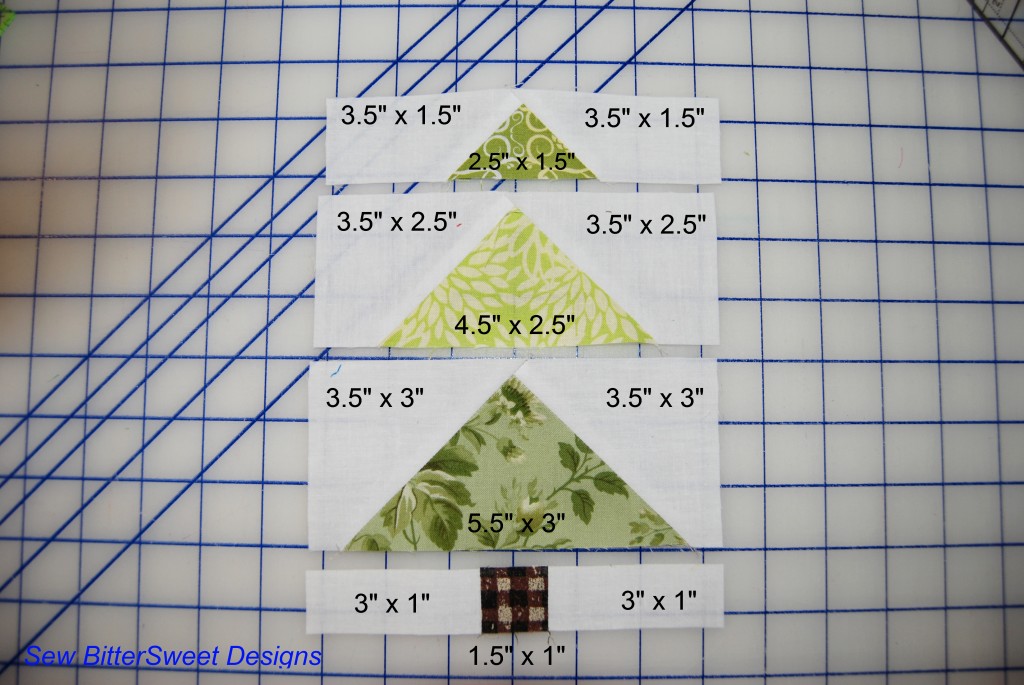
Following the cutting measurements on the next 2 images for the background and tree trunks:
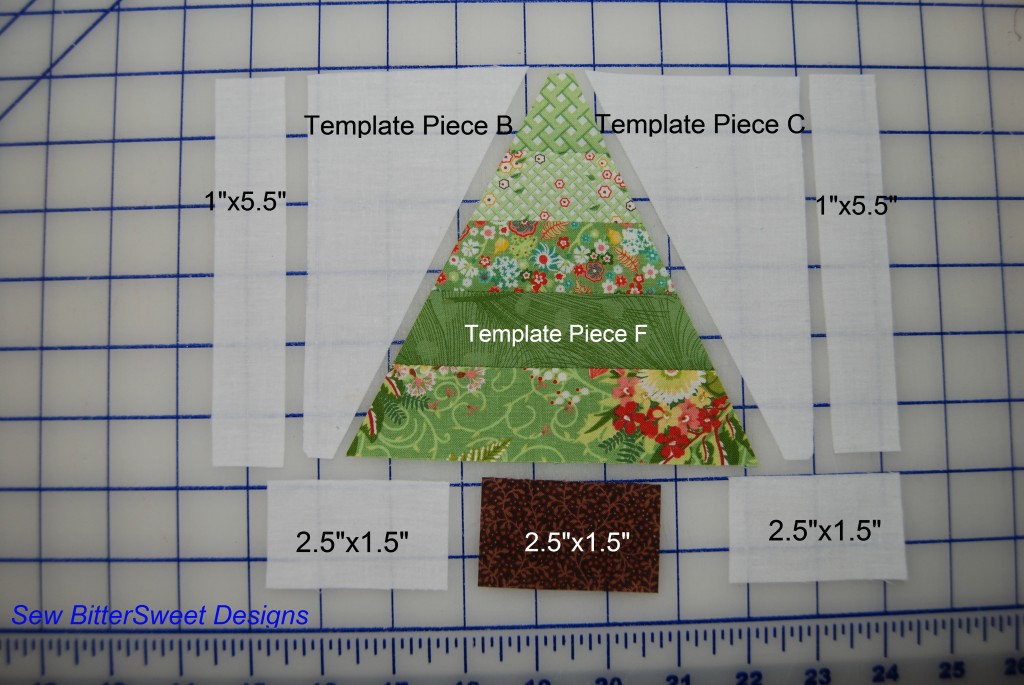 Sew your sections together and voila! Two scrappy pine trees
Sorry about this next block – it was easier to show you the cutting measurements on a partially assembled block:
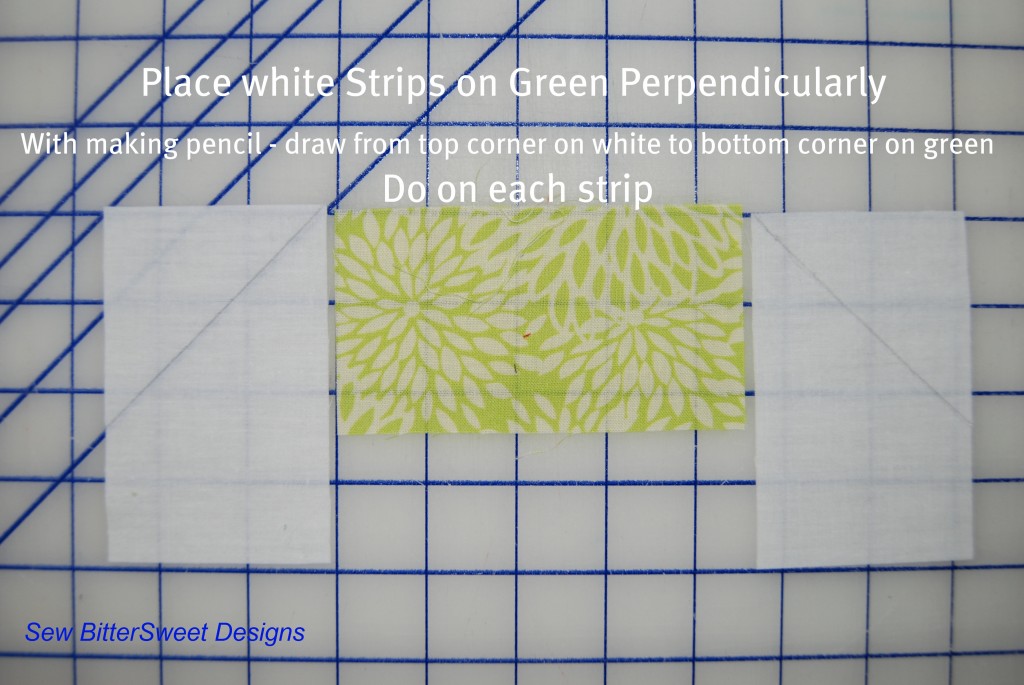
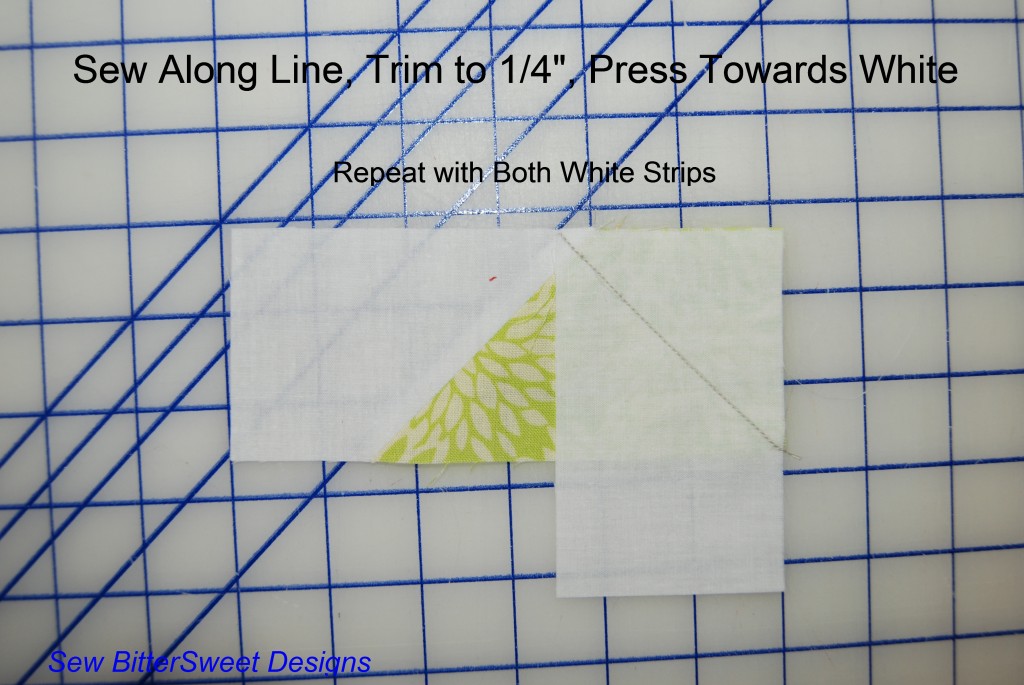
(The technique is the same for each section of the tree, I am demonstrating on the center section – the first section is small and it was hard to get good pictures)
With one white strip at a time, place it perpendicularly on your green strip and use your ruler to draw a line from the upper corner of your white fabric to the bottom corner of your green fabric. Do the same on both sides of the green fabric. Your lines should slant down on your white strips in opposite directions (picture flying geese, except these are rectangles not squares).
Next place your white strip on the green strip and sew along the line you drew. Trim to ¼” and press open, repeat with the other white strip. Once trimmed the entire strip should measure 6.5” long.
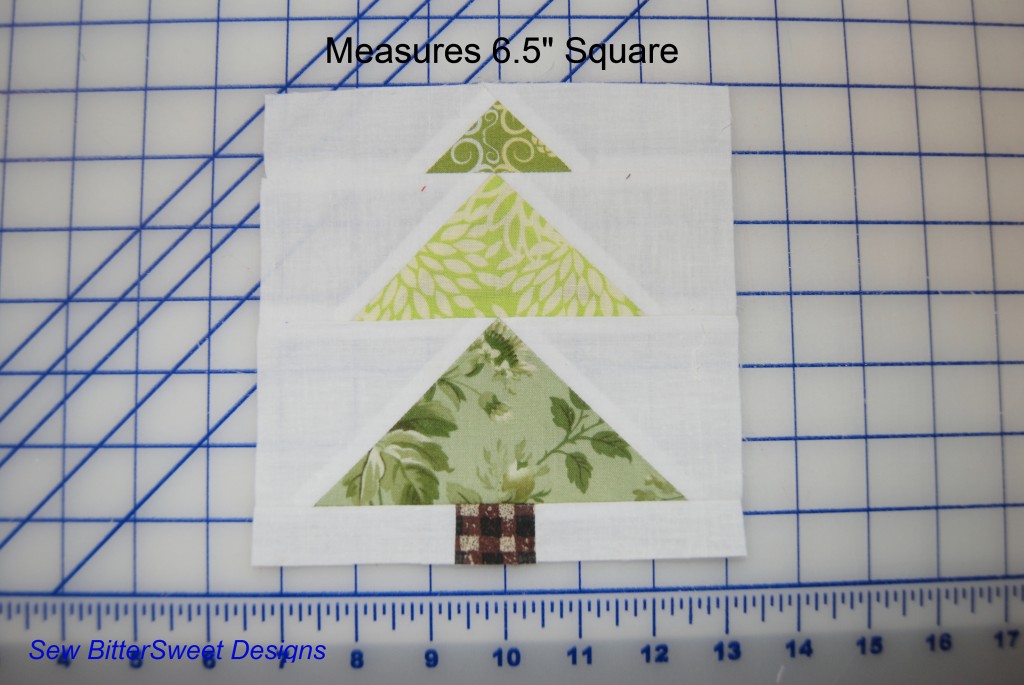
Sew on your bottom section with the tree trunk and you are done! Block should measure 6.5” square
Layout your 4 blocks in a way that makes you happy and sew them together!
Please let me know if you have any questions at all or if you need more pictures! And thank you Kim for hosting such a fun QAL and allowing me to be a part of it!
![]() I’m linking up to Quilting By the River
I’m linking up to Quilting By the River



Very cute. Thanks for the tut. This just might be the perfect jumping off point for a Christmas project that I am thinking about.
These are just adorable , Melissa ! And you did a fine job on the tutorial ! I saw many tree quilts this past year and fell in love , So I may have to try this ; thanks !
I love this block!! The trees are adorable!! 🙂
Very cute!
I love your trees 🙂
Very cute trees….I think I see one of the bears peeking out – you could make a placemat just for Anne with a tree house or a bear added to the tree! LOL
Cool 🙂 I’m just starting a new strip bee, and these will work perfectly with my idea, I shall point my bee mates over here!
great tutorial! I am going to pin this for sure 🙂
What a great variety of trees that could be used for so many projects! Thanks for linking!
Join me at Linky Party Tuesday
Love your project and the tutorial is so well done. Excellent pictures and explanations. Thank you,
All 4 look great! Thanks for the tuts.
What great blocks..love the trees!!! Thanks for the easy-to-follow tutorial!!!
Great block! Great tutorial! LOVE how mine turned out! Thanks so much for agreeing to be apart of the fun!