How do you make Flying Geese? Do you use the no waste method that involves cutting squares and sewing them to each other as seen on this PDF? I recently bought a new toy that has made flying geese so much easier for me, the Easy Star & Geese Ruler. It has made all the difference – believe it or not using this ruler I was able to make 240 geese in ONE day!
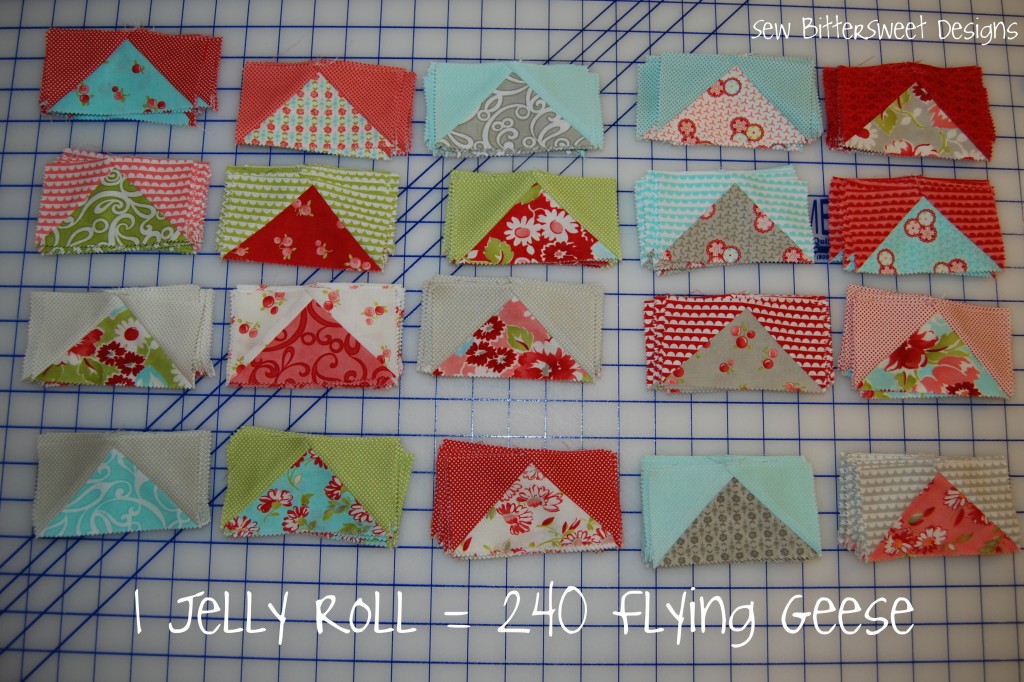 When Fat Quarter Shop sent me a Jelly Roll of Ruby by Bonnie & Camille – I just sat and stared at it for a day or so, I truly didn’t know what I was going to do with it. Then I realized it would make the cutest quilt for my bestie’s baby girl who turns 1 next month.
Learn how to make Flying Geese from a Jelly Roll after the jump!You will need:
1 Jelly Roll – I used Ruby by Bonnie & Camille
Easy Star & Geese Ruler
Rotary Cutter
Cutting Mat
Basic Sewing Supplies
Take two strips from your jelly roll – I like mine to be a nice contrast
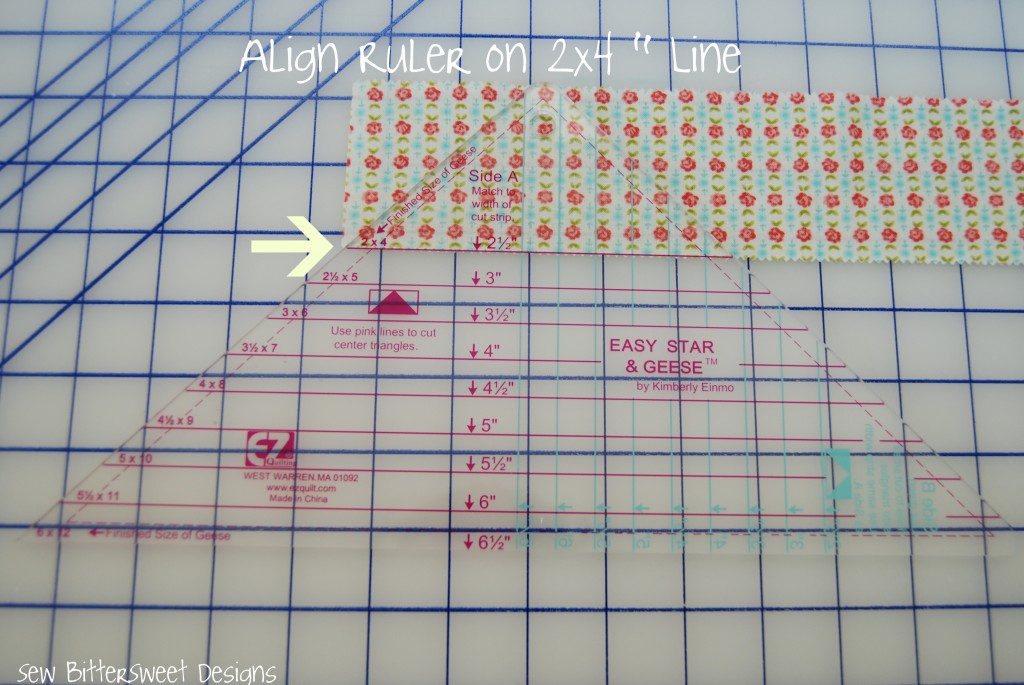
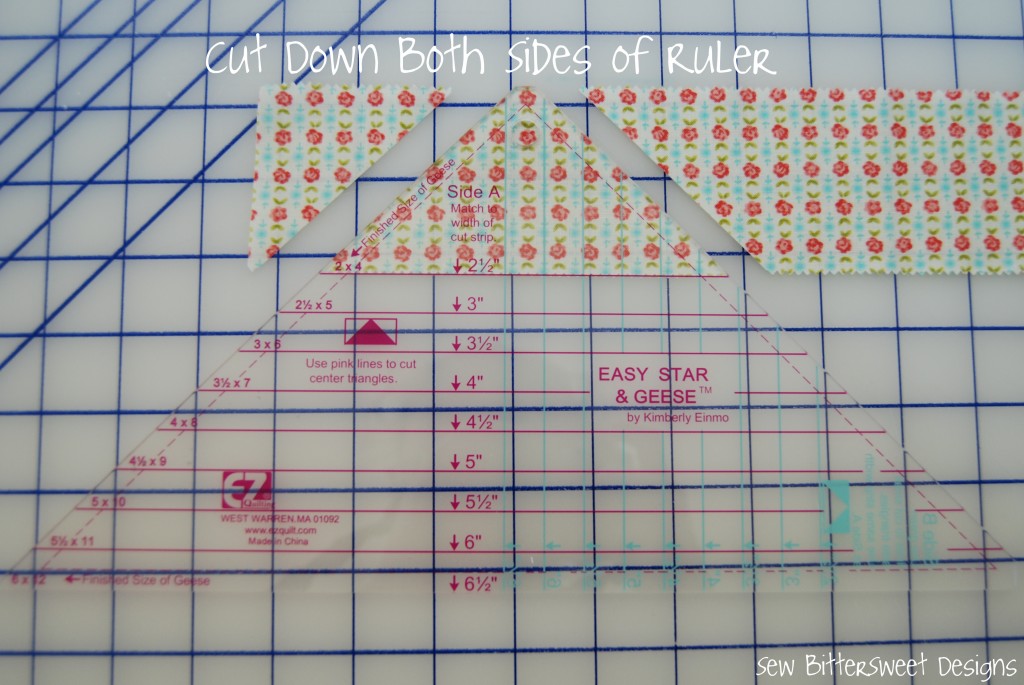
With Side A of ruler cut your long triangles out – line it up with the 2 x 4″ line on the ruler (the ruler by the way is awesome because it can help you make geese as small as 2×4 all the way up to 6×12!) I already have future plans in store for this bad boy!
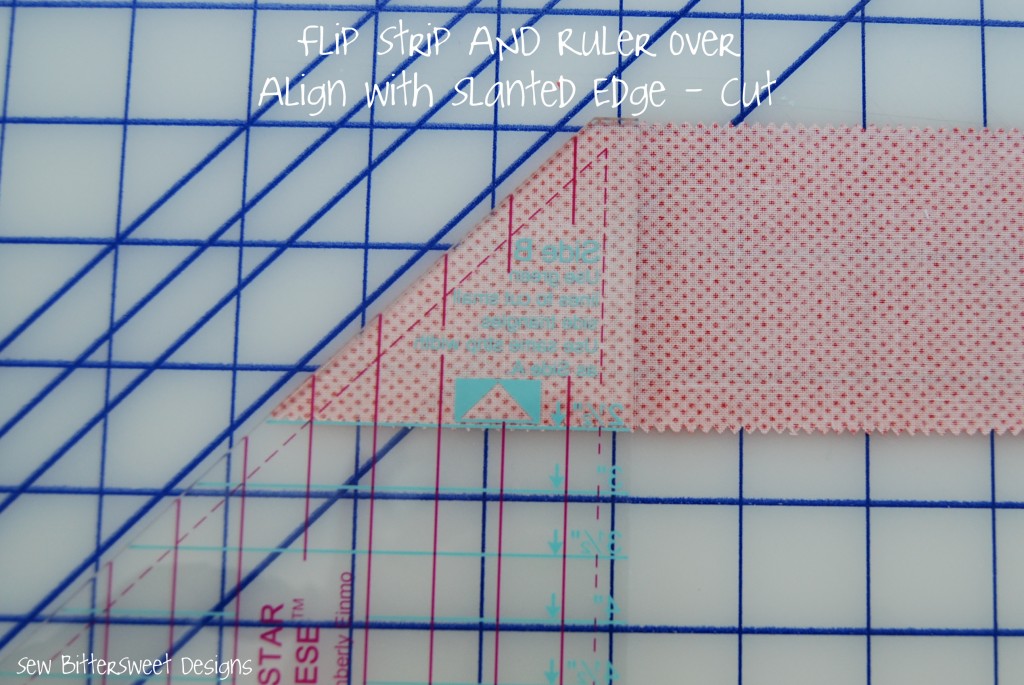
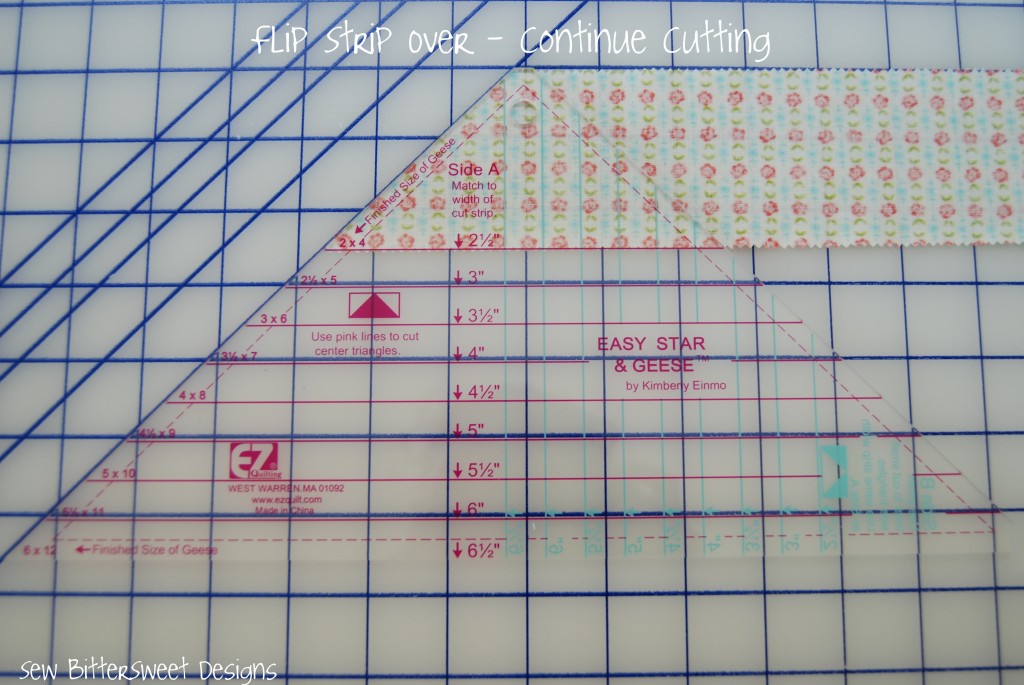 Every time you cut – you will need to flip the strip over – this makes the process fast and easy!
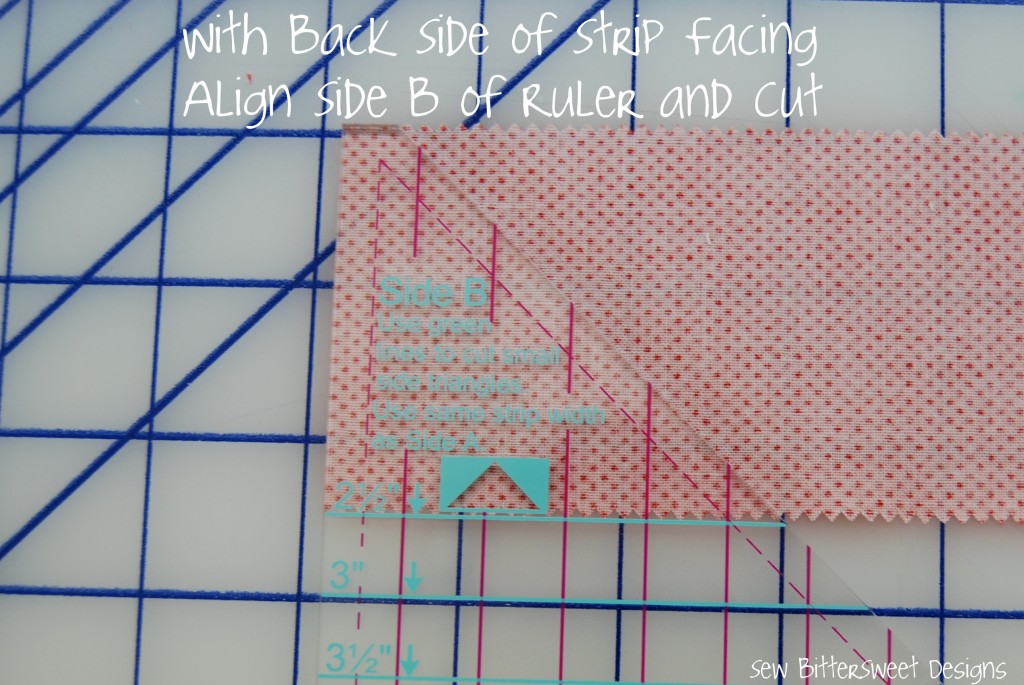
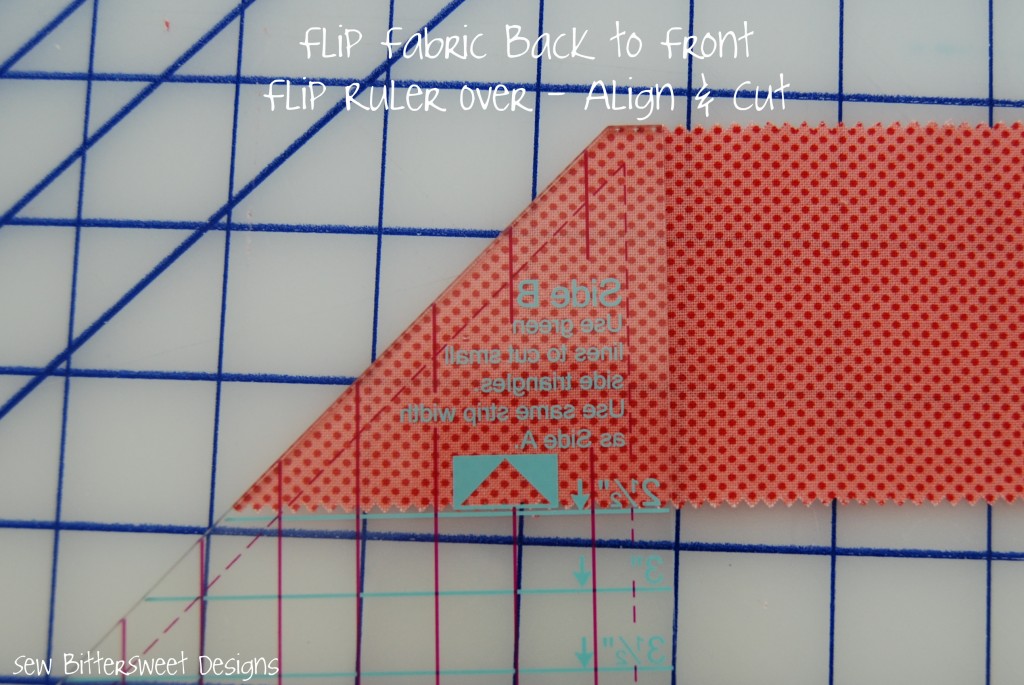
Next you will need to cut what I refer to as your goose wings – the outer smaller triangles – this is a little more complex but I think the pictures illustrate it quite nicely.
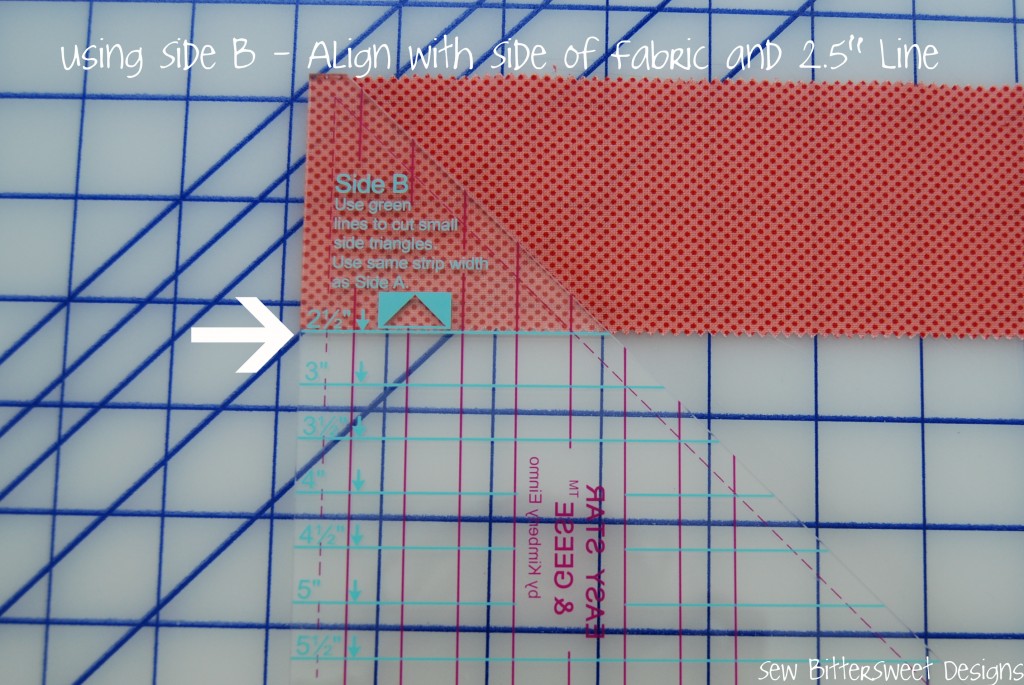
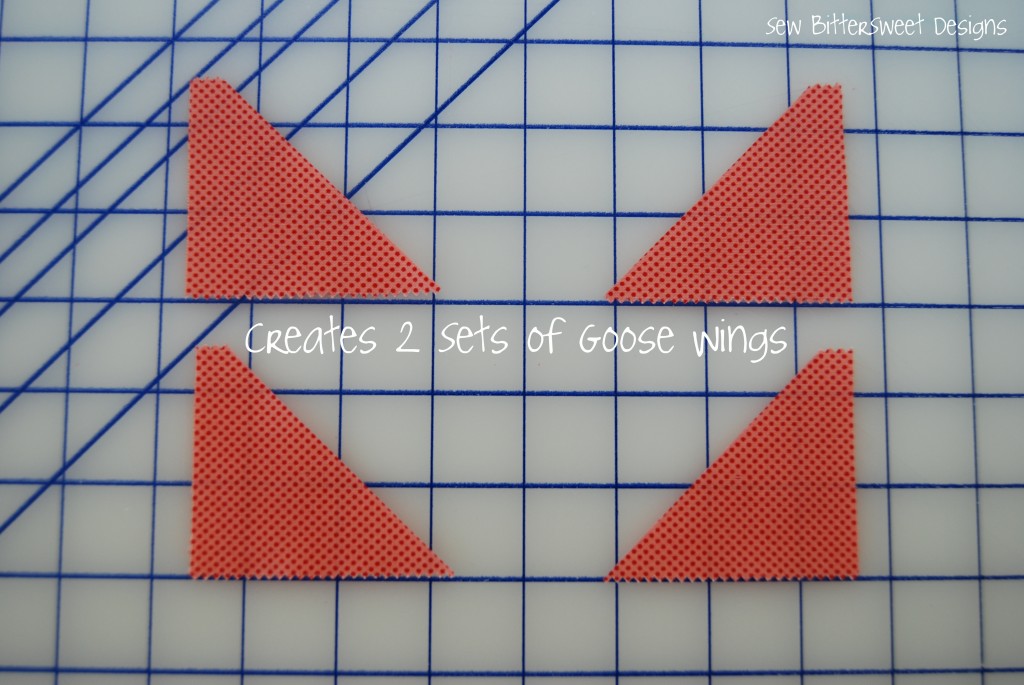 Sorry for the picture heavy post – but the pictures illustrate the idea better than I could!
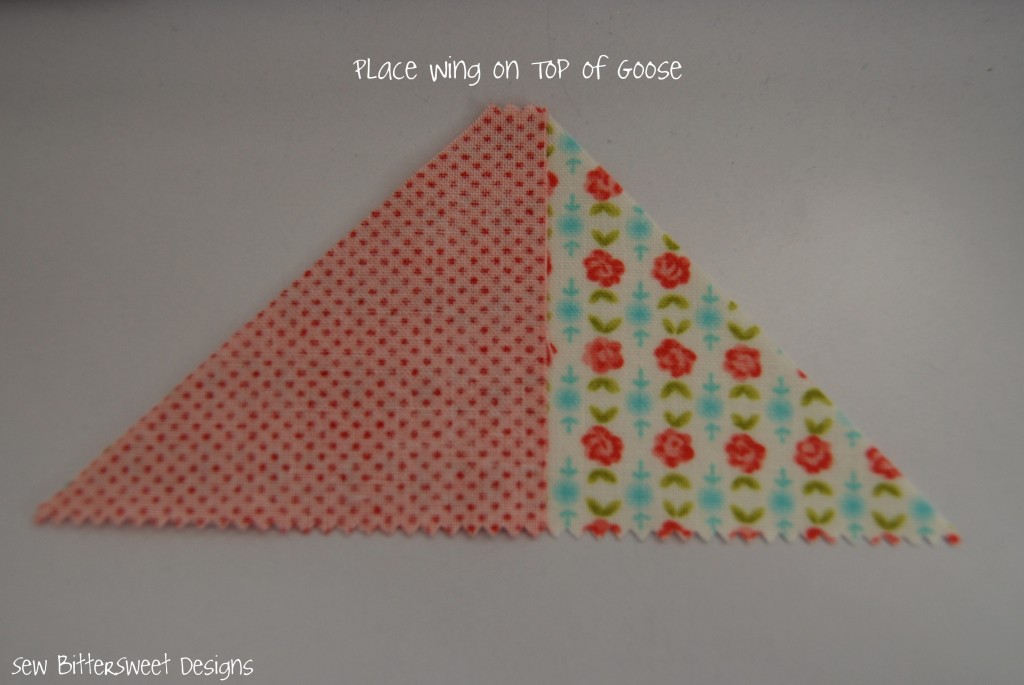
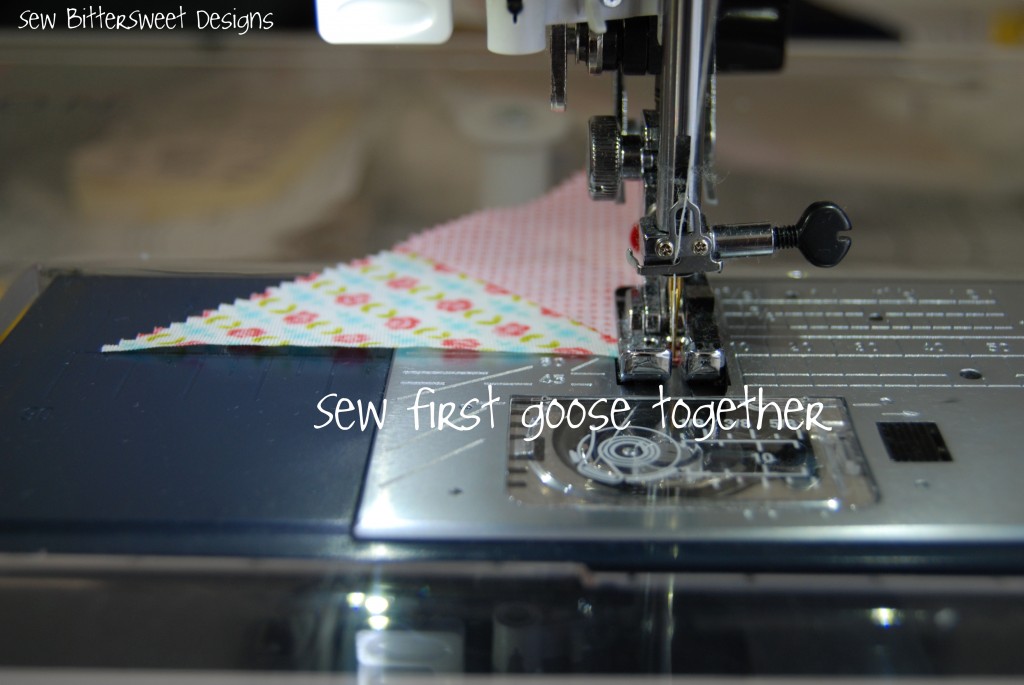
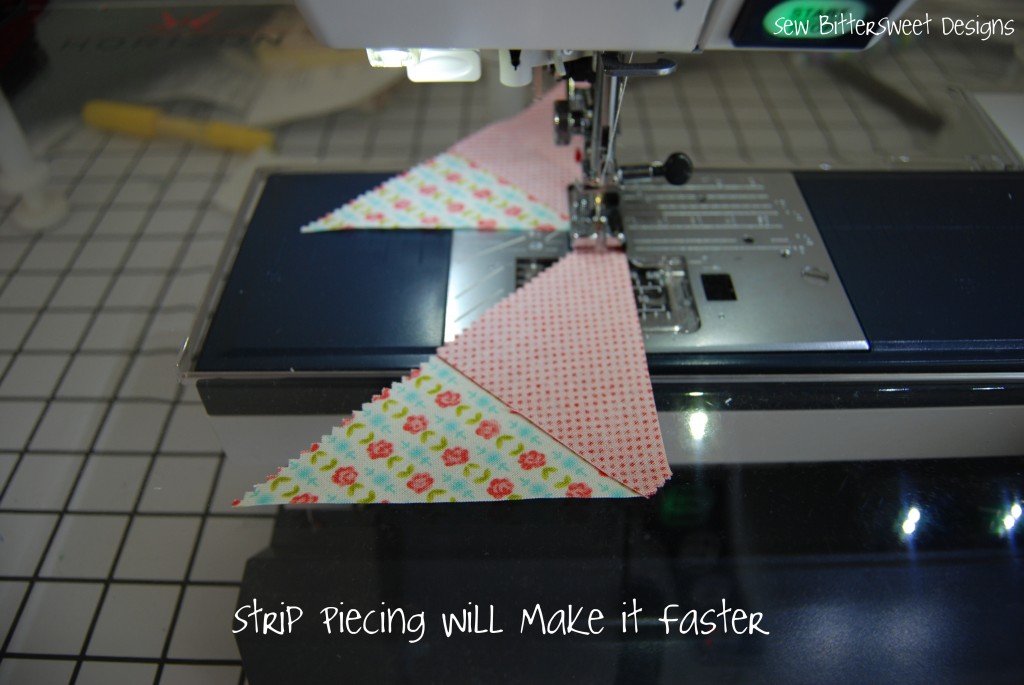
Next comes the sewing – I decided to strip piece my geese.
Once you have all pieced all of the first wings on, cut them apart and iron them open. Next strip piece the second wing on.
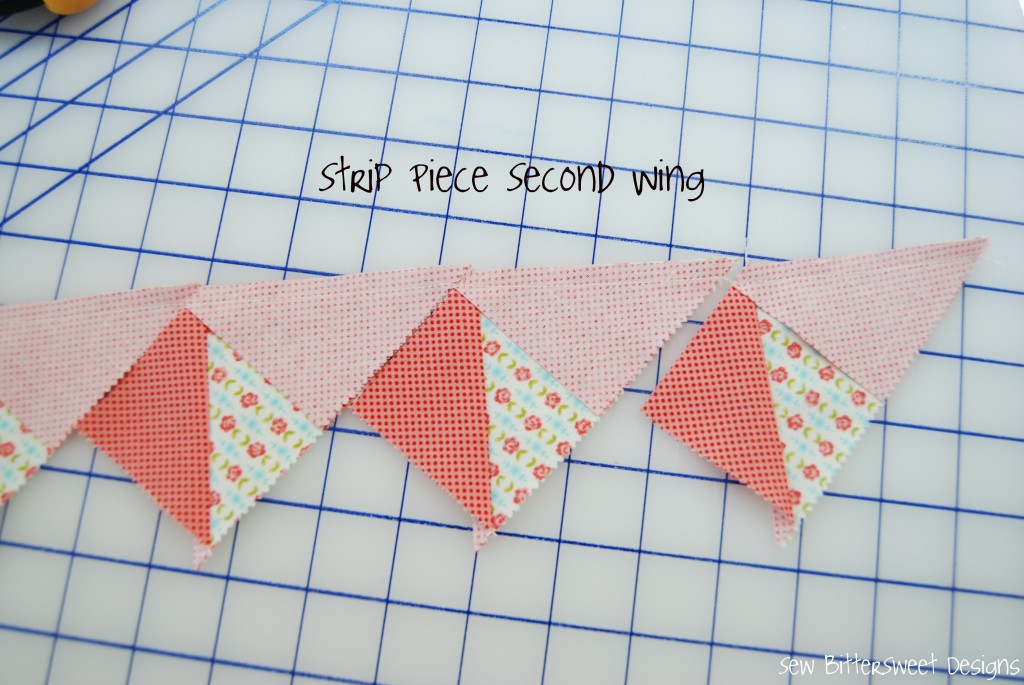 Cut these apart and iron open – A goose (or a dozen geese) is born!
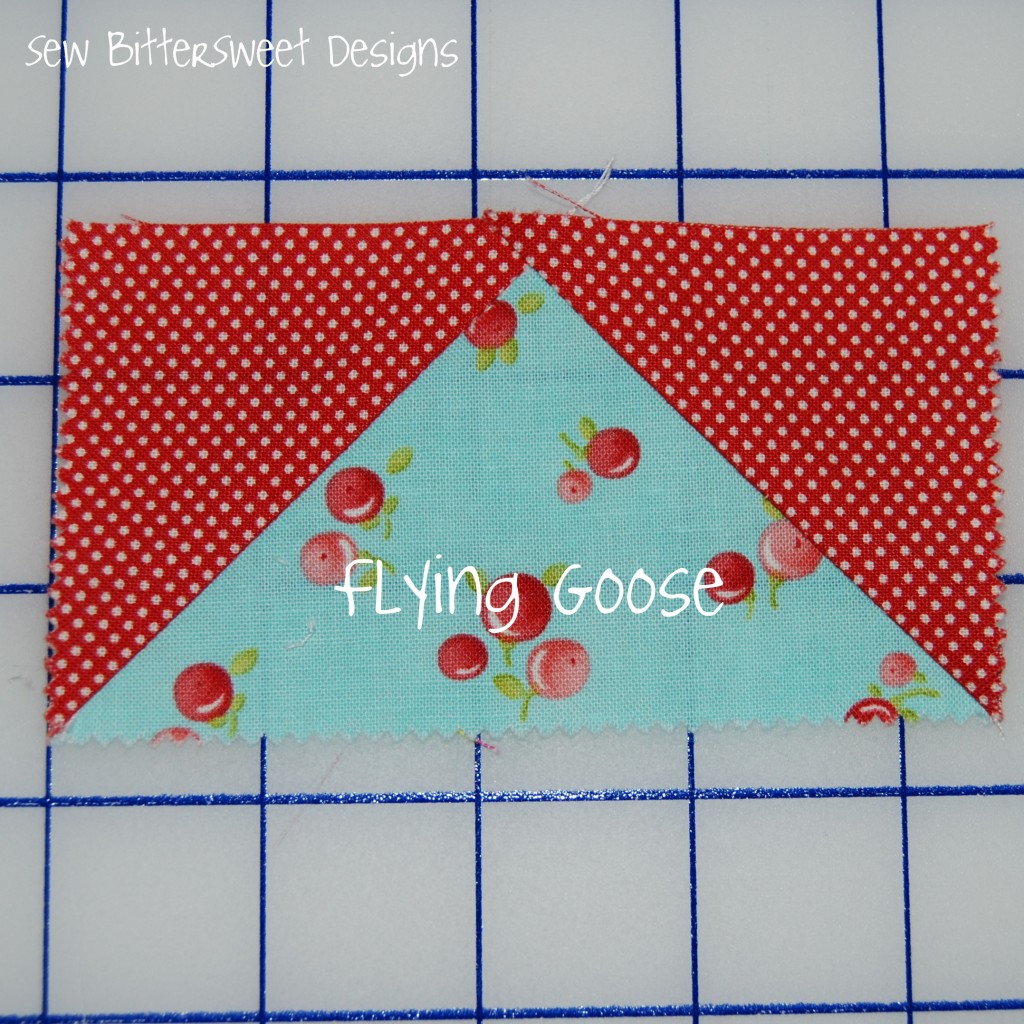 One of the things that I love best about the Easy Star & Geese Ruler is that it eliminates the need to cut off any bunny ears after sewing together your goose – and when you have made 240 geese believe me that is a HUGE time savings!
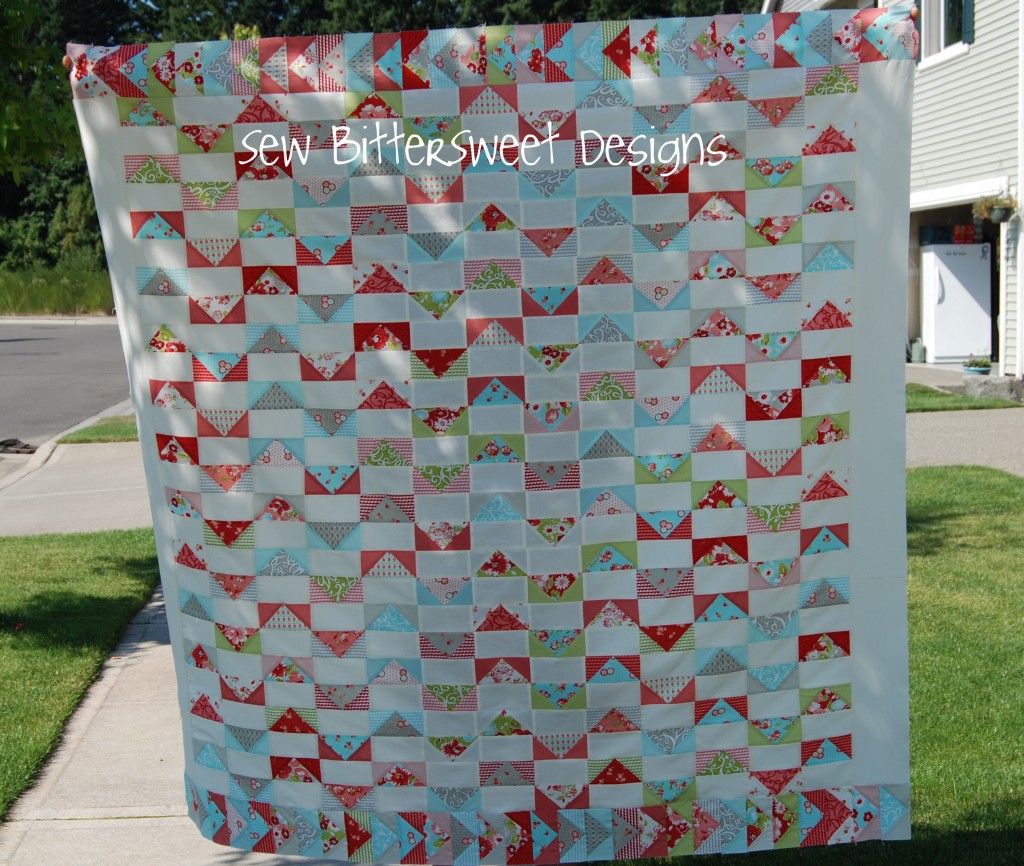
I used my geese to make what I am calling faux chevrons. I used some Bella Solids in Ivory as spacers for my chevrons – 2.5 x 4.5″ squares sewn between each goose.
 I also used the Bella Solids in Ivory for two of my borders and some of my left over geese for the other two borders.
 This quilt is called “Fancy Flocks”
I have so many ideas in store for the Easy Star & Geese Ruler! I can’t wait to get started 🙂
Will this be a new method you add to your repertoire? Have done geese a few different ways now, unless I have to go super small this is the only way I will be making them from now on!

Love the geese!! Gonna have to give your toy a try! 🙂
Flying geese are one of my favourite blocks! this ruler looks a godsend – is it available in the UK???
Your new quilt is gorgeous!! especially as you have used ‘Ruby’ !!!
Wow! You outdid yourself. It is beautiful!
Your quilt is just beautiful and I love your fast and easy method. I love to strip piece. Makes me really feel like I am accomplishing something. Way to go!!
What great quilt…I love the layout.
I use the ruler for mine and that makes it so easy…it’s nice to see oths using them.
I found you thru Southern Lovely link up party.
What a great tutorial. Excellent instruction and images. I have been a quilter for years, but am new to the blogosphere. I look forward to visiting your blog from now on. I am now following you. Thanks for the helpful lesson today. Have a GREAT weekend.
Hi Melissa! Just wanted to let you know I featured your tutorial today on SewHappyGeek Feature Friday!
I am still following!! I feel sort of like a stalker. roflol My only wish is that I had a blog so that I could feature you on it. 🙁 I had seen the flying geese but not the quilt. I adore it. I haven’t had a chance to look at the tutorial but I pretty certain that it is as easy to follow as what I have seen in the past. My least favorite color has always been red and I don’t believe that I have ever made a quilt that had red in it with the exception of a Christmas wall hanging (I’ve been qulting for 20 yrs!). Since seeing you put together the flying geese with the red and turquoise color scheme I have discovered that maybe red isn’t such a villain after all. Have a great weekend!
What a great tutorial and I LOVE that ruler. Being a new quilter this would definitely be a huge help; especially for a new quilter who absolutely HATES math. LOL
Thank you for the info and I love the quilt. So pretty.
Love your quilt!! Haven’t attempted flying geese yet (but with your tutorial and this ruler).. I just may have to give it a try!!!
Thanks for letting me know I can now follow via email :o)
Hi well i know understand how too use that easy geese ruler, thanks too you . Your designs and color, making it so delite – full . Renee
Hi Melissa, Wondering what size this quilt turned out? I could probably guess, but don’t know how tall the person holding it is. lol Will you be quilting this any time soon? I reall look forward to seeing it finished.
Thanks! Dawn
Lovely! Very well-done! 🙂
Oh this was an exciting post to stumble upon as I enjoy my Sunday morning coffee!! You are brilliant, and I adore all fabrics by Bonnie & Camille,and Camille!! Thank you for the inspiration. Greetings from Canada!
LOVE THIS !!!! missed it before when you posted it ! 😀