This was originally posted at Purple Panda Quilts as part of her Stockings for Kids Drive. I had so much fun being a part of the drive and I am so happy to say that Lyanna collected 219 hand made stockings for the foster children that she works with. The truly impressive thing is that her goal was only FIFTY!!!
This stocking takes less than an hour to make and is the perfect last minute gift project!
Materials (enough to make 2!):
 You will also need an old stocking or use Lyanna’s pattern.
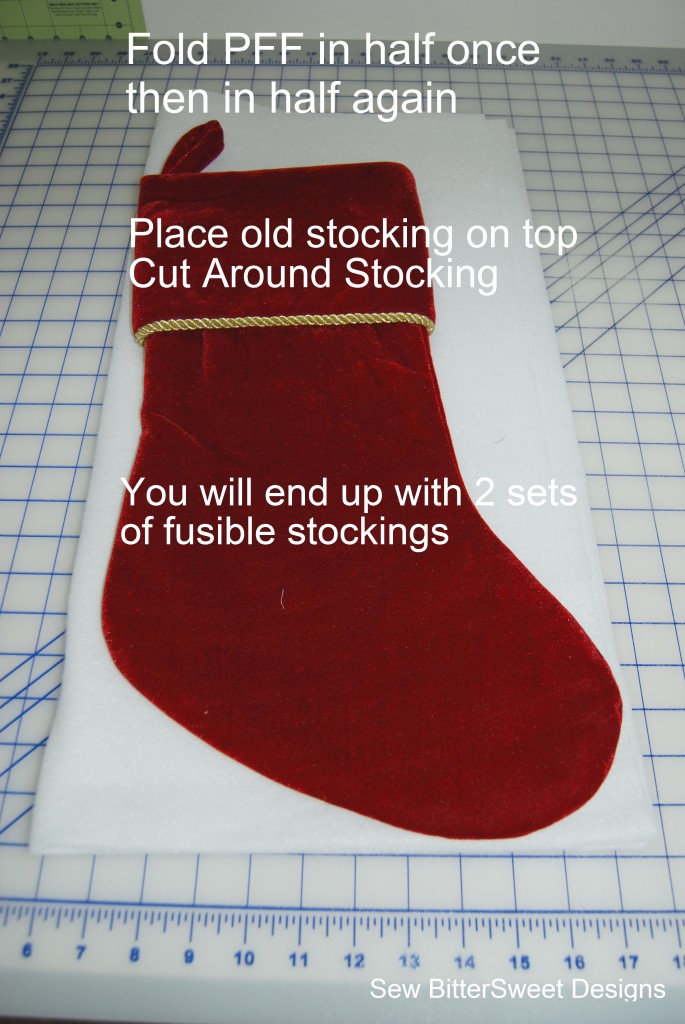
Fold your PFF in half lengthwise and then in half again:
Next cut out stocking from flannel – fold flannel in half width wise. Place one of your PFF stockings on top, cut around with 1/4″ extra on all sides – You will end up with 4 flannel stockings total.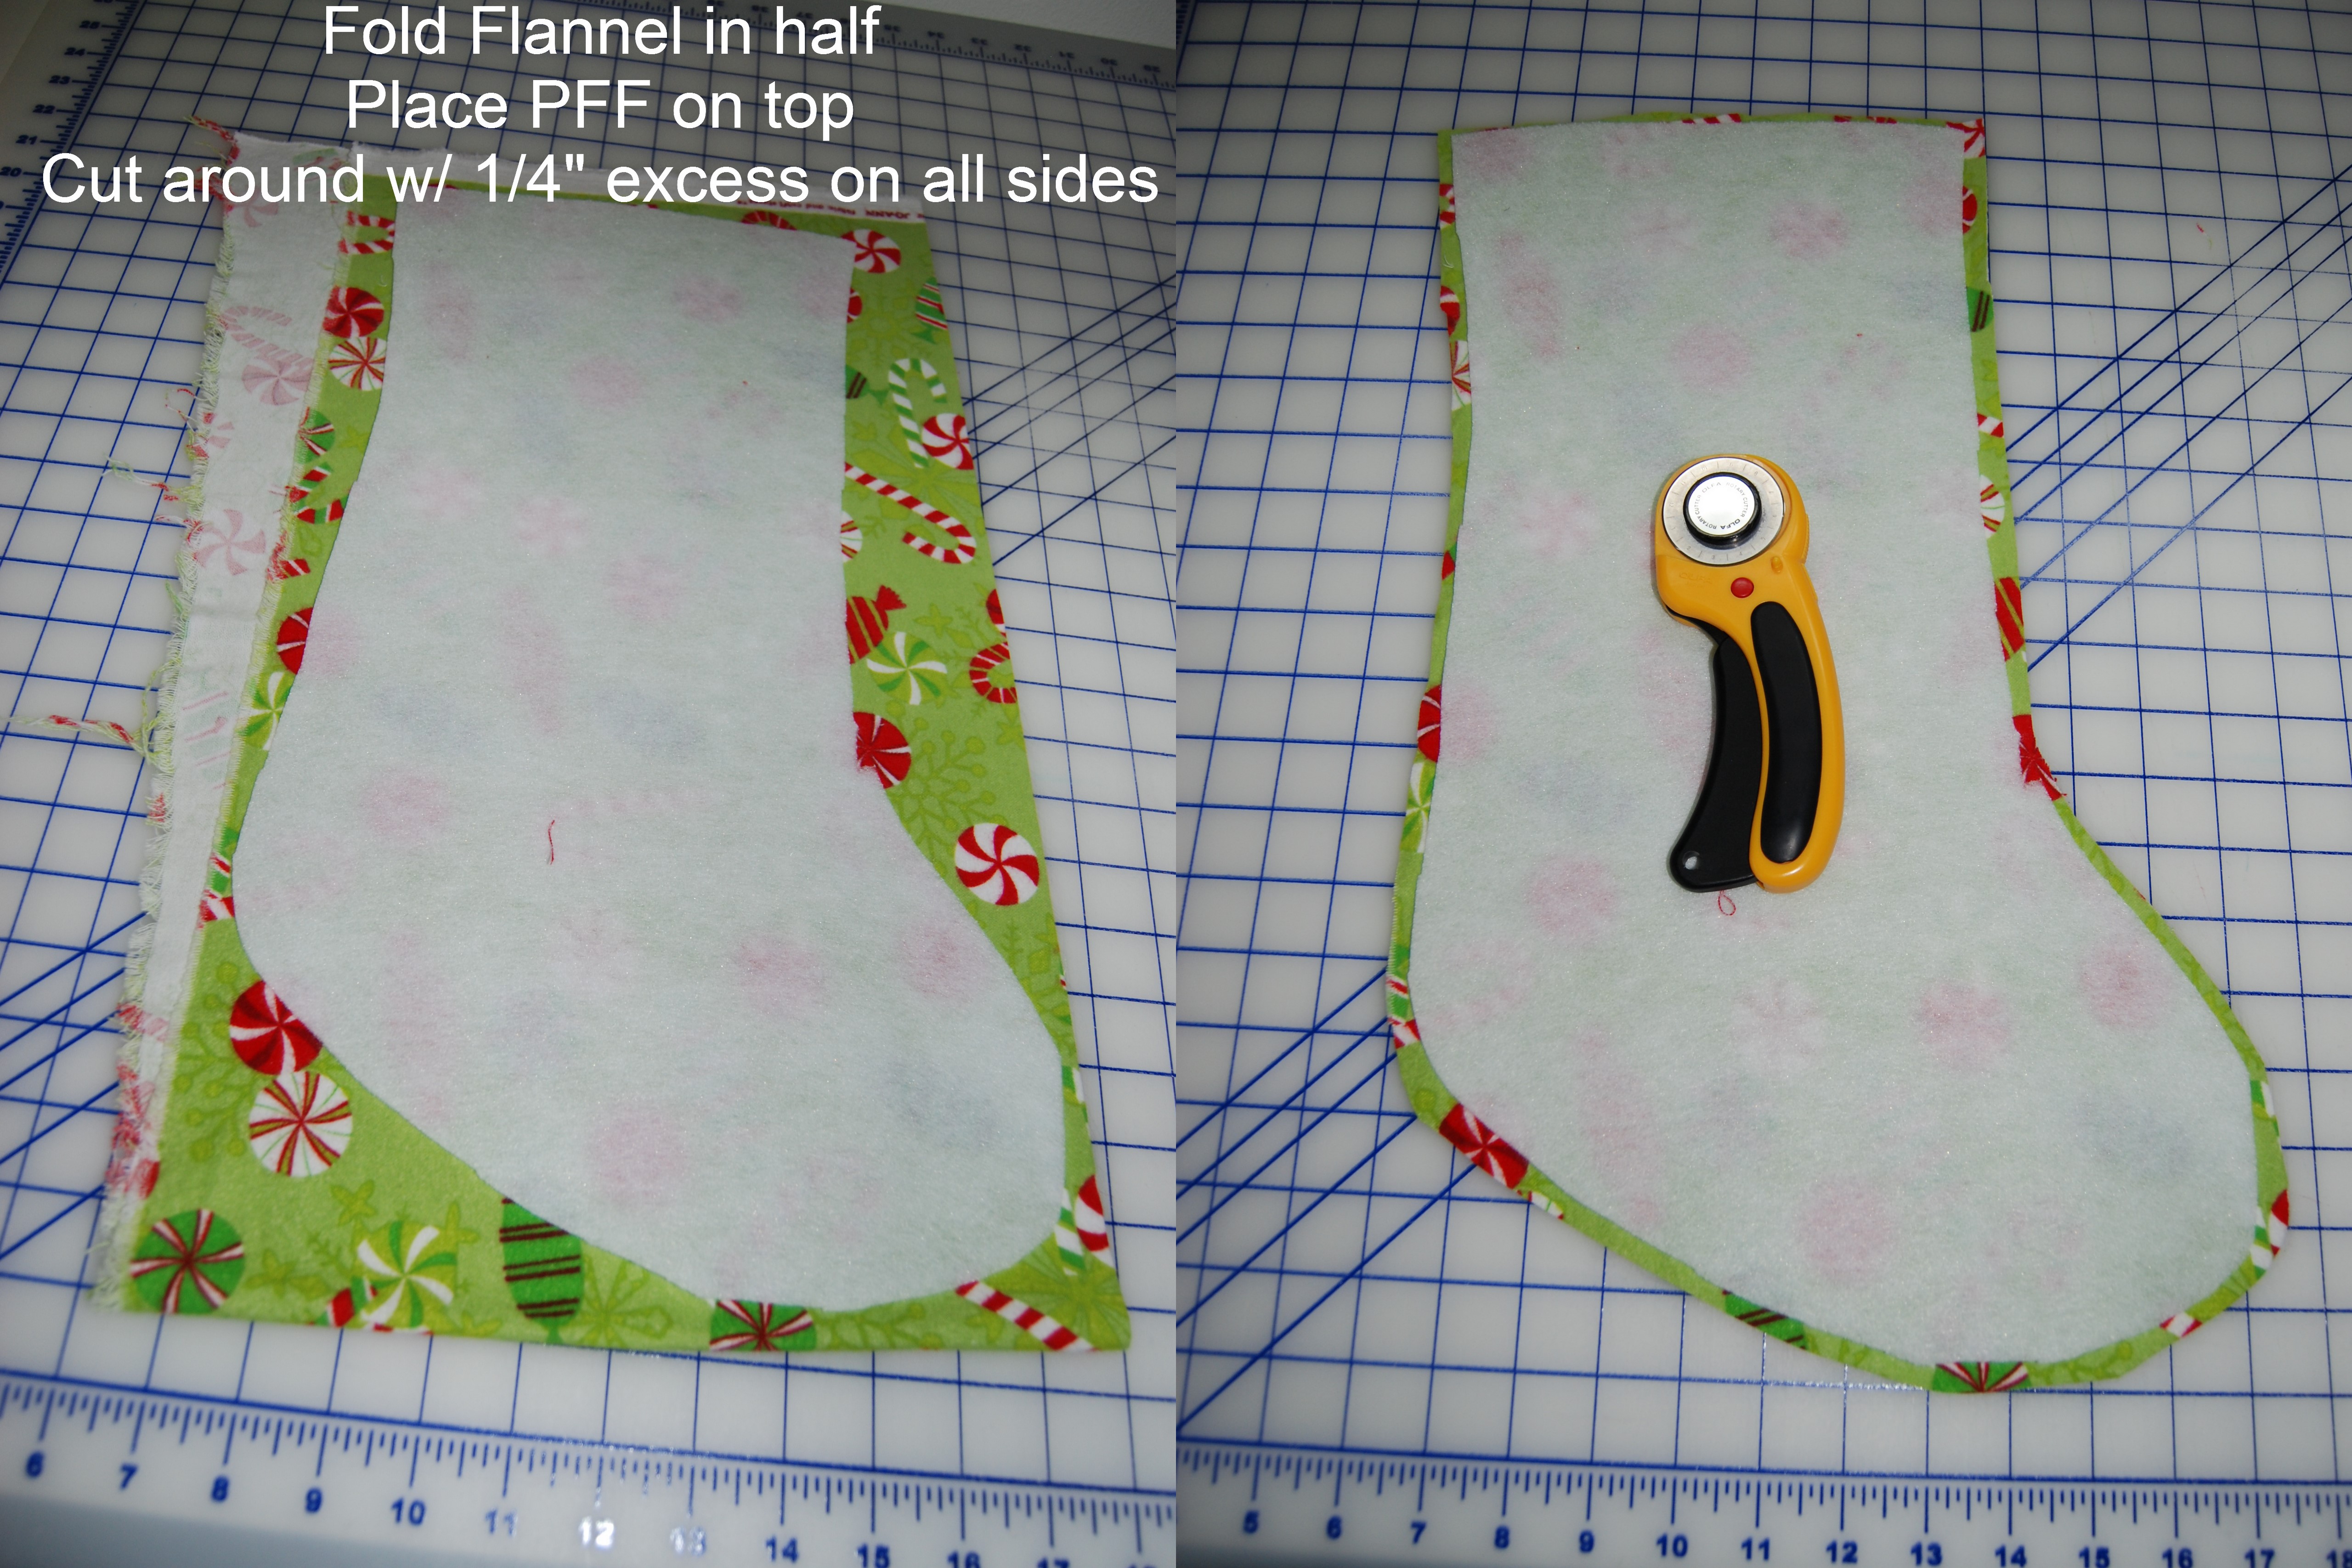 You will also need to cut pockets out of the flannel and out of the PFF – Eyeball these based on the size of your pocket. Make the PFF pockets smaller than your flannel by 1/4″. Cut 4 from the PFF and 4 from each of the flannels.
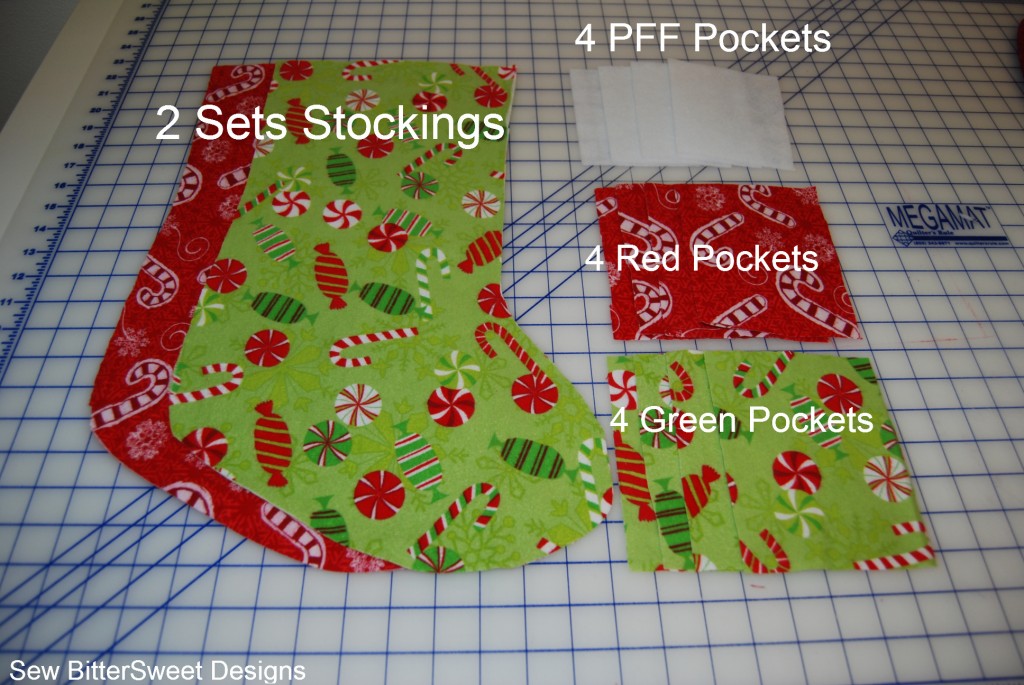 Fuse your PFF following the directions included with the PFF to the flannel (note it may take longer than usual):

 Make your pockets. My pockets are also reversible so I layered one red square with one of the green squares that was fused with PFF. Sew 1/4″ around three sides – leaving BOTTOM open, clip your corners:
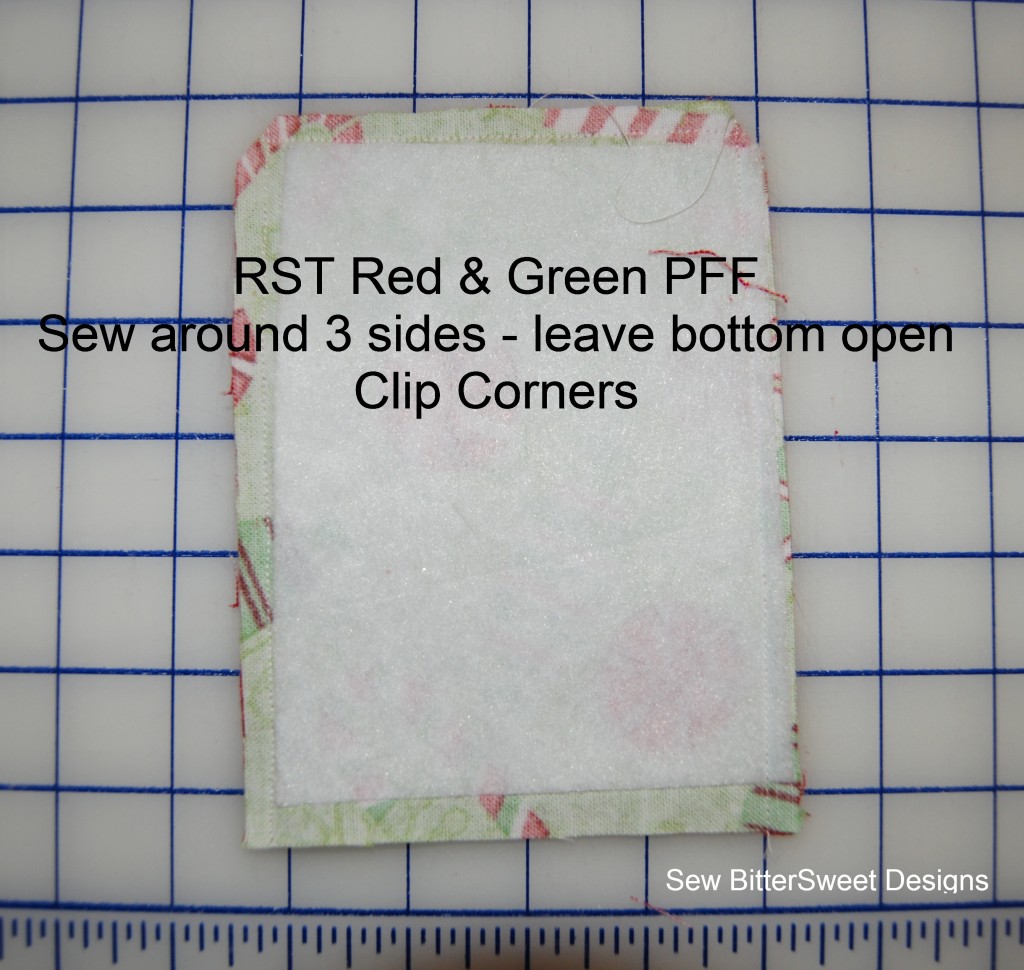 Make 4 pockets – Turn them right side out and press. Sew to stockings.
Place right side up on stocking to determine placement, flip down and pin in place, using 1/4″ seam sew across opening of pocket.
Flip the pocket up, pin in place and top stitch down 1/8″ from edges.
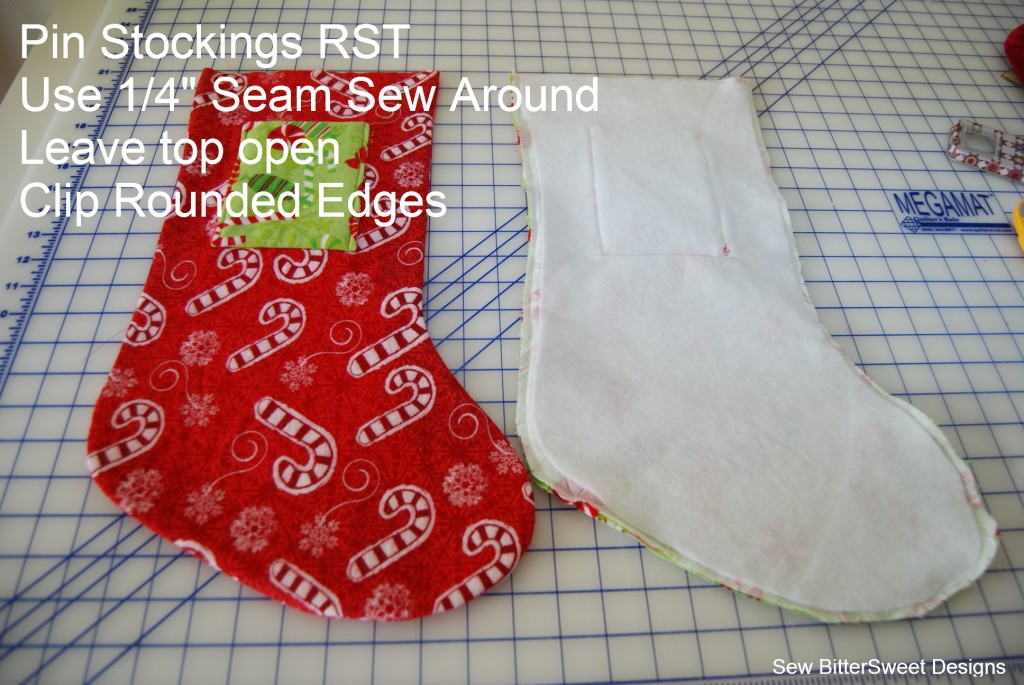
Next sew the stockings together – place red stockings right sides together and green stockings right sides together. Sew around both stockings with 1/4″ seam – leave tops open.
 Next, make your handle. I cut a strip from each flannel – 1.5″ x 8″, and sewed them into a tube – turn tube right side out and attach to one of the stockings.
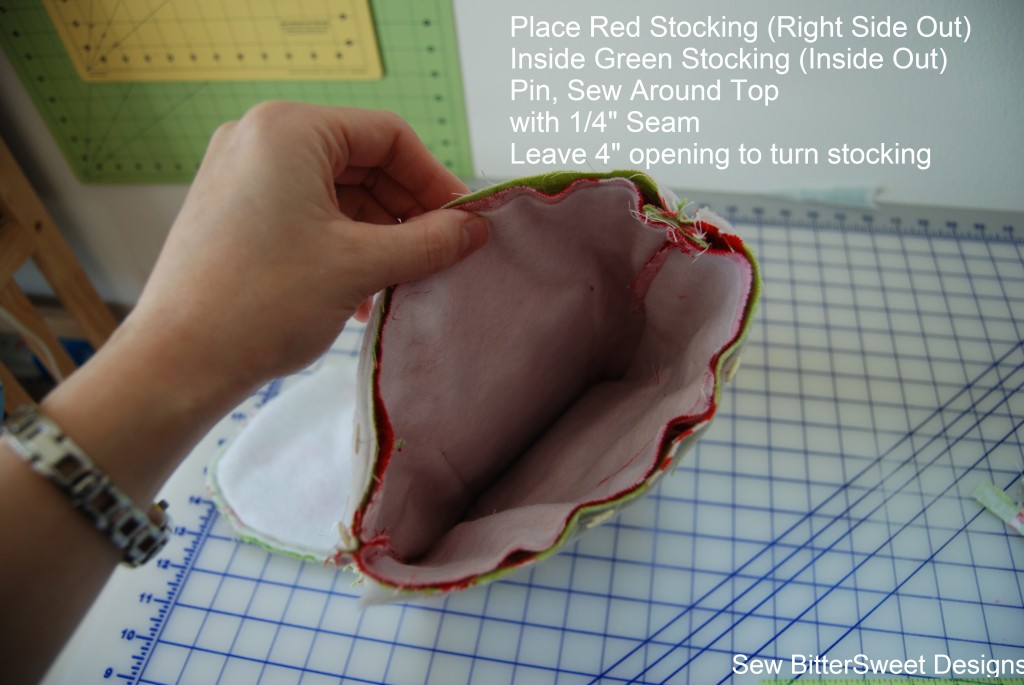
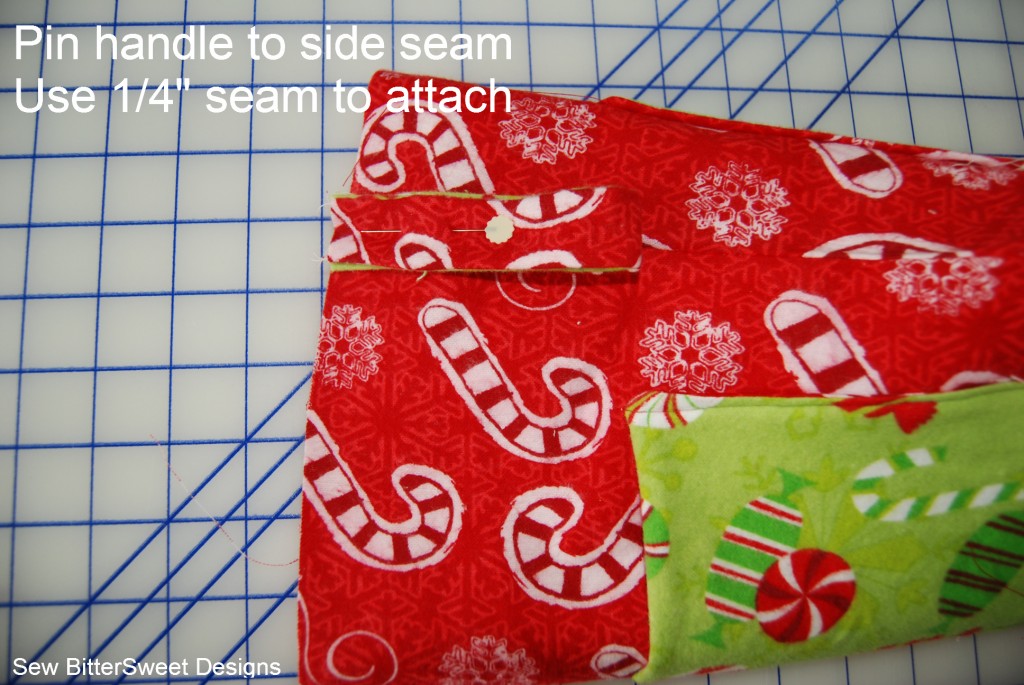 Time to make these 2 stockings into 1! With the green stocking inside out and the red stocking right side out. Place red stocking inside green stocking – pin side seams and around, leave 4 inch opening so you can turn stockings. Sew with 1/4″ seam.
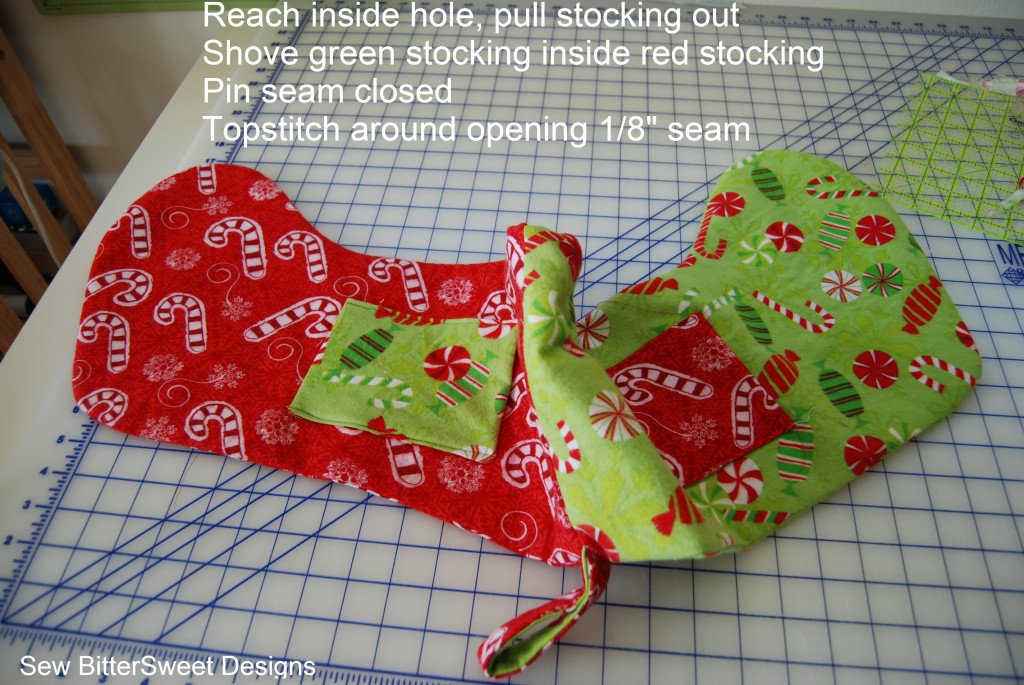
 Reach inside the opening and pull red stocking out. Then pull green stocking right side out and place back inside the red stocking.
Pin the opening closed and topstitch around the top of the stocking using an 1/8″ seam. This will close the opening you used to turn the stocking and it will give it a nice finished look.
Congratulations! You have just made 2 stockings in one – and you should have enough fabric to make another reversible stocking too!
Happy stocking making!
I will be back on the blog Friday to figure out who the winner of The Intrepid Thread $25.00 gift card is and I will announce the winner on Christmas Eve! You still have time to enter if you haven’t already!
![]() NOTE: Don’t forget, I am one of the bloggers who is going to lose Google Friend Connect in March 2012, please take a moment and follow me via Bloglovin’, Facebook, RSS or networked blogs. You are important to me and I want to be able to stay in contact with you! Check my side bar for all the best ways to stay in touch after GFC goes bye bye!
NOTE: Don’t forget, I am one of the bloggers who is going to lose Google Friend Connect in March 2012, please take a moment and follow me via Bloglovin’, Facebook, RSS or networked blogs. You are important to me and I want to be able to stay in contact with you! Check my side bar for all the best ways to stay in touch after GFC goes bye bye!





I loved this tutorial and totally used it for the stockings I made for the drive! They turned out quite well. 🙂 Thanks!