Author name: Melissa Dunworth

Owner/Operator

Superior Threads – Sponsor Highlight & Giveaway

Hi Everyone! I’m back. Next week I will tell you all about why I have been MIA, but in the meantime I have some really fabulous things going on here that I want to share with you! Today I have Superior Threads here and I wanted to tell you about some of my favorite products that they carry that are just plain FUN!

I love this product and I have 2 dress patterns and a package at home waiting for me to sew up a dress for Anne.  Texture Magic allows you to add dimension to whatever project you are working on, and the best part is that it is permanent. You can wash your finished project and the texture will remain!

Can you guess what that is?!? Yup! It’s glow-in-the-dark thread! Superior Threads product NiteLite Extra Glow Polyester Thread to be exact. I happen to have a spool of the pink thread and I do see a fun embroidered pillow in Anne’s future with it!

Hello Summer! How about a fun embroidered shirt or a picnic quilt that has been quilted with color changing thread. Inside you see white thread and when you step out side into the sun you see a fun colored design! I also have a spool of this thread! I think Anne and I need a picnic blanket for trips to the park this summer and color changing thread would be the perfect finishing touch!

Now did you see that the title for this post also said “giveaway”.  Well Superior Threads told me that I could pick out three of my favorite threads, and I picked three that I have reviewed and they will be giving away a spool of each to THREE different winners.

I decided to pick three threads that I have reviewed: King Tut, So Fine and Treasure Hand Quilting Thread (oh wait, I guess I haven’t reviewed that one yet – come back tomorrow for that one!).

How do you enter:

1. Head over to Superior Threads and tell me your favorite product/thread line or the one you most want to try. (1 Entry)
2. Go like Sew BitterSweet Designs on Facebook or follow me on Twitter (1 Entry)
3. Spread the word: blog, facebook, or tweet about this giveaway, come back and leave me the link (1 Entry)

Three ways to enter!  This giveaway will be open until 9pm Pacific time on Wednesday, May 23rd. I will announce the winner on Thursday the 24th.  Good luck and make sure you stop by tomorrow to see what I made my mom for mother’s day and my review on Treasure Hand Quilting Thread!

Guest Post – Susan from The History Quilter

Today I have a special treat for you, Susan from The History Quilter.  I met Susan on Twitter – gotta love that social networking thing! We quickly discovered that we had so much more in common than just quilting. Susan is working on her master’s degree in education to teach High School History…and oddly enough before my wonderful daughter was born, I was doing the EXACT SAME THING!  Susan does a regular podcast that you can download and it is so much fun, I usually listen to it while I am cooking dinner – make sure you check it out!  One of my favorite things that Susan does every week is a food post – and she just hits it out of the park every week!
_______________________________________________________________________

Hello fellow quilters and fans of Melissa of Sew BitterSweet Designs!  My name is Susan and I blog at The History Quilter and host a podcast called The History Quilter Podcast available on Podbean and iTunes.  Melissa and I discovered each other via Twitter and not only do I enjoy her blog but her wonderful support via Twitter has been invaluable these last few months.
As Melissa enjoys my dessert posts so much I thought I would share with you a Chocolate Streusel Cake recipe that I’ve been making ever since I was a teenager when my mother first shared it with me.
First the recipe:
Chocolate Streusel Cake
1 Pkg. Yellow Cake Mix – any kind, no pudding in the mix
1 small package Instant Vanilla Pudding
4 Eggs
8 oz. Sour Cream
1/4 Cup Milk
1/2 Cup Oil
Streusel Mix
1/4 Cup Brown Sugar
1/4 Cup Sugar
3 Tb. Cocoa
1/2 tsp Cinnamon
8 oz. Chocolate Chips
Bundt Pan
Butter or Oil Spray
Cocoa or Flour to dust pan
1. Spray or rub bundt pan with oil or butter.

2. Dust with cocoa or flour.  I like to use cocoa to change things up a bit.  Plus I like the color at the end. You’ll see….

3. Mix first six ingredients together. I usually use a stand mixer.

4.  Pour in 2/3rds of the batter into the bottom of the bundt pan.

5.  Mix up the Streusel Mix in a separate bowl.


6. Sprinkle 1/2 of the streusel mix over the batter.  Then drop in chocolate chips very precisely just like a quilter would do.

7. Oh come on….forget that – add them all in haphazard.  Who cares if they look nice?  Like our mother’s have said, it all mixes up in our stomach.

8.  Pour over the remaining batter.

9.  Take a knife and go down deep enough to swirl the streusel/chocolate chip layer with the batter.  Do not over swirl.

10. Sprinkle the remaining streusel over the top.


11. Bake at 350 degrees for 1 hour.  Remember this is the bottom so cracking is just fine.

12.  Let sit about 30 minutes before you un-mold the cake.  I like to run a knife around the perimeter of the cake and the center to catch any chocolate chips that might have adhered to the sides that may prevent the cake from coming out nicely.  I usually do a quick 1, 2, 3 and flip…ah success.  See how dark it is?  That’s the cocoa.

13.  After the cake has cooled I sprinkle with a bit of sifted powered sugar but sometimes I leave it plain.

14. Enjoy.  Goes well with hot chocolate (my favorite), milk or coffee.

A huge thank you to Melissa for inviting me to guest post today.  I’ll be sending her a virtual piece of cake right away. Please come visit me at The History Quilter to see what I’ve been working on – quilting, sewing, gardening and cooking/baking.

Ciao,

Susan
____________________________________________________________________

Thank you so much Susan! Everyone has to cook this and tell me how good it is because I’m allergic to chocolate and I need to enjoy it vicariously through all of you!

I will officially be back tomorrow and I have some really special things up my sleeve for you that you won’t want to miss out on!

Guest Post – Vicki from Quilting Lodge

Hi! Today I would like to welcome Vicki from Quilting Lodge. I started blog stalking Vicki as a silent follower months and months ago, and back in March I decided to finally jump in on the conversation. Vicki is absolutely wonderful and so very very talented. Go check out the blog she writes with her mom, and make sure you check out her shop too!
________________________________________________________________________

A huge thank you to Melissa for giving me the opportunity to visit with you all today!  My name is Vicki and I blog with my mom over at Quilting Lodge.  I’m so thrilled to be here today.  However, I am a bit nervous because this is my first time as a guest blogger.

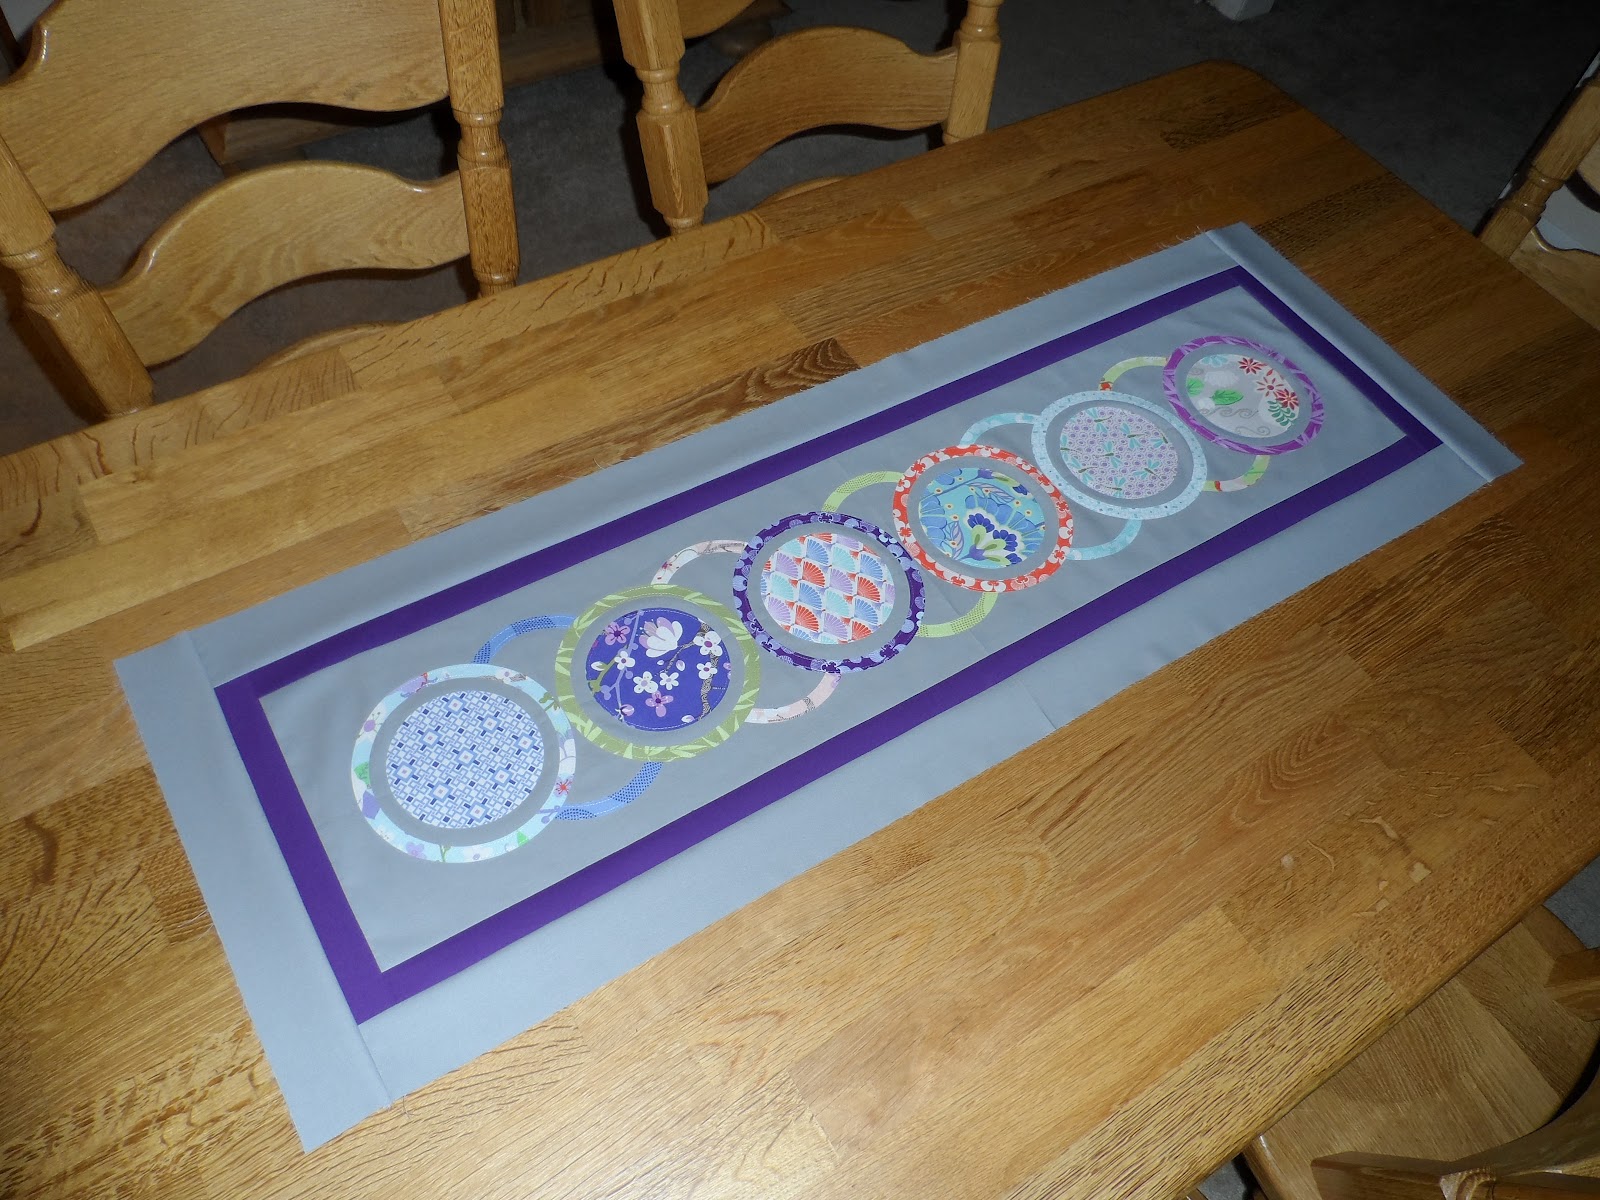
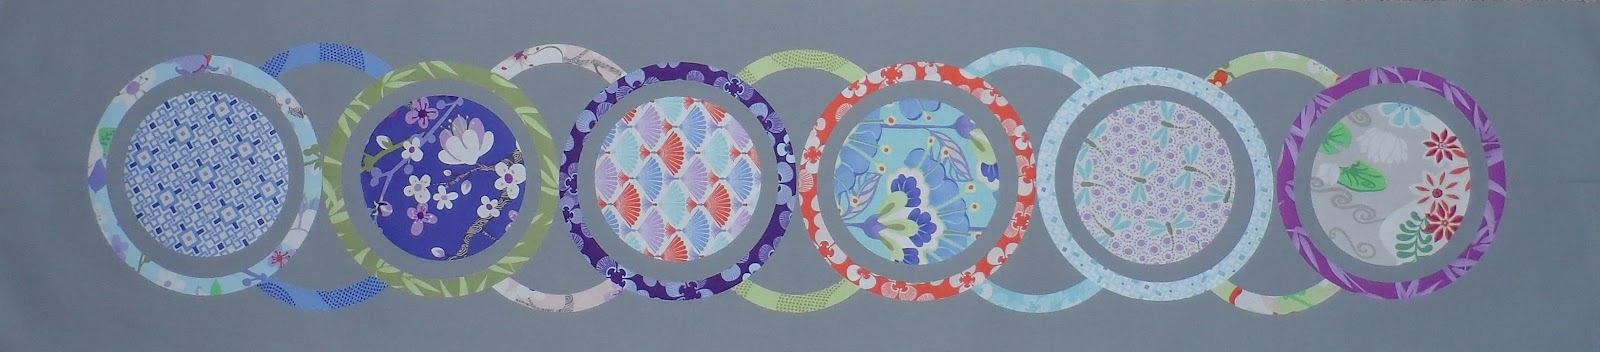
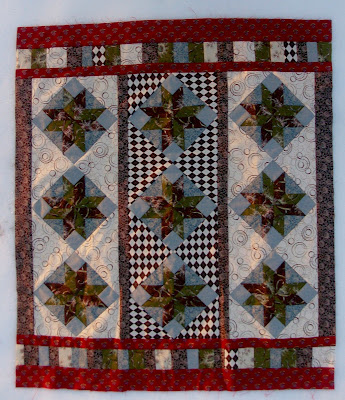
It took me forever to decide on a topic for today but I finally landed on a tutorial for a table runner that can double as a wall hanging.

You might have noticed it’s not quilted.  Unfortunately, I just didn’t have time to get it completely finished.

All seams are 1/4″

Supplies:

6 ~ 7″ square pieces of fabric {I used part of a Good Fortune Layer Cake}
5/8 yard for background & outer border {grey}
1/4 yard inner border {purple}

Instructions:

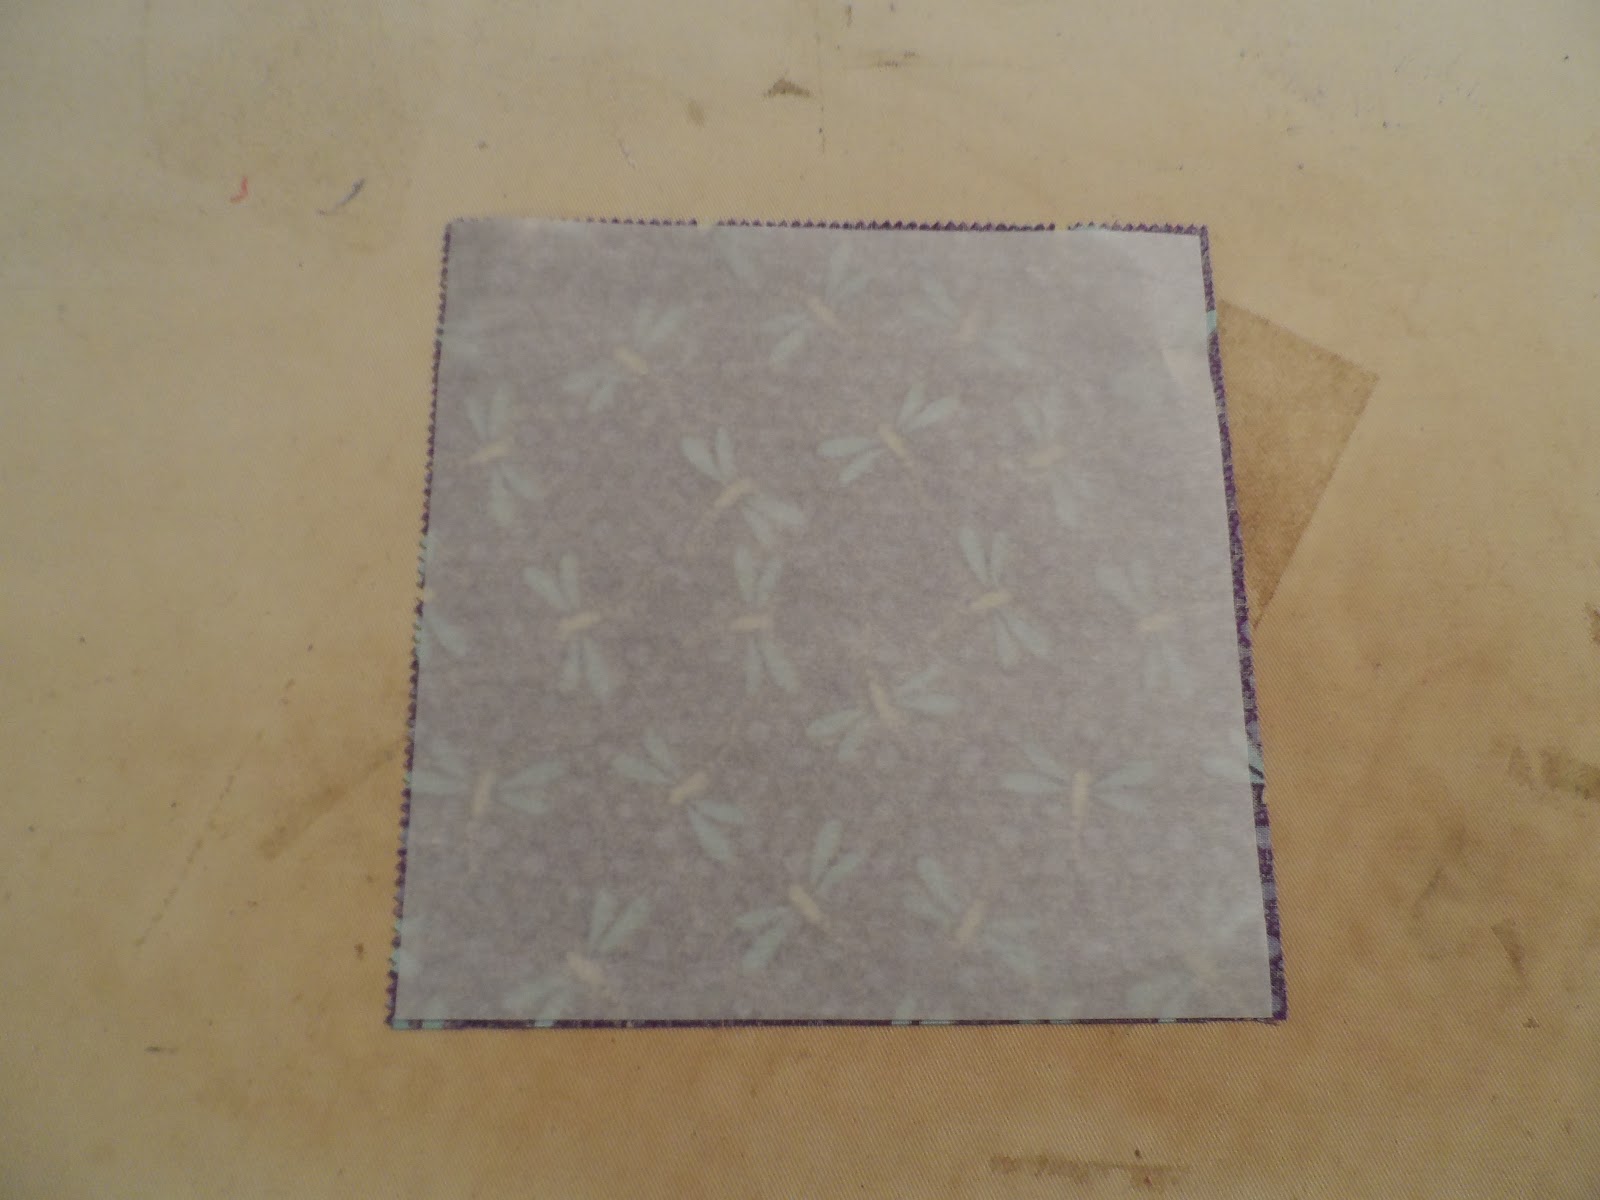
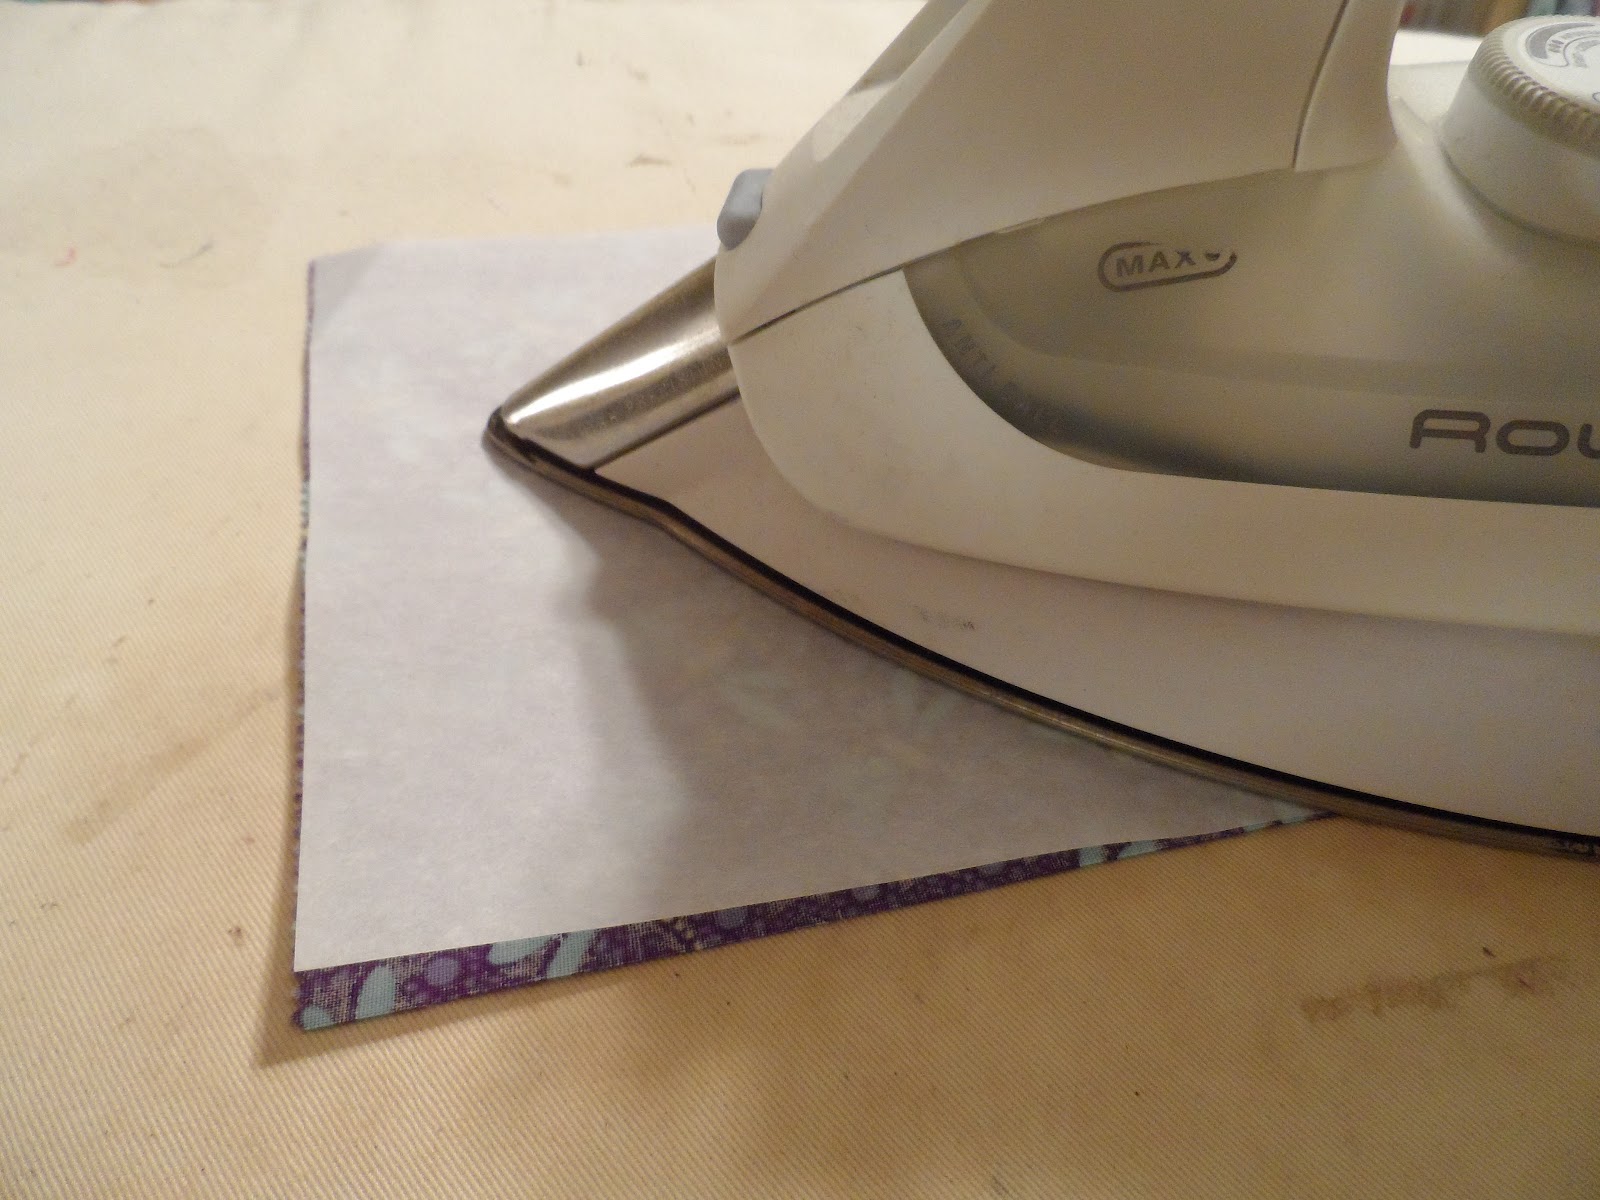
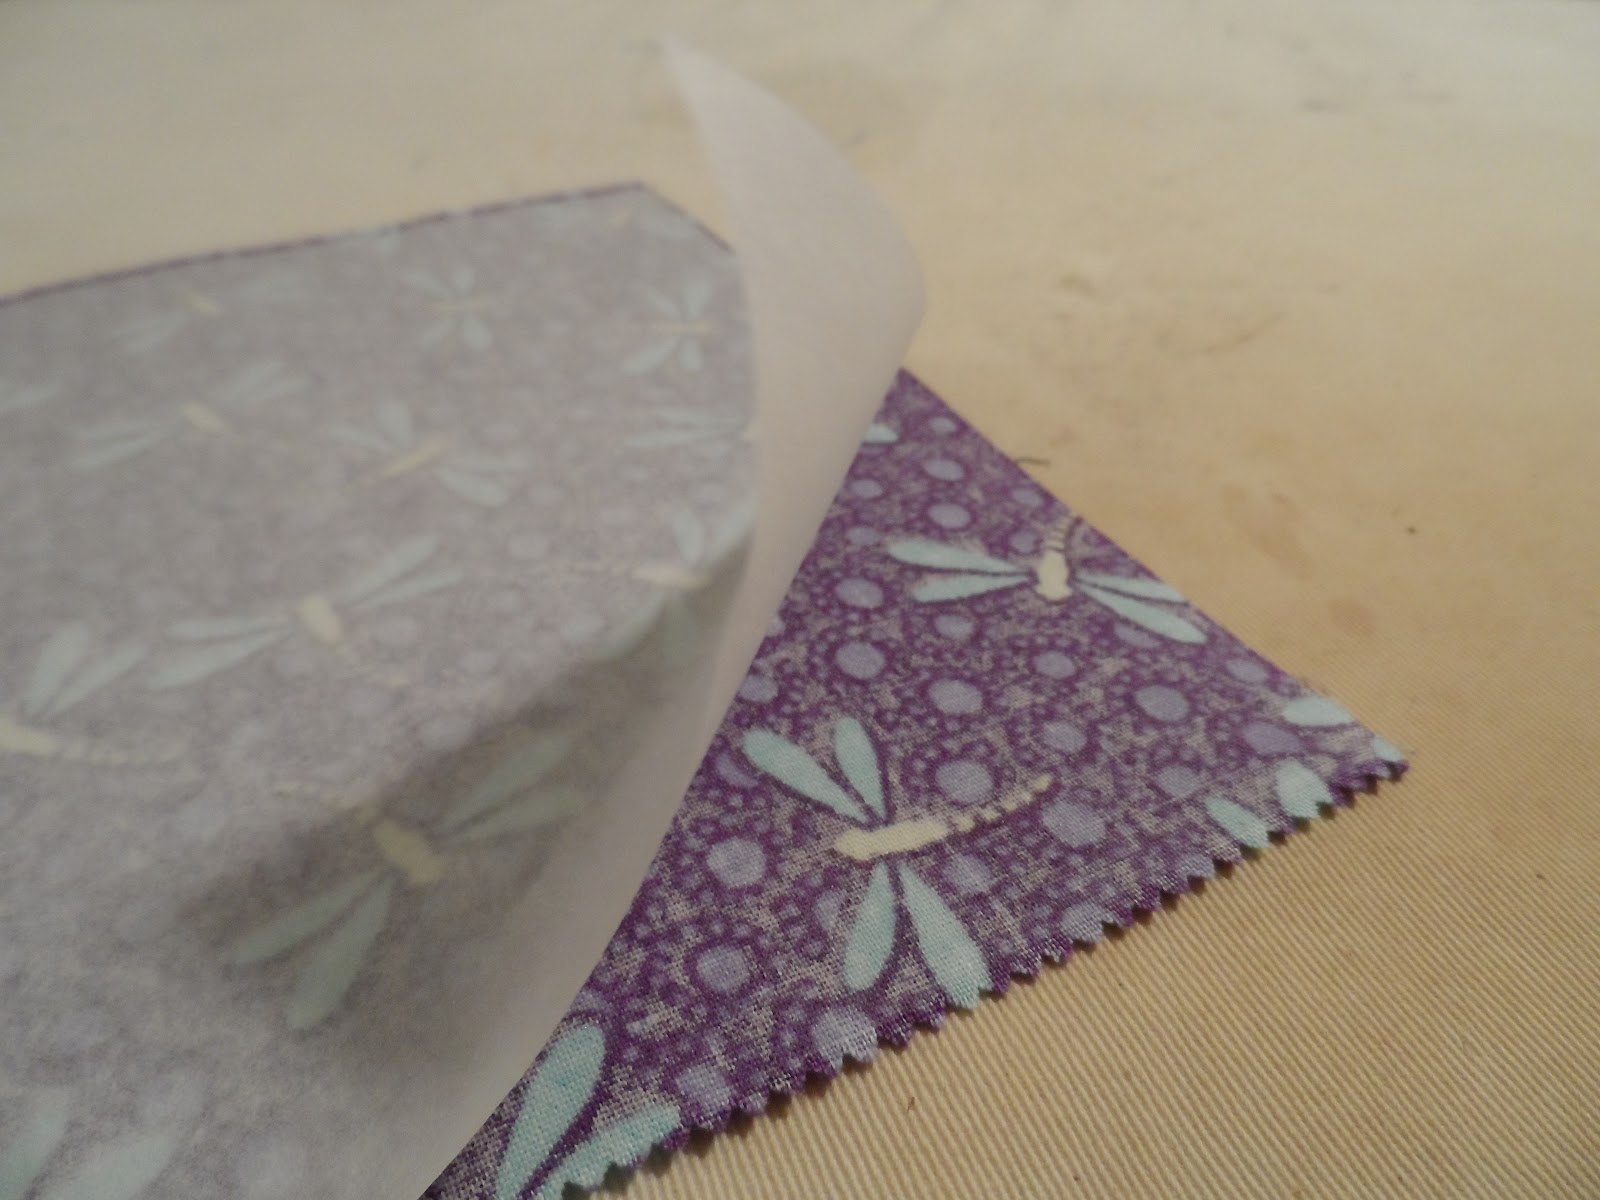
First, I cut out all of my circles.  I took each 7″ square of fabric and applied  a 6 7/8″ square of Steam a Seam to the wrong side.  It’s very important that the Steam a Seam is smaller than the fabric.  Otherwise, you will have a sticky mess on your iron.


Steam a Seam on Wrong Side
Ironing it on


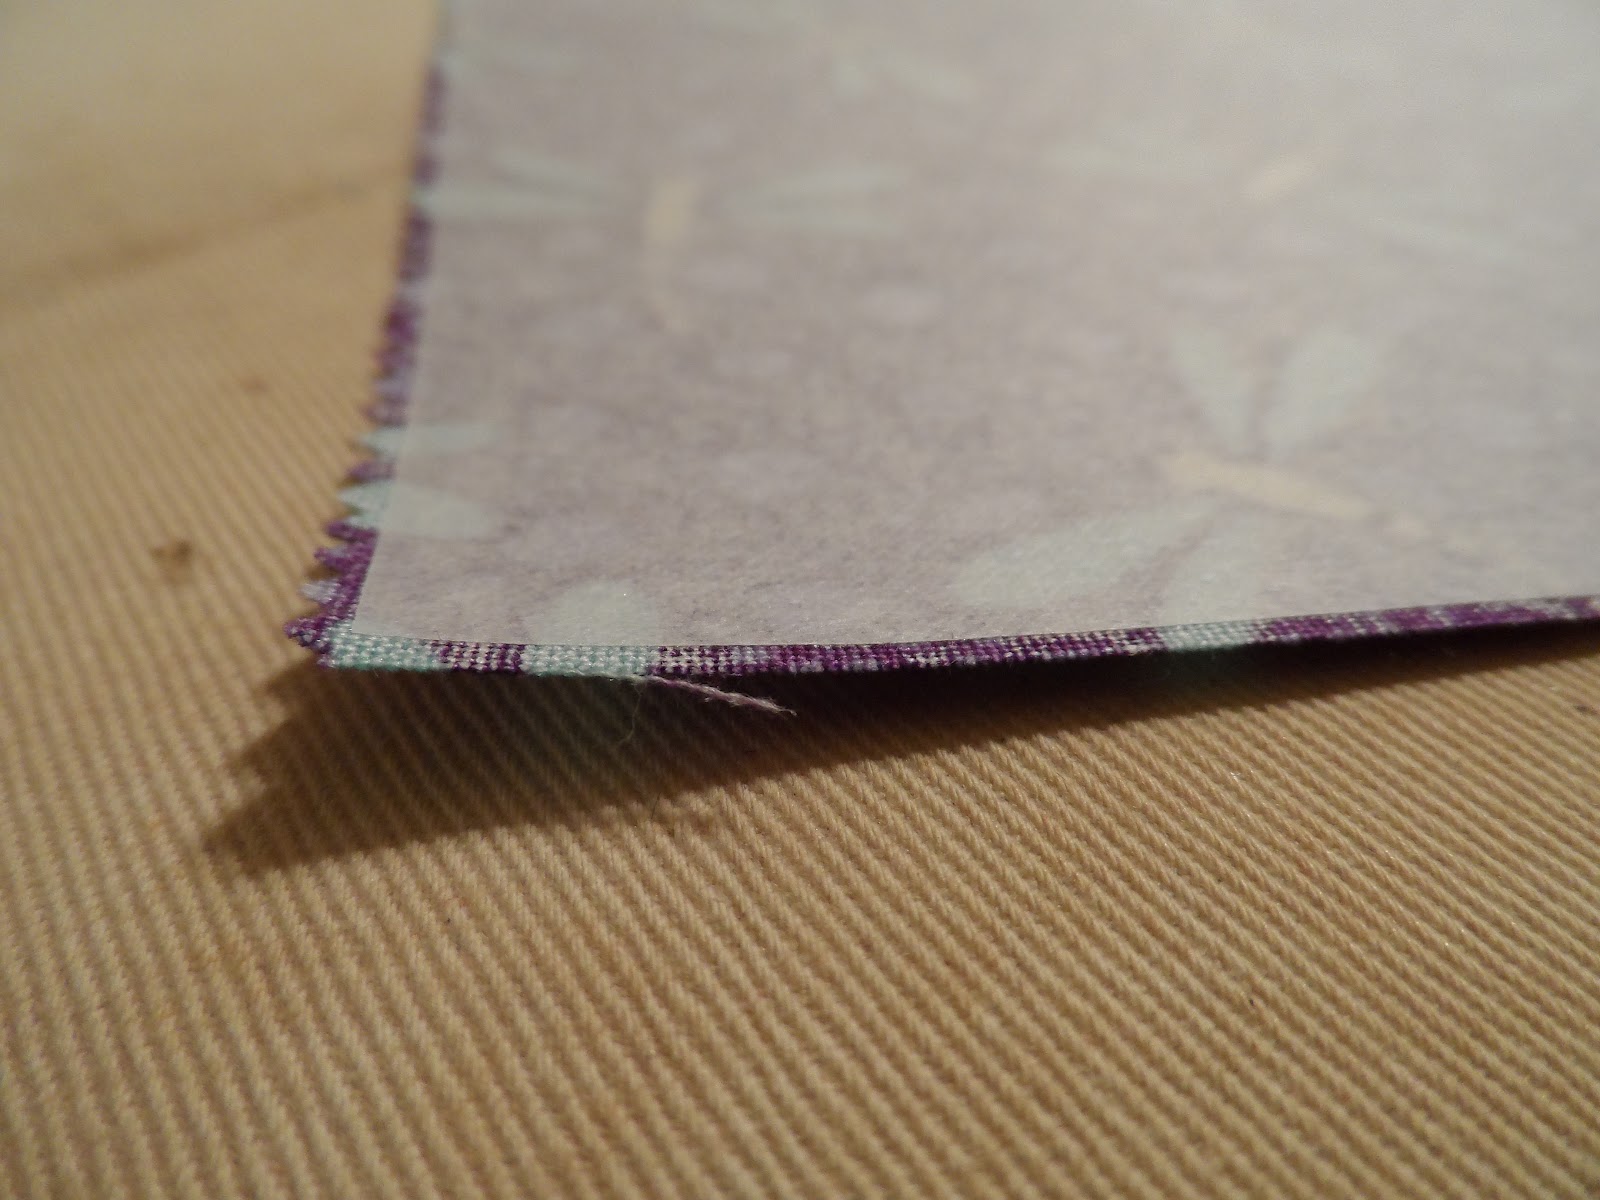
Almost ready to cut circles
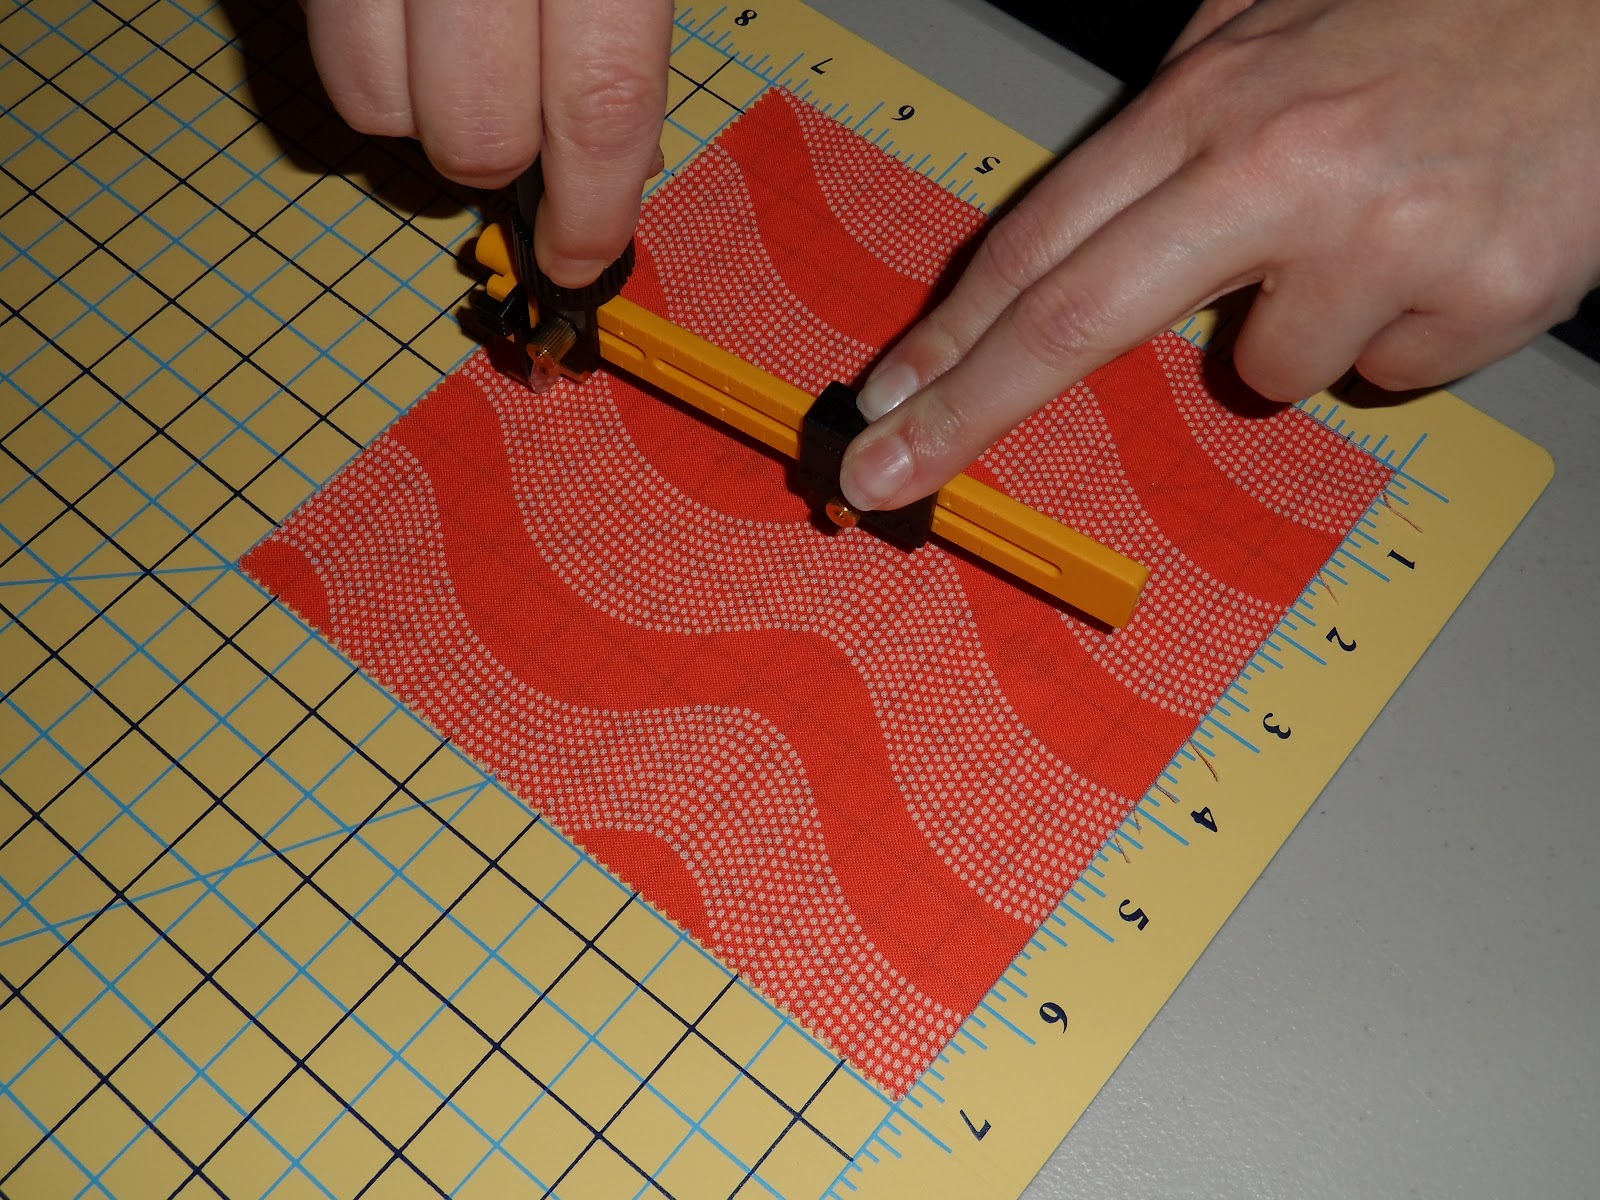
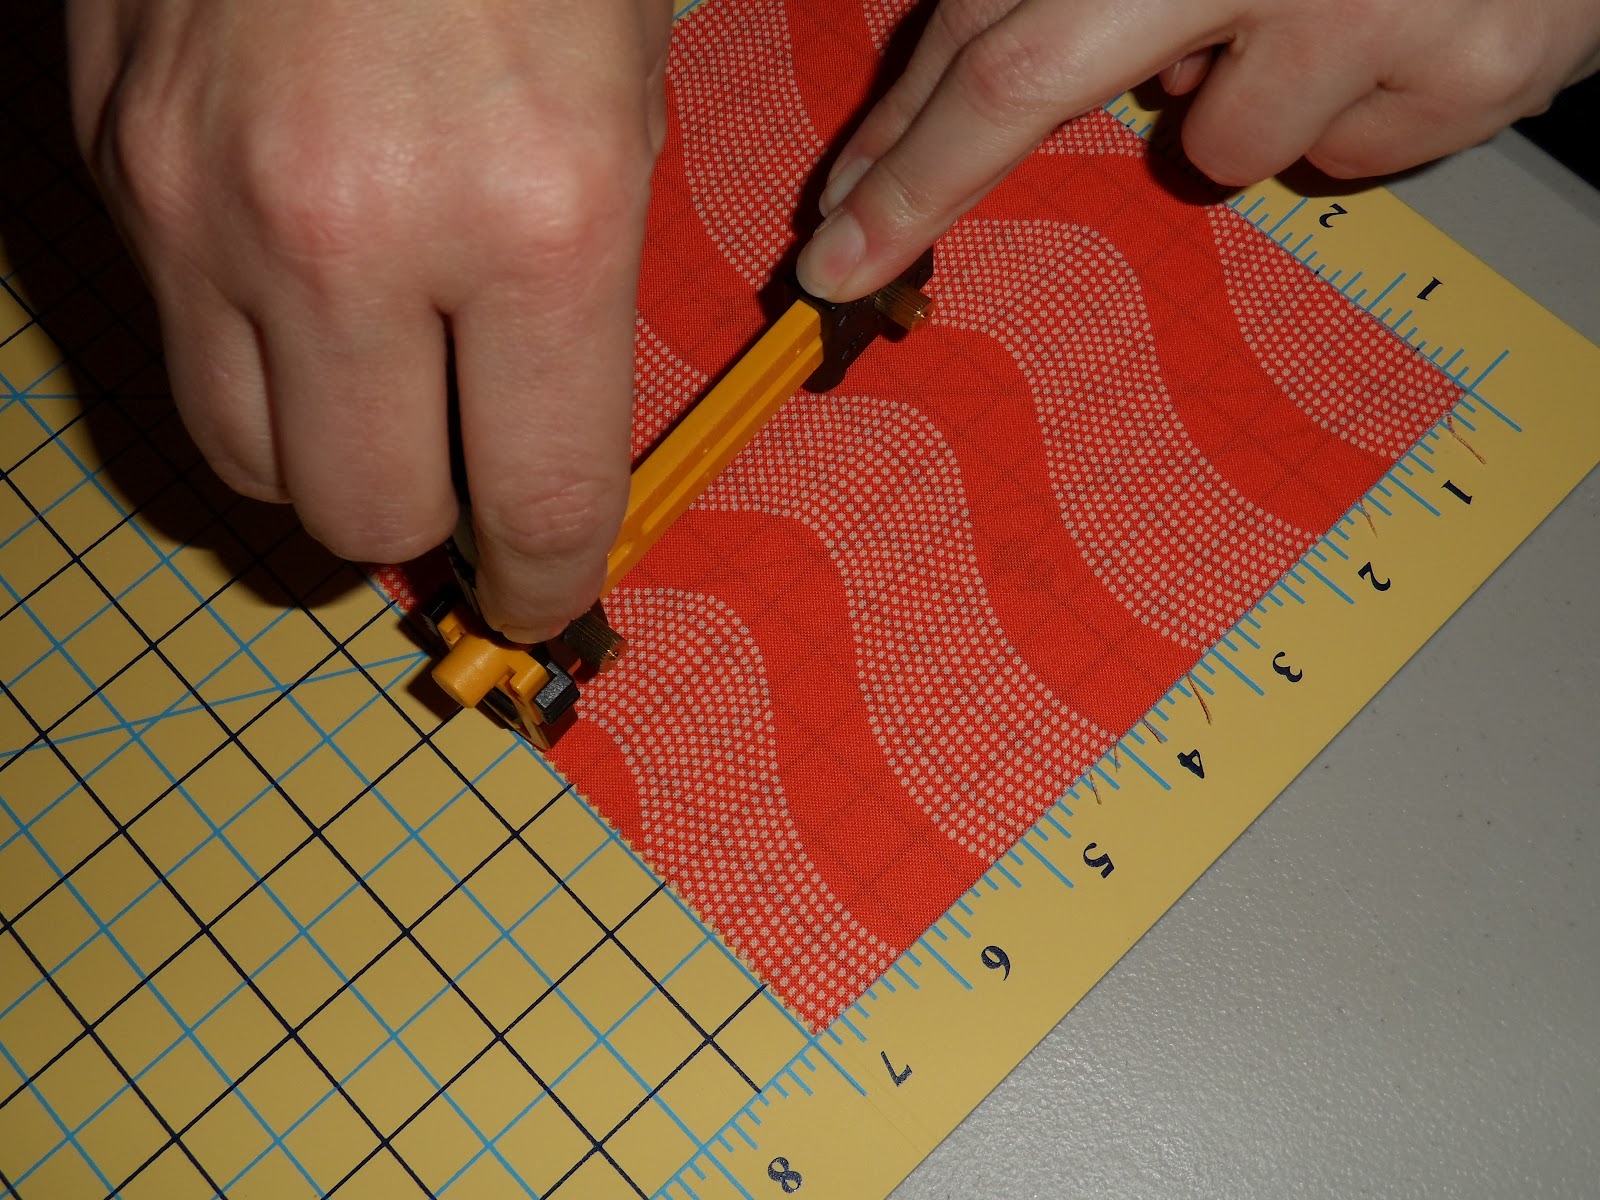
There are two different ways to cut the circles out.  The old fashion way…scissors.  Or the easy way….use an Olfa Circle Cutter.  I went with option number 2…I used my handy dandy Olfa Circle Cutter which made my life a whole lot easier!  First, I’ll show you how I did it and then I’ll show you the alternative way using scissors.

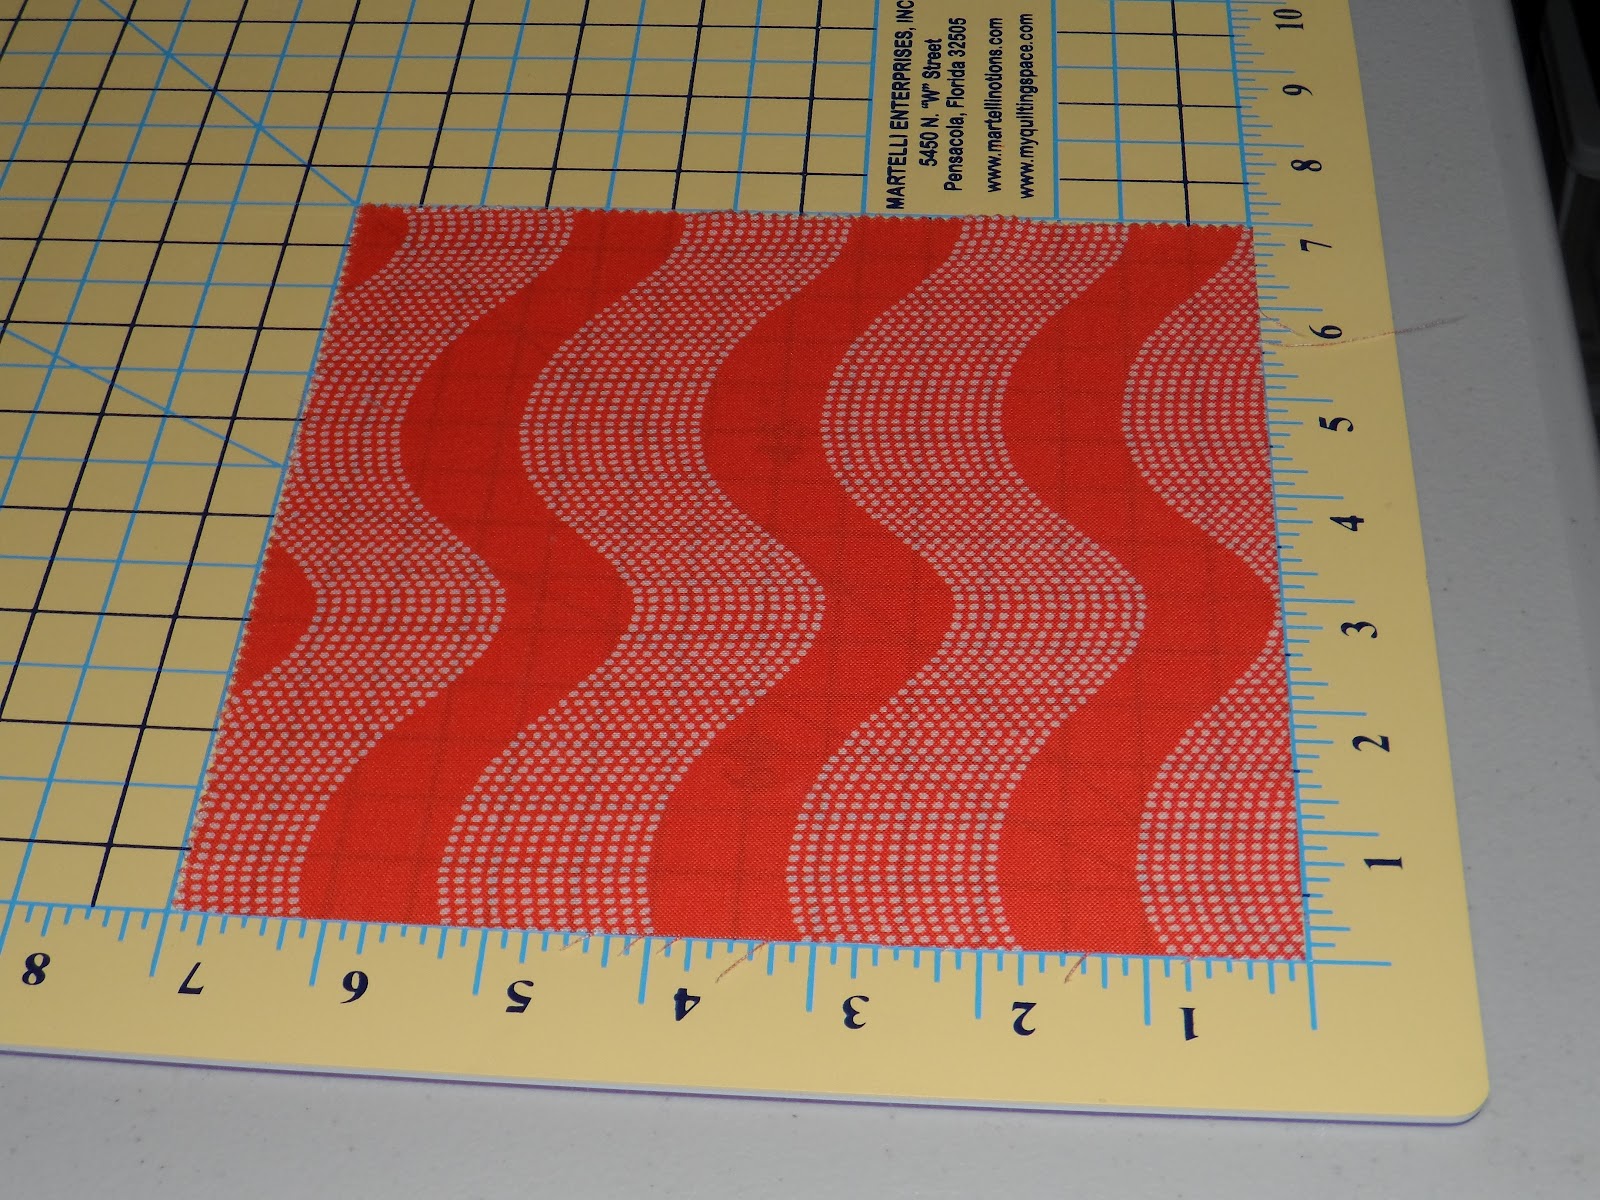
Before I cut my circles I peeled off the paper backing.
I laid my square right side up on my cutting board and started cutting.


Ready to cut
Cutting the 4.5″ Circle


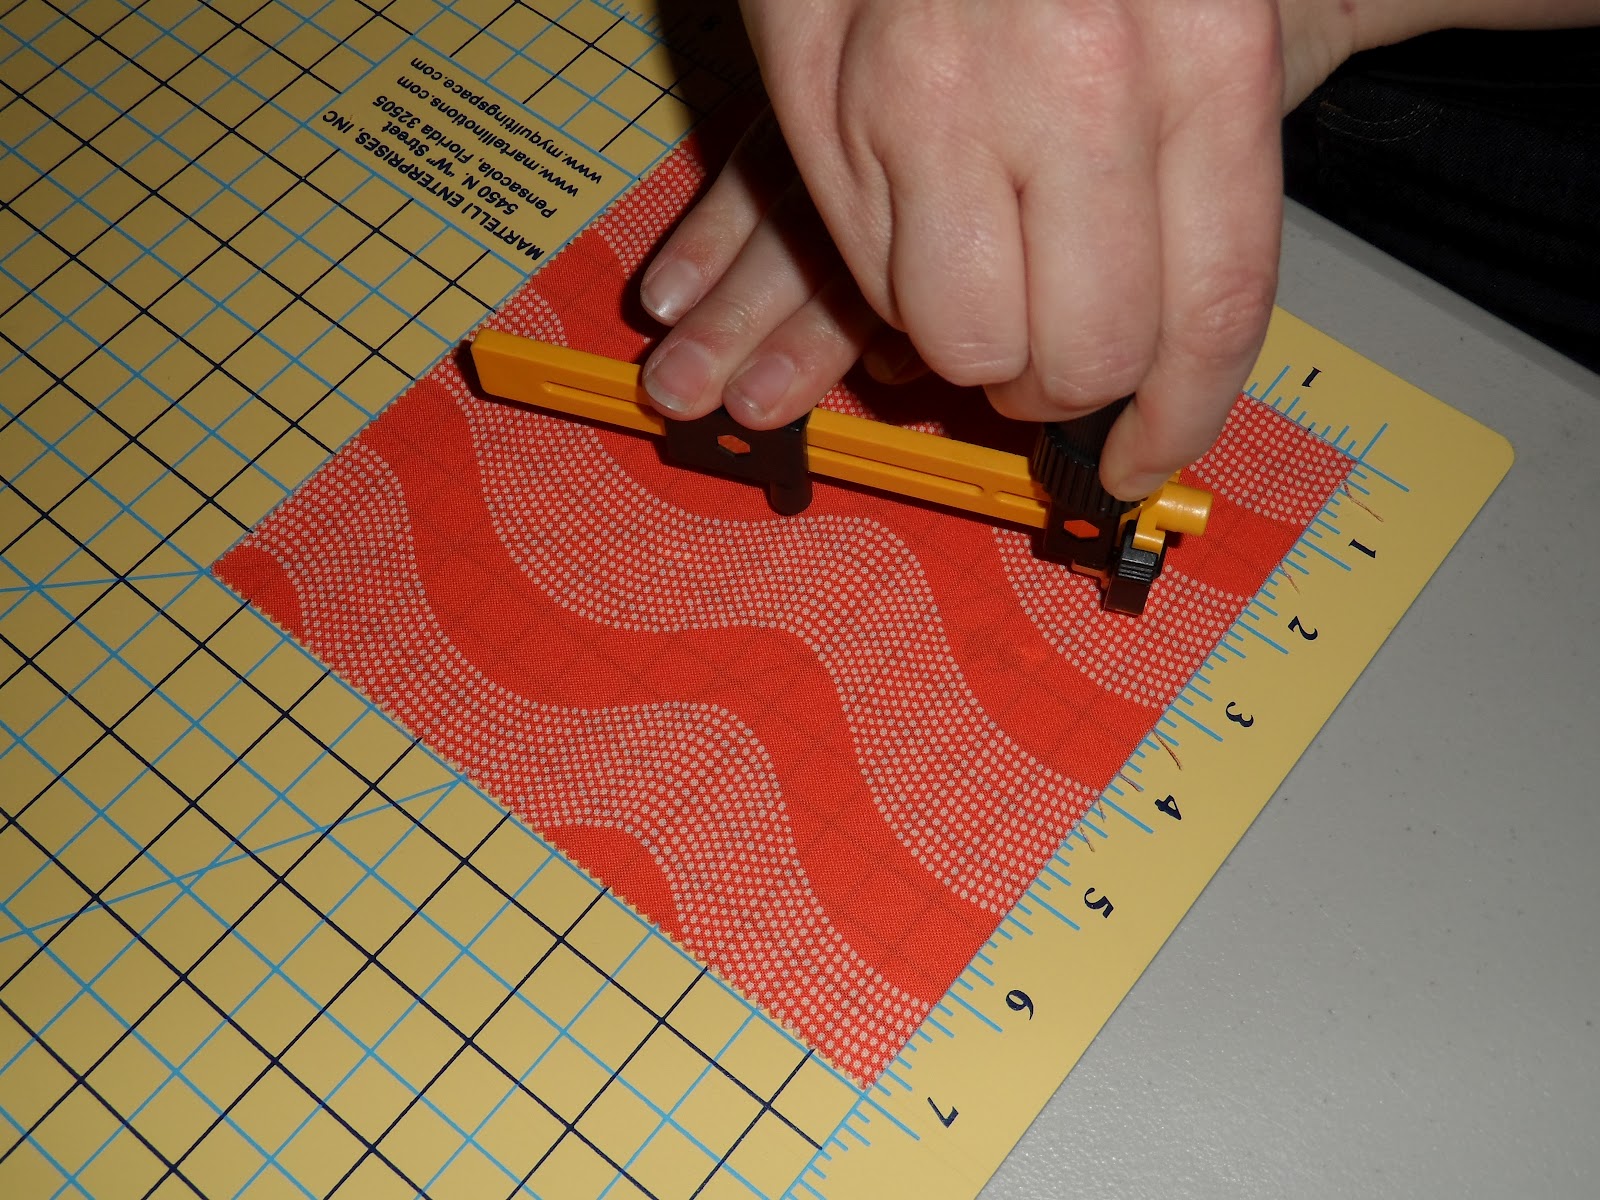
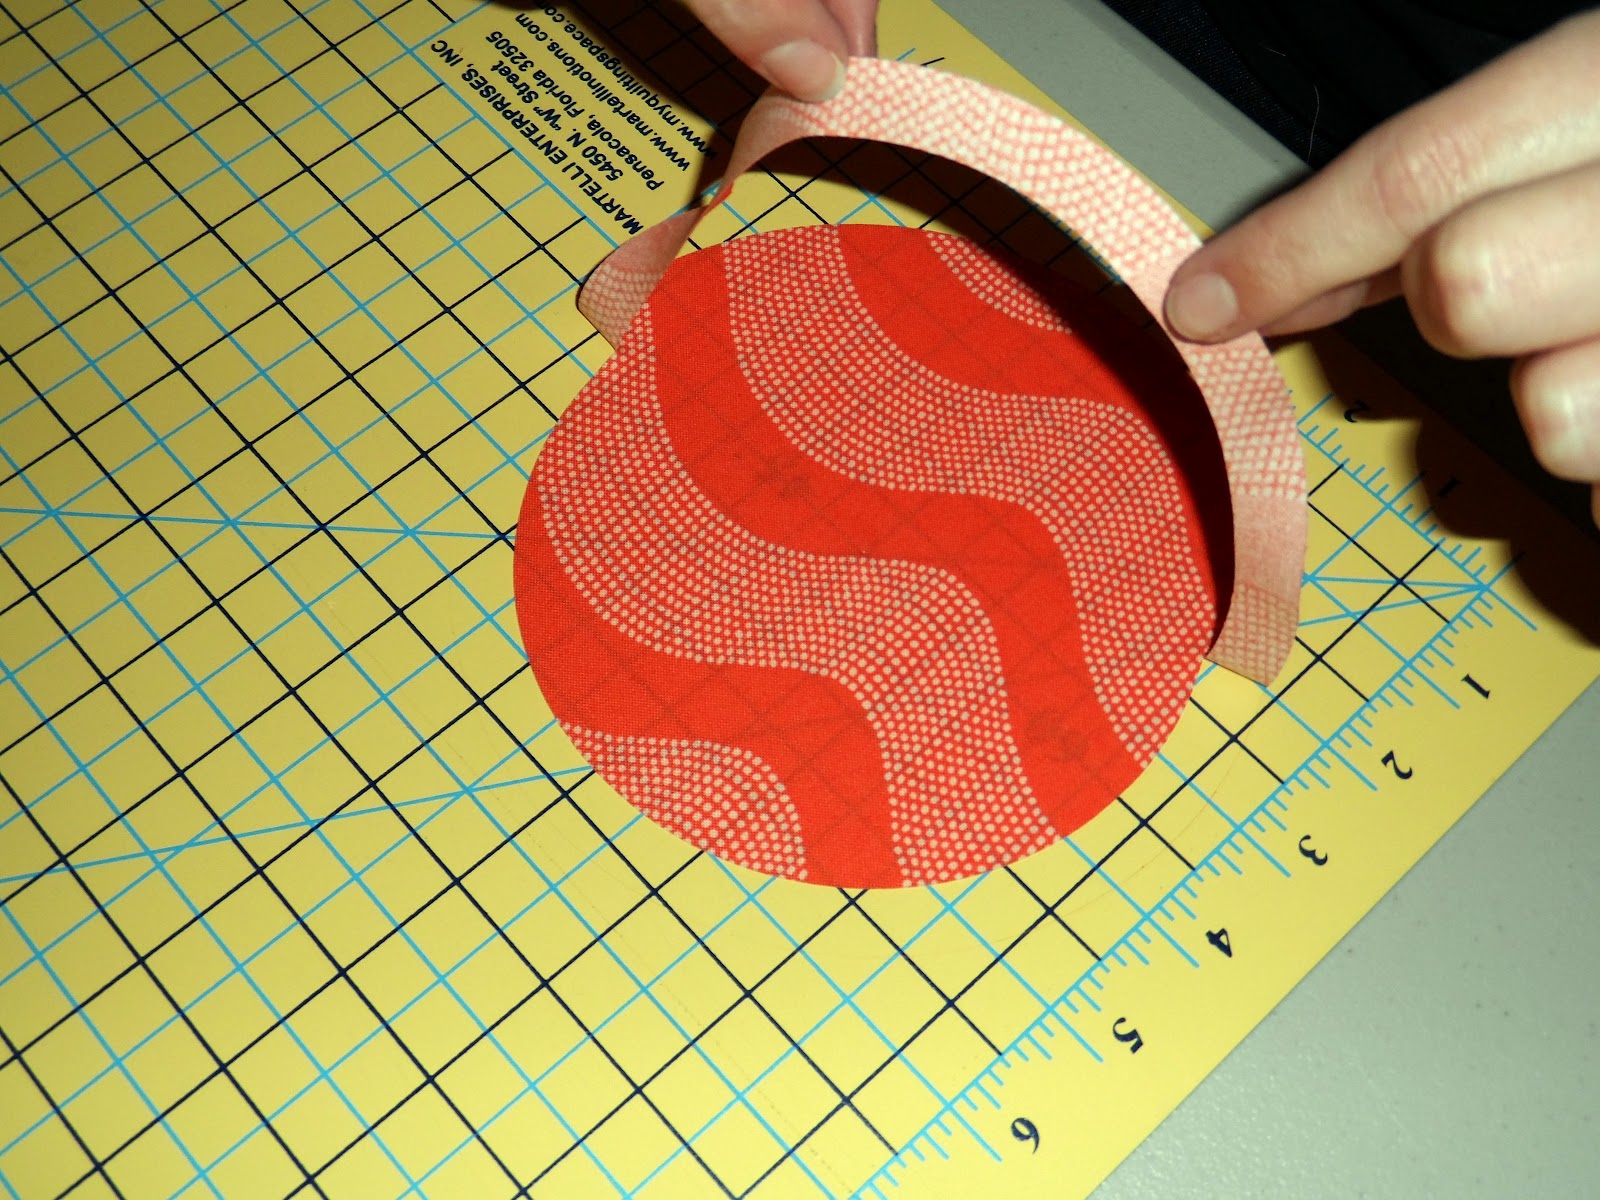
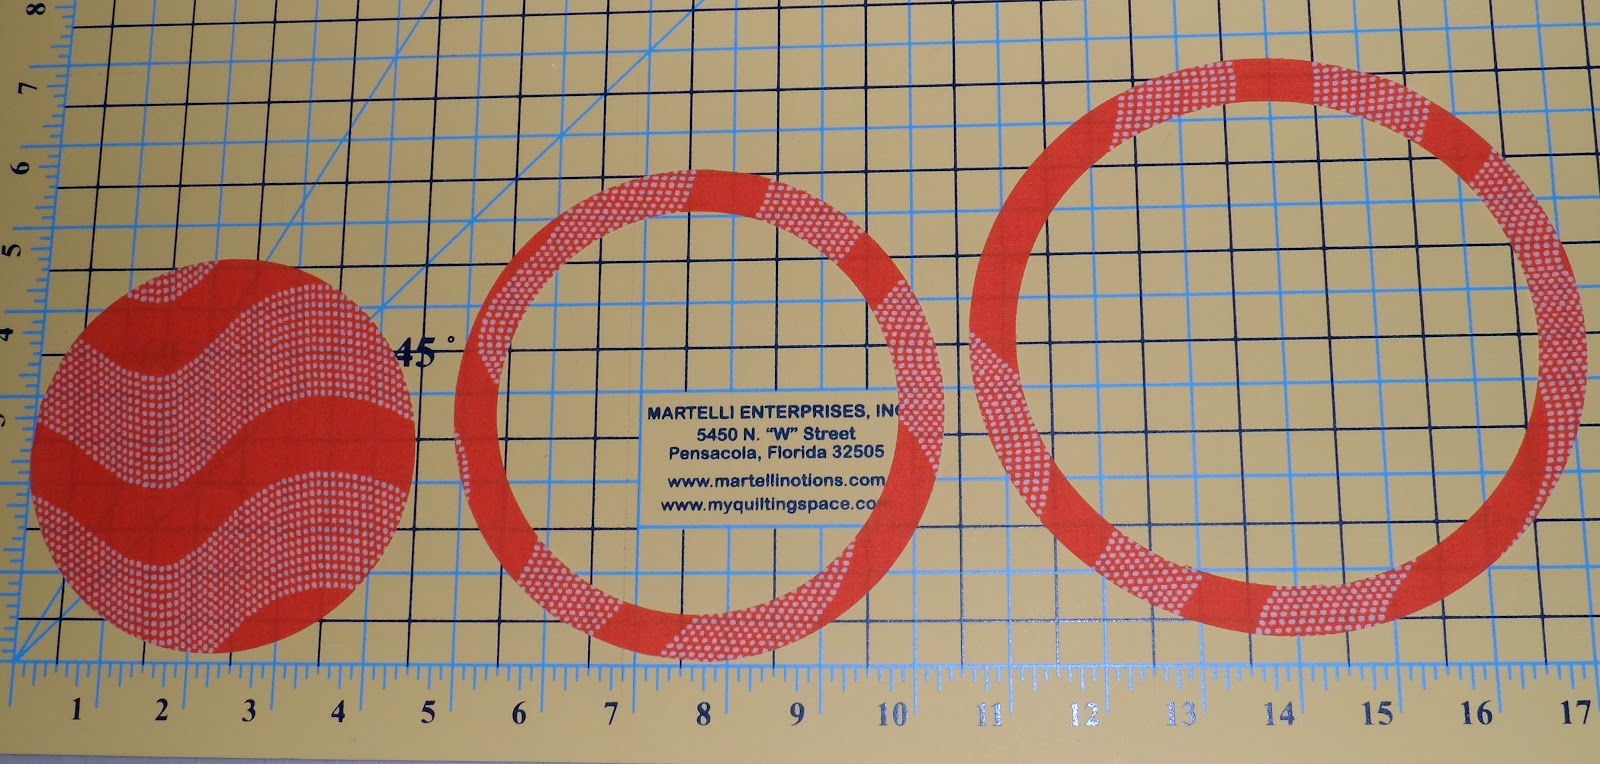
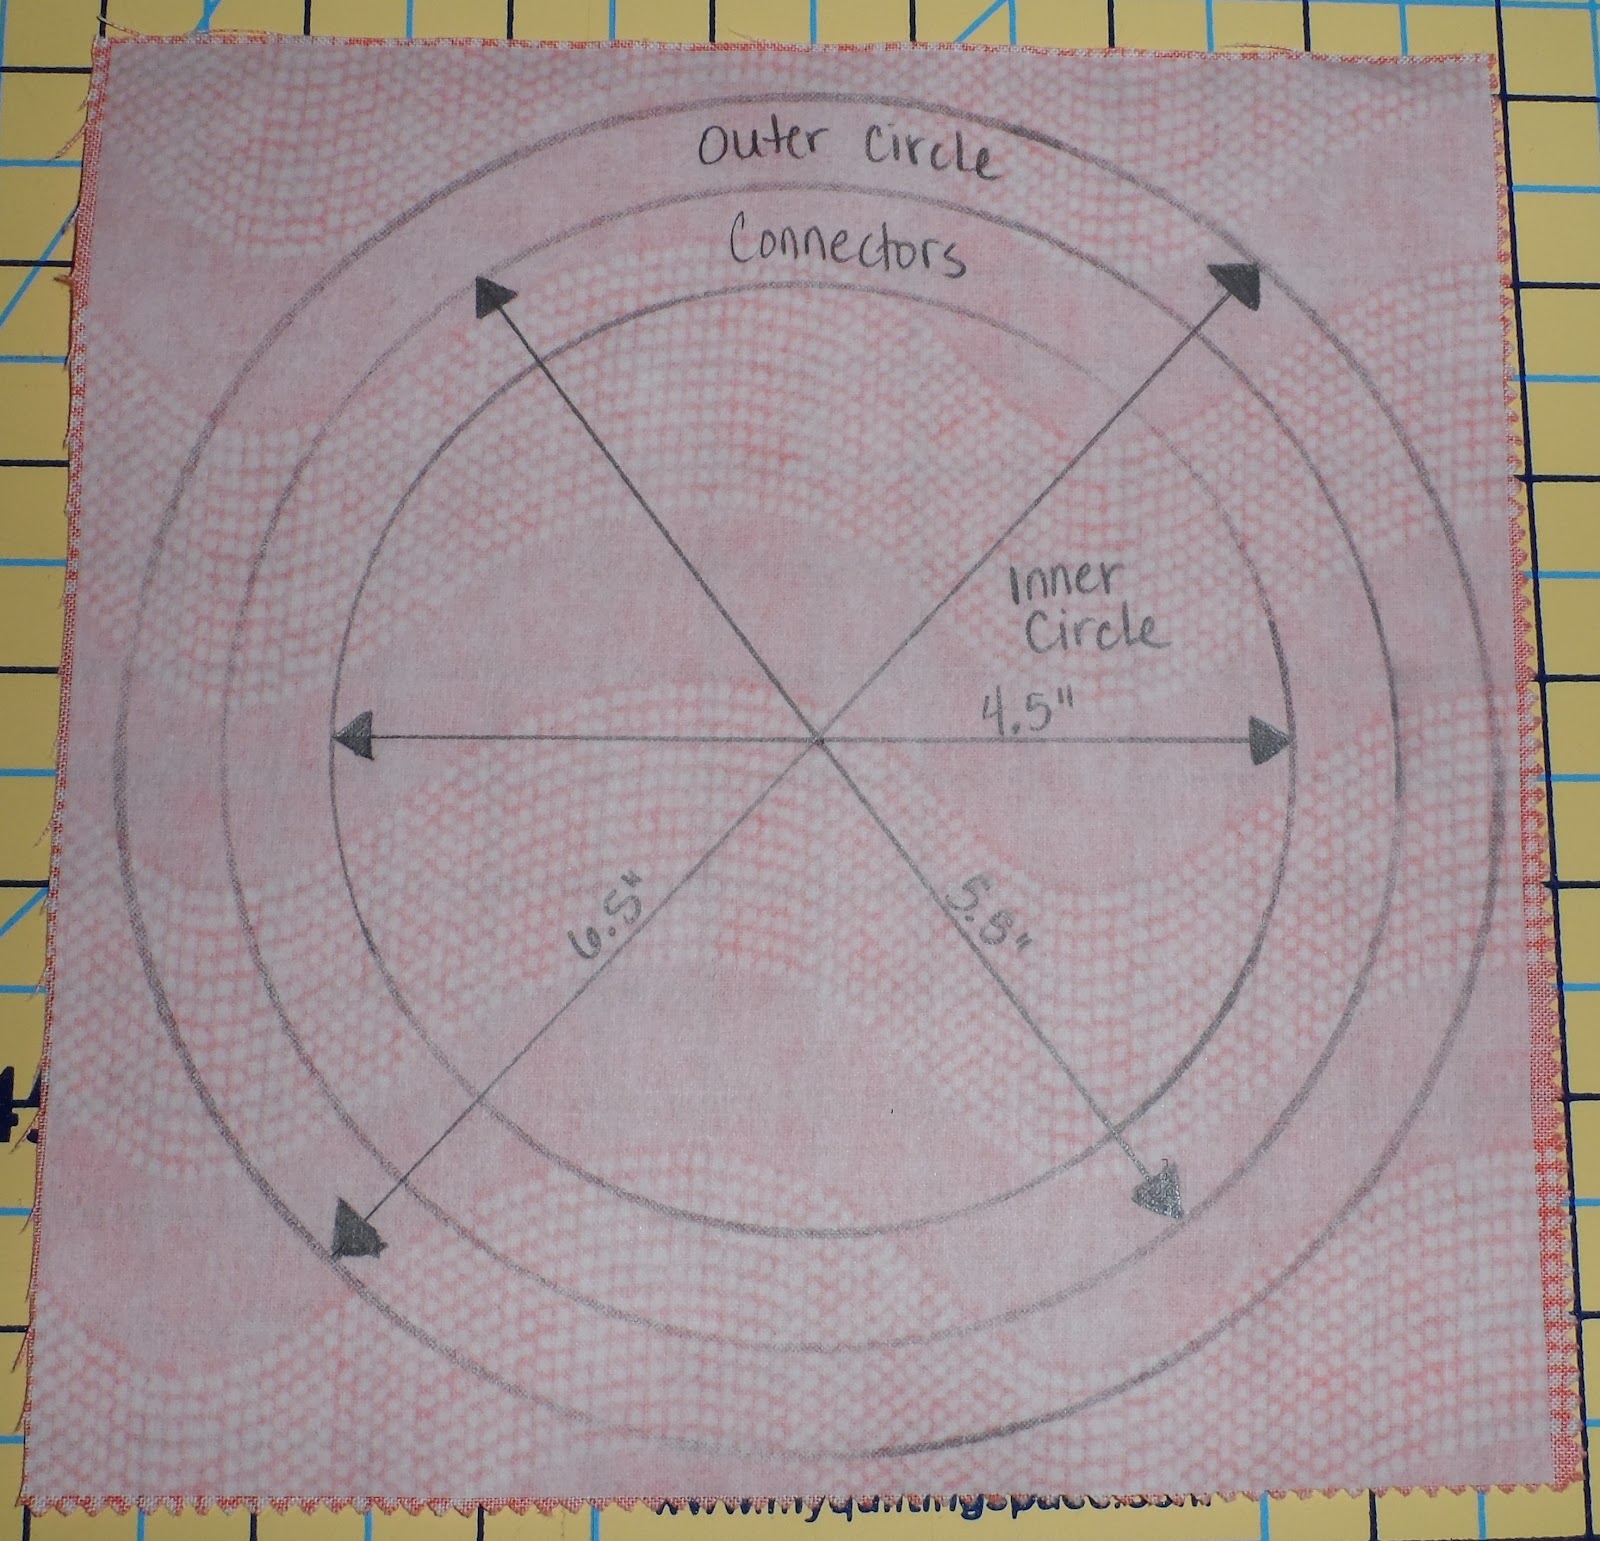
I made a total of three cuts.  I started with the smallest circle, the 4.5″ circle.  Then I cut the 5.5″ circle.  Then the 6.5″ circle.


Cutting 5.5″ Circle
Cutting 6.5″ Circle


Check out what I did in a matter of minutes…


Alternative:
If you do not use the Olfa circle cutter you need to leave the Steam a Seam paper backing on the fabric and draw circles.
I used a compass to draw the circles and then used scissors to cut out each circle.  Then peel off the paper backing.

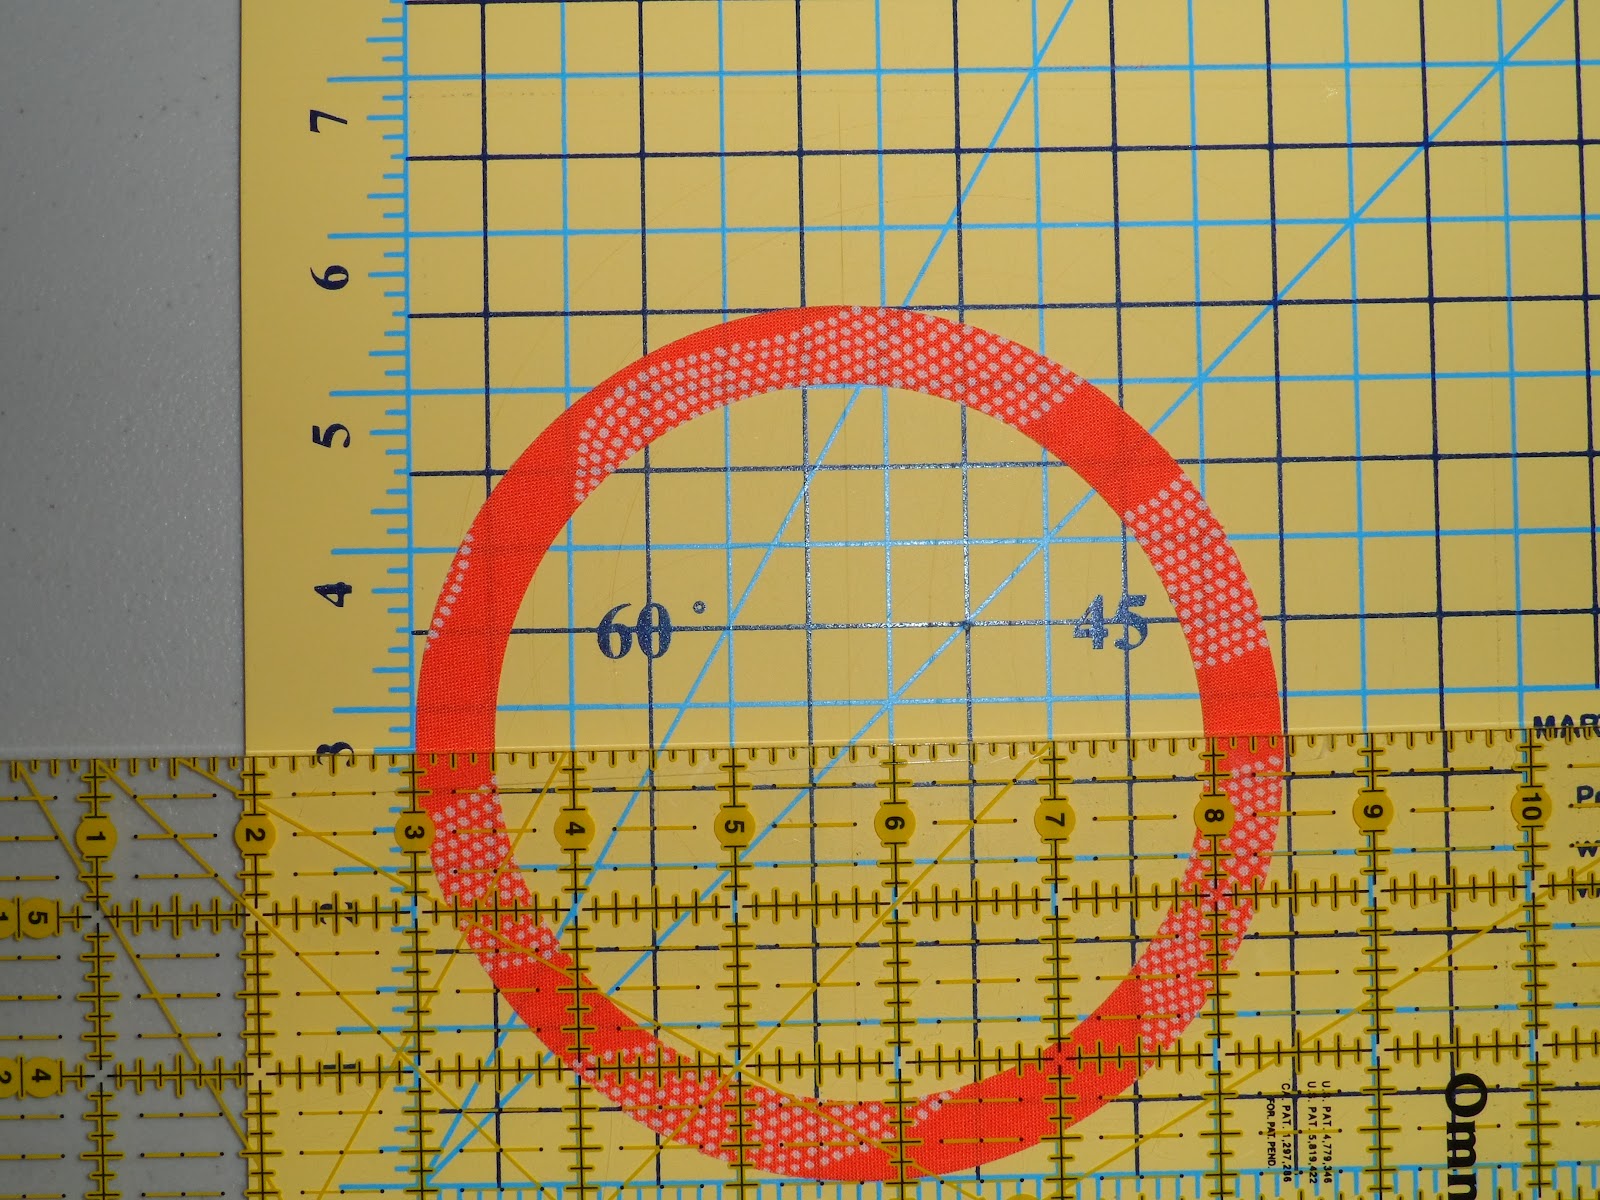
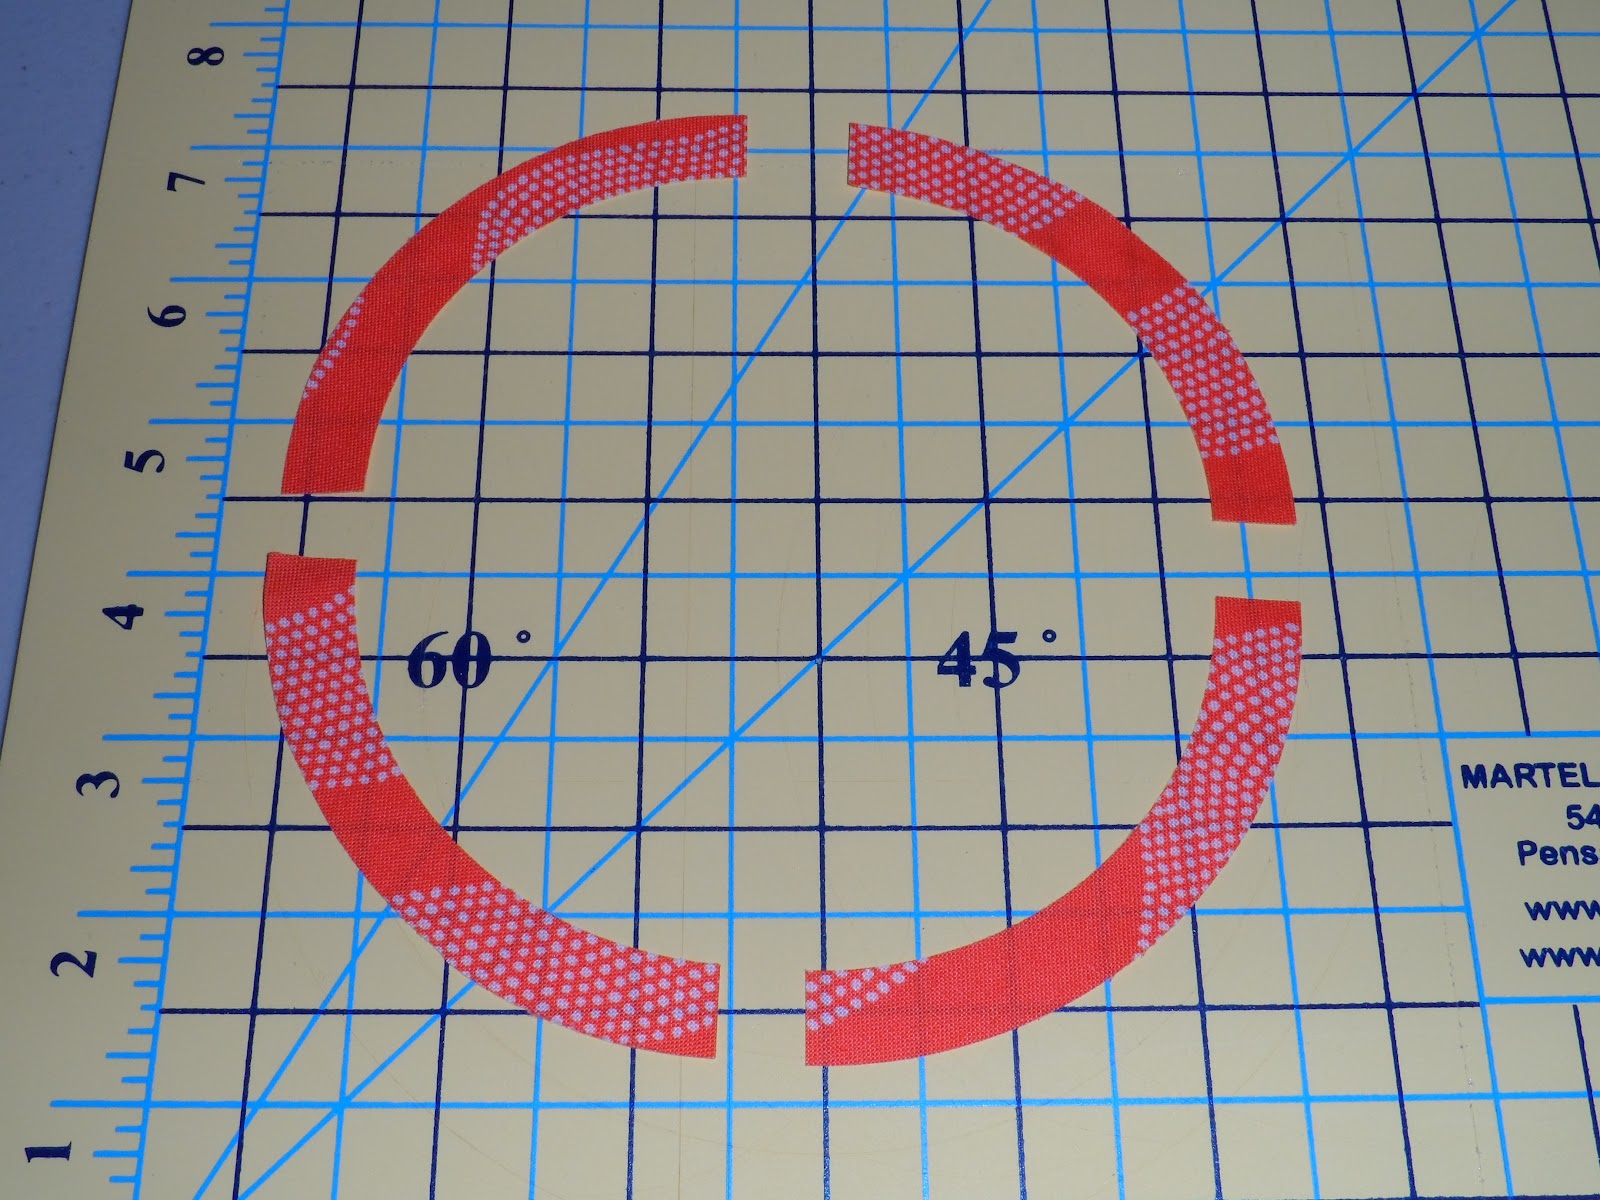
Next, the 5.5″ circle must be cut into fourths.  I only used 5 of the 5.5″ circles so I picked my favorites.  Cut in half and then in half again.


Line up on the 2 3/4″ mark and cut
Flip ruler and line up on other 2 3/4″ mark


All done!
Now I’m ready to lay out the circles on the background fabric.

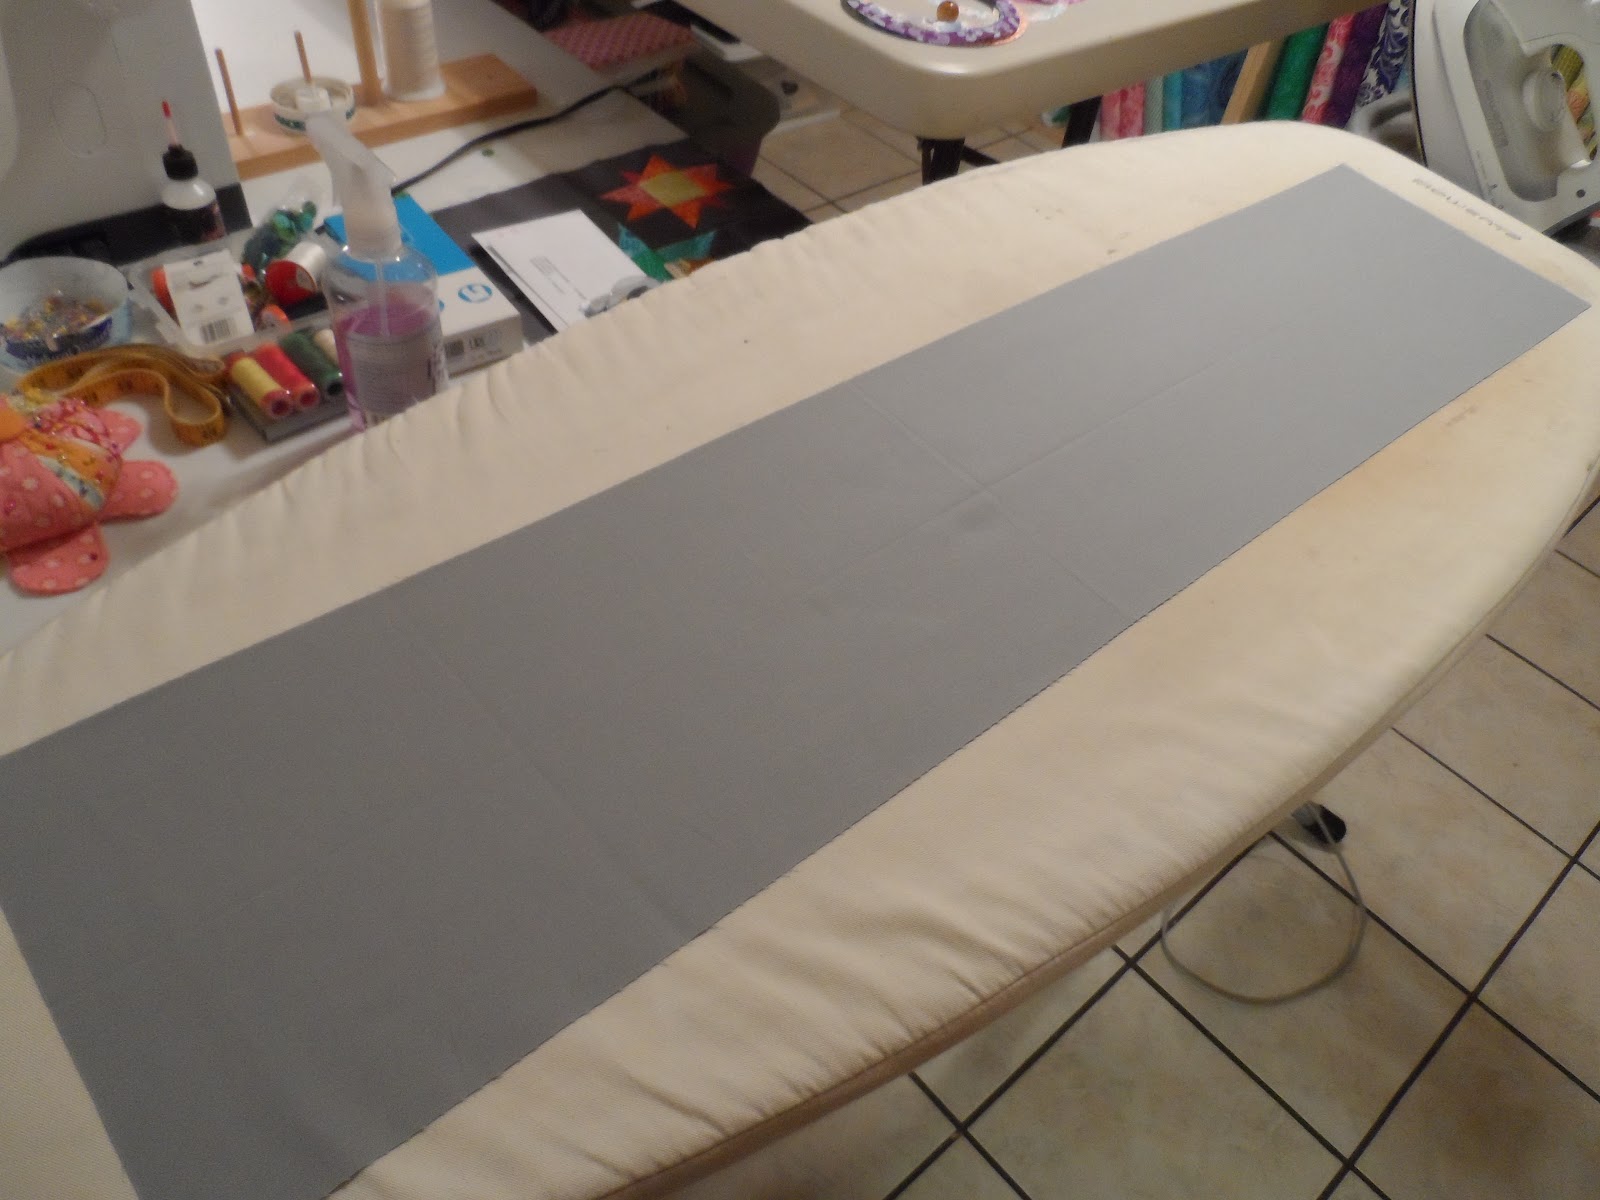
I cut a 10″ x width of fabric strip of grey

I laid this strip out on my ironing board, right side up.  I pressed it in half lengthwise to create a mark down the center.  I used this mark to help me align all the circles that will be applied.
Right side up ready to press
Press in half lengthwise
This is the center mark used for aligning circles
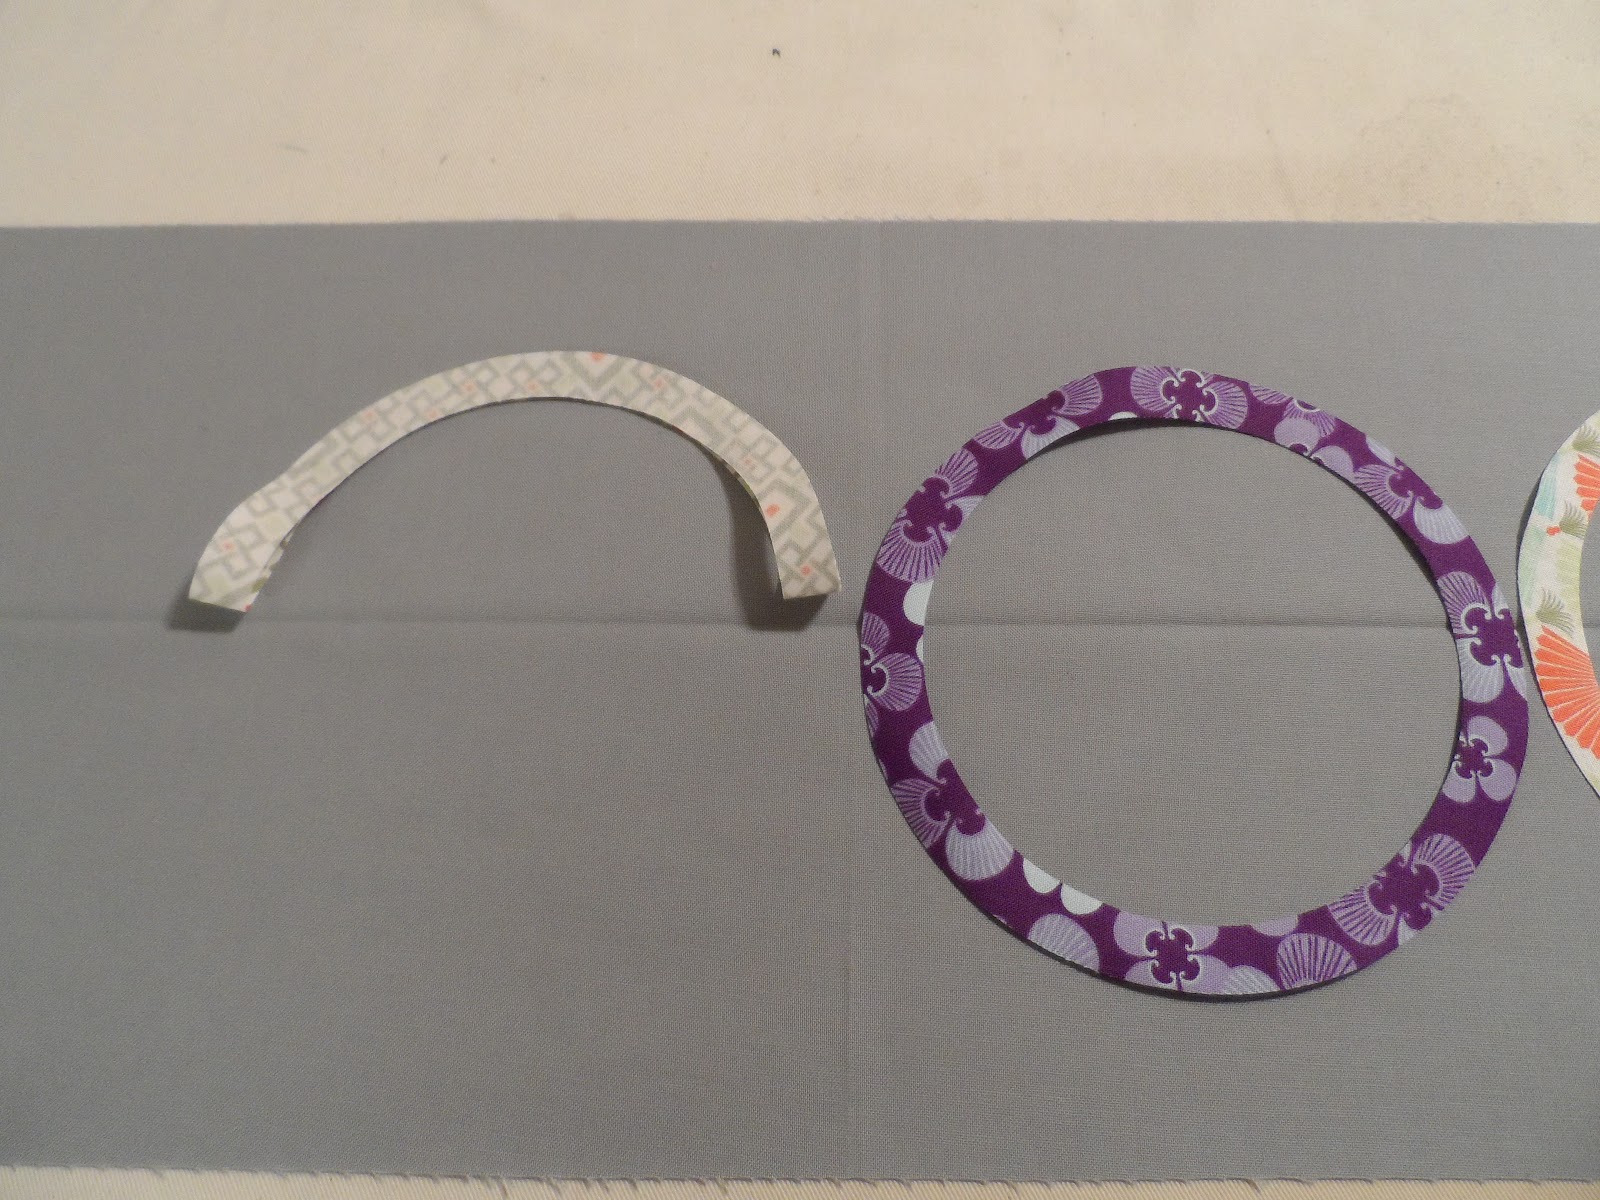
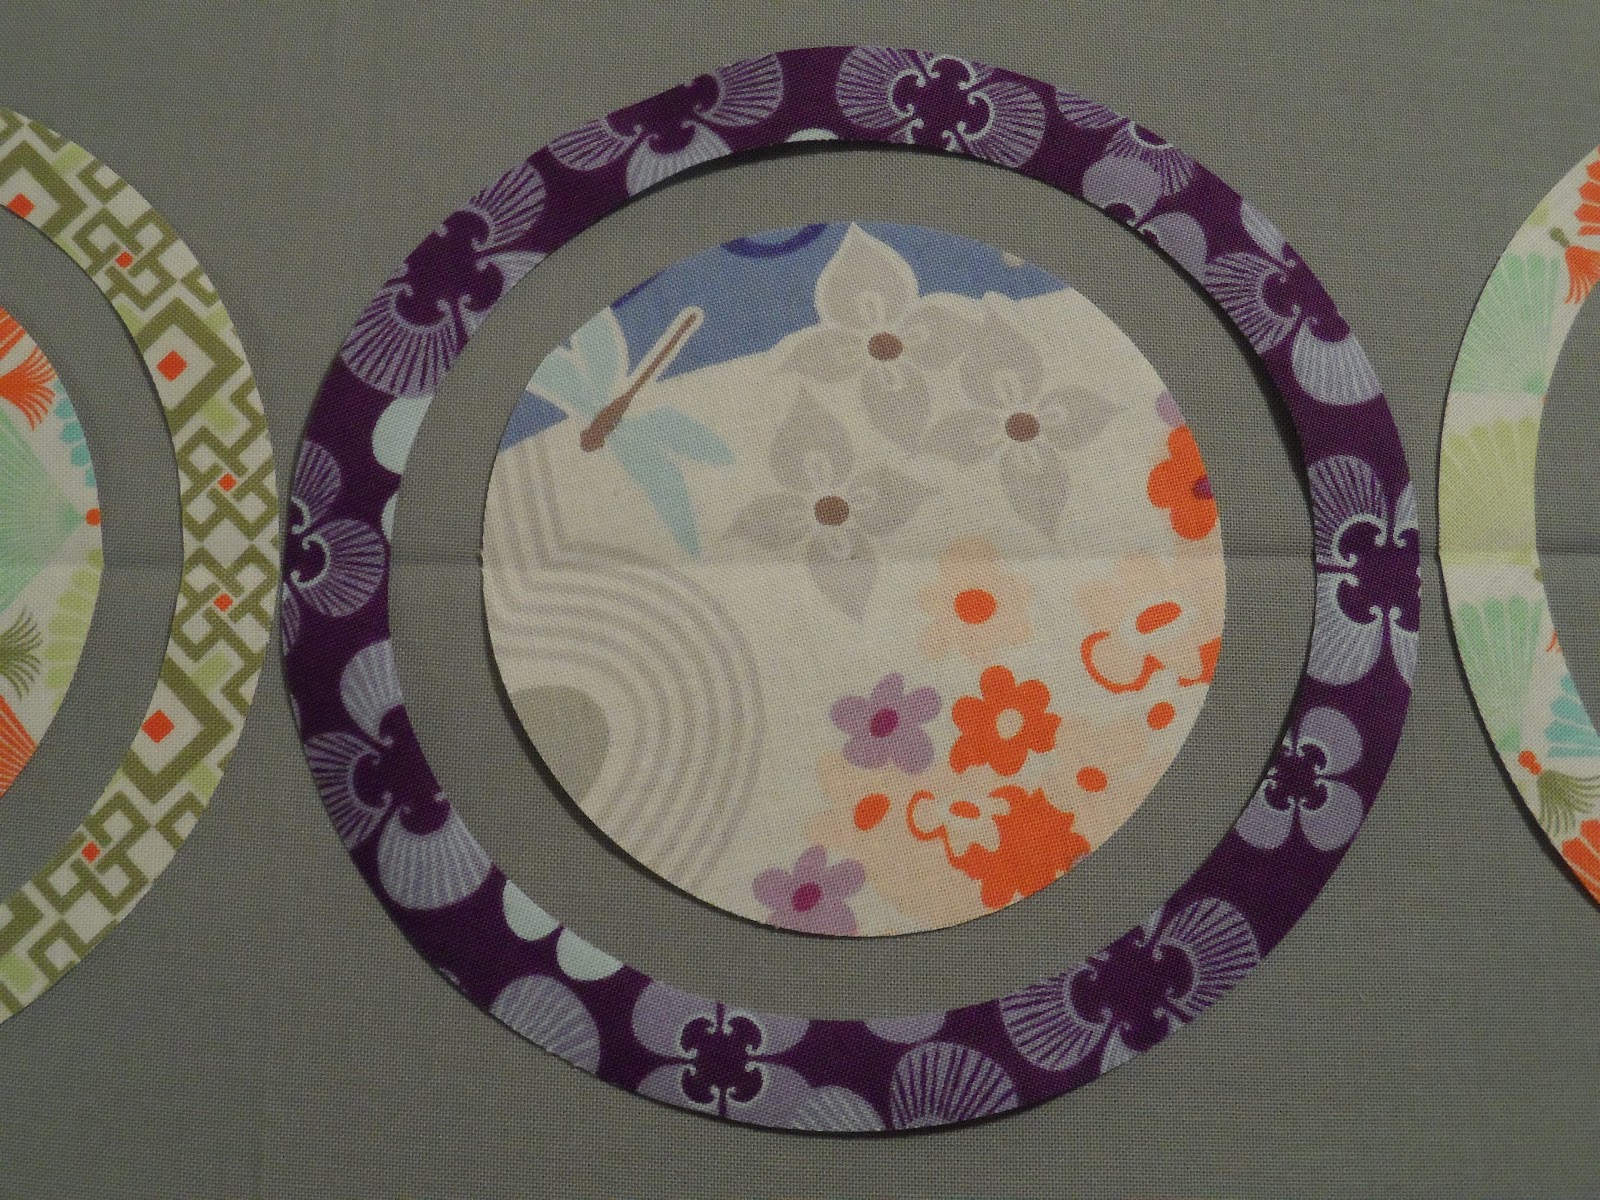
The 6.5″ circle rings will be the first to go onto the grey fabric.  Also, I started with the two center rings and worked my way out.  I folded each ring in half and made a crease on each side.  This crease was lined up with the center press mark on the grey fabric.  Keep going until all 6 rings are laid on the fabric.  They should be touching but not overlapping.  DO NOT iron anything yet.
Next, take each center 4.5″ circle and fold in half to make a crease in the center.  This crease will line up with the center press mark on the grey fabric.
If you look closely at the picture you can see all the crease marks line up with the pressed line I made earlier.  This is how I made sure everything lined up just right with no measuring!  DO NOT iron anything yet…

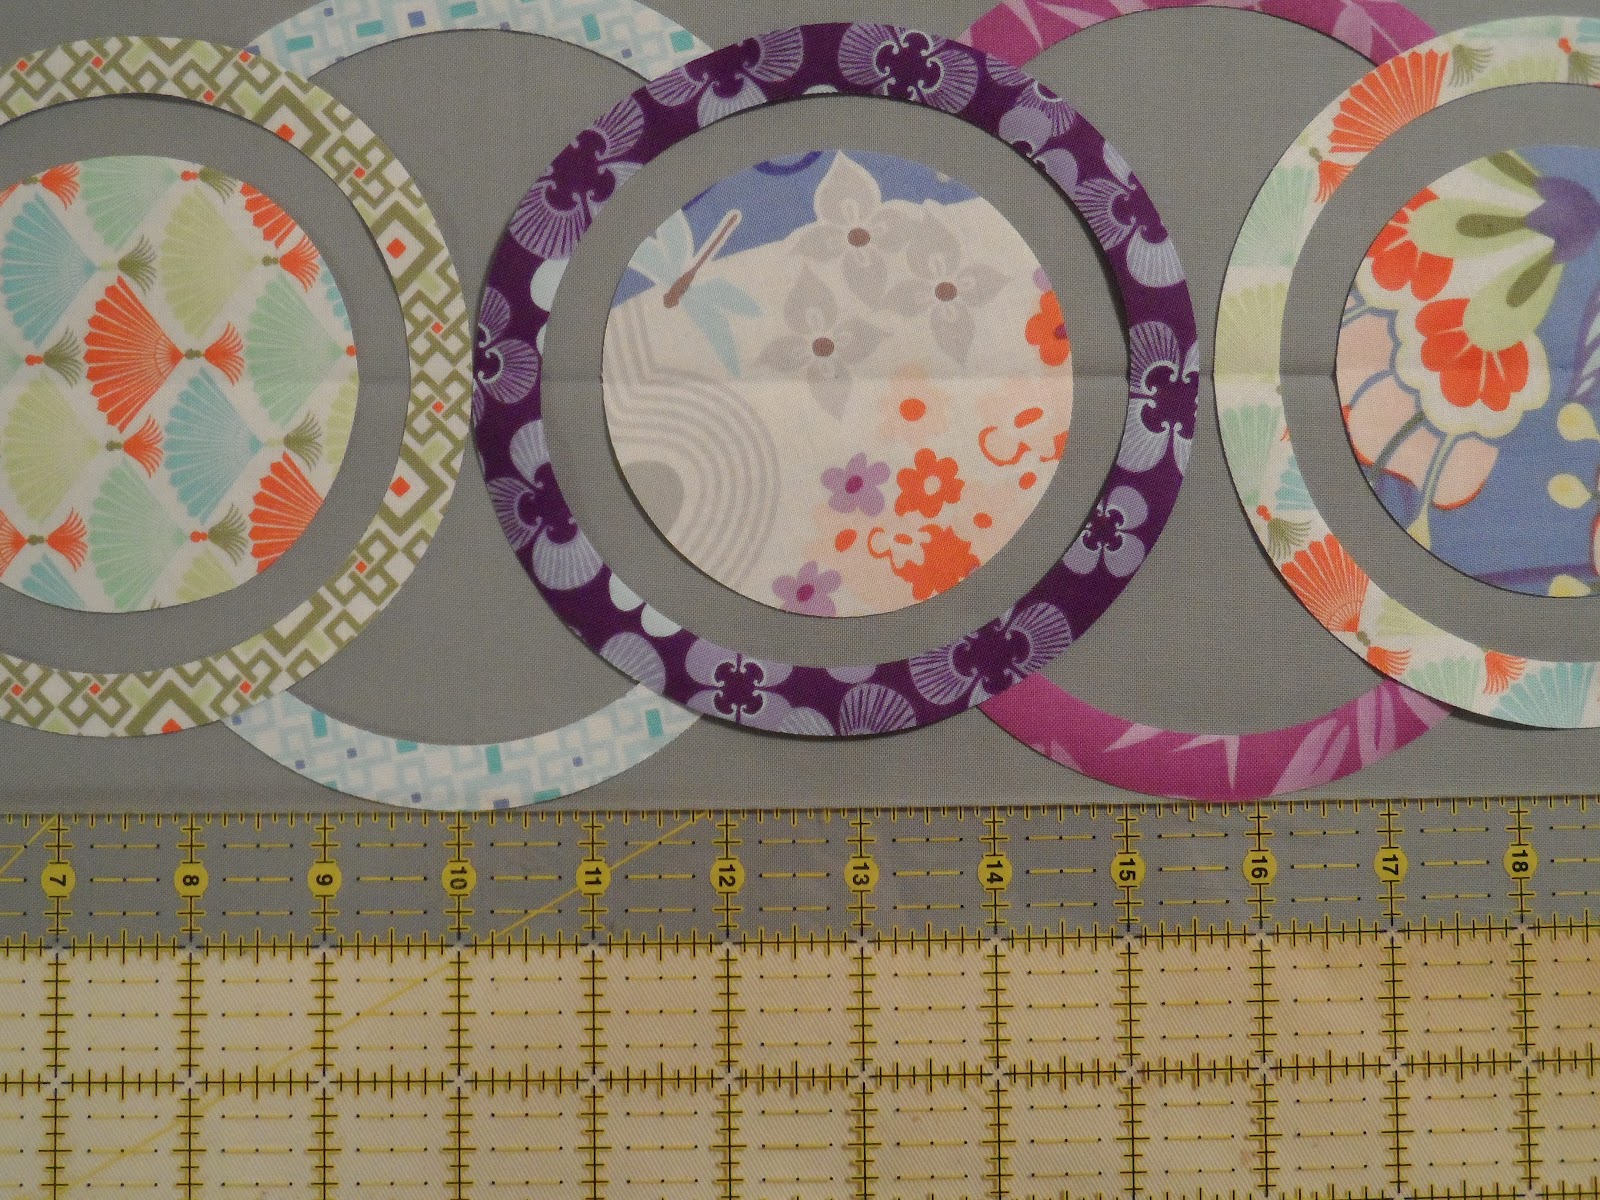
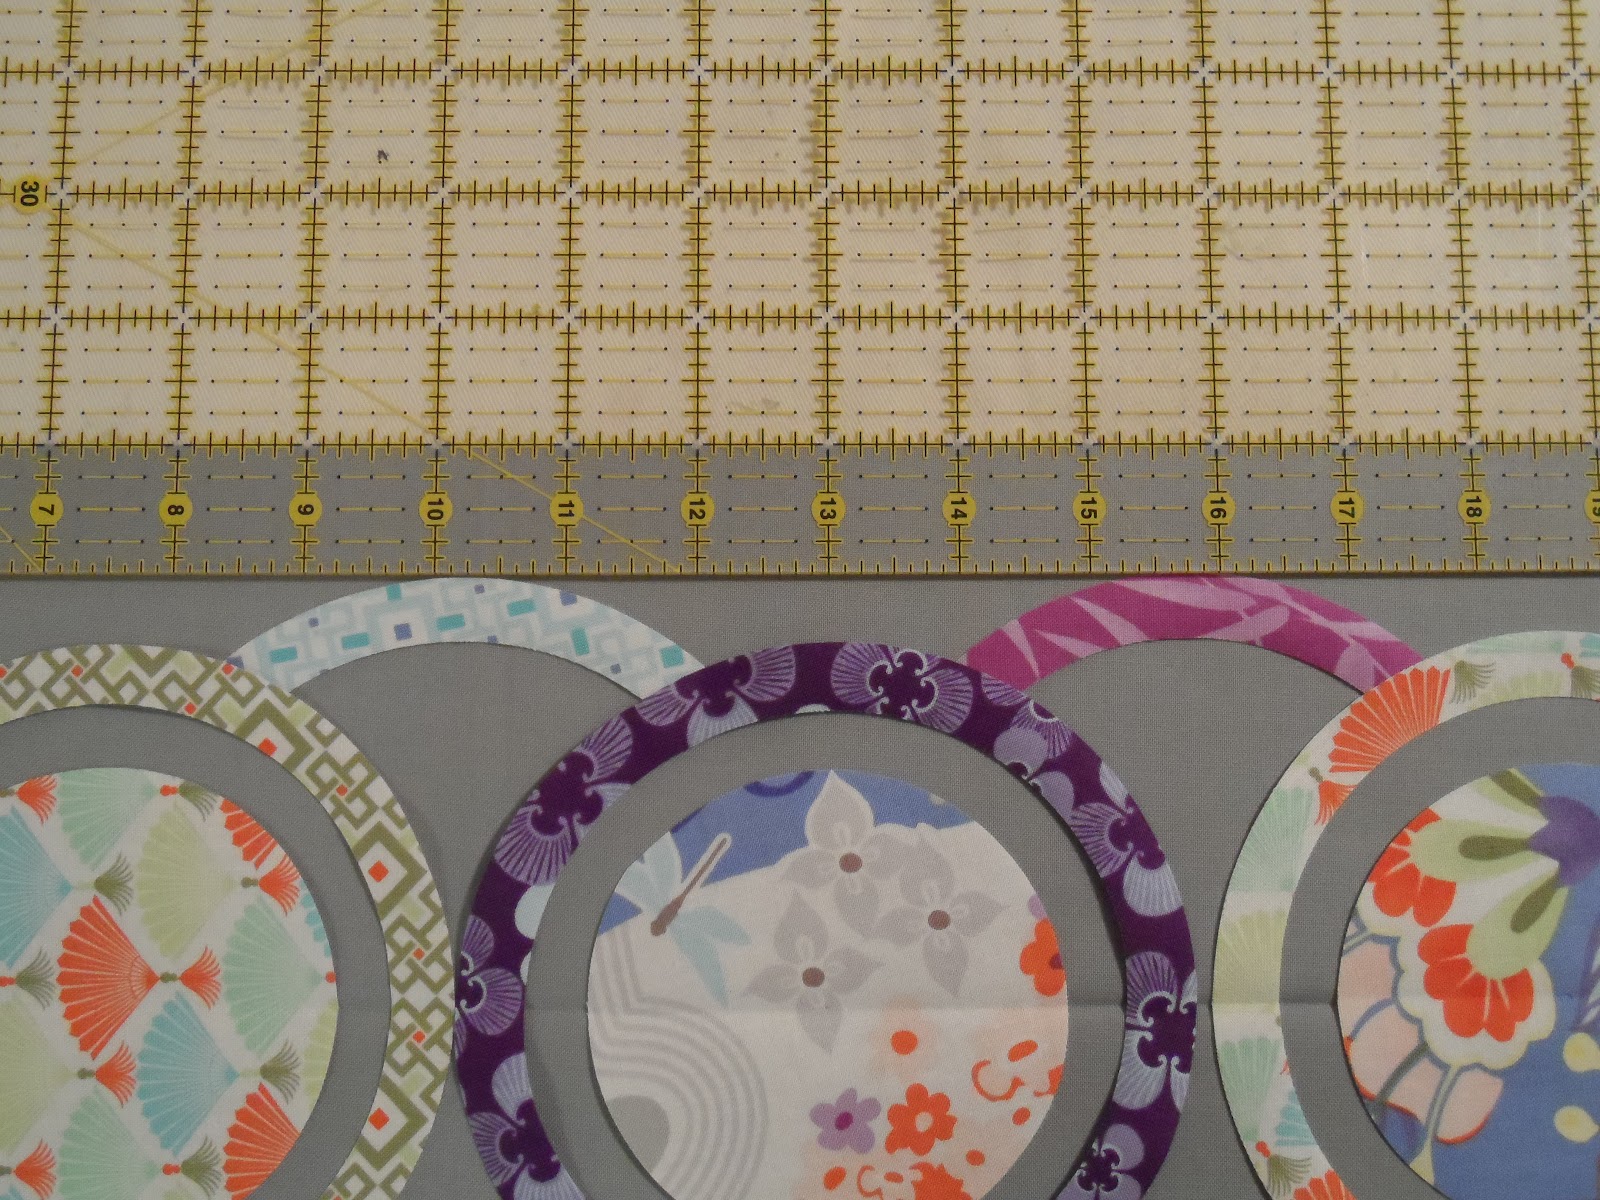
Next, add the connector pieces.  These pieces will be tucked under the outer rings.  I used my 6″ x 24″ ruler to make sure they were all placed the same distance from the edge of the grey.  I used tweezers to move them around if I needed.  Everything is still NOT ironed down at this point.

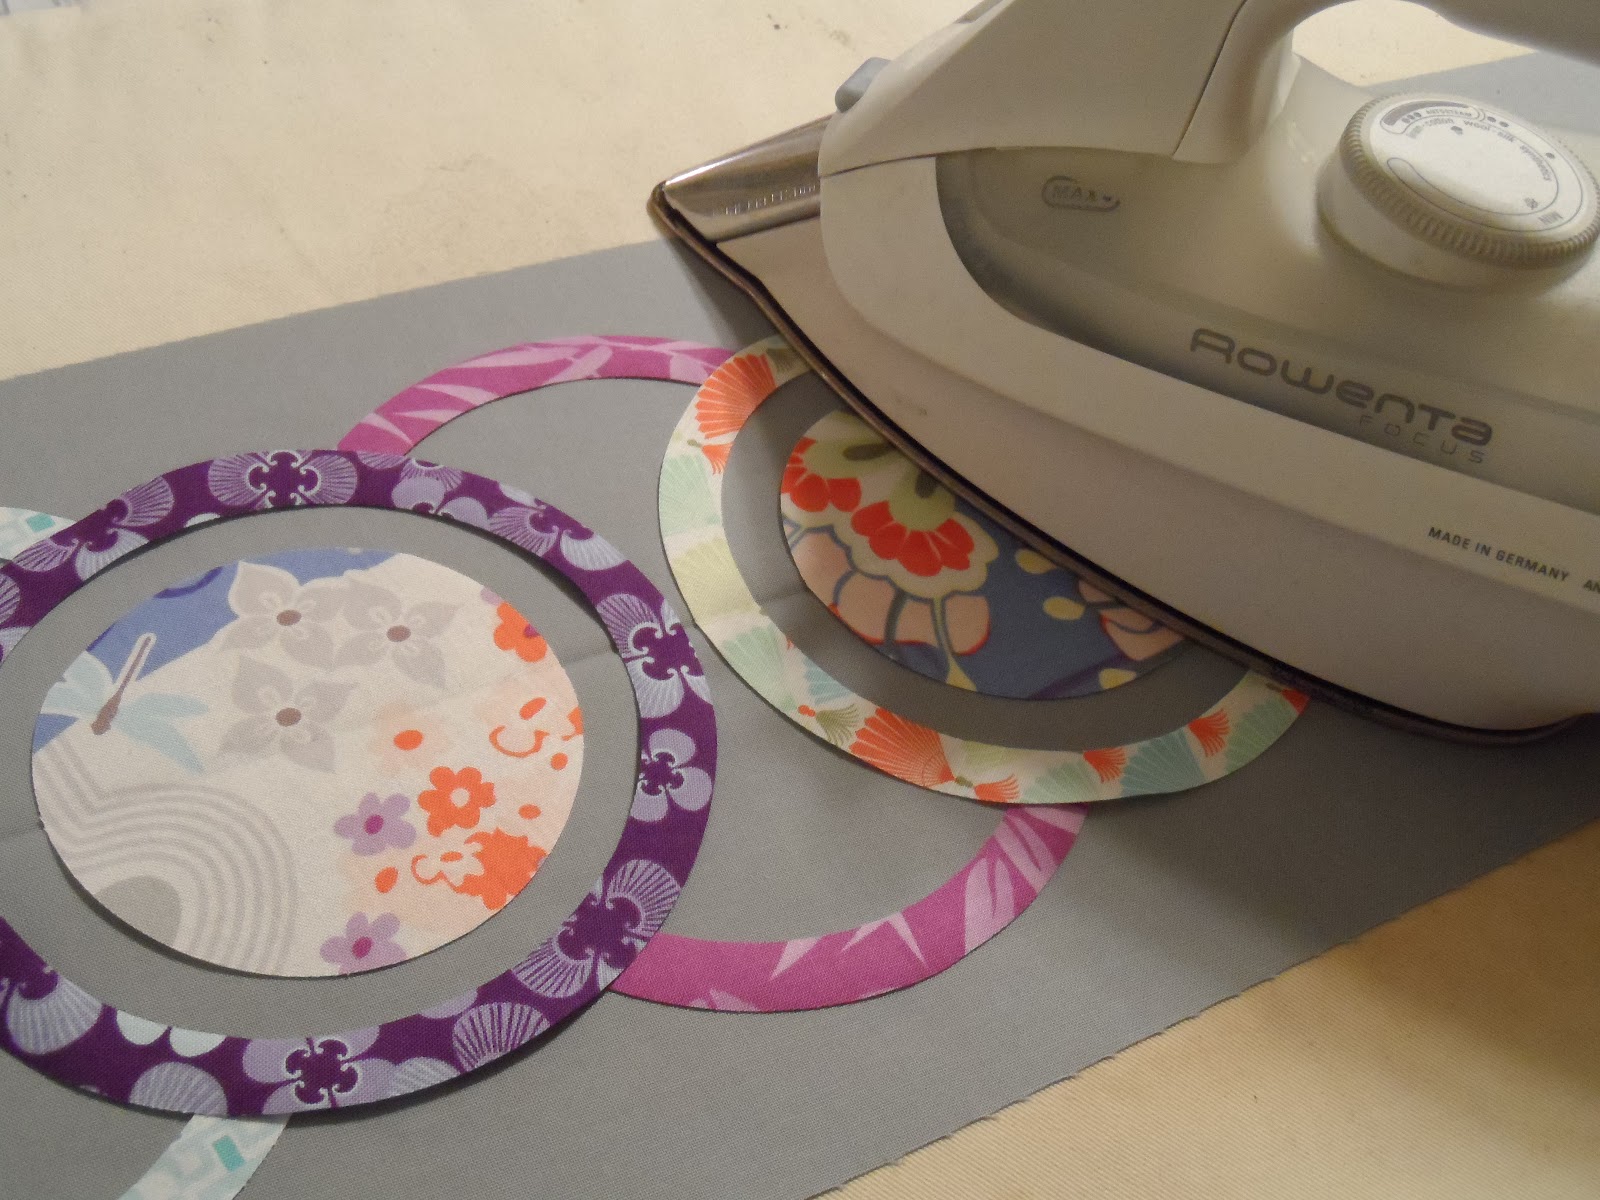
Stand back and take a look.  If you’re happy you can iron it all down.  If something looks off, just wiggle it around until you’re happy and then iron it all down.


Here’s what you have before adding any borders.

All we have left is appliquéing the circles, adding borders and quilting!

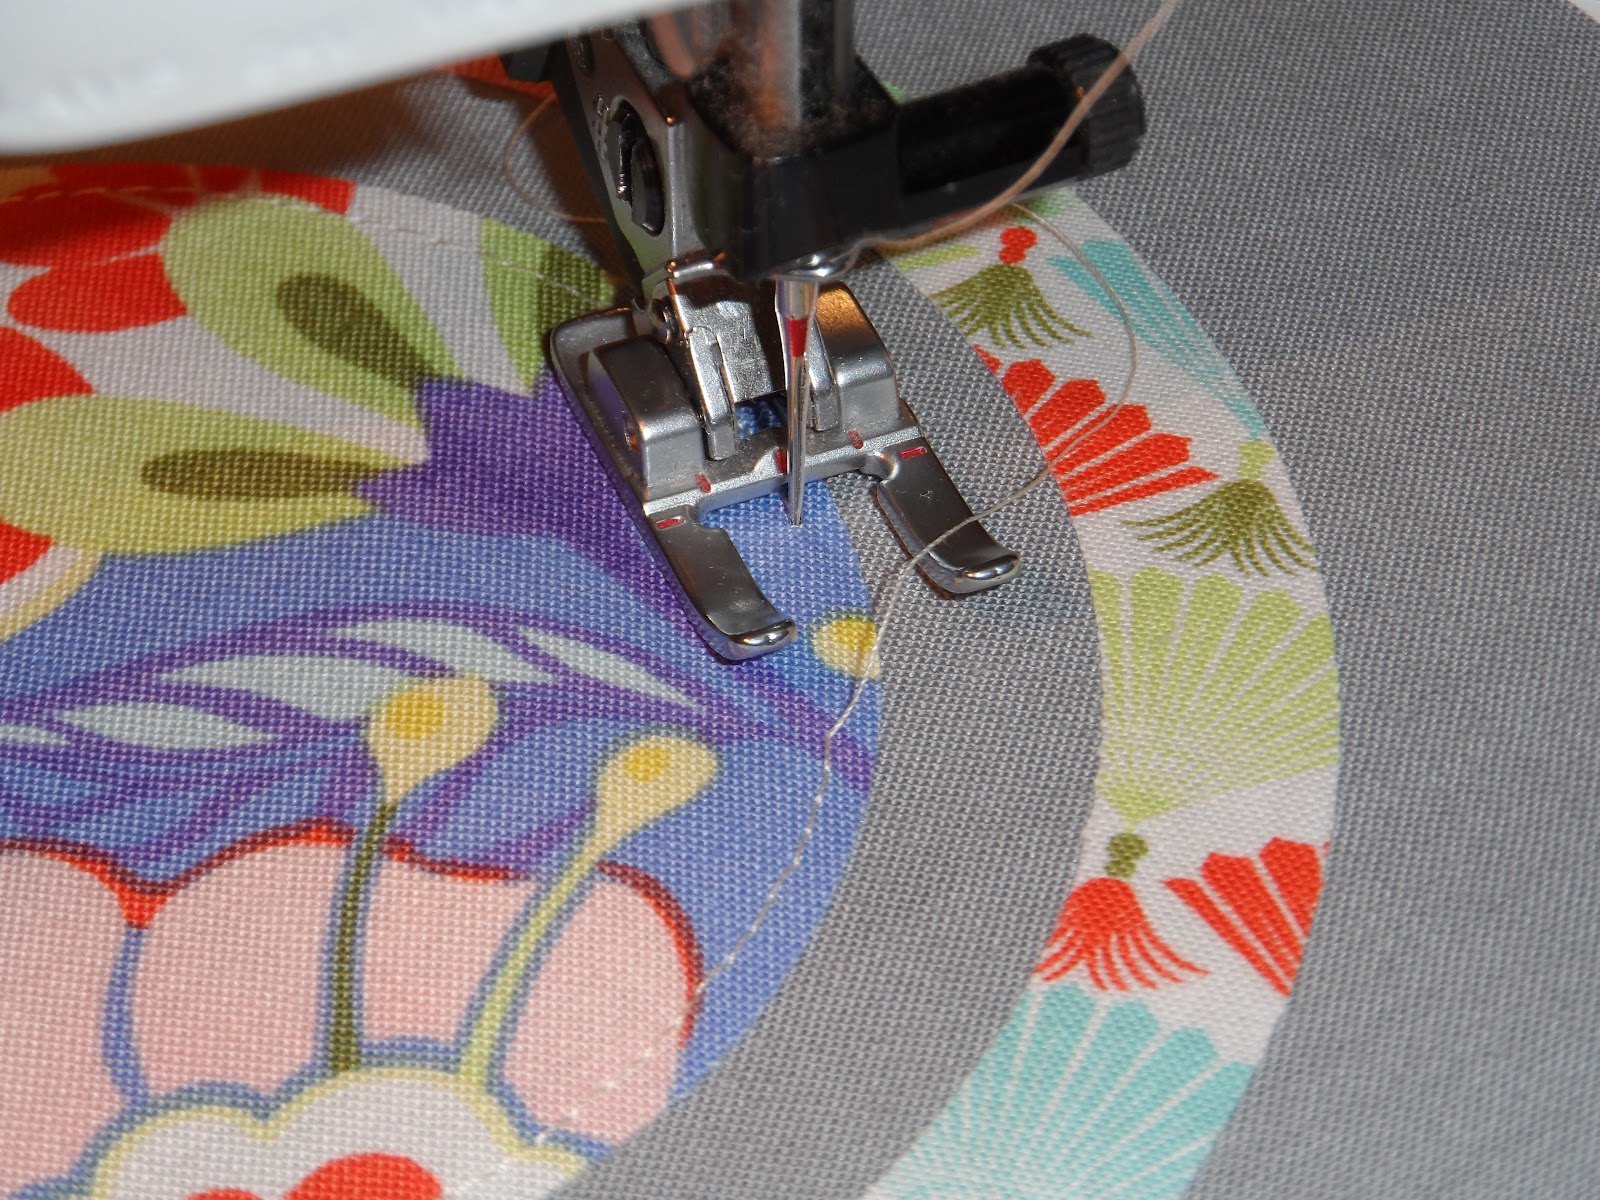
I used my open toe foot and stitched around each circle.  It’s a little time consuming but not too bad.  Just stop and have a little chocolate every now and then!

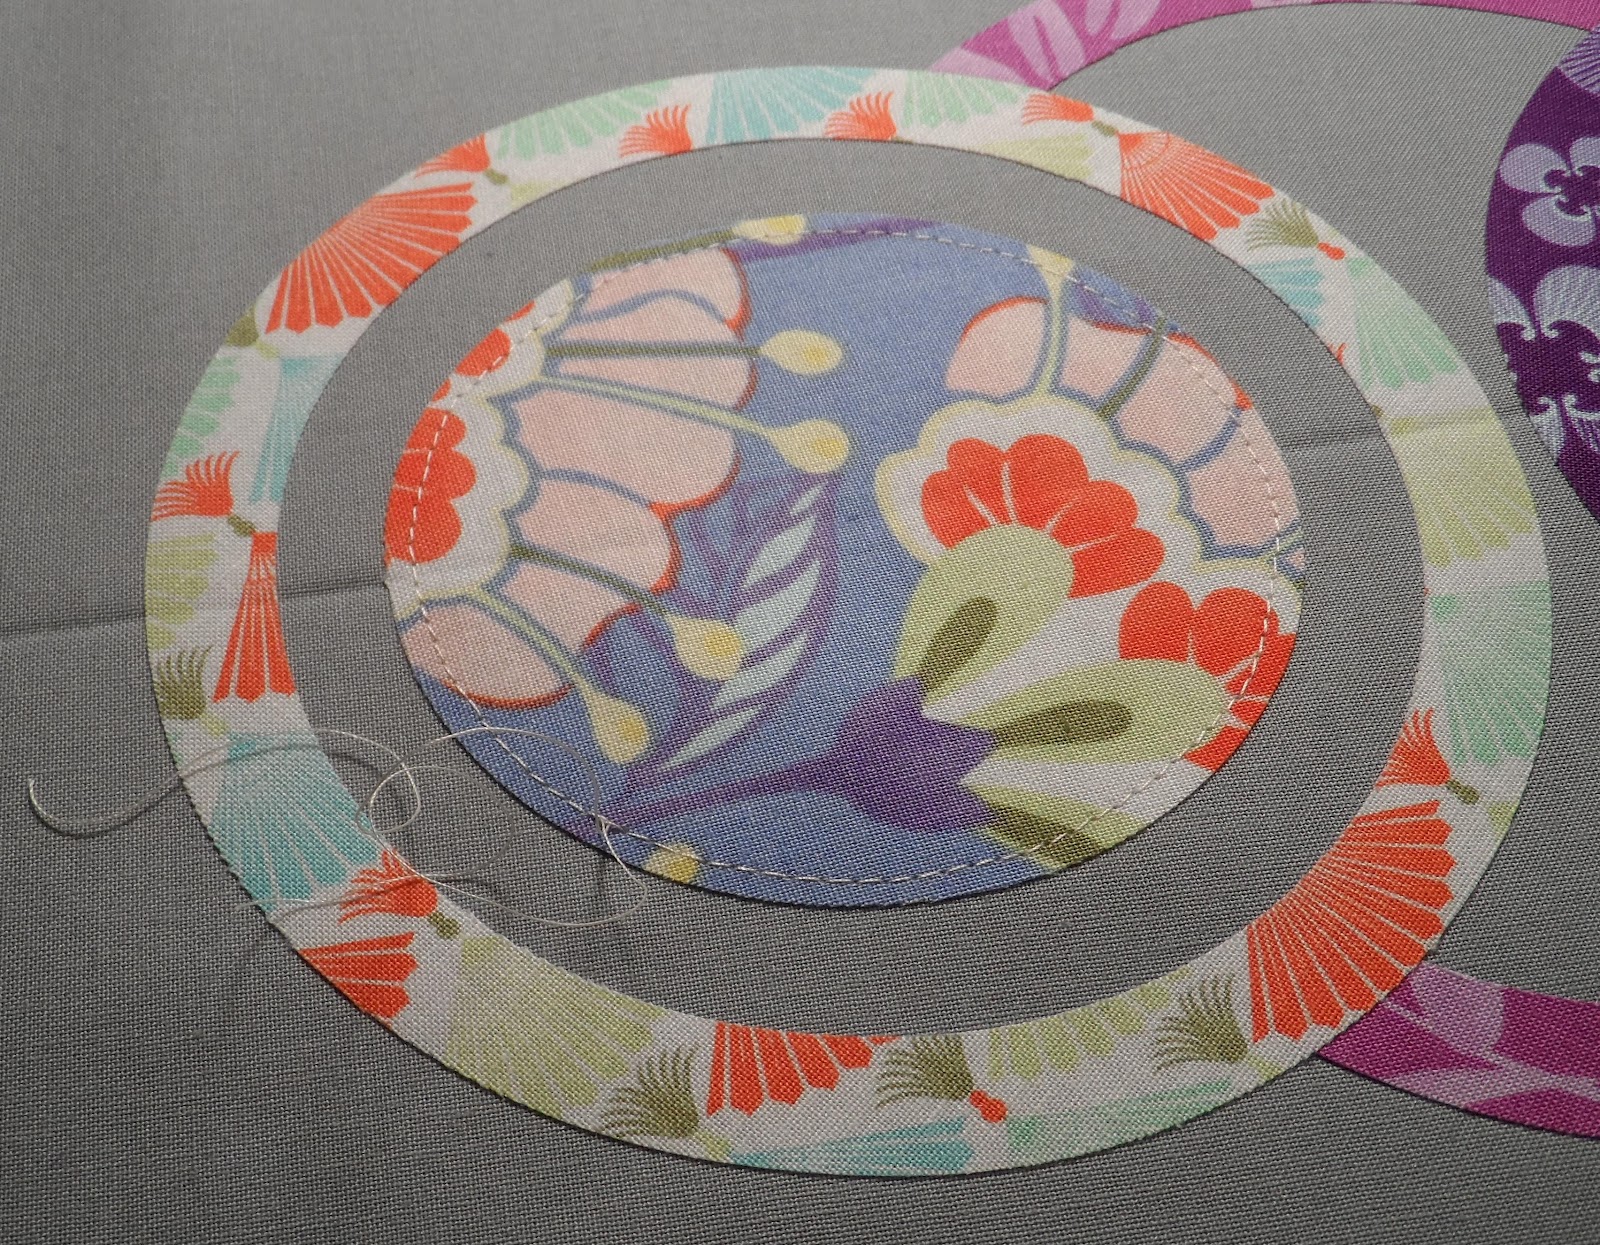
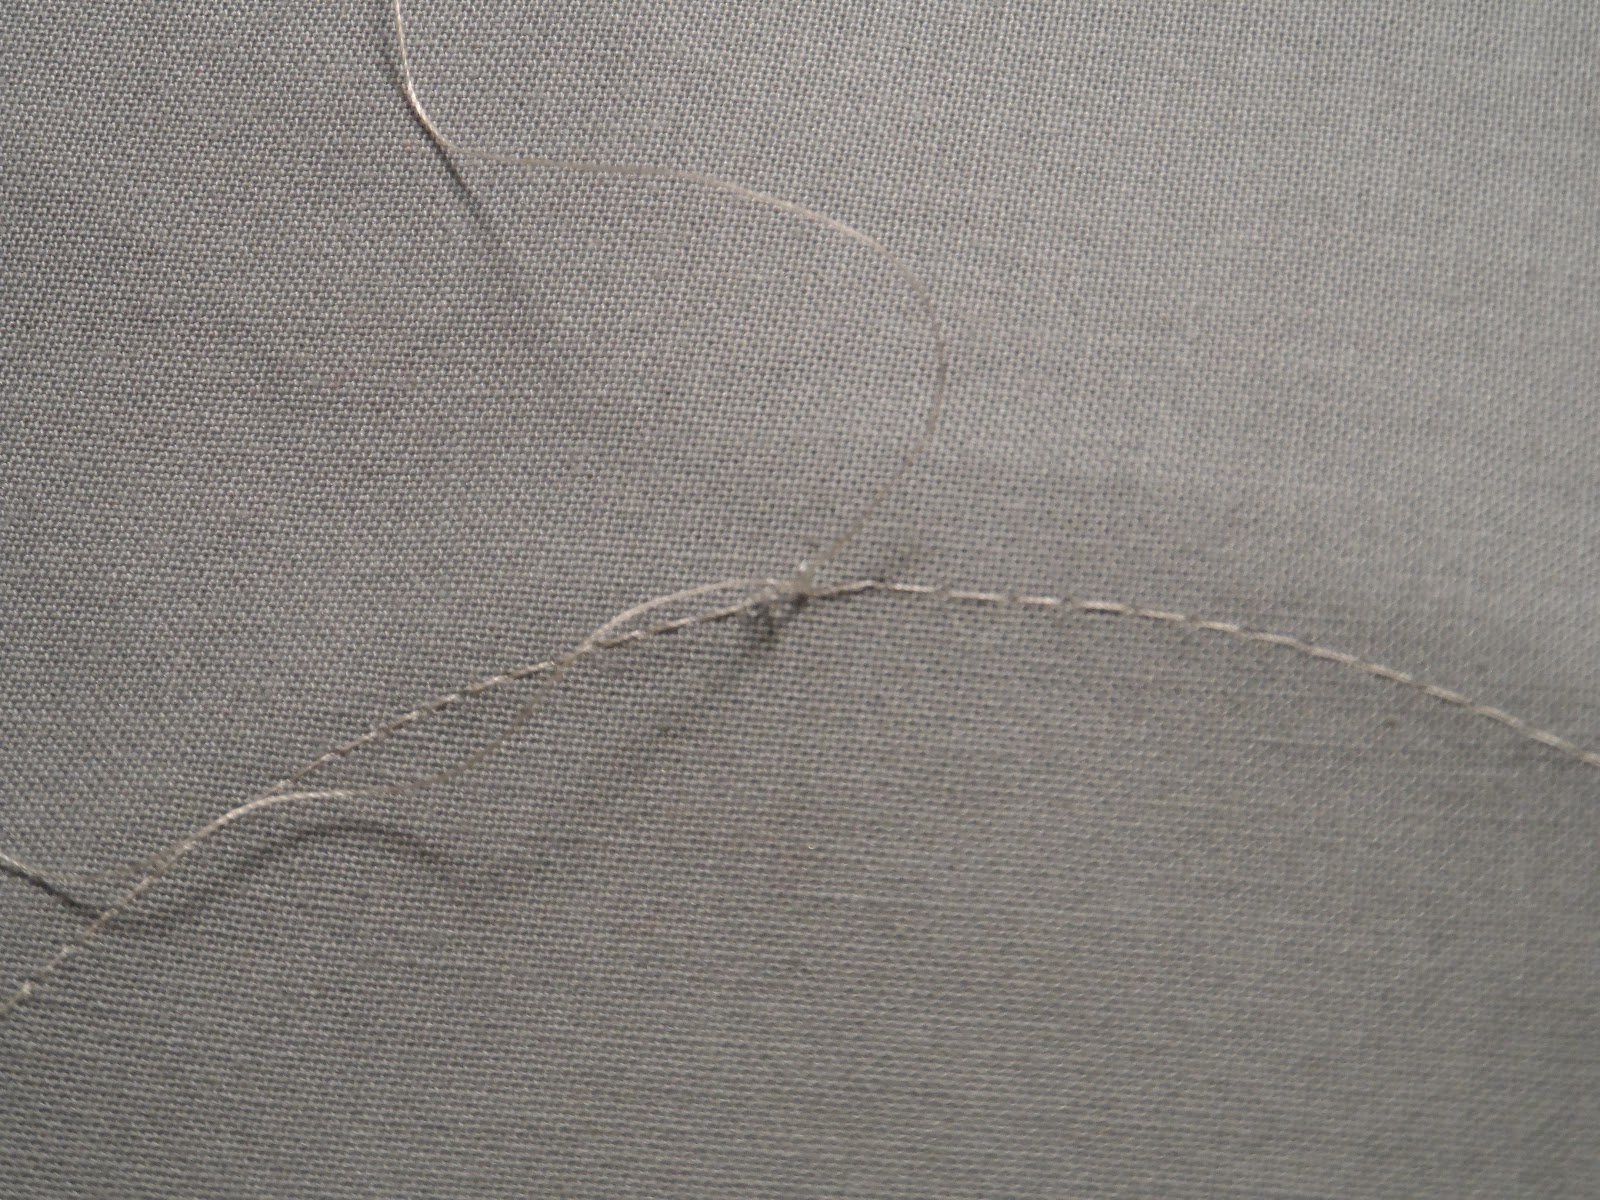
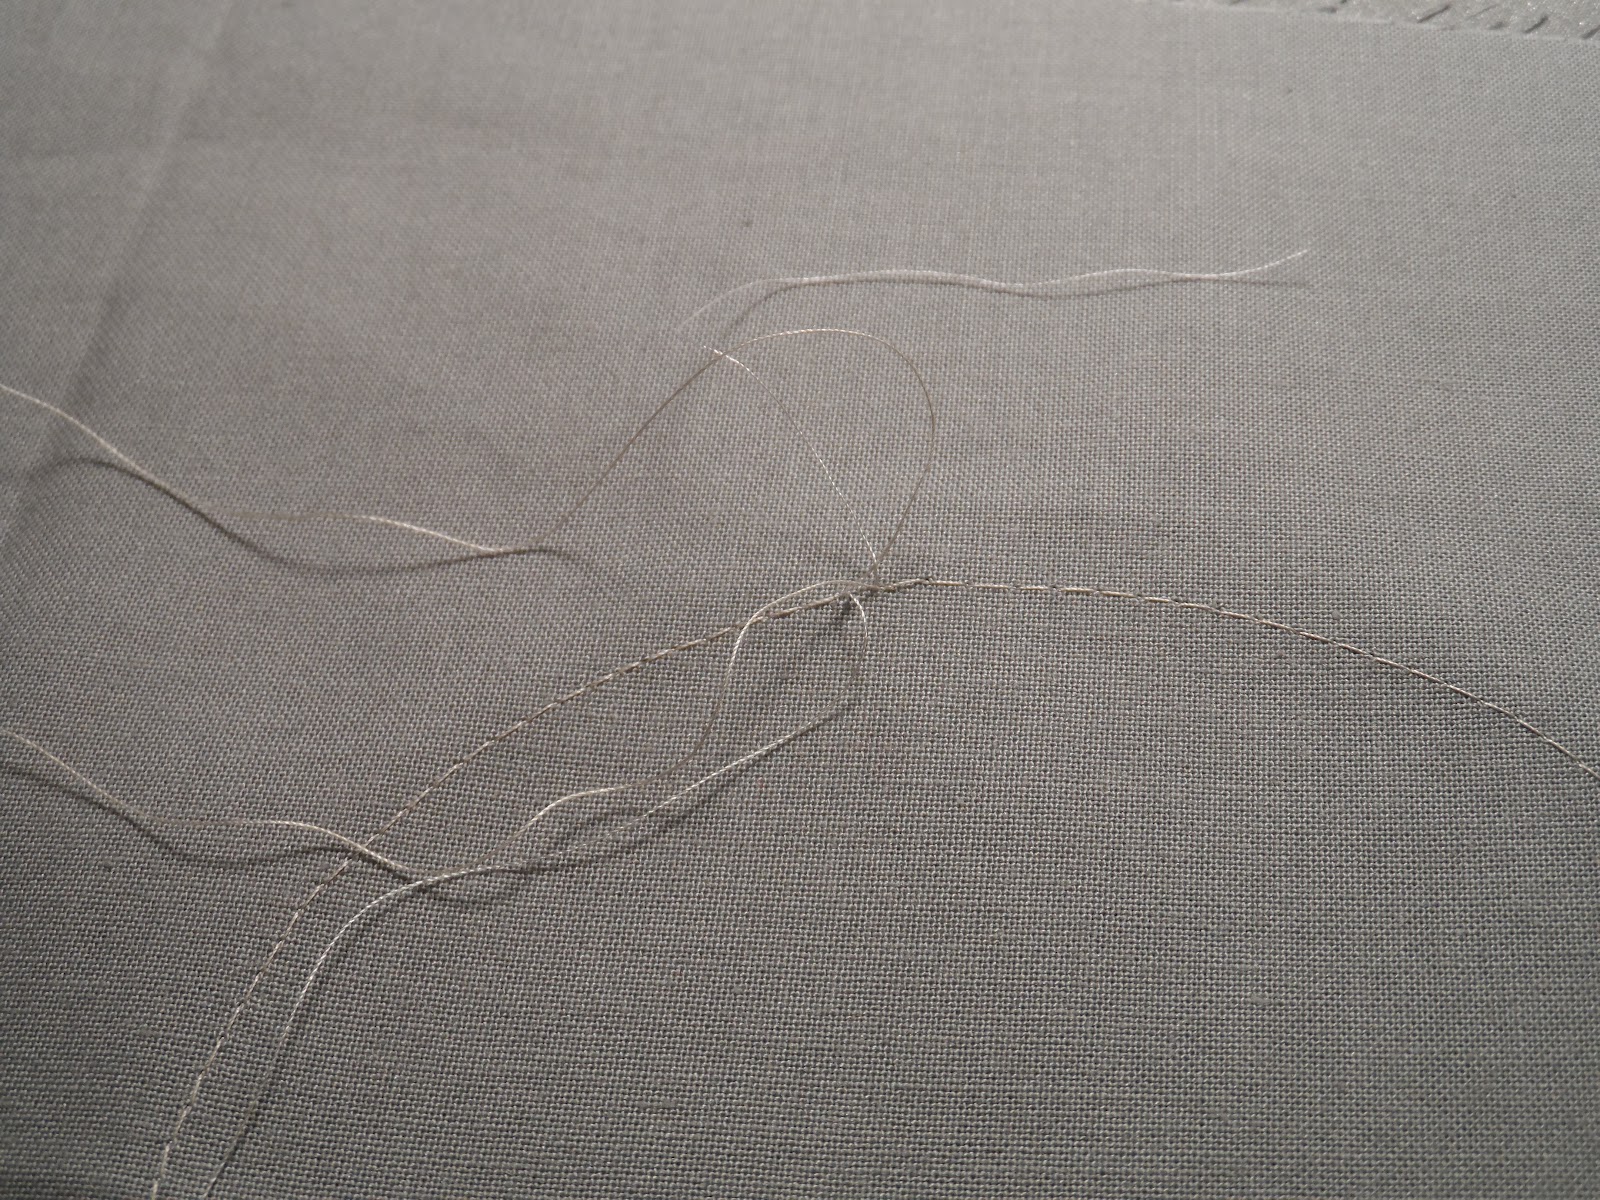
When I appliqué I always leave the threads long at the beginning and end so I can pull everything to the back and tie off.

The two threads on top will be pulled to the back and tied off
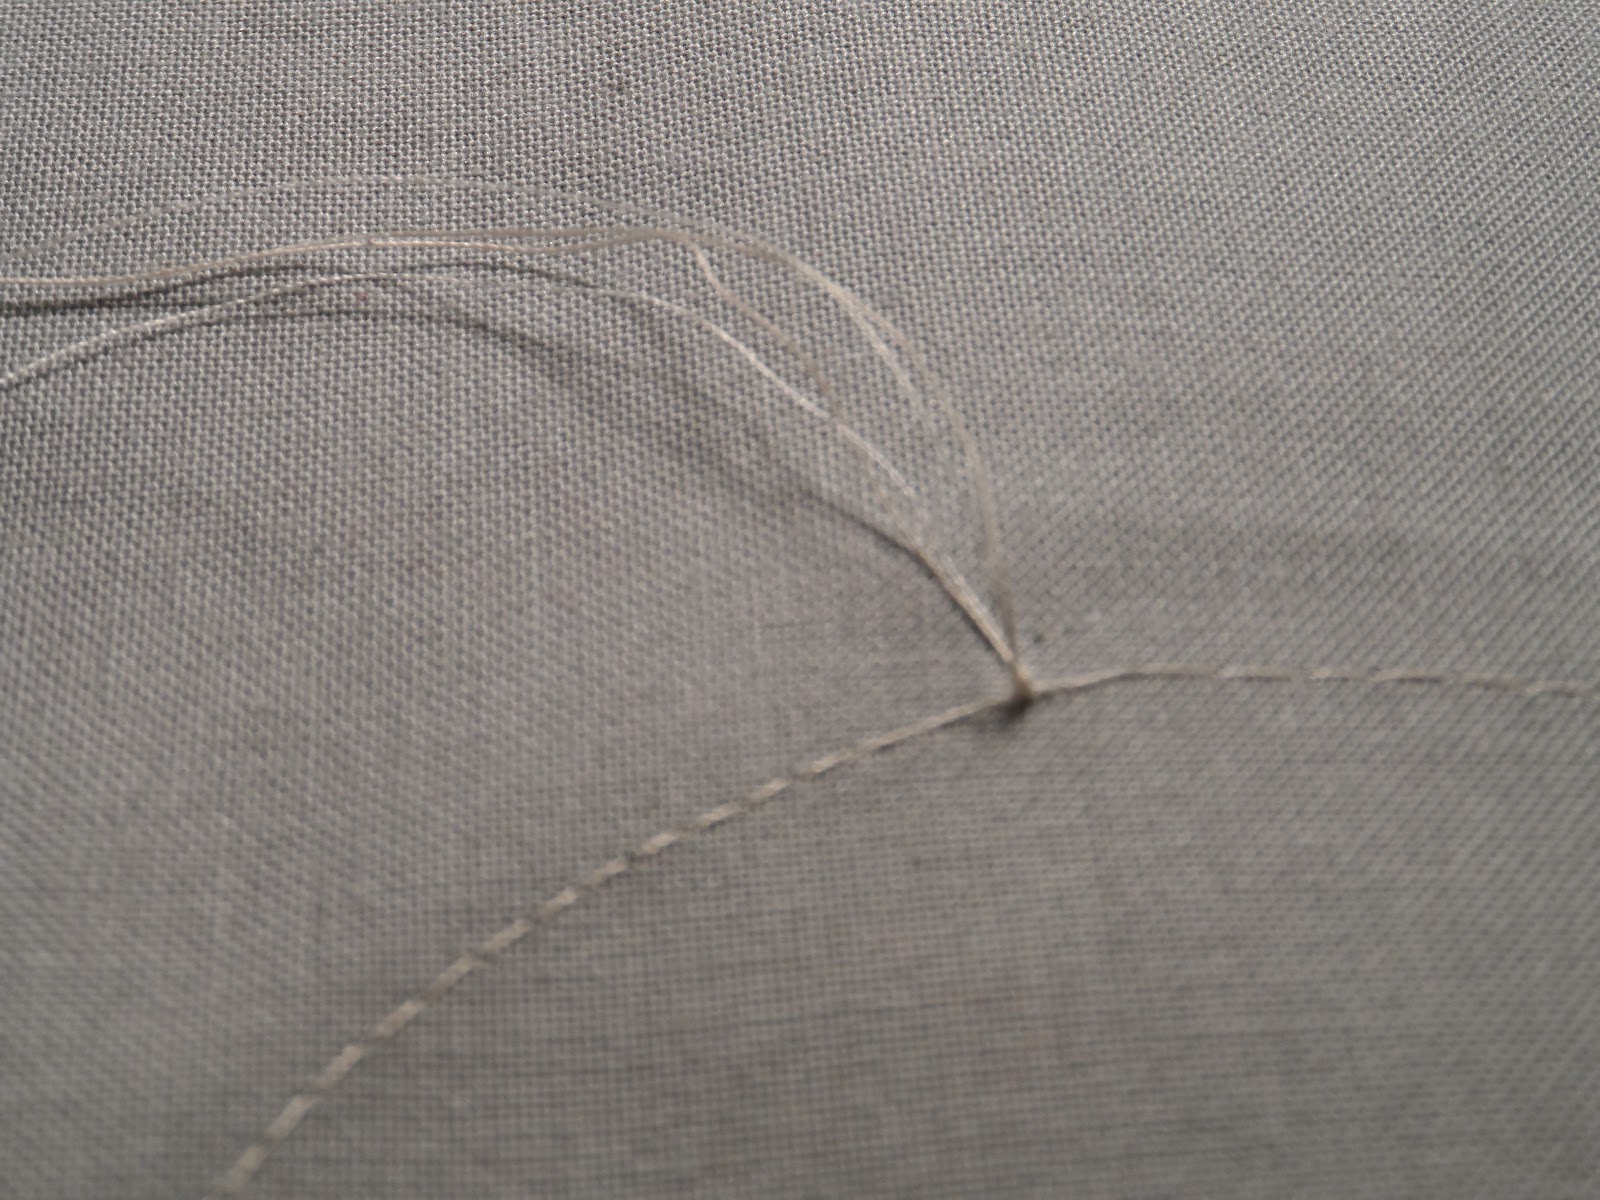
 

2 bobbin threads
2 bobbin + 2 top threads
Double knot & Trim

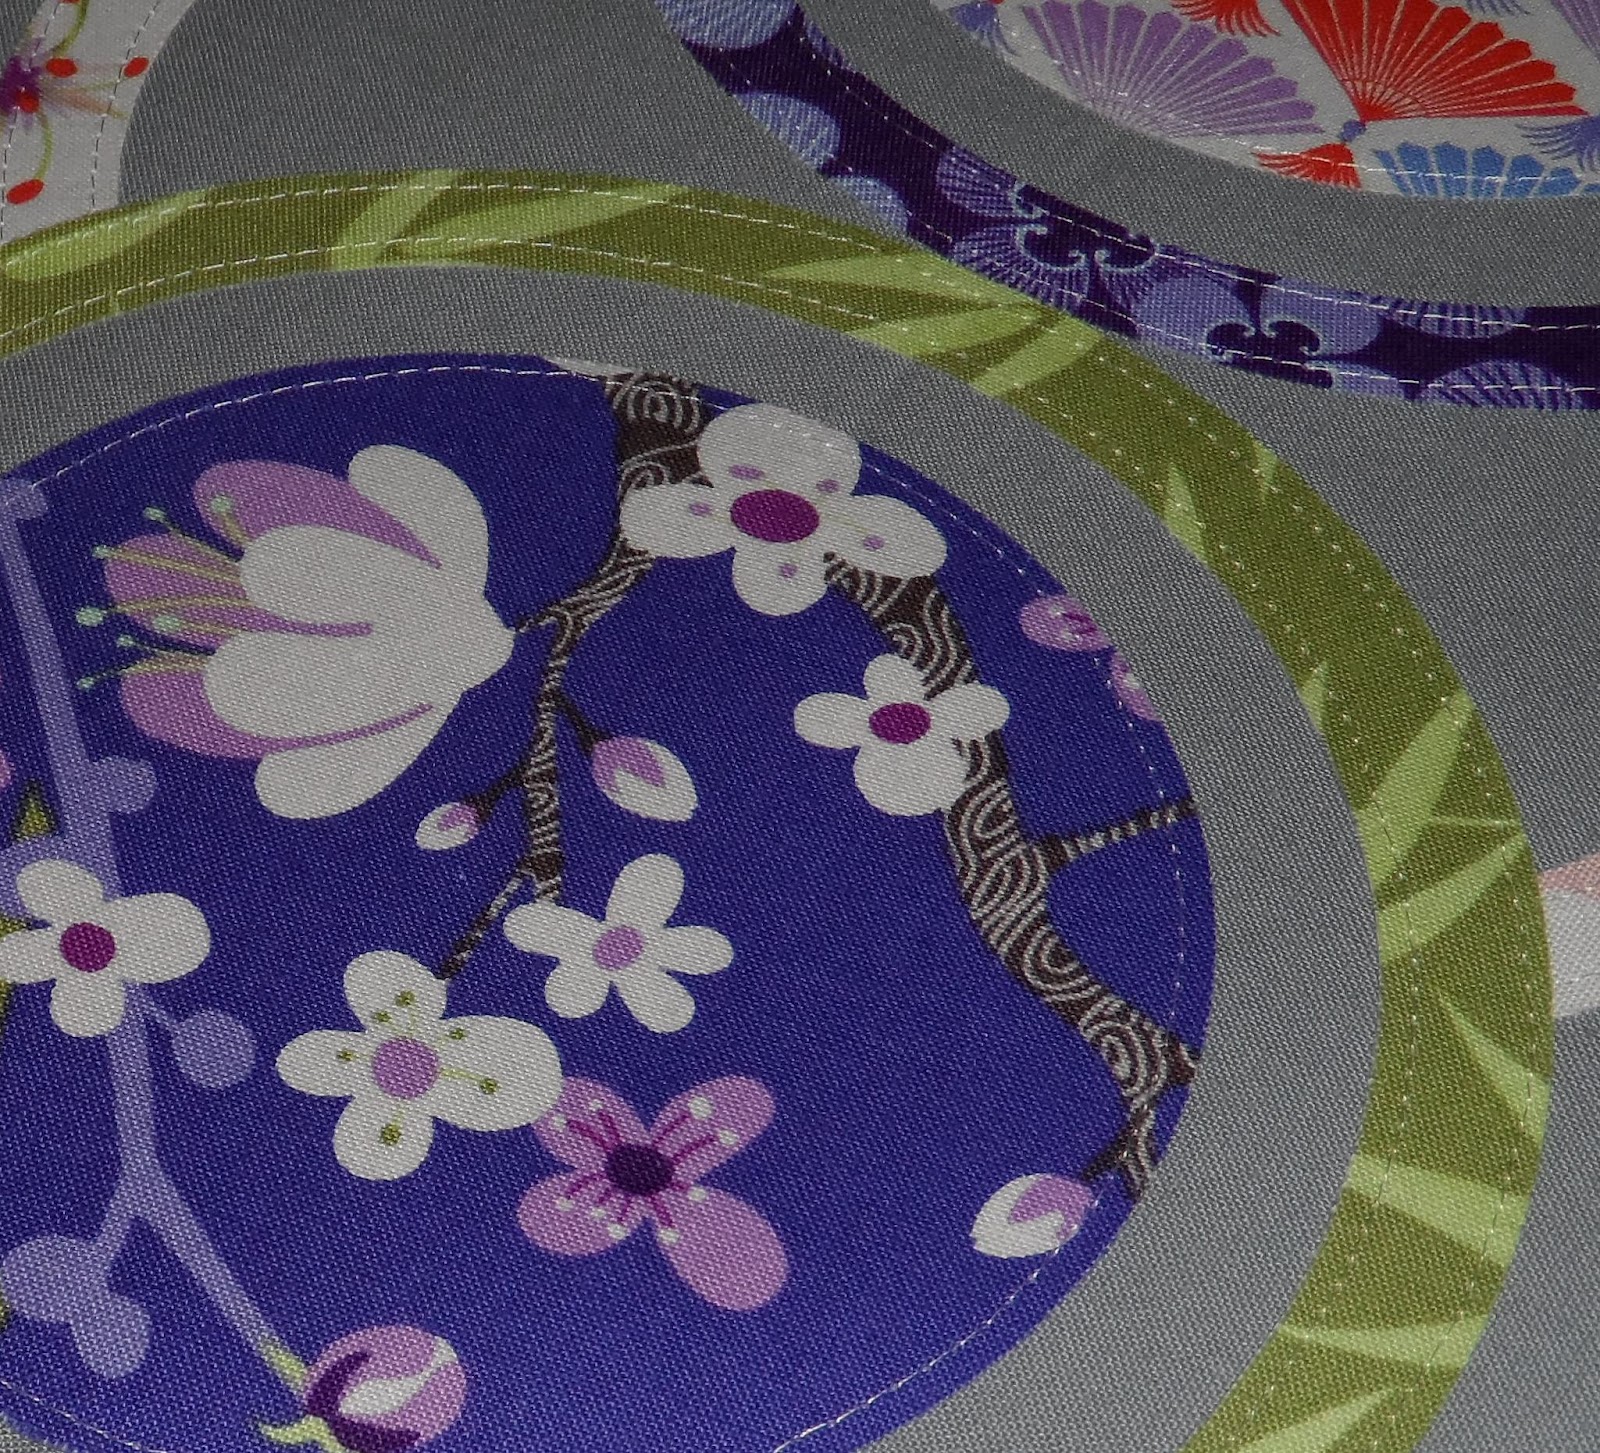
A close up of the appliqué…

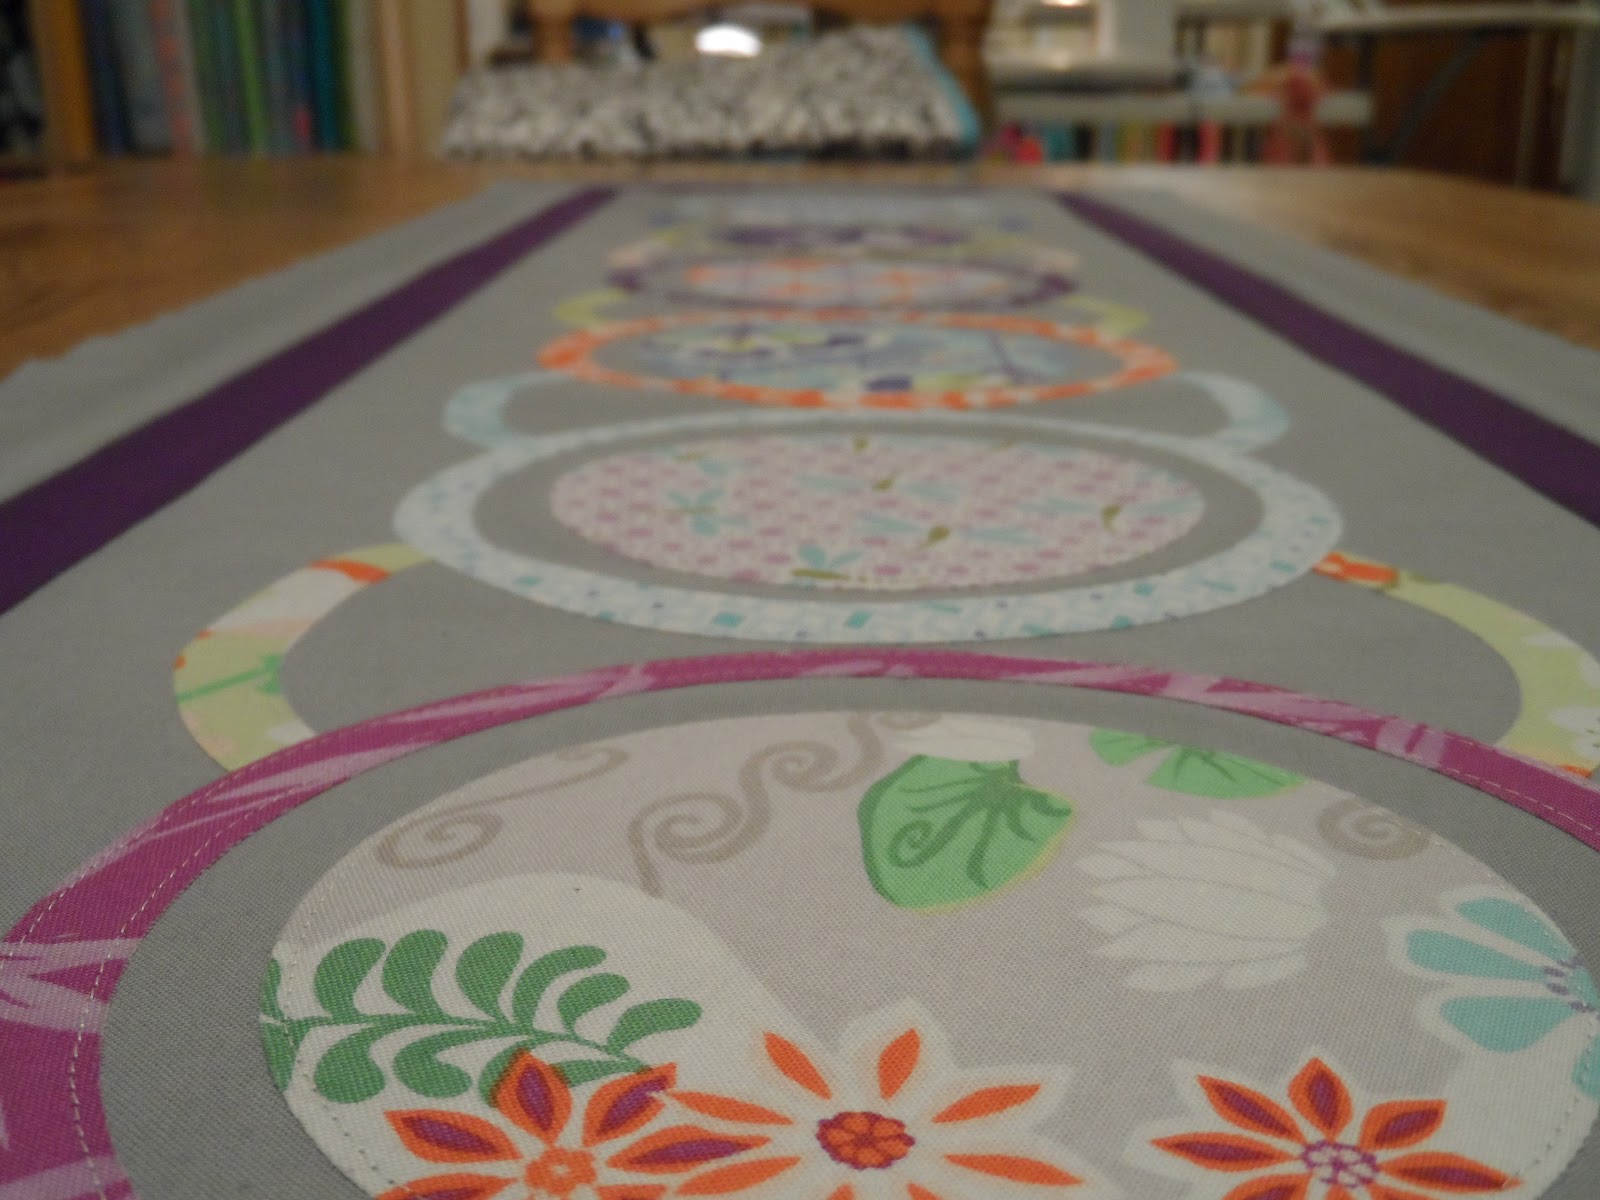
After everything is stitched down it’s time to add borders.

Almost done!

I added a 1″ inner purple border to frame the design and a 2.5″ outer grey border to finish it all off!


I know I didn’t give a step by step on the borders.  I figured you’ve had enough of me for one day.  Plus, these were standard run of the mill borders that don’t really need a lot of explanation.

Boy oh boy that ended up being a really long tutorial.  I hope I didn’t lose too many of you along the way.  It’s been a true pleasure hanging out over here at Melissa’s today.  Come check out my blog if you get a chance.  You just might see pictures of this bad boy all quilted!

Now I’m off to pack and get ready for Spring Quilt Market in Kansas City!  I’m too excited for all the quilty goodness coming my way!


______________________________________________________________

So I happen to have an Olfa Circle Cutter, a ton of fusible web, and a charm pack of the SAME fabric. I think I see a downsized version of this in my future!  Thank you so much for sharing Vicki!


Guest Post – Jessica from Noguchi Designs

Happy Monday everyone! I hope you had a fabulous weekend. I spent mine with Anne and family.  It was very low-key. I made blueberry pancakes on Sunday for breakfast and we BBQ’d pork chops for dinner, YUM!  Today I have my friend Jessica from Noguchi Designs here for you. I first met her through a sewing group on Facebook and we learned that we have a lot in common and have become fast friends. She is sharing a fabulous recipe with you today. Make sure you check out her facebook and blog – she is wonderful, and I will tell you more about that next week!
_________________________________________________________________________

This is really good, not spicy at all, Gluten & Dairy free!
Yum Yum Yum
This feeds my family of 6
Ingredients:
4 Steaks of your choice 1in think
Romain Lettuce
Spring Mix Salad
1 English Cucumber, halved & sliced
6 Cherry Tomatoes, quartered
4 Sweet Mini Peppers, seeded and sliced
1/8 of an Onion of your choice, thinly sliced
4 Big Limes, juice 3, half and slice 1
1pk/cup Fresh Mint Leaves, rough chop
1cup/handful Fresh Cilantro, rough chop
1pk Lemongrass, cut into 1in pieces
1/4 Sugar
1tbs Sweet Chili Sauce
1/3 cup Fish Sauce
1tbs Sesame Oil
1/4 cup Olive/Veggie Oil
PhotobucketPhotobucket
In a large bowl combine-
Cucumber, Tomatoes, Peppers, Onion, Lime, Mint, Cilantro, Lemongrass, Sugar, Chili Sauce, Fish Sauce, Sesame Oil, Olive/Veggie Oil
Let your 3yo daughter stir 😉
Photobucket
In a hot pan-
Cook Steaks until medium, don’t over cook
Slice into thin strips, combine steak and juices into the Veggie/Sauce bowl
Mix well
Cover and refrigerate 3 hours
When it’s time to serve-
Chop Romaine and mix with Spring Greens
Pull out Lime slices and Lemongrass pieces from Steak/Veggie bowl
Mix Steak/Veggie mixture well, serve over lettuce mixture, spoon sauce over as a dressing
Photobucket

_______________________________________________________________________

Doesn’t that just make you hungry!  Have a great day!


Guest Post – Karen from Quilting, Losing and Tea

Today I have Karen from Quilting, Losing and Tea. She has been such a wonderful blogging pal, even helping me proofread my very first pattern. She is quite talented and is here today to share with you her love of charms.
____________________________________________________________________________

I love charms!

Hi everyone!  My name is Karen, and I live in wonderful Minnesota.  I blog at Quilting, Losing and Tea.  I am excited to be visiting Melissa’s place today.  I started following Melissa last year right when she started Sew Bittersweet Designs, soon after I first discovered quilt blogs.
I was honored to be able to help proof her first pattern – Twirling Around. You can find this pattern for sale at The Intrepid Thread.  And the best part?  Melissa is donating the proceeds from the sale of this beautiful pattern to Charity.
Today I want to share the results of my love of charms!  I think these 5 inch squares – called charms or nickels, are magical.  I have only been quilting seriously since last fall.
I had done a couple of simple projects before that.  And through reading all of the blogs and looking at the lines of fabric out there, I discovered charms and charm packs!  I love how versatile they are.  And now I am discovering charm swaps! I thought I would share the projects I have made using charm squares.
My First Quilt Wall Hanging
The pinwheels are made from charms collected during the 2010 Minnesota Shop Hop.
Fabric by Holly Taylor for Moda.
Little Twister in fall colors:
This one now resides in Florida at my Dad’s house to remind him of our beautiful fall weather!
Fabric designed by James Meger – from the 2011 Minnesota Shop Hop.
Christmas wall hanging from a kit I won!
Fabric is Reindeer Games by Sandy Gervais and pattern is Done! by Sandy Gervais
By December of 2011, I had started my blog, and discovered the Schnibbles patterns by Carrie Nelson.  These adorable patterns use 2 charm packs.  Sherri at A Quilting Life and Sinta at Pink Pincushion sponsor a monthly Schnibbles, with a parade of those created at the end of each month.  Carrie herself donates a wonderful prize that is given randomly from the entries each month.   I won the very first month – a fat eighth bundle of Reunion.
January Schnibbles – Full House
Fabric:  Modern Workshop
February Schnibbles – I.S.T.H.
Fabric:  Bed & Breakfast by Connecting Threads and Pure by Sweetwater

March Schnibbles – Bibelot
Fabric:  Storybook Friends by Sandy Klop
(This now has the border added and will be finished up next week – it is a baby quilt for a coworker).
April Schnibble – Summer Days
Fabric:  Strawberry Fields by Fig Tree
I will be receiving a pack of 112 rainbow charms within the next 2 weeks, and my mind is already racing – trying to decide what type of rainbow quilt I can make.
I would love to hear about the quilts you have made using charms – whether an entire line like I used, or random charms you put together.  Are you a Schnibbler?
If you visit my blog, Quilting, Losing and Tea,, you can learn about The Charming Travelers and have a chance at being the next to receive them!
Thanks again, Melissa, for allowing me to visit!
Blessed Sewing, Karen
_____________________________________________________________________________________________

Thank you so much Karen, your quilts are absolutely beautiful and I can’t wait to see what you make with The Charming Travelers!  Now head on over to Karen’s corner of the blogging world, Quilting, Losing  and Tea, to go learn about a chance to receive those traveling charms (and follower her too while you are over there, you won’t be sorry you did!!!).


Scroll to Top