Author name: Melissa Dunworth

Owner/Operator

Happy Birthday to Me & Giveaway for you!

This Giveaway is closed.

Today is my 30th Birthday. For my 30th birthday my husband decided to be the most wonderful man in the world! He bought me a brand new Janome Horizon 7700!

Even the box is pretty – it weighed 26 lbs!

I took pictures of the unpacking and setting up process. I was just so giddy!

Toys (also known as feet – 15 in all, and instruction manual w/DVD)
So pretty!
All set up with her extension table!

I finished my first quilt block on her the day after I opened the box. Check it out!

Chevrons are all the rage – look for a tutorial on this block later this month!

I have already decided that she is a she, but I don’t know what I want to name her…which is where my giveaway comes into play.

I want our faithful brother lover readers to suggest names for my sewing machine.  You will have three chances to win some fabulous prizes!

There will be one grand prize winner who will receive…

A Heather Bailey pattern for the Happy Stacker Ring Toy, Small Stash Sewing: 24 Projects Using Designer Fat Quarters (forward by Amy Butler), and one “Little Wallet” (the pattern is by Valori Wells, and it is made by yours truly).

2 versions of the “Little Wallet”

Mr. Random Number Generator will pick a second winner and that person will also receive a wallet

Wallet winners will get to choose between a small wallet for business cards or a large wallet that can hold a Blackberry/iPhone/iPod with a Bluetooth headset – the fabric will be out of my stash and will not necessarily be one of the wallets pictured above)

Here’s how to enter:
  1. Leave me one comment with a name suggestion for my new machine
  2. Follow our blog and leave a second comment telling me that you are a current or new follower
  3. Like us on Facebook and leave me a comment here telling me that you did

**** for a bonus entry – blog, twitter or facebook about this giveaway and comment with the link that you did!

Make sure to tell me which type of wallet you want with each entry – small or large is good enough 🙂

This contest will be open from July 2nd until July 7th. This giveaway is now closed. The winner will be announced on Friday, July 8th.  Good Luck and get creative with those names!!!

Fourth of July Wall Hanging Tutorial

Last month Craftaholics Anonymous put up a post asking for people who were interested in participating in a handmade gift exchange with other people on the web. I jumped at the chance and I ended up with a wonderful partner, Staci from Just Sew Sassy. Let me tell you she’s got TALENT!  After viewing her blog and her Pinterest Boards I knew I had to come up with something really special for our gift exchange.  Staci mentioned several things she was interested in and the one that stood out to me the most was 4th of July decor.

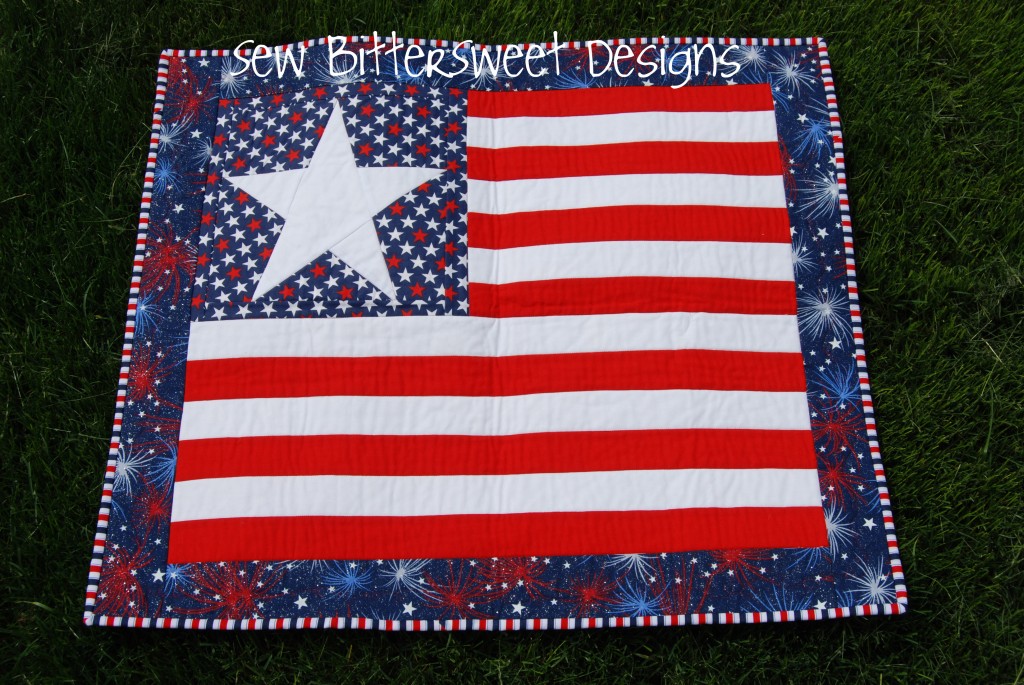
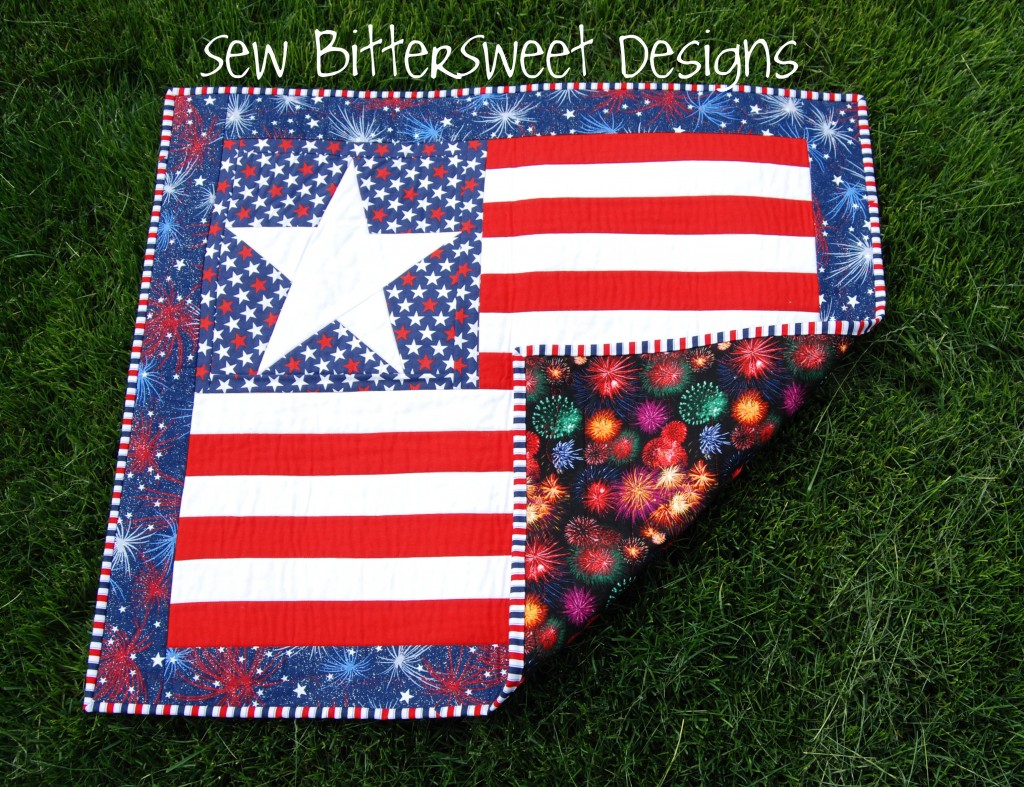
Here’s what I came up with:

Front View

I thought that you all might like a tutorial on how to make this patriotic wall hanging.

Supplies:

From top to bottom:
1/2 yard star background fabric
1/2 yard white fabric – I used Kona White – for stripes and star
1/2 yard red – I used Kona – fabric for stripes
1/2 yard blue fireworks for border
1/2 yard red/white/blue stripe for binding
Craft size batting
1 yard fireworks on black background for backing
1 spool metallic red thread for quilting

Cutting:

From star background fabric cut 2 – 2 inch strips
From white fabric cut 3 – 1 2/3 inch strips
From red fabric cut 4 – 1 2/3 inch strips
From border fabric cut 4 – 2.5 inch strips

For binding – following your favorite binding method cut after you have finished top and having final measurements.

Star Block: I got the pattern for my star block here – I would love to give you good instructions on paper piecing, but it was my first attempt and I have made several more attempts at it and have decided that I have a severe dislike for paper piecing. Maybe in my next life I will come to enjoy it.

Here is my finished paper pieced block – it measured approximately 8 inches with 1/4 seam allowance.

I squared my block up and then added borders from the star fabric – once done your star block should measure 10.5 inches – if it is bigger then trim it down to size

If it doesn’t measure 10.5″ – trim it down to size

Stripes:
Sew together 6 strips in this order – red, white, red, white, red, white – cut down to 24.5″ set aside

Add last cut red strip to bottom the last white strip on the remaining panel – cut down to 14.5″


Sew this to the side of the star block:

Next, attach 24.5″ panel to the bottom of the stars and stripes – square everything up.

Borders:
Add your borders from the blue background fireworks strips (2″ each)


I used basting spray to baste the backing to the batting to the quilt top.  I used both my free motion foot and my walking foot to quilt it. I went around the star and along each stripe with metallic thread using my walking foot. I did free motion quilting in the fireworks border.

Here is a close-up of the quilting on the star from the back:

What do you think? Would this quilt brighten up your Fourth of July?

Good luck making it and let me know if you have any questions. This is the third quilt that I have “designed” on my own and the first one that I have written instructions for.  How did I do? I know they are not the best but I am hoping with time I will get better! Happy 4th of July!


Mystery QAL Update

I have finally finished part 2 of the Mystery Quilt Along that I have been working on from the Quiltmaker Magazine.  Here is what my blocks look like so far:

Part 2 only blocks

Parts 1 & 2 together

I am still trying to figure out exactly what this quilt is going to look like. So far all I can think is the block from Part 2 remind me of argyle socks and sweaters. 

If nothing else these blocks are providing me with some ideas for a new argyle quilt design 🙂

What do you think? What QALs are you participating in this summer?

One Thing, One Week Challenge

Last week I wrote a list of three things that I wanted to accomplish. My list included making an Apple Pie (check), finishing my organization project for my sewing room (check) and completing Part 2 of the Mystery QAL that I am working on in Quiltmaker Magazine (check).  This whole setting attainable goals for myself has turned out to be a good thing…maybe something I will continue 🙂

I also decided to participate in the One Week, One Week Challenge over at Amy’s Creative Side:


Amy's Creative Side


For my challenge entry I decided the most important thing for me to complete was my organizational project and I am IN LOVE!!!

Here is a before picture of my cabinet:

Love the cabinet – hate the mess inside!

Do you remember my post where I was testing a tutorial.

Well, I made a few changes to the tutorial and decided to go big or go home.  I made 9 more baskets with my own measurements and they turned out GREAT!

I decided that ROYGBIV was the way to go, but I added a box for black and/or white fabrics and another box for multi-colored fabrics.

I am so in love with these boxes. This time I used Pellon Fusible fleece on the outer layer and a craft weight fusible stabilizer on the inner layer.  I used 2 fat quarters for each of the boxes, the bottom outside and the entire inside of each box was done in white linen – I was trying to add some strength and stability to the boxes because I know they are going to get used and abused.

After sorting out my fabric and filling the boxes it because painfully apparent what my favorite colors are – the blue, indigo, black/white, multi-color and red bins were stuffed to the gills!  I guess that means either I can’t buy anymore of those colors or I simply need to buy more fabric in the other colors so those bins can catch up 🙂

I know you are thinking that I need more boxes, but the rest of the fabric on the left hand side is minky and felt, which I don’t really want to put in a box. The fabric on the right hand side is unfinished quilts that are in some stage of completion and I really don’t want them in a box because that will just make them out of sight out of mind and they will NEVER get finished!

What do you think?  I am still waiting on a delivery of mason jars from my mom to do more organizing and prettying up, but the sewing room is definitely coming along!

Check out my “Where I Get Down” Page to see where I am linking up this week!
I am also partying at: http://todayscreativeblog.net/

Scroll to Top