binding

Label Your Quilts! A Tutorial

*****For this tutorial you will need to have a computerized sewing machine that is capable of doing a monogram. (Added Note: my machine is not an embroidery machine, it is a fancy quilting machine – Janome Horizon 7700)*****

I would like to start off by giving the person who taught me this method full credit, my mom, Michele Ward. She has been binding her quilts like this for as long as I can remember (she has had her current sewing machine for 20 years and it was state of the art when she bought it). Now that I have done a quilt label with this method, I am now out of excuses for not labeling my quilts and you will be too!

So to start off you will need to make your binding, I do not do a bias binding, I do a straight binding. 2.5″ strips sewn together, then folded in half and pressed.

Next you will need to program your monogram. As each machine is different I highly suggest consulting your owner’s manual if it is the first time using this feature on your machine. My manual failed to mention the max character limit and I had to do my label in two different sets.

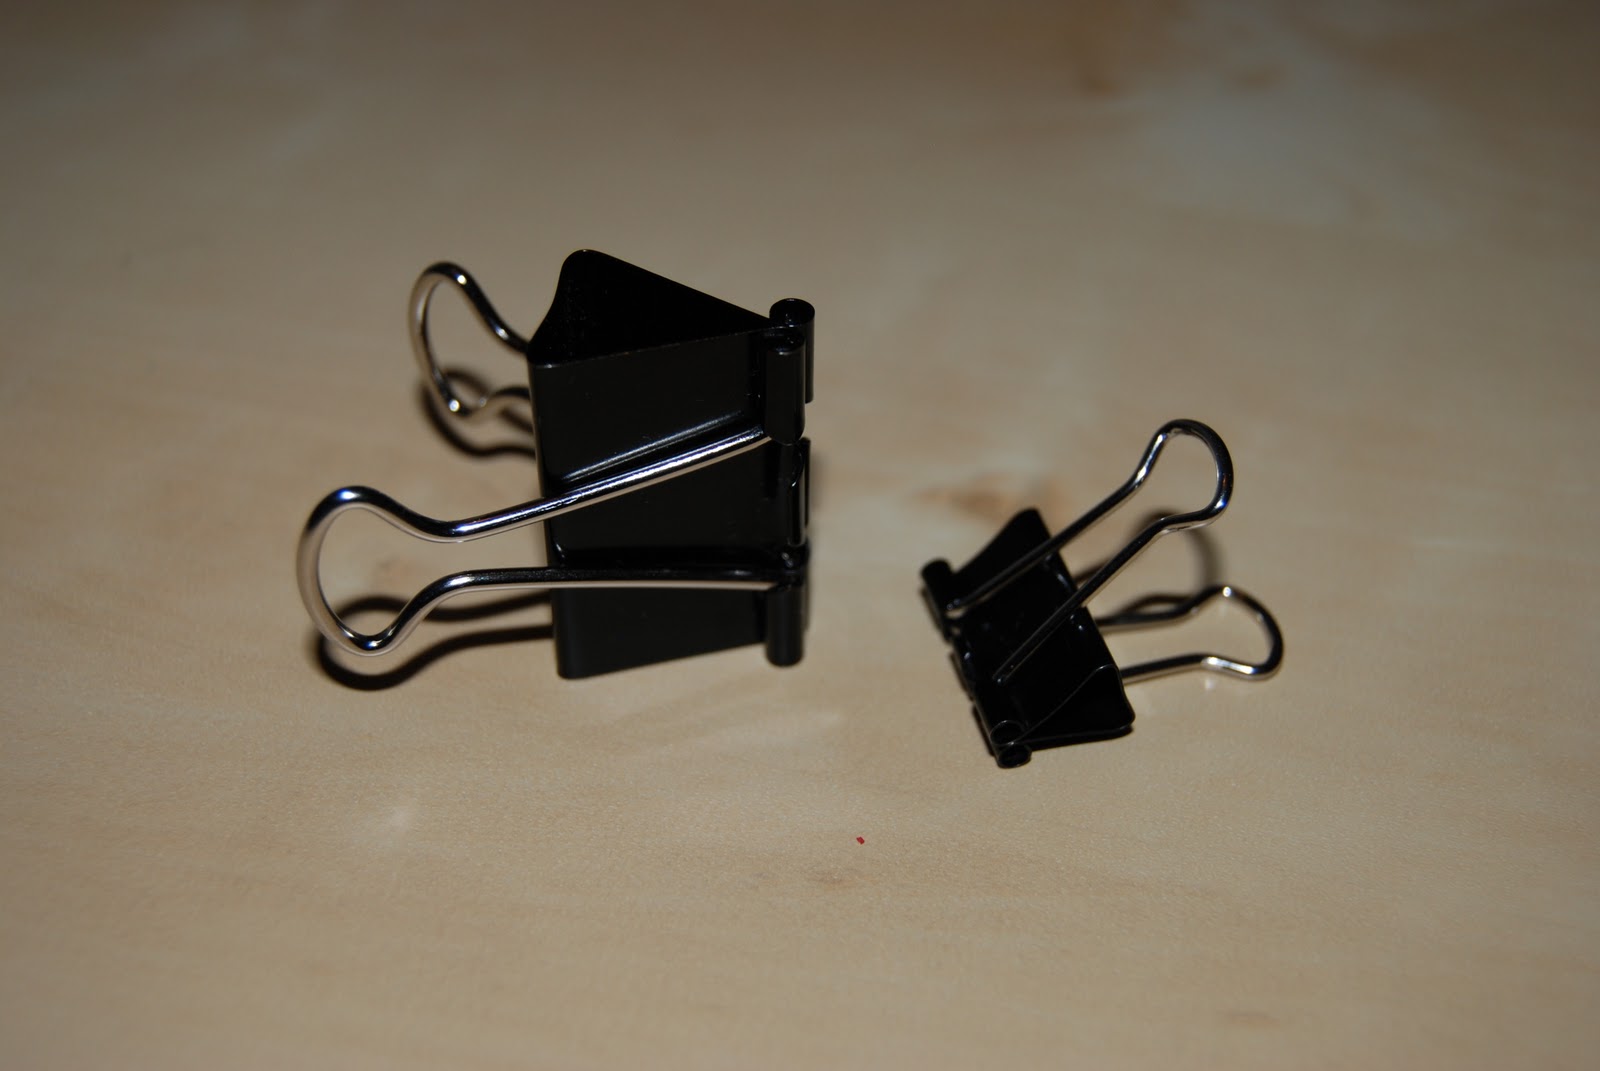
You are ready to sew your monogram, I would also suggest that you practice this on a scrap piece of fabric cut to 2.5 inches and folded as you would fold your binding strips. This will tell you exactly where to align your fabric. My fabric is placed with the fold up against the right hand side of the foot. (see picture below)

Once your binding is monogrammed you are ready to attach the binding to the quilt.

Number one hint when attaching the binding to the quilt is to make sure that the binding is facing down toward the quilt when you attach it and also make sure that you will not hit a corner when attaching it because that will ruin the label and make it impossible to read. This just takes some simple looking ahead.

Once your binding is attached to the front of your quilt, you can now choose to hand sew it down or you can machine stitch it down (this is my preferred method because of my RA – handwork is not my friend).

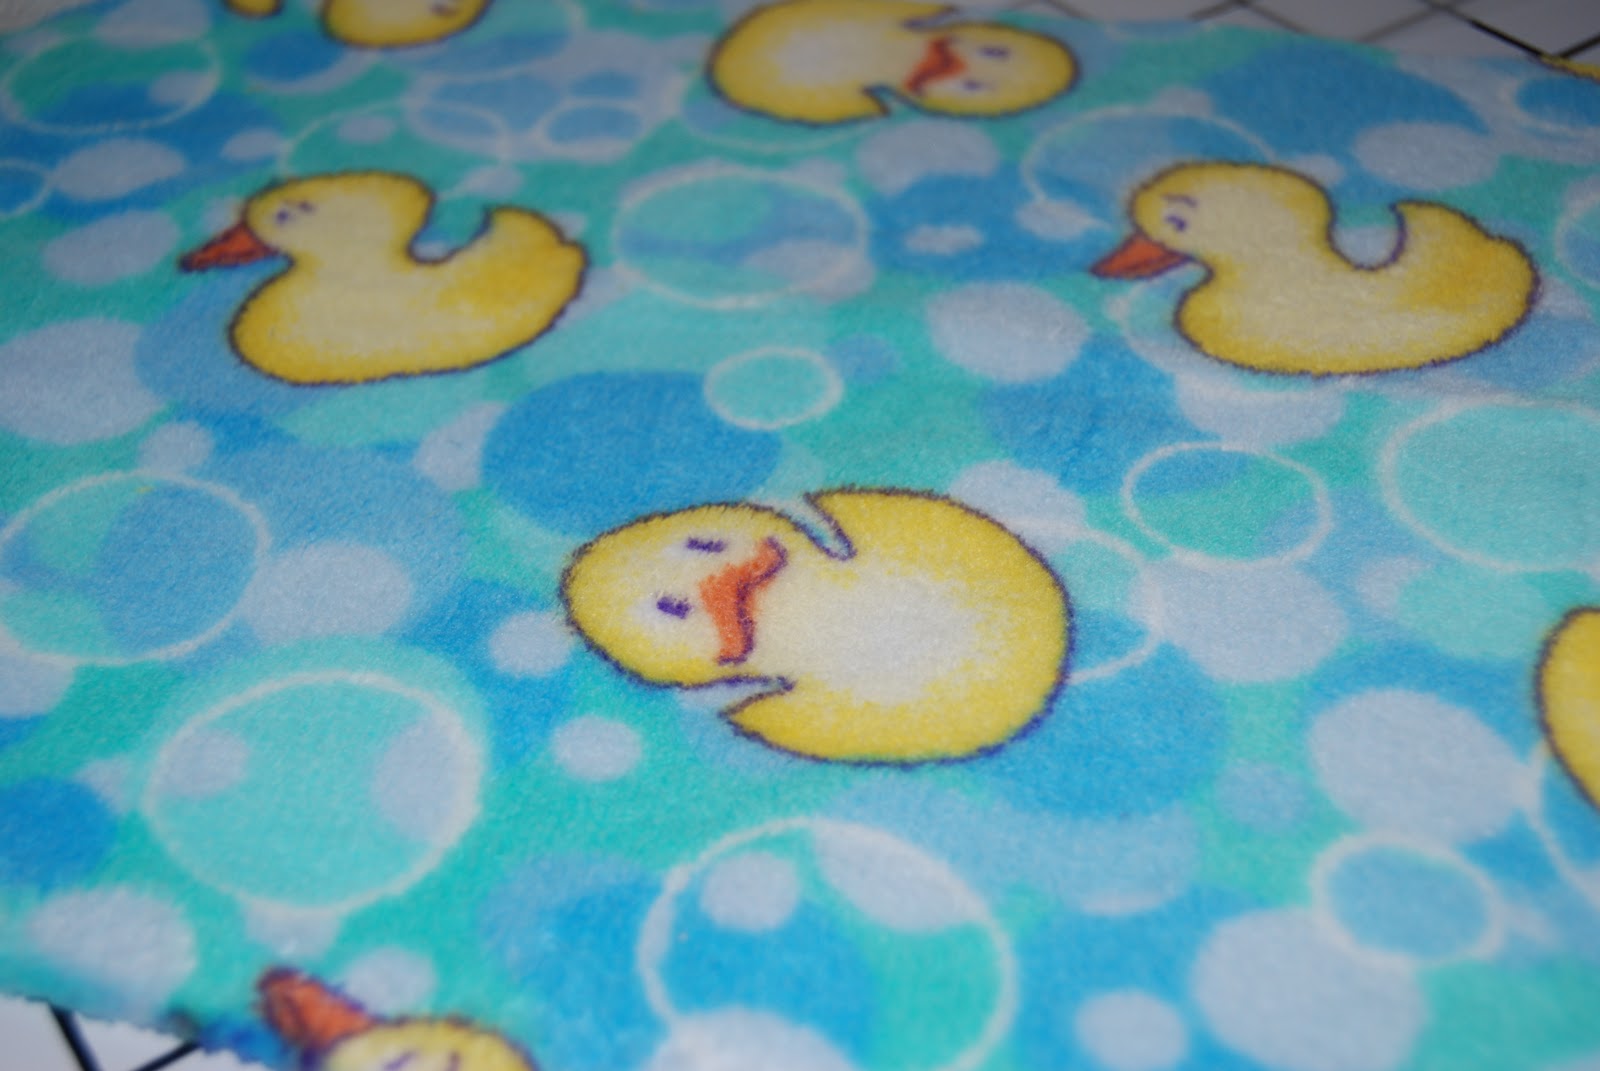
Here is another close up of the stitching. This binding should last the lifetime of the quilt and the nice thing is that you do not need to worry about it washing out.

My mom uses this method on all of her quilts. For baby quilts she records the baby’s name, birth date and weight. For other quilts she says who made it, who it was made for and usually a special message.

I hope you find this helpful, especially everyone who is like me and never finds the time to label. If it is part of our binding routine perhaps it will become more routine!

Quilt Binding Tutorial

In December I posted a quickie basting tutorial and I asked if anyone would like me to do a binding tutorial, several people asked and it is time for me to deliver!

This is a picture heavy tutorial – my apologies!

Valentine Pinwheel Table Runner

The steps that I am going to detail in this tutorial will work for virtually any machine quilt binding that you will do.

For the Valentine Pinwheel Table Runner you will need three strips measuring 2.5” x WOF (width of fabric) – I am using solid fabric for my border. If you are using a patterned fabric make sure you sew your strips right sides together.

Placing fabric corner to corner, right sides together, take a ruler and draw a line with an air or water soluble pen/pencil from corner to corner.

Pin in place and sew along the line you drew.

Place your ruler with the ¼” mark on stitched line – trim triangle off

Press your fabrics open and repeat until all your strips are sewn together

Fold your strip in half and press along the entire strip.

Note Before: when you are going to do the entire binding on the machine – sew your binding to the back first. If you plan on hand sewing your binding down – sew your binding to the front first!

Place the raw side of the strips to the quilt edge. I like to start in the center of the quilt and have an excess of 8-12 inches of strip when you start sewing.

Sew the strip to the quilt with a ¼” seam. Stop sewing when you are ¼” from the corner.  (I like to measure with a tape measure and place a pin so I know where to stop).

When you reach the corner, you will want to fold the fabric back (refer to picture)

The fold your fabric back down  – align it with the next edge you will be sewing on (you are creating your mitered corners)

Repeat the last two steps at each corner. Stop sewing when you are 8” from where you started.

Fold the strips in towards each other – meeting in the middle, fold the strips back on top of themselves.

Fold the strips down, making a point

Using a quilting ruler – place it on the edge of the quilt and cut off the excess fabric from the binding strips.

Place the strips right sides together, draw a line corner to corner, sew on the line and trim ¼” from stitching and press open

Finish sewing down your binding

Fold your binding over to the front, at this point you can pin or not pin (I start out pinning usually and then end up just folding the fabric over with my fingers).  Pick a decorative stitch or straight stitch. NOTE:  Make sure when you fold your fabric over that you are covering the stitching from when you attached the binding to the back!

I like to pin my corners down until I am ready to sew them (literally right until the needle is about to hit the pin). I also leave my needle down, lift my foot and turn at the corner rather than starting and stopping at each corner.

Congratulations you have just machine sewn your binding!

NOTE: Don’t forget, I am one of the bloggers who is going to lose Google Friend Connect in March 2012, please take a moment and follow me via Bloglovin’, Facebook, RSS or networked blogs.  You are important to me and I want to be able to stay in contact with you!  Check my side bar for all the best ways to stay in touch after GFC goes bye bye!


How do you bind your quilts? A few tips

I have been quilting for about 10 years now and until October I have always bound my quilts the exact same way each time. I have cut 2.5 inch strips, sewn them together, folded them in half, sewn them to the front of the quilt and hand sewn them in the back. A couple of times I have skipped binding all together and just used the quick turn method (which really ISN’T that quick if you ask me!).

In October, I started working on Bottled Rainbows and I decided to do it as a quilt as you go project. This meant that instead of just having a binding around the outer edge of the quilt blocks, I had a binding around each block – that is 16 individual bindings…which is A LOT of hand work for someone who has arthritic hands.

Solution for tired hands:

When I blogged last week saying that the Flora quilt would be the first time I machine stitched a binding – I had actually forgotten about the Bottled Rainbows quilt – mainly because in the QAYG technique this is considered to be sashing – even though it is really the exact same method as binding.

I don’t have a great pictures of the binding on Fancy Flocks, you can kind of see in this picture that I just did a basic zig zag stitch on the binding.

For the Flora Table Runner I used the same Feather Stitch that I used for Bottled Rainbows, but I put the stitch right at the edge of the binding.

Finally I used it in a couple of mug rugs I made this weekend, I definitely could have hand sewn these because they are so small, but I was finally starting to really get a handle on machine sewing the bindings and it had finally become fun instead of frustrating (it takes a little practice).

For this project, I used a decorative star stitch on the binding and it turned out really cute – love the Christmas colors!

A quick break down of how I did it:

1. Make your binding strips using whatever method you usually do.

2. Attach them to the BACK of your quilt (when I hand sew I usually attach them to the front so my horrible stitching is on the back of the quilt)

3. Fold the binding to the front – now here you can choose to pin or not pin, I only pinned in half the projects I made (Bottled Rainbows and the mug rugs)

4. Select your stitch: Straight stitch, decorative, basic zig zag

5. Start sewing, if you are holding down the binding or pinning, simply make sure that you have folded the binding over far enough to cover the stitches from attaching the binding to the back you don’t want those to show after you have done your decorative stitching.

6. When you get to your mitered corners, put on decorative stitch in each corner and that will be sufficient to hold down the corner

Easy Peasy!  Lyanna from Purple Panda Quilts – left me an awesome comment with a description of a technique she uses to bind quilts on this post here, check it out to for more ideas on how to machine bind your quilts. I seriously need to find the fusible tape she is talking about – that would make it SO much easier! I hope she does a more complete tutorial of her method soon!

Have a great Tuesday!

NOTE: Don’t forget, I am one of the bloggers who is going to lose Google Friend Connect in March 2012, please take a moment and follow me via Bloglovin’, Facebook, RSS or networked blogs.  You are important to me and I want to be able to stay in contact with you!  Check my side bar for all the best ways to stay in touch!

Two Tricks for the Price of One!

This week I learned two new tricks that have made two sewing tasks SO much easier! I thought I should share them with you.

I learned that binder clips are not only effective at holding together large amounts of paper but they are also effective at holding fabric in place.

I also learned that I no longer hate sewing with plush/minky fabrics!

Binder clips now have a whole new meaning for me. As a quilter I hand sew all of my bindings. I was taught by my wonderful mother to pin them in place and sew, moving the pins as I went.

Do you see all those pins at the bottom?

This method has worked for me for years and probably for you too…but I have recently discovered there is a better way!  BINDER CLIPS!

Now, the beautiful thing about these binder clips is that I didn’t get any bunching while I was working. The binding remained smooth as silk making it so much easier to sew! Plus, as an added bonus there was only one sharp pin/needle to stick myself with, instead of five or six. I will never go back to pinning again!
The other trick I learned this week is how to sew minky/plush fabrics. I am making a quilt for a friend of mine who is having a baby. It is a kit that I picked up from my local craft store. It is the second time I have attempted one of their kits, the first time didn’t turn out so well because of the minky…well it didn’t turn out at all because I just GAVE UP!

This time though, I listened to my mom. She is a GENIUS! She told me to pin the heck out of my fabrics and put the minky/plush side facing up, but that isn’t even the coolest part of her insight. She also told me to sew using my walking foot!  Who knew what a difference a walking foot could make?!?

See all those pins

Place your pine every 1/2 inch and sewing with your minky/plush fabric on top!

I have a whole new appreciation for this foot!
The first time I tried sewing with minky/plush fabrics I did everything but the walking foot and the needle kept going up and down but the fabric wasn’t moving forward. The walking foot though is designed to evenly feed your fabric under your foot and it works great for minky/plush fabrics. If you haven’t tried it, I would highly highly recommend it. What a difference a foot can make!
Scroll to Top