Blog Hop

Goings on in blogland

A couple of my blogging friends have some pretty exciting things going on right now.

First, Jennie and Clara from Clover and Violet have A Season By Hand going on. For the next two months they will have inspirational projects handmade projects on their blog from some of your favorite bloggers (including me!). There will also be contests and prizes! Go check it out!

Beth from Plum and June is holding her second annual Let’s Get Acquainted New Blogger Blog hop. I participated last year and had a blast getting to “meet” new bloggers from all over the world. Go check it out!

Plum and June

Michele from Quilting Gallery is holding her second QAL called “Aiming for Accuracy”.  The blocks and over all quilt design look fantastic and she is offering some great prizes for those who quilt along with her, you will want to check out the sponsors page, you might just find someone you know on there (wink wink).

Aiming for Accuracy Quilt-Along

And last, but certainly not least, Kristy from Hopeful Threads just announced her first ever ongoing project. I am so very excited for her and for those that will be on the receiving end of this wonderful project. The ongoing project is called the Fluff Project – go check it out, I know you are going to want to sew some fluff too!

Fluff Project (large)

I know there are tons of other things going on too, but I wanted to draw your attention to these projects, as I think they are going to be lots of fun!

A Season By Hand

Hi Everyone! I am so excited to share with you a wonderful blog hop I will be participating in this summer – A Season by Hand with Clover & Violet.  My project will be unveiled at the end of this month and I can’t wait to share it with you!  As anyone who follows me on Facebook knows, I spend much of my evening basting away on my hexies while hanging out with my hubs.

Jennie and Clara are the creative minds behind Clover & Violet and they have organized a Season By Hand! This summer they have arranged some seriously amazing bloggers who are going to show off some inspirational projects for you to enjoy. There will also be sponsors throughout and this fun series will have a linky with prizes at the end to share projects you have created.

Hope you enjoy the series. I can’t wait to share my project with everyone!

Schedule:

June 3 – Kick-off
June 4 – Alyce – Blossom Heart Quilts
June 6 – Emily – Mommy’s Nap Time
June 7 – Jodi – Pleasant Home
June 10 – Suz – PatchworknPlay
June 11 – Beth – Plum & June
June 13 – Jenniffier – Jenniffier’s Sometimes Creative Life
June 14 – Heidi – Fabric Mutt
June 17 – Rachael – Imagine Gnats
June 18 – Elaine – Dashasel Sews
June 20 – Sandie – Crazy ‘Bout Quilts
June 21 – Amy – Lots of Pink Here
June 24 – Danny – Mommy for Reals
June 25 – Cindy – Tops to Treasures
June 27 – Leanne – She Can Quilt
June 28 – Melissa – Sew Bittersweet Designs
July 1 – Cindy – Fluffy Sheep Quilting
July 2 – Rhonda – Quilter in the Gap
July 3 – Trish – Notes of Sincerity
July 5 – Erin – Why Not Sew
July 8 – Chrissy – Sew Lux
July 9 – Carrie – A Passion for Applique
July 11 – Katy – The Littlest Thistle
July 12 – Kelley – Casa Crafty
July 15 – Emily – Strawberry Patch
July 16 – Heather and Megan – Quilt Story
July 18 – Annette – My Rose Valley
July 19 – Katy – There & Back
July 22 – Melissa – Lilac Lane
July 23 – Jenelle – Echinops & Aster
July 25 – Shanna – Fiber of All Sorts
July 26 – Jane – Jane’s Fabrics and Quilts
Wrap up and Linky running July 26 – August 5, 2013

Share what you’re making:

Flickr group

Facebook group

Instagram – #aseasonbyhand

Sponsors:

These lovely shops and pattern designers are sponsoring some amazing giveaways throughout the series, so make sure you stop over and show them some support!

Supplies:

Jane'sfabricllogopleasant home smallSewLuxFabric

Patterns:

LilacLaneelefantzEchinops&AsterFrosted Pumpkin StitcheryAneelaHoey_LogoWO150quiltstoryimaginegnats

Fabric:


StashFabrics160x160160x160knotted thread 125fabricwormi don't do dishes intrepid thread buttonpinkchalkfabricFat Quarter ShopFabricFlybutterfly kisses fabricSewLuxFabric

Quilting Secrets Blog Hop – My Favorite Cutting Tools

mrs pickles garden

Good morning and welcome to day four of the Quilting Secrets Blog Hop hosted by the wonderful Mrs. Pickles!

If you have missed any days, here is the schedule:

December 31st, Christine from Quilt Monster in My Closet
January 1st, Linda from Buzzing and Bumbling
January 2nd, Barbara from CatPatches
January 3rd, Melissa from Sewbittersweet designs
January 4th, Sharon from Vroomans Quilts
January 5th, Sue from Quilt Times
January 6th, Hayley from Mrs.Pickles Garden

There have been some amazing secrets shared so far, so make sure you go and check everyone out!  I would also like to thank our wonderful hostess, Mrs. Pickles, for organizing this wonderful hop and inviting me to join. She has also arranged some pretty fantastic prizes, so make sure you read to the bottom of the post.

Today I am going to share some of my favorite cutting tools. Accurate cutting is ESSENTIAL in quilting, especially when we are dealing with 1/4″ and scant 1/4″ seams. Being off by just a couple millimeters can change the size of your entire quilt.

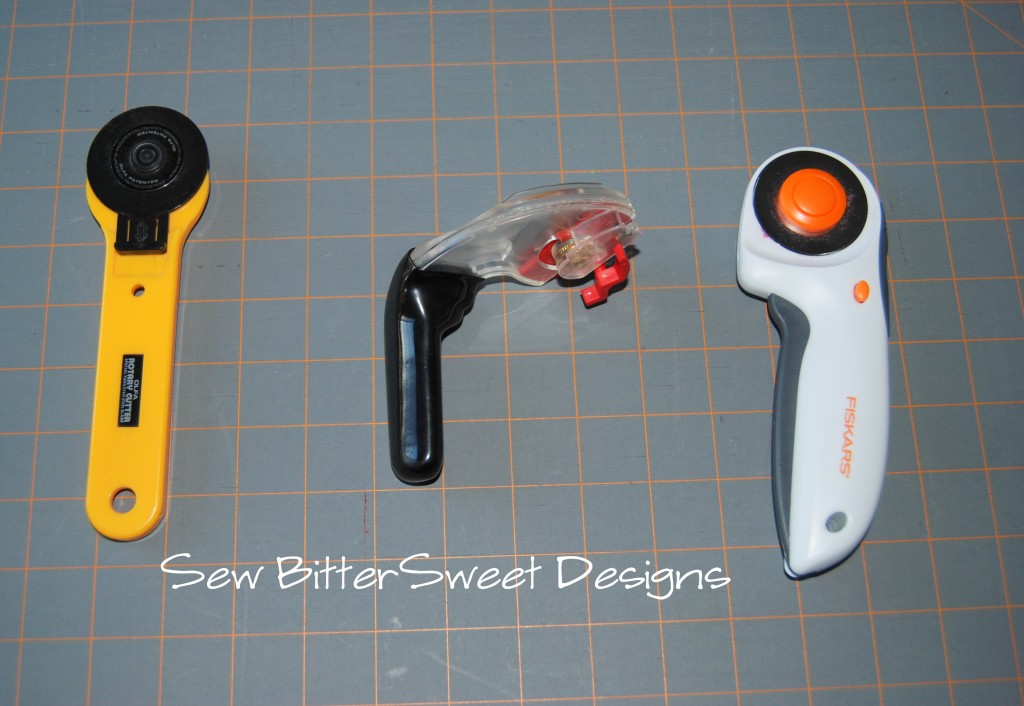
To start with, if you are completely new to quilting and only own a pair of sharp scissors, my first recommendation is to invest in a good rotary cutter. There are lots of different types, including ergonomic ones.

The reason rotary cutters are preferred is that they are super sharp and the blade is super thin. This makes cutting easy and accurate.

Next you will want to invest in a rotary cutting mat – pictured above. And then some quilting rulers.

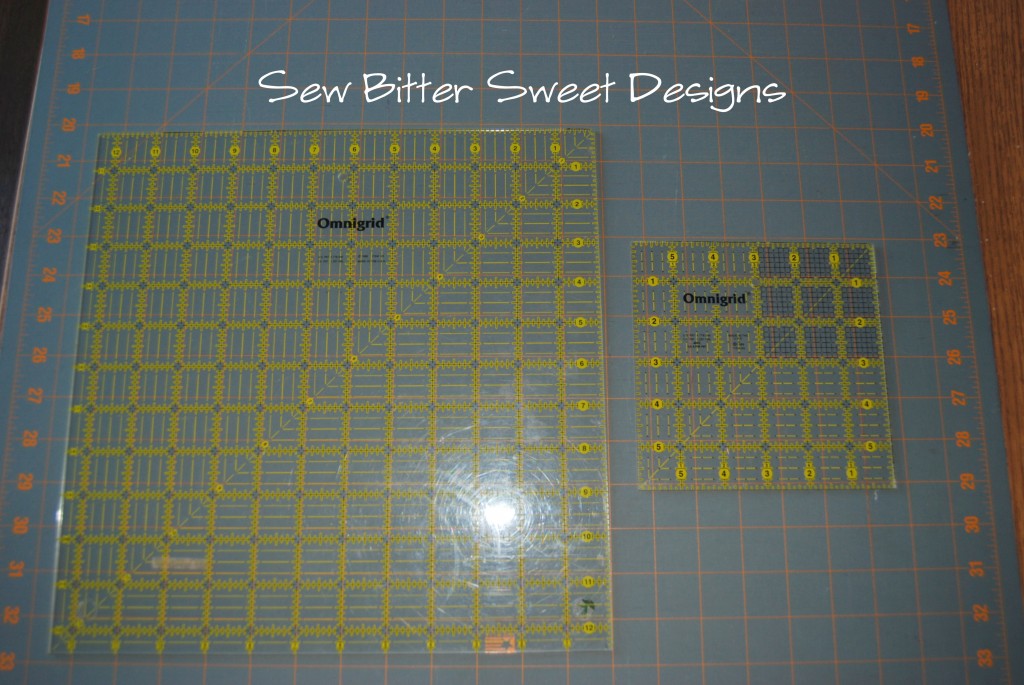
As you can see from the picture above…I have a thing for rulers, and I have them organized so that they are easy to get to when I am cutting. I use curved and bent screws to hold them to my walls. They are easy to grab.  When you are first starting you do not need all of these, for me they are mostly toys…I mean tools. The 2 that I would highly recommend to start with is a 12.5″ square ruler and a 6.5″ square ruler.

I recommend these because the 6.5″ ruler makes it easy to cut and trim smaller pieces, you can do that with a 12.5″ ruler, but the smaller one makes it slightly more manageable. I recommend the 12.5″ ruler because if you are working with larger blocks you will need this size to easily trim them down.

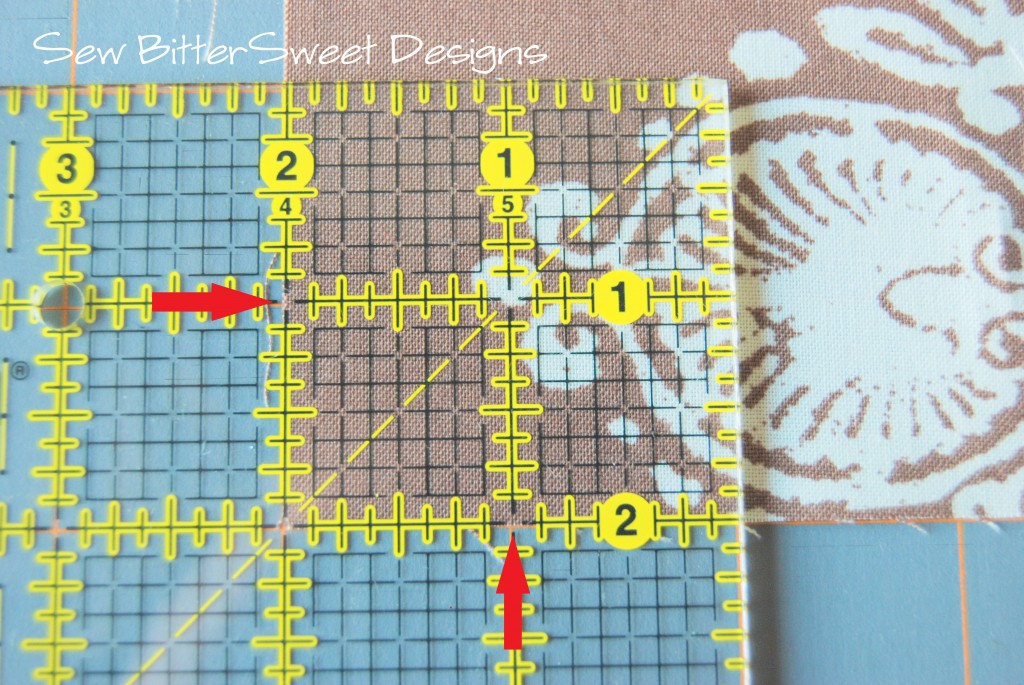
When cutting your fabric I have found that the best way to account for the seam allowance in piecing is to line your fabrics up as below:

Your fabric should sit flush with the bottom of the black line on the bottom 2 inch line. It should also sit flush with the left hand side of the black 2 inch mark on the top.  Having your fabric lining up flush with the black mark will give you a smidgen more fabric and it will help you achieve your perfectly sized blocks.

You DO NOT want your fabric to line up on the inside of the lines, always on the outside. This ensures accuracy and accounts for any length lost when pressing your fabrics.

Now rotary blades and rulers are not the only cutting tools I use in my quilting. I also use a variety of scissors.

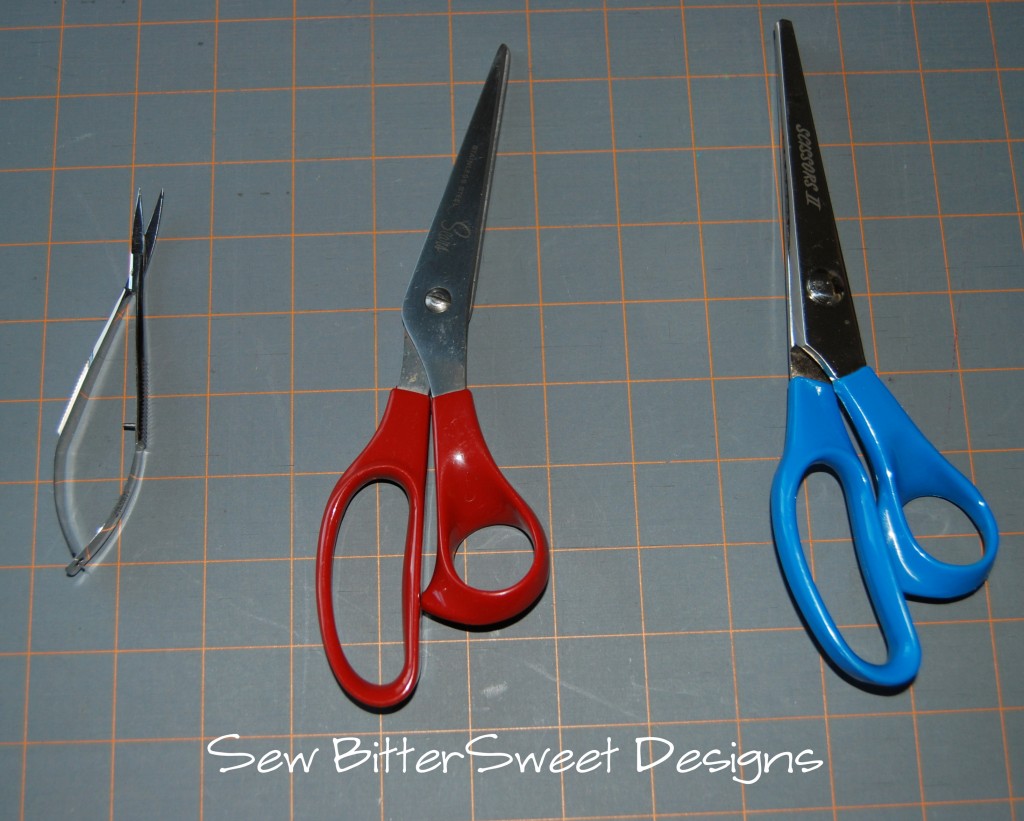
From left to right: Applique Scissors, Sharp Cutting Scissors (these are my mom’s I usually use my Gingher Dress Maker’s Shears), and Pinking Shears.

I personally love the applique scissors and use them ALL the time. I use them to help get a thread that I can’t reach under my needle, I use them when I’m basting my hexies, I use them for EVERYTHING!  What I love most is that you squeeze them to cut as opposed to having to open them. This is much easier on my arthritic hands and I highly recommend a pair!

I use my Ginghers when I am paper piecing to trim my seam allowances down. Nobody needs to know that my seams are not trimmed exactly down to 1/4″. This makes the process SO much faster!  I use the pinking shears when I am sewing any kind of curve, it is much easier than cutting little triangles (I gleaned this tip from the fabulous Kristy at Hopeful Threads and now use it in my regular sewing).

Being able to sew an accurate quarter inch seam is essential but if you are not cutting your fabrics accurately it will not matter if your quarter inch seam is accurate. Invest in the right tools and take the time to line your fabrics up perfectly and your quilting will improve instantly!

This giveaway is now closed

The winner is: Kathy MacKie – Congratulations! You will receive an email from Mrs. Pickles!

And now….A Giveaway! Today’s lovely prize was donated by Clint Masden from Green Fairy Quilts. One very luck commenter will win one

Moda Jelly Roll – Bear Country School
Includes 40 strips at 2½ x 44 inches

Company Info

Judi Madsen, aka the Green Fairy of Green Fairy Quilts, started piecing and quilting at a young age.  She grew up watching her

What used to be a hobby, she and her husband have now turned into a full-time, successful business selling Judi’s many quilt pattern designs with pattern distributors, fabric stores and quilt shops all over the country, and into foreign countries.  They have expanded with their on-line store selling a large variety of fabric products.

Judi is an award winning Long Arm Machine Quilter, Clint manages the website, and stays busy shipping out all the orders and is also in charge of buying all the fabric you see on the website.

http://greenfairyquilts.com/

To win, simply leave me a comment. If you need inspiration: tell me your favorite cutting tool.

Followers will get an additional entry – just leave a second comment telling me how you follow!

This giveaway will be open for 24 hours. Good luck!

Glorious Autumn Block Party

Glorious Autumn Block Party and Super Deals for Quilters
Welcome! Today is my stop on the Quilting Gallery Glorious Autumn Quilter’s Block Party and I can’t tell you how excited I am! I would like to take a moment and thank Michele for all of her hard work putting all of this together for us, due to her hard work of gathering some AMAZING designers there are 45 free block designs available for you!  In addition to 45 new block designs, Michele has also arranged Quilter Super Deals, so make sure you head over to Quilting Gallery and check them out. While you are over there make sure you check out my Designer Profile, you can see a picture of the first quilt I ever made! I haven’t been able to share it before because I never took pictures until this summer!!!

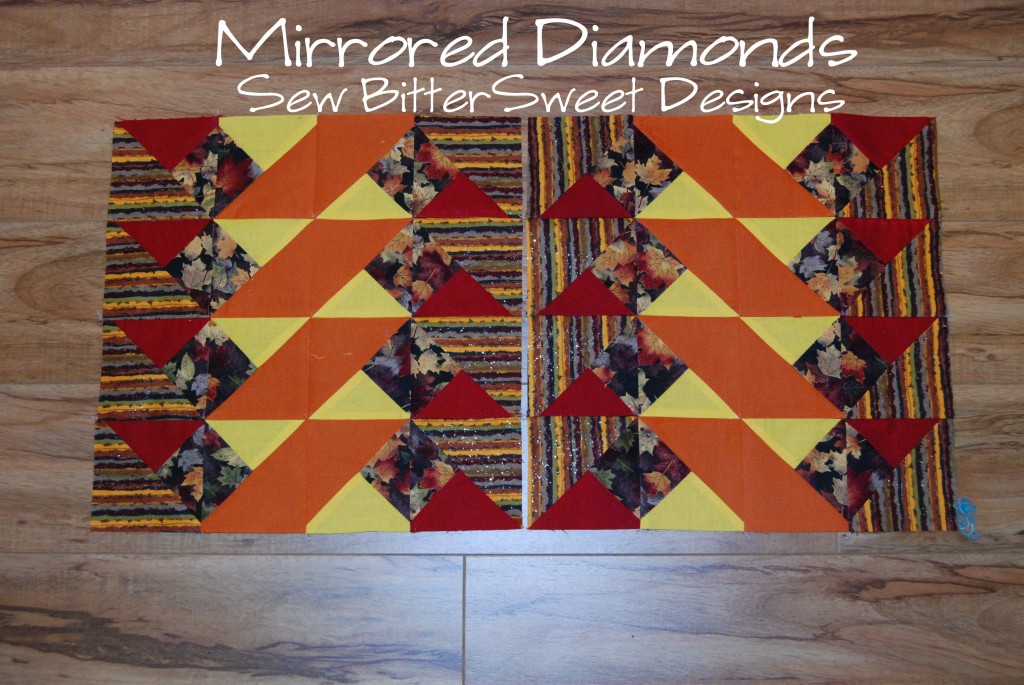
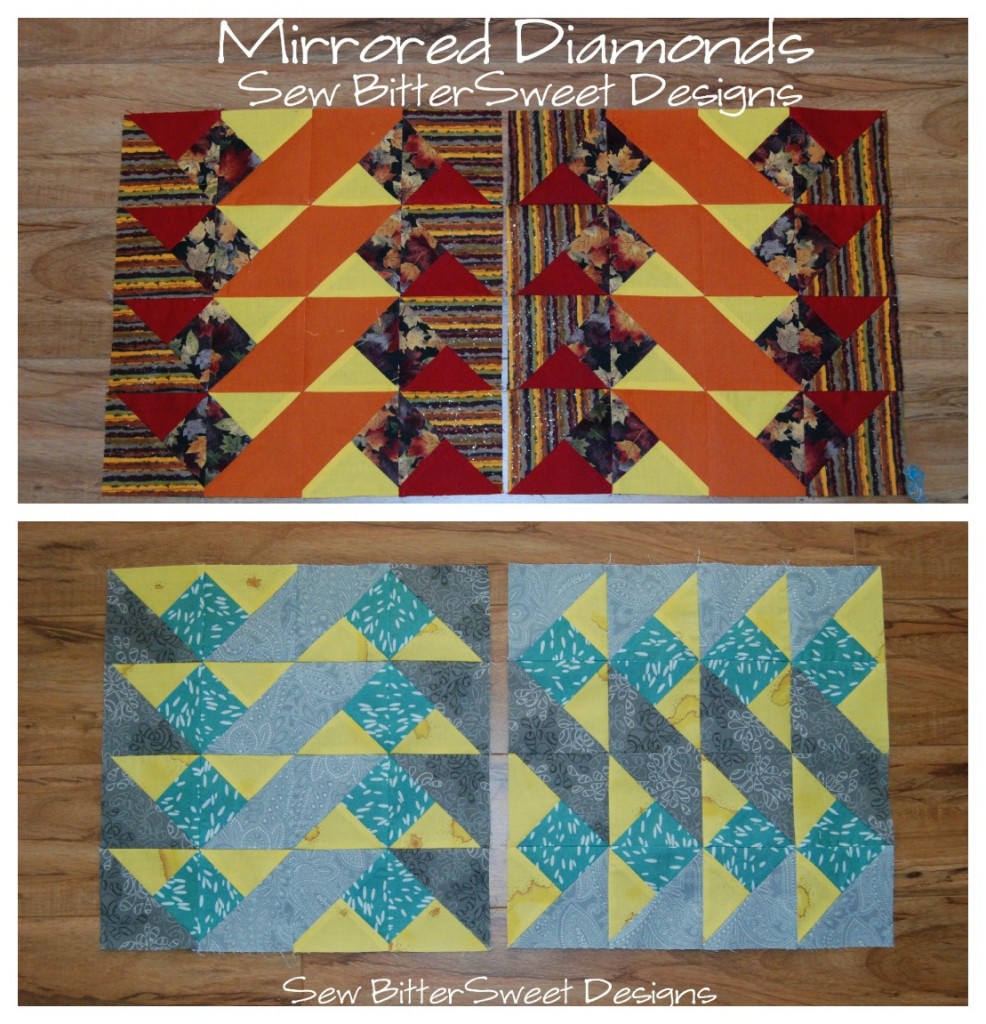
On with the block making! My block is called Mirrored Diamonds (pdf of tutorial: Mirrored Diamonds Tutorial):

The cool thing about this block is that in order to make one, you actually make two! Two blocks for the price of one!

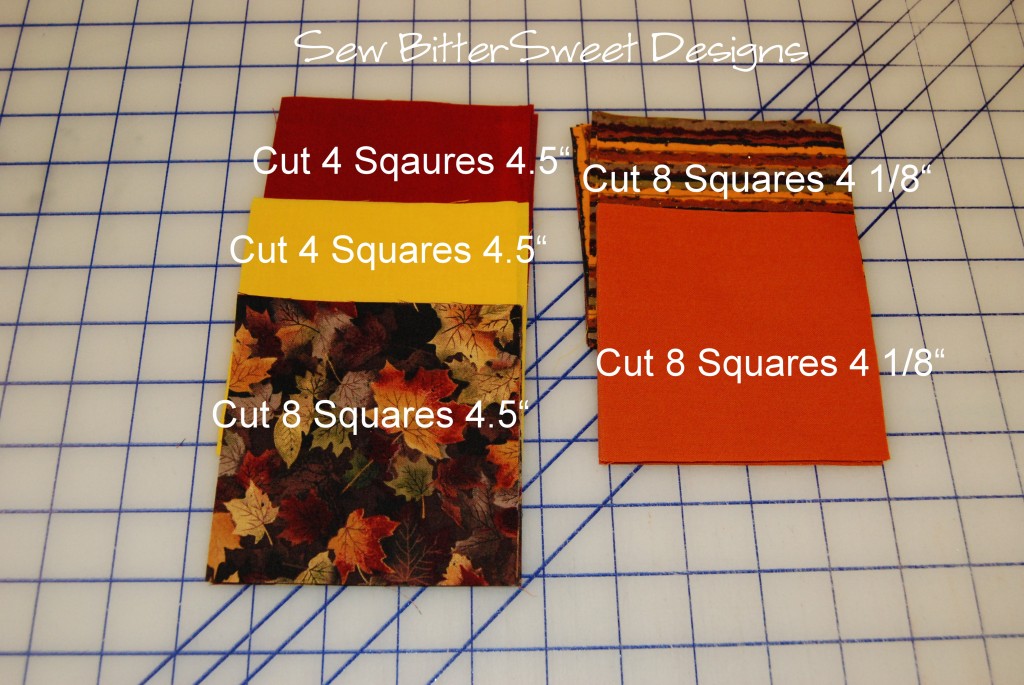
You will start by cutting the following: (the fabrics on the left are for your QSTs, the fabrics on the right are for HSTs)

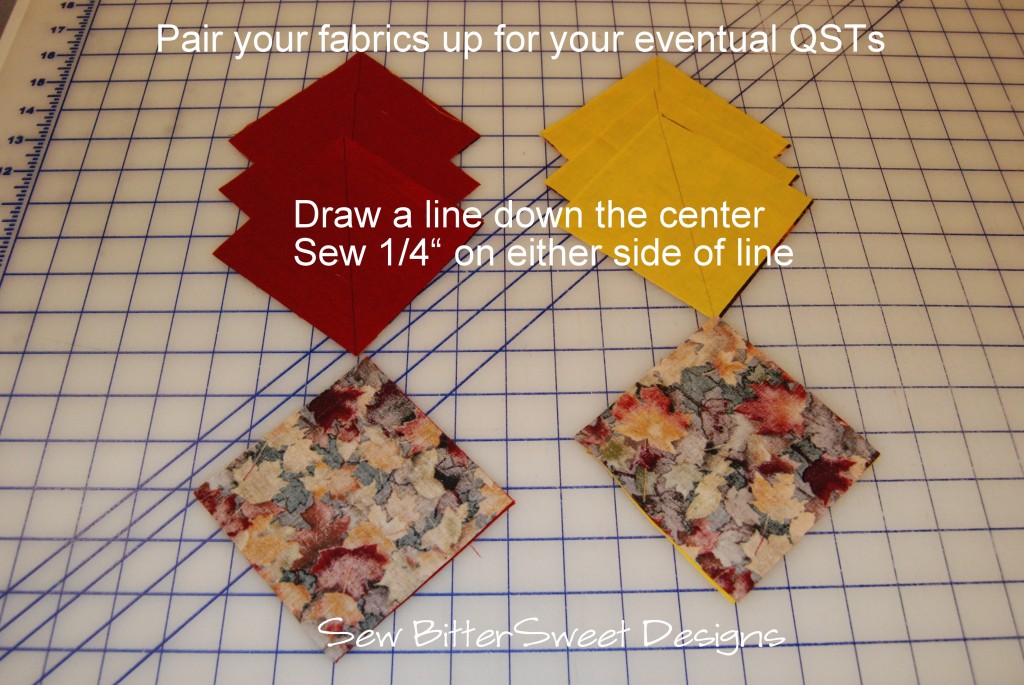
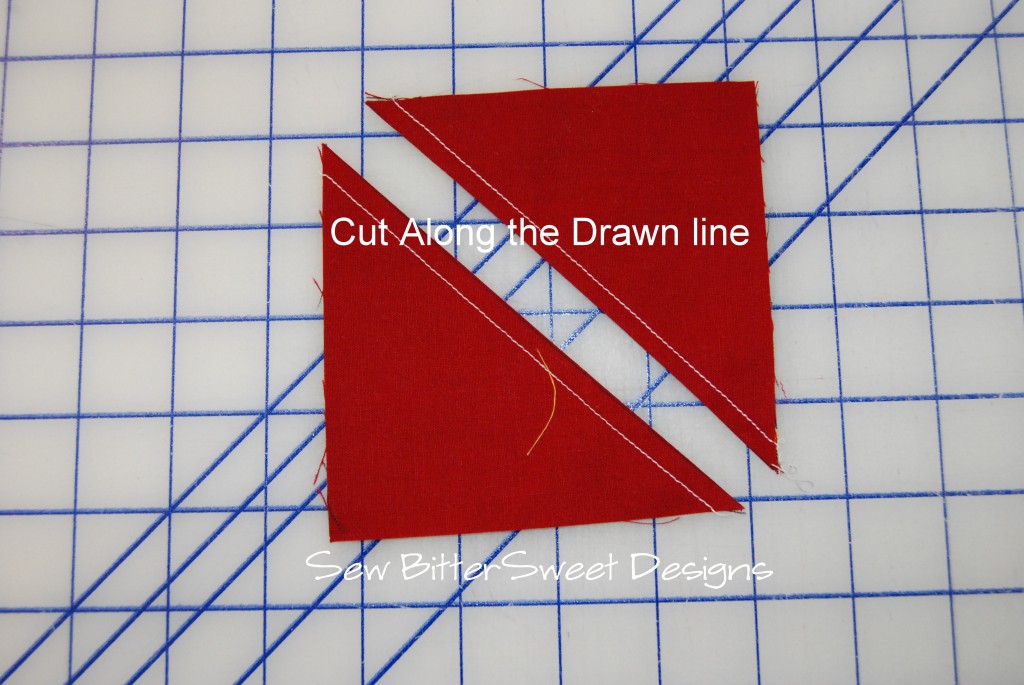
Next you will want to pair up your fabrics that will become your eventual Quarter Square Triangles (QSTs), prepare them for sewing by drawing a diagonal line corner to corner. Sew ¼” one either side of the line. Note: when you construct QSTs the first step is always to make Half Square Triangles (HSTs).

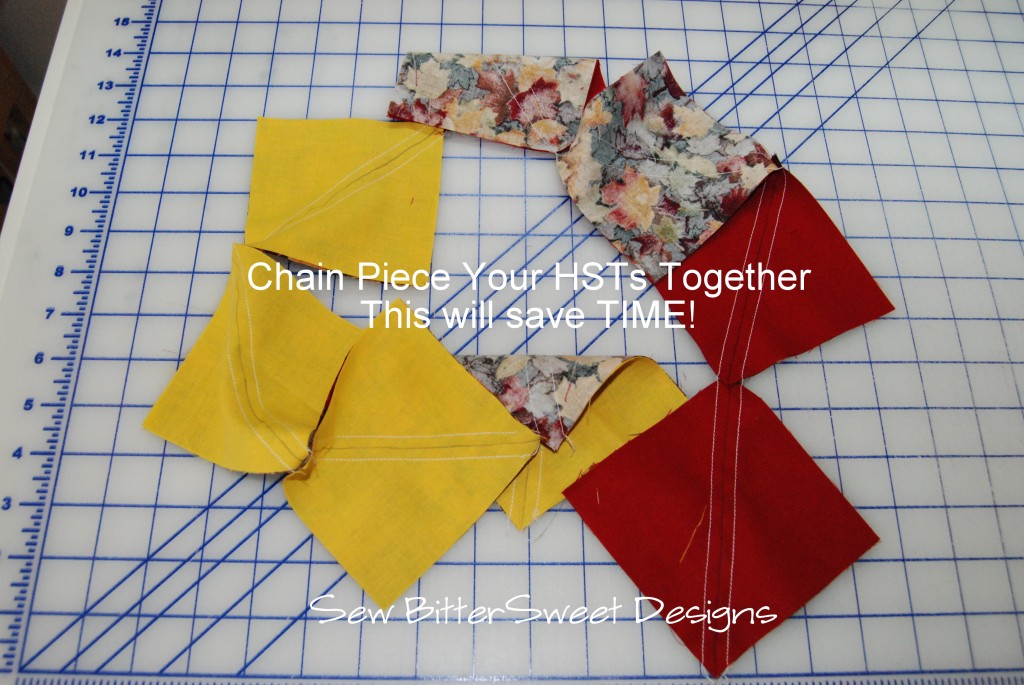
Time Saving Tip: Chain piece all of your HSTs and QSTs, and then snip them apart before you cut them in half!

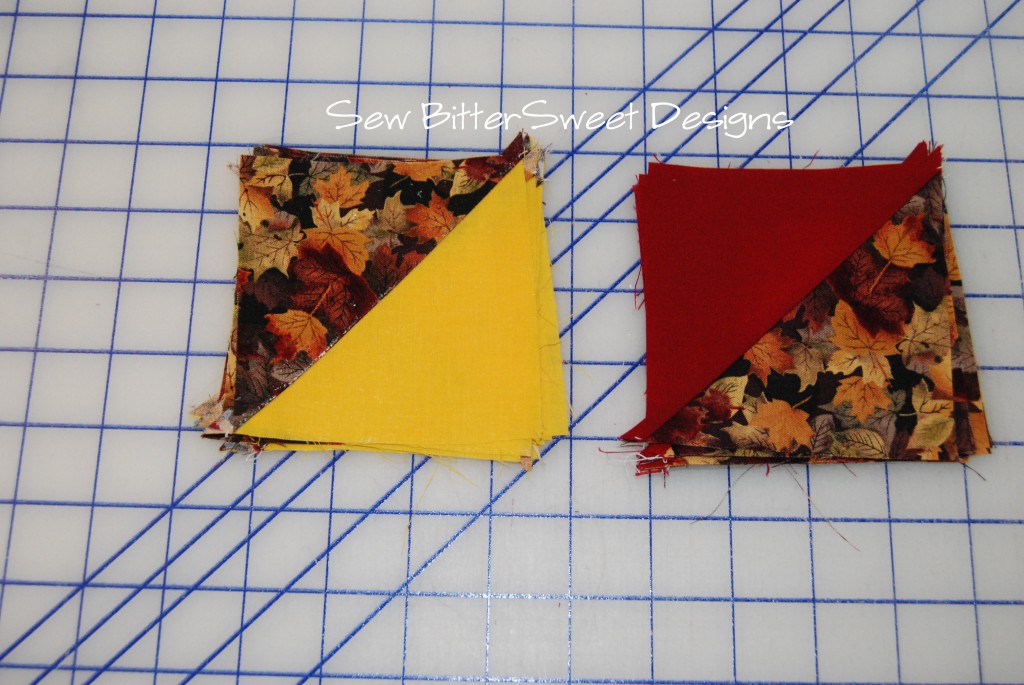
Cut them along the line that you drew and press to the side. You will have 16 HSTs that are destined to become QSTs:

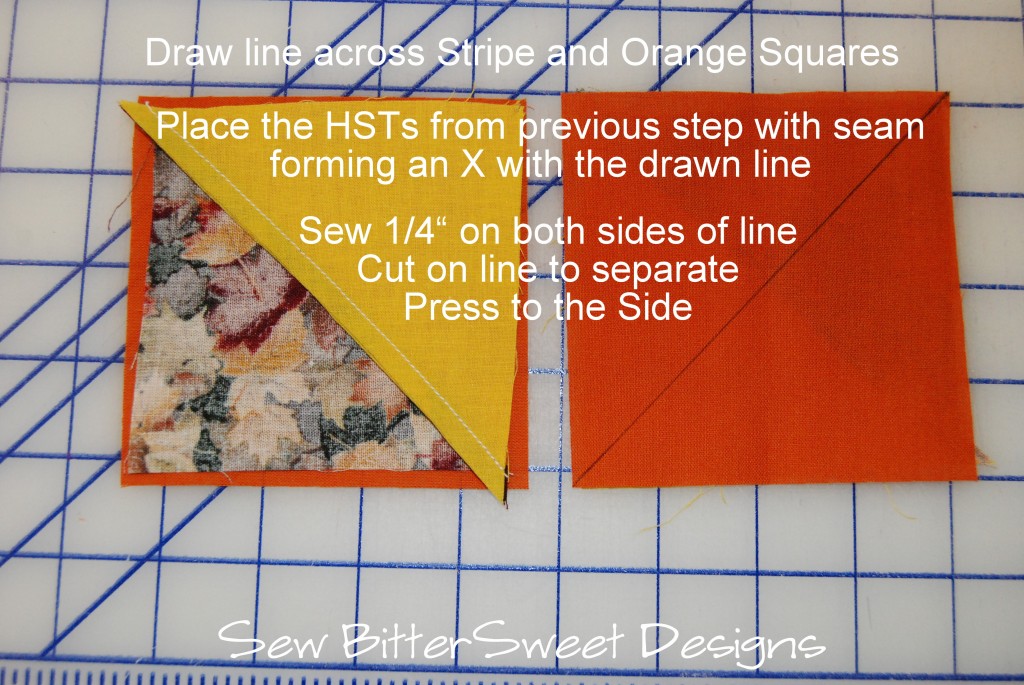
Next take your squares measuring 4 1/8” and draw a line corner to corner as you would for HSTs (for my block this is the solid orange and the stripe fabric pictured).  Then you will want to center the already made HSTs (which will become your QSTs) on the square right sides together. You will want to make sure that you are making an X. The seam from your HST should cross the drawn line diagonally; you DO NOT want them to line up!!!

Sew ¼” one either side of the drawn line on the 4 1/8” square.

Note: I was using smaller measurements when I sewed these two blocks (4.25 for the QST fabric, and I found that going to a larger size made a world of difference). That is why mine seem a touch off, yours will not if you are cutting your QST fabrics to 4.5”.

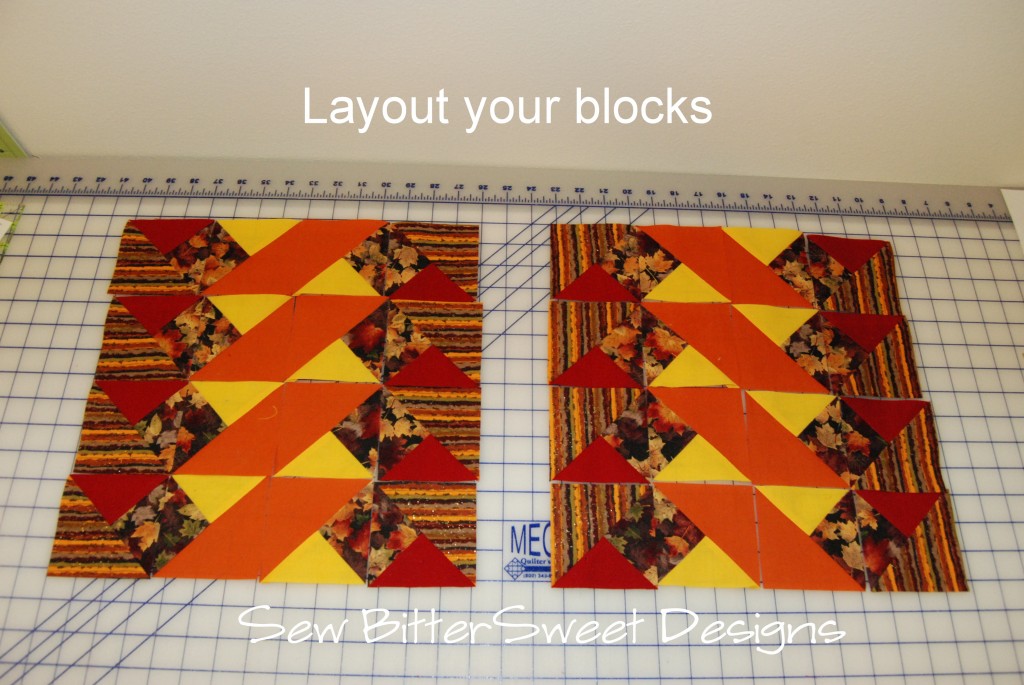
Again, chain piece these to make the process go by faster, snip them apart, cut along the drawn diagonal and press to the side. Then you will be ready to layout your blocks!

Not keen on this design, you can play with it and switch it up. There are endless possibilities. Here are 4 blocks I have made with this design.

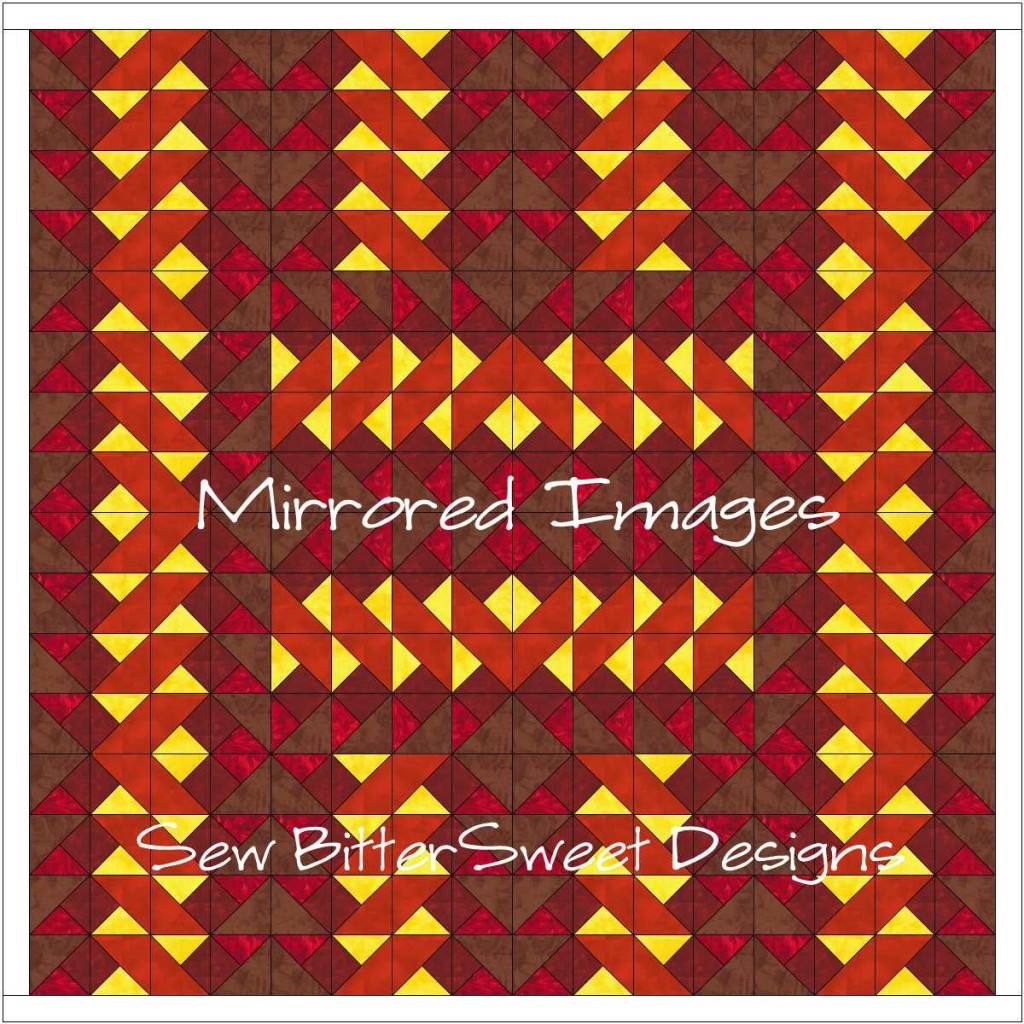
If you totally love the mirrored image design, here is an example of a quilt that could be made using the first two blocks pictured above:

If you decide to sew this block, make sure you upload it to the Flickr Group so everyone can check it out!

Make sure you take the time this week to check out the other two amazing designers that are presenting block on Wednesday and Thursday:

Wednesday, Nov. 14
Soma – Whims and Fancies
http://www.whimsandfancies.com/

Thursday, Nov. 15
Mickey … It’s a Fiber Life
http://www.itsafiberlife.blogspot.com/

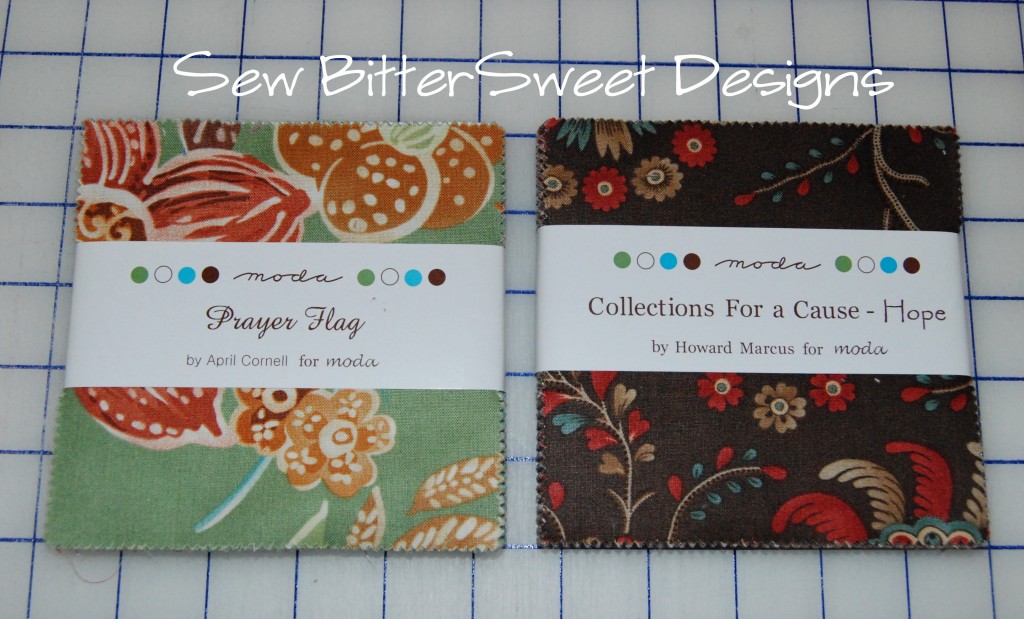
Now just for coming by and having some fun with me today! I have a fun giveaway for you! I am giving away 2 charm packs, so there will be 2 winners!

Enter using the Rafflecopter below and Good luck! I will leave this giveaway open until Monday, November 19, 2012 at 9 pm Pacific Time.

a Rafflecopter giveaway

Thank you so much for stopping by today!!!
My turn on the Let’s Get Acquainted Blog Hop & Tutorial!

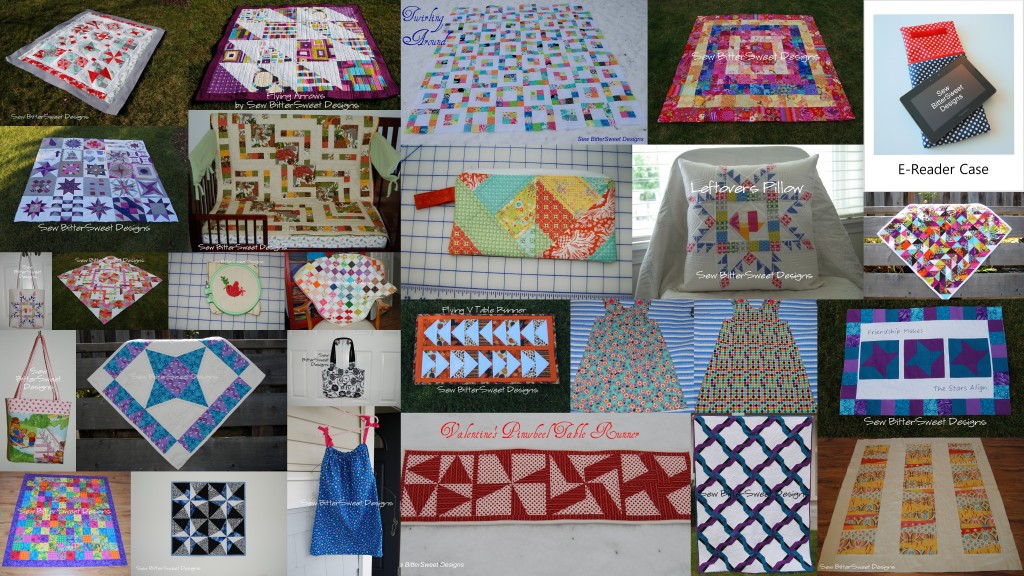
Hi everyone! Welcome to my stop on the Plum and June Let’s Get Acquainted Blog Hop! When you have finished here make sure you check out my hop partner today – Martha from Weekend Doings.  The pictures above are a sampling of my finished 2012 projects, many of them you can find in my tutorials section on my blog, I would love if you would take a moment and check it out!

Beth has asked us a bunch of get to know you questions and then after the questions I have a fun fall table runner tutorial for you!

How long have you been quilting? I’ve been quilting for about 11 years now. I made my first quilt for my niece and was won over to the quilting side immediately. I grew up watching my mom quilt and I have loved doing it with her.
Favorite quilting tip(s)? Trust yourself and try new things, especially those that intimidate you!
Favorite blogging tip(s)? Be yourself and don’t put pressure on yourself to blog every day. Once your blog becomes something you feel obligated to do you won’t enjoy it nearly as much.
Favorite fabric (or wish list fabric): My favorite line is Half Moon Modern – which is why I’m making a king size swoon quilt out of it!
Favorite craft book: I don’t really have a favorite, but I do love the Quilt Block Encyclopedia and probably the Log Cabin in a Day book by Eleanor Burns, it is the first real pattern I ever followed.
Favorite book (or book you are currently reading): I don’t have a favorite book, but I have read the Harry Potter series more times than I can count…
Favorite children’s book: The entire Berenstain Bears Series
Favorite quilting tool: I’m going to go with the Easy Star and Geese Ruler because it helped me to conquer my fear of Flying Geese.
Favorite music to listen to while quilting: I don’t listen to music, I have MASH dvds playing in the background when I sew 🙂
Favorite TV show while hand stitching: Whatever is on
Binding – by hand or by machine? Lately by machine but that is mainly because hand sewing kills my RA
If I’d only known – what you wish you knew about blogging before you started your blog: That it can really be a full time job, but only if you let it become one.

Thanks for taking the time to get to know me a bit better! I also want to thank Beth from Plum and June for putting all of this together! It has been so much fun to get to know all of the other newbie bloggers out there! I hope you enjoy the tutorial I have for you today!

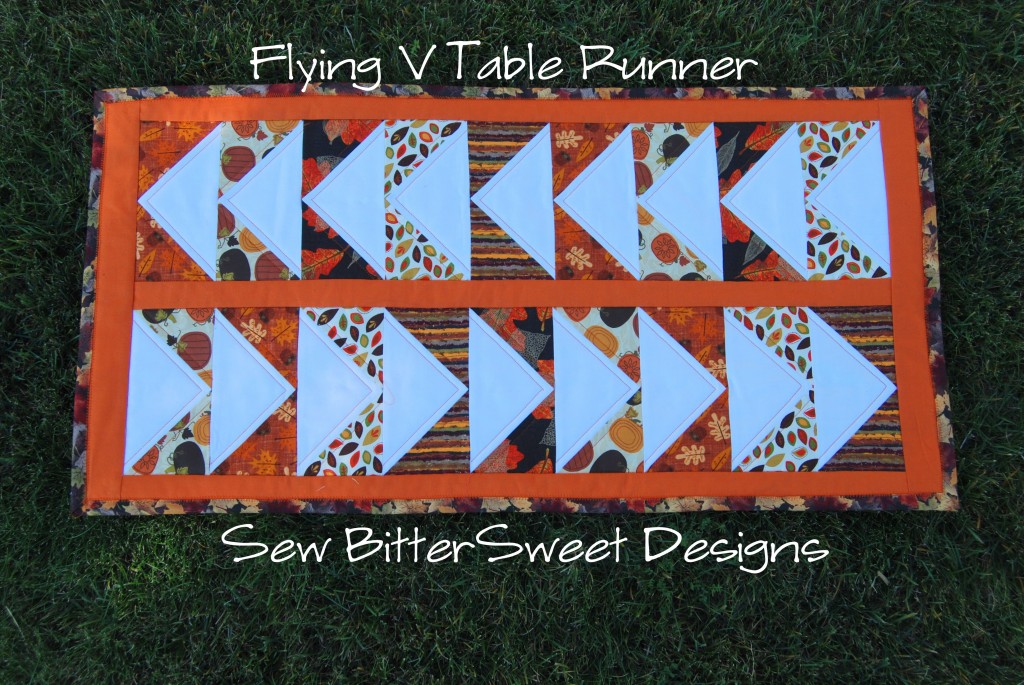
Flying V Table Runner Tutorial

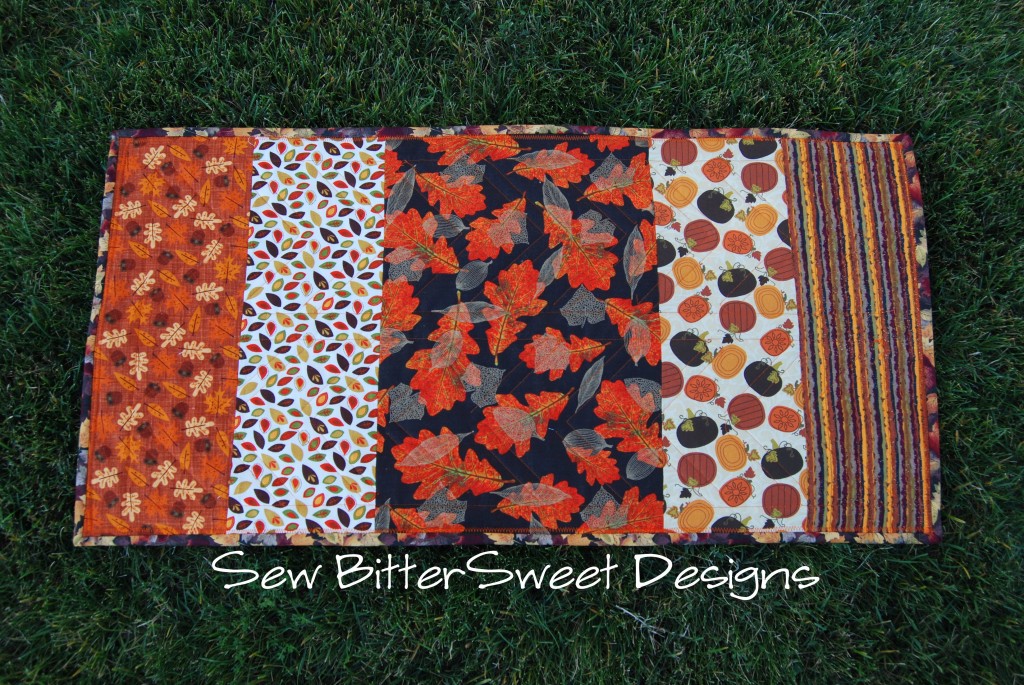
I belong to a swap group on Facebook and for our last swap we made Fall or Halloween table runners measuring 15” x 30”. This is my table runner. I was inspired by all of the Canadian geese flying over our neighborhood, nothing makes me think of fall more than geese and falling leaves!

Supplies:

5 Fat Quarters
¼” yard of white solid
¼ yard of the Orange Solid
¼ yard of the leaf print – binding
Scrap of batting – at least 15” x 30”

Cutting:

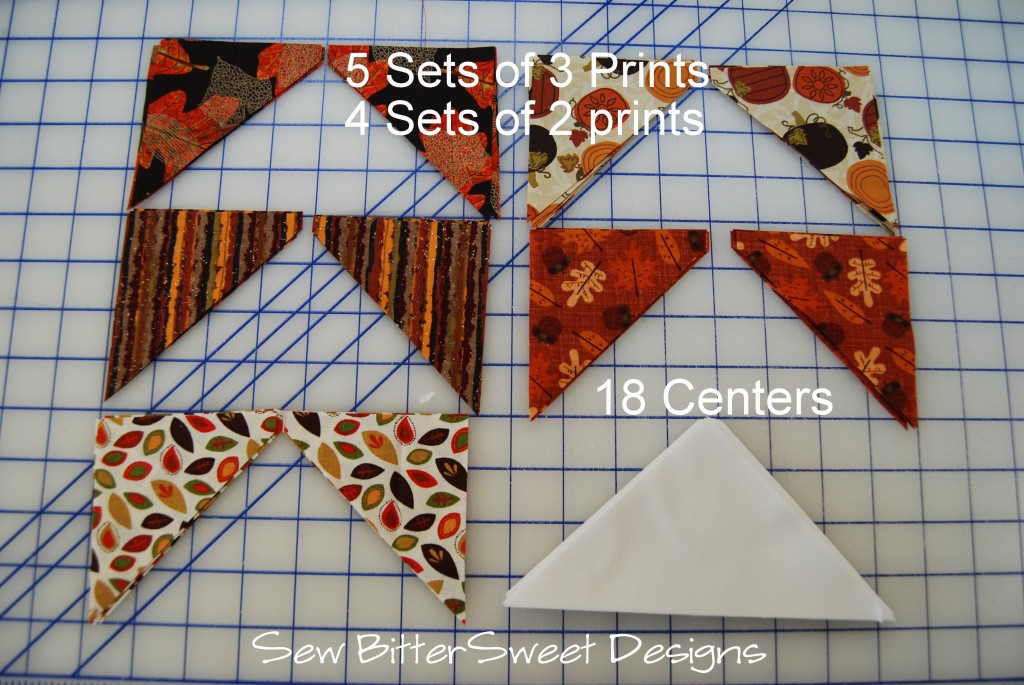
I used the Easy Star and Geese Ruler which I think makes flying geese TOO easy for words!  My cutting and sewing instructions will be for this ruler. However, if you don’t have one, for the white center sections of the geese you will want to cut 18 3.5”x6.5” sections and then you will need a total of 36 squares measuring 3.5×3.5 for the wings.

For Geese: For those using the Easy Star and Geese Ruler – cut 3.5” strips from your fat quarters and 2 from your white solid, then sub-cut according to picture below:

For Sashing and borders: from Orange fabric cut four 1.5” Strips

For backing: From 4 fat quarters cut a strip from each measuring 18” x 5.5”, from 5th fat quarter cut 18” x 10.5” strip.

Sewing:

Use ¼” seams throughout.
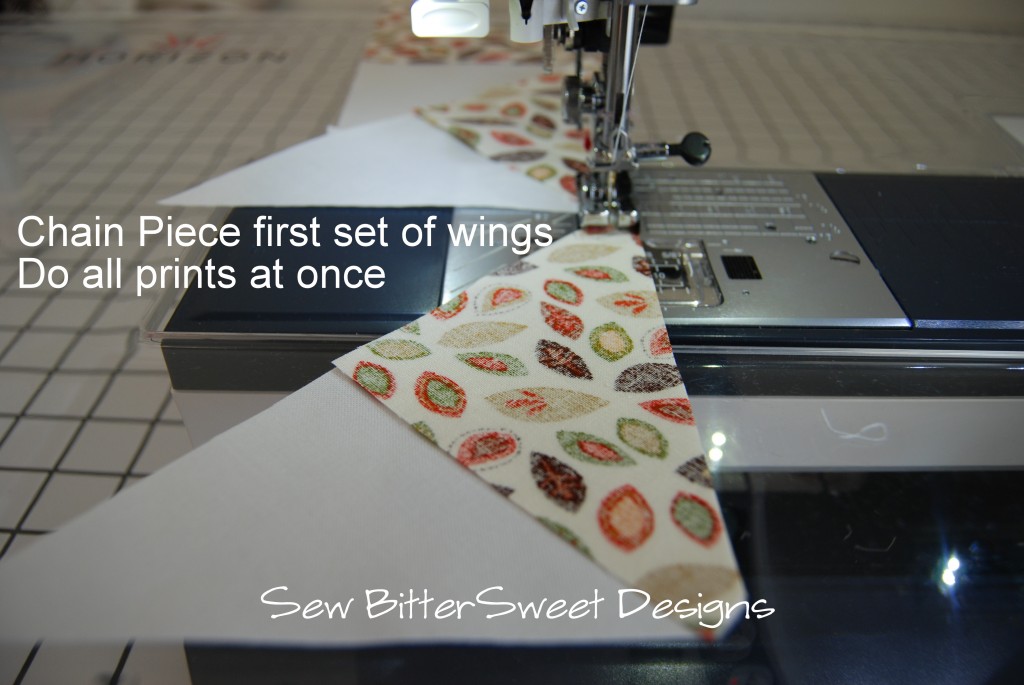
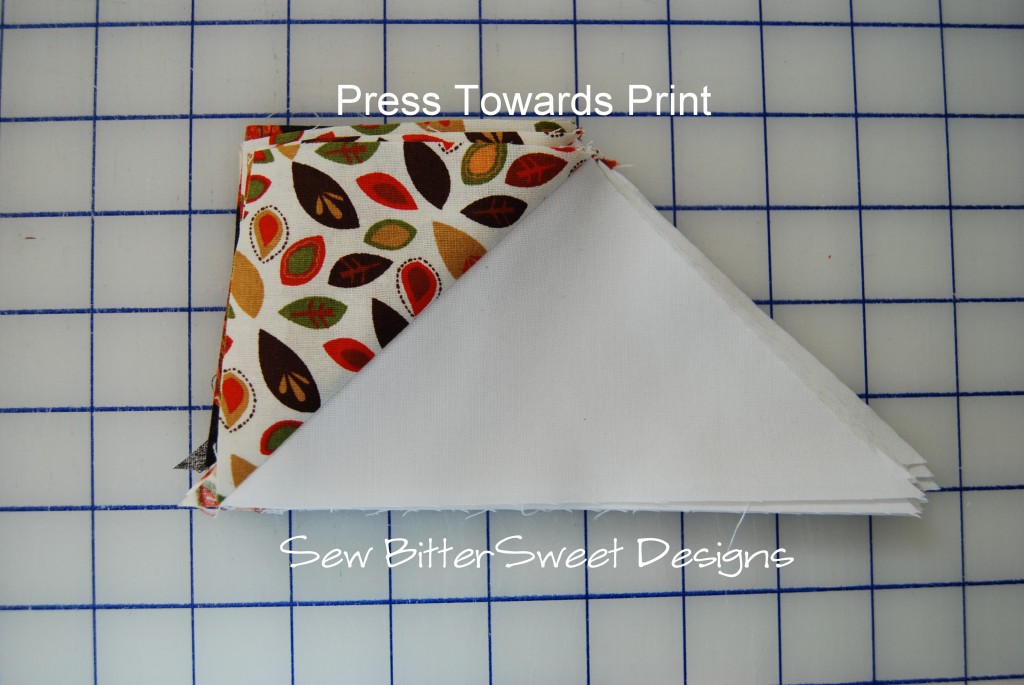
Start by sewing on your wings.

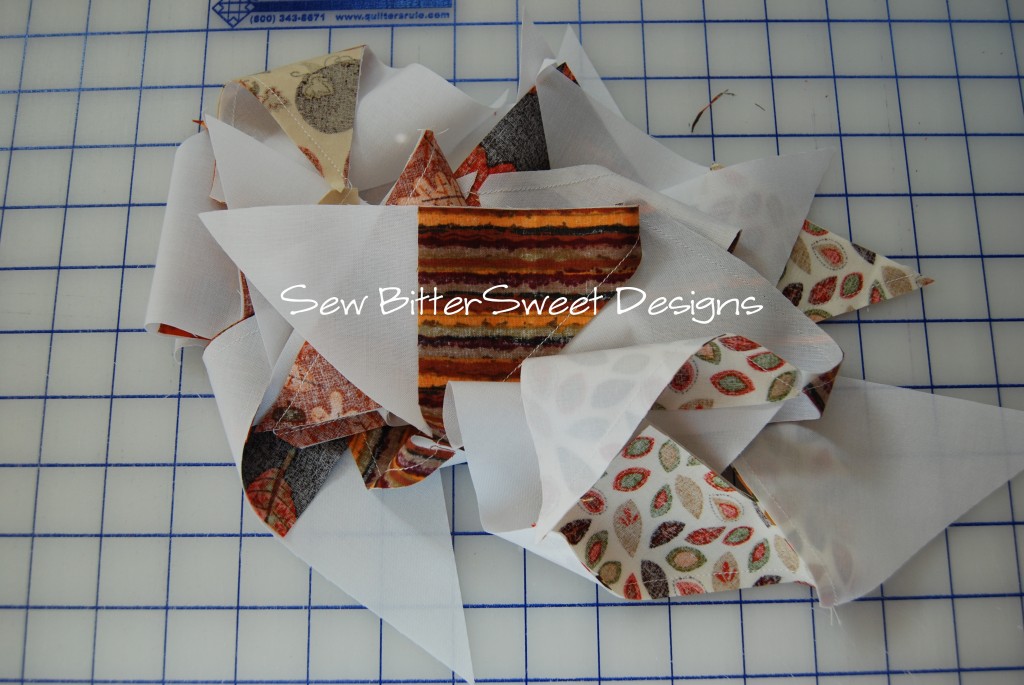
Cut them all apart.

Press towards the print.
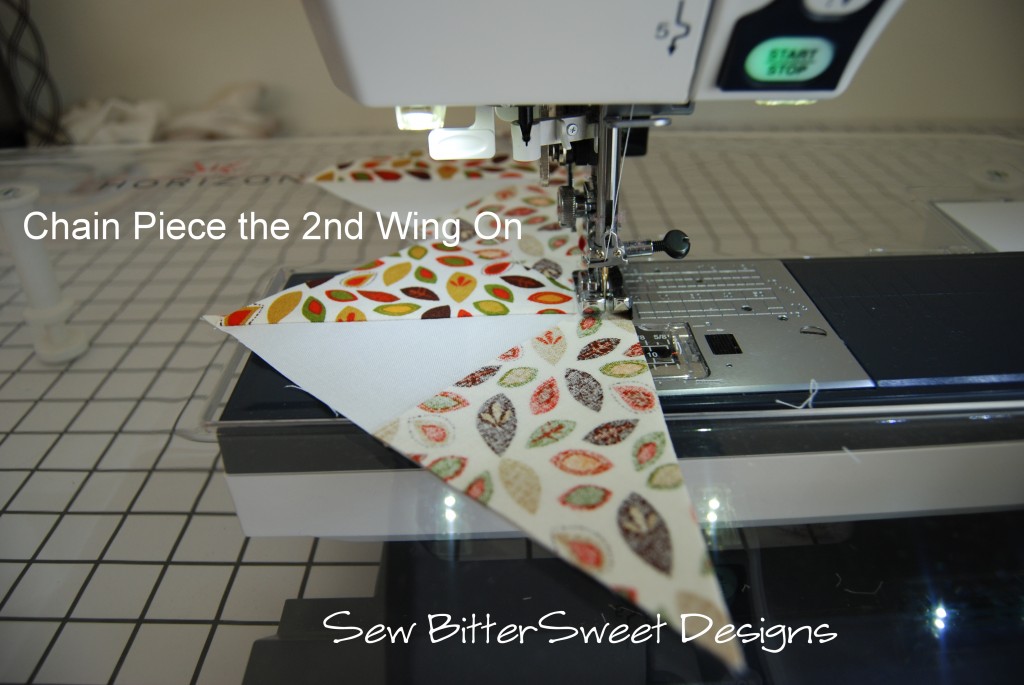
Chain piece on the second set of wings.
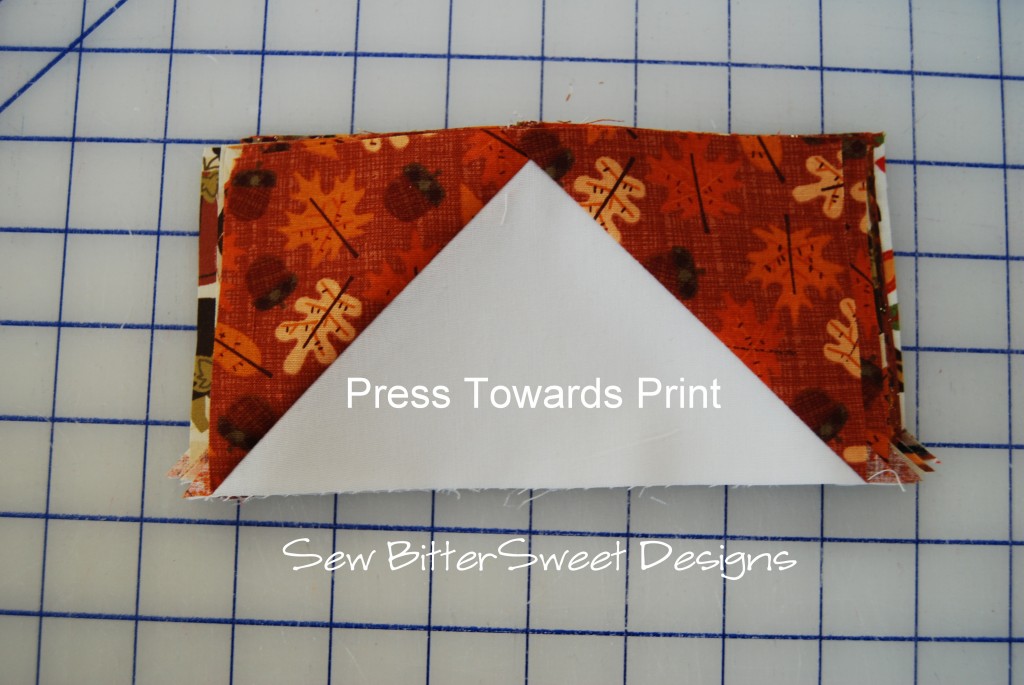
Cut the geese apart and press towards the print again.
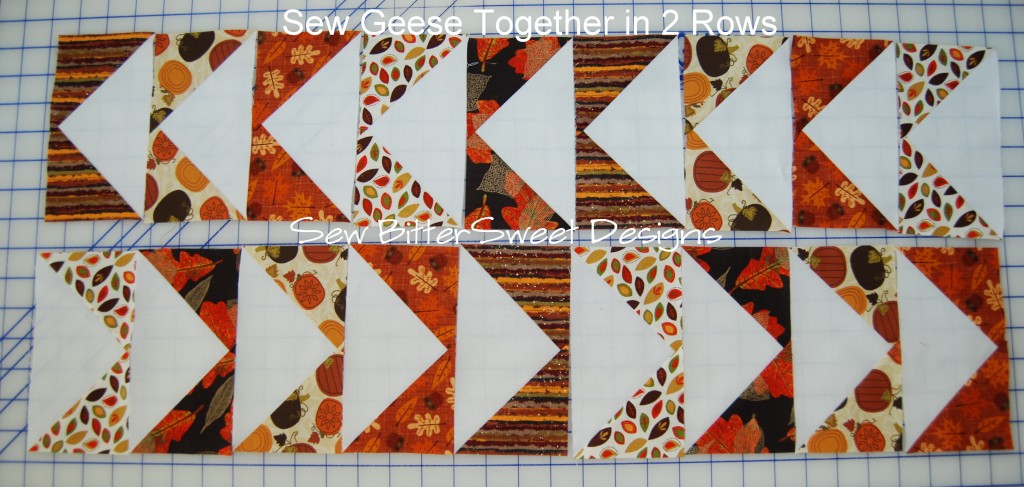
Lay out your geese and sew them into 2 rows.
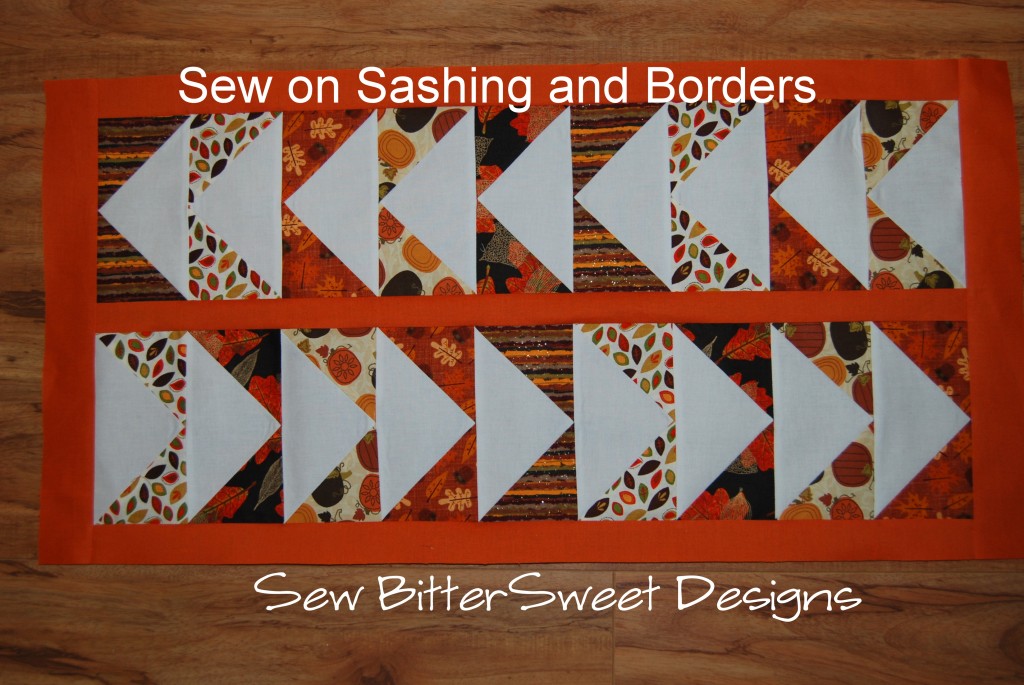
Sash the rows and add borders.
Sew together your backing, quilt, and bind.

I hope you enjoyed my stop on the Let’s Get Acquainted Blog Hop, make sure you head on over and visit Martha from Weekend Doings.


Scroll to Top