Pattern – Crochet Granny Square
Talk about versatile! You can do so much with a Granny Square. My grandmother made afghan blankets that were one GIANT granny square.
| Four Round Granny Square |
Here is a granny square that I whipped up during the 10 free minutes I got during nap time yesterday.
Very simple and there is so much I could do with this bad boy!
Granny Square Pattern:
I hate reading crochet patterns, they confuse me to no end, so I am going to try to simplify this and add pictures. I am assuming if you are attempting the granny square you have a few basic crochet skills already, including:
- Chain (CH)
- Double Crochet (DC)
- Slip Stitch (SS)
If you can do these three things, you can make a granny square.
Hint: I have put these [ ] marks round the chunks of work that go together, for example when working on corners, I have chunked that work so you know it all goes in the same chain 2 space, please refer to the pictures. I hope this does not over-complicate the pattern.
Start: Chain 4 and join into a round with a slip stitch.
Round one: CH 3 (this CH3 counts as a double crochet) then DC 2 in the ring. Next: [CH 2, DC 3] into ring – do this two more times (You are creating corners!!!). CH 2 and SS into top of CH 3 (from beginning of round).
| Chain 3 |
| 2 Double Crochet |
| CH 2, DC 3 into ring – do this three times |
Round two: SS into first three stitches. [CH 3, DC 2 in CH2 space, CH 2, DC 3 in same CH2 space]. Next: [CH 2, DC3, CH 2, DC 3 (all in next CH 2 space)] – Repeat 2 more times. CH 2 then SS into top of CH 3 from beginning of round. You are still creating corners. When you DC3, CH2, DC3 in the same space this is a corner, only Rounds 1 & 2 have nothing but corners.
| Corner One – CH 3. 2DC in CH2 space, CH 2, DC 3 |
 |
| Chain 2 Spaces that you will work in |
| All four corners done |
Round 3 and all Subsequent rounds (yes, all you need to know is THREE rounds!): SS into first three stitches. [CH 3. 2DC in CH2 space, CH 2, DC 3 in same space.] Next: [CH 2, DC3 in CH 2 Space. CH 2] (you are now at the corner) [CH 2, DC3, CH 2, DC 3 (all in same CH 2 space).] [CH 2, DC3 in CH 2 Space. CH 2] (you are now at the corner) [CH 2, DC3, CH 2, DC 3 (all in same CH 2 space).] [CH 2, DC3 in CH 2 Space. CH 2] (you are now at the corner) [CH 2, DC3, CH 2, DC 3 (all in same CH 2 space). CH 2] then SS into top of CH 3 from beginning of round.
First Corner: SS into first three stitches. CH 3. 2DC in CH2 space, CH 2, DC 3
|
| CH 2, DC3 in CH 2 Space. |
| Finished Round 3 |
Repeat these rounds as many times as you like to get the Granny Square size of you choosing. NOTE: On each round you will be adding a [CH 2, DC3 in CH 2 Space] between each corner. For example, on round 3, you did one between each corner, on round 4 you will do two between each corner, on round 5 you will do three between each corner, etc etc.
Project ideas for Granny Squares:
Be like my grandma – grab whatever yarn you have and make a giant granny square. She would change the color of her yarn every few rounds. Great if you have a ton of yarn that is the same weight and just need to use up some of your stash.
 |
| Image Courtesy of: Designs by KN |
Make a granny square blankie like I did for Anne: I did 49 granny squares that were 5 rounds each in three different colors and just alternated the pattern and sewed them together.
 |
| One of Anne’s MANY baby blankies |
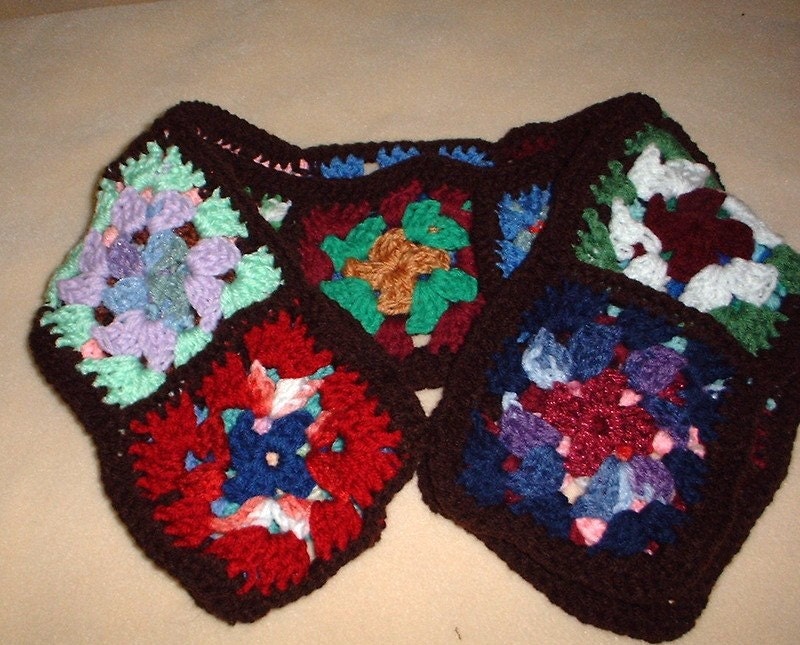
Funky Scarf: Make a retro scarf. Again using leftover chunky yarn and a big hook, whip up 10 to 15 different granny squares and darn them together, creating a chic and retro scarf.
 |
| Image courtesy of: Etsy Twitter Team |
Granny Squares are fun and versatile. They take little to no time at all to make and have SO many uses. Whip up a few and let me know what you make!


