Fat Quarter Shop

4.5″ Easy Angle Ruler Review & Tutorial

Do Half Square Triangles send you into near palpitations? Do they make you sweat and say, nope, I can find a different block?  Well, do I have a ruler for you!  The Easy Angle 4.5″ Ruler by EZ Quilting available at Fat Quarter Shop.
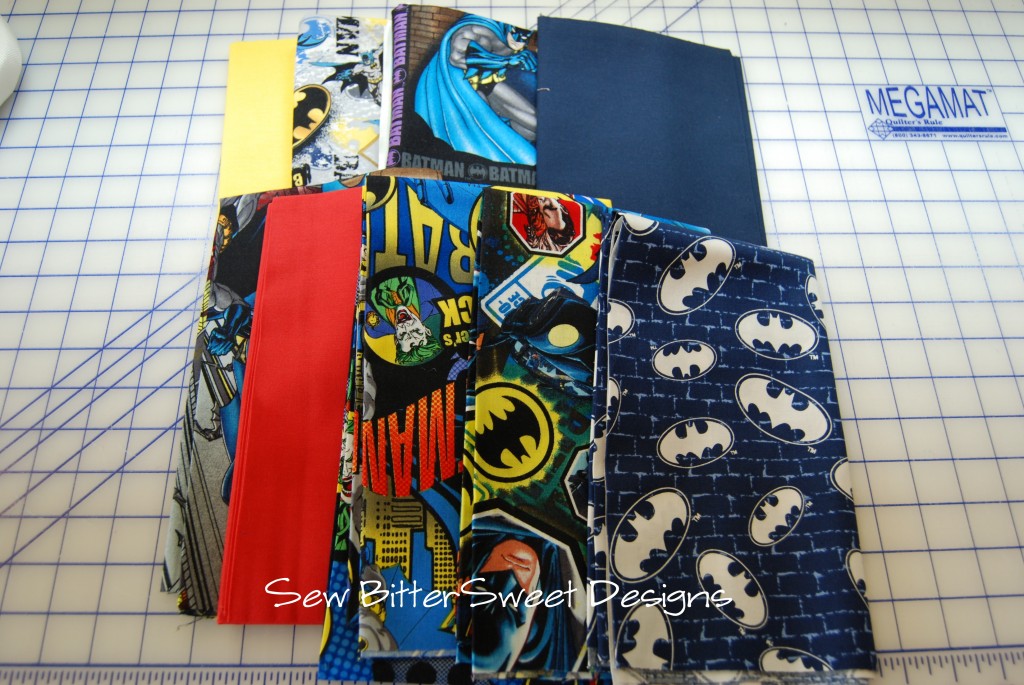
I started out with some amazing Batman Fabric by Camelot Fabrics and a vague idea to make a quilt for my nephew (I hope he isn’t reading my blog!).  The idea is still vague but it involves mixing solids with the prints for Half Square Triangles and interspersing these with fussy cuts of the panels and larger prints. I am hoping to tell a story with the quilt, you will get to watch it evolve here because I’m not using EQ7 to draw this quilt out! I’m quilting without a net!

Always on the look out for a new and hopefully easier method for Half Square Triangles, I asked Fat Quarter Shop if I could do a review of the 4.5″ Easy Angle Ruler.  Before I give you my thoughts on this ruler, I thought I would do a quick tutorial.

When using this ruler cut your fabric strips 0.5″ wider than the finished size you want your HSTs to be. I wanted 4″ finished Half Square Triangles so I cut my strips to 4.5″ wide.
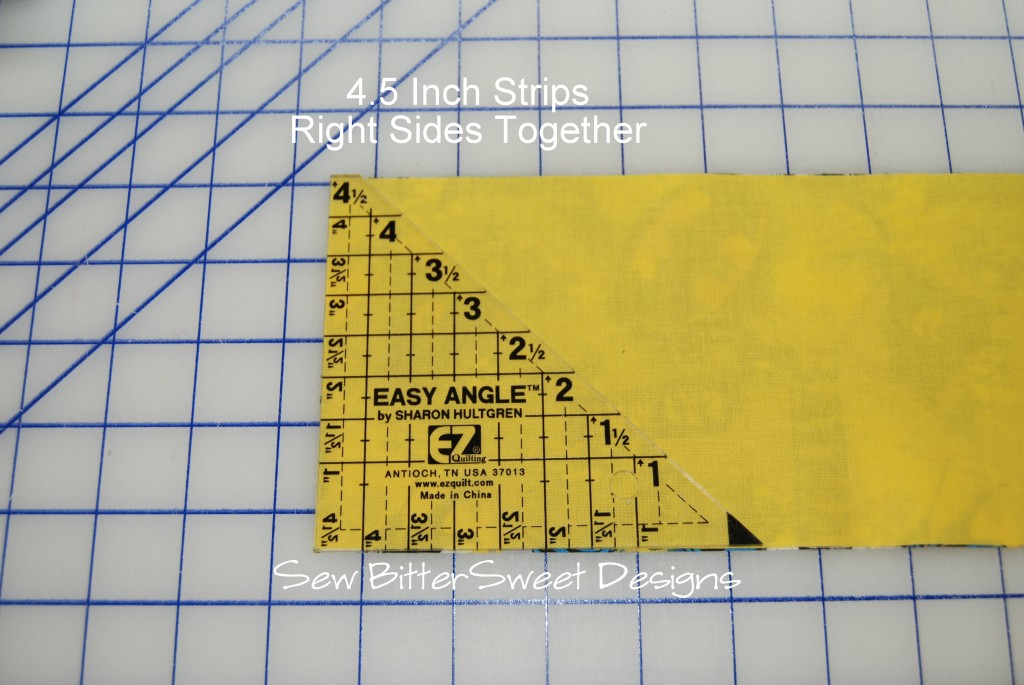
Line up the ruler and cut along the diagonal.
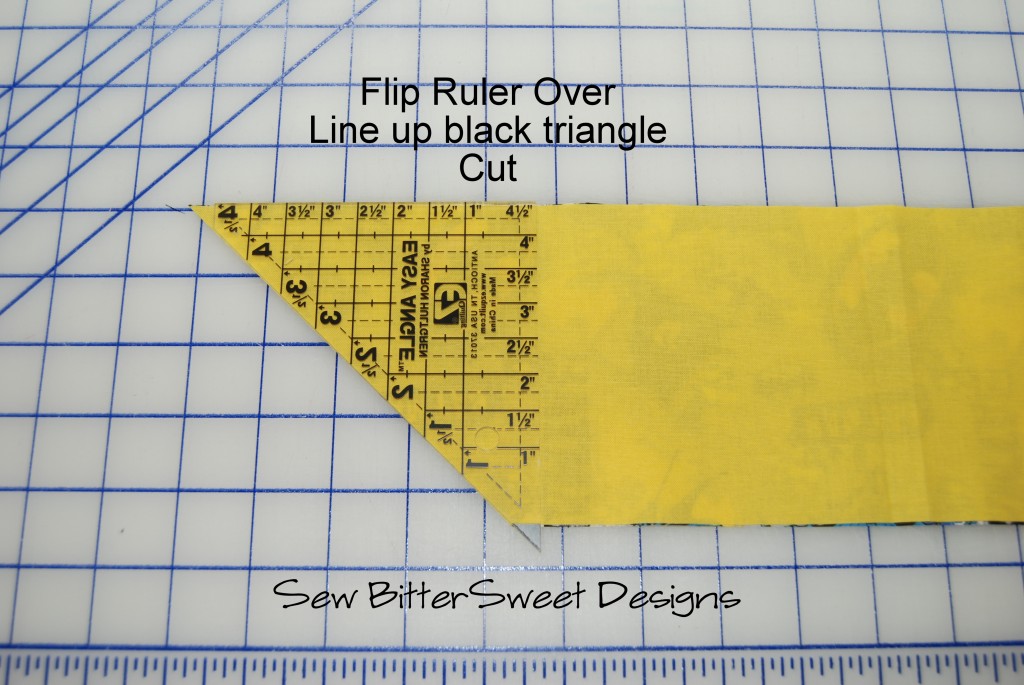
Next sew along the diagonal with a 1/4″ seam.

I created 4 PERFECT half square triangles in less than 10 minutes – my fastest time yet!
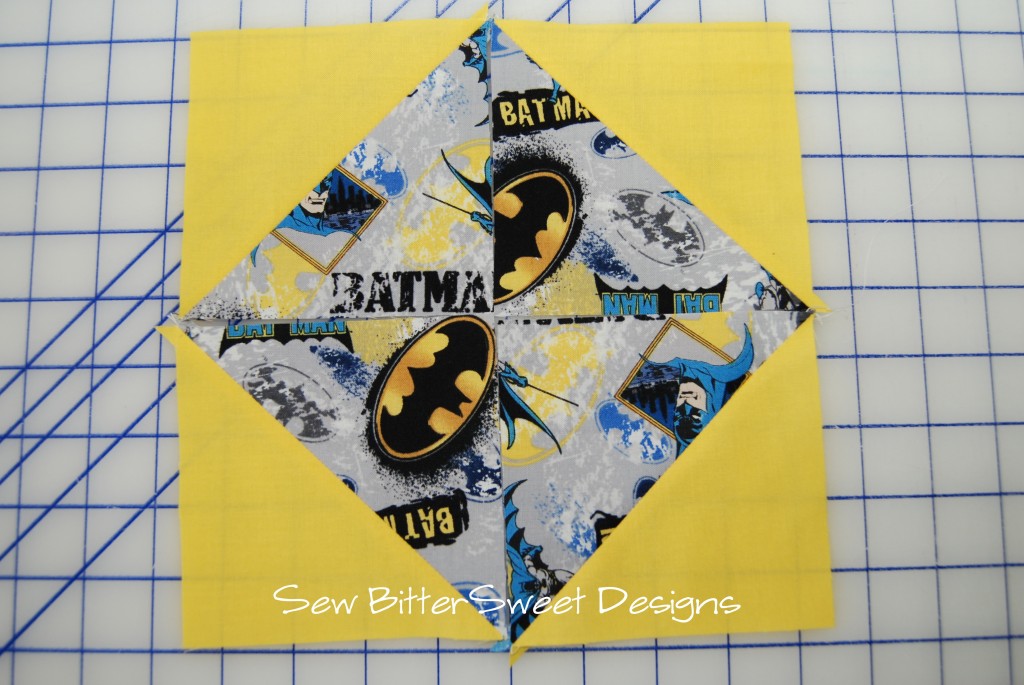
(and yes, I do time how long it takes to make my HSTs with different methods – you have to remember, I sew during nap time and being able to sew fast is important to me!)

Things I Like:

  • The included instructions are easy to follow and written in 3 different languages – which is normal for all EZ Quilting products
  • This method is fast, as I said, 4 perfect HSTs in less than 10 minutes
  • This method is PRECISE. I didn’t have to trim my HSTs down to size at all.
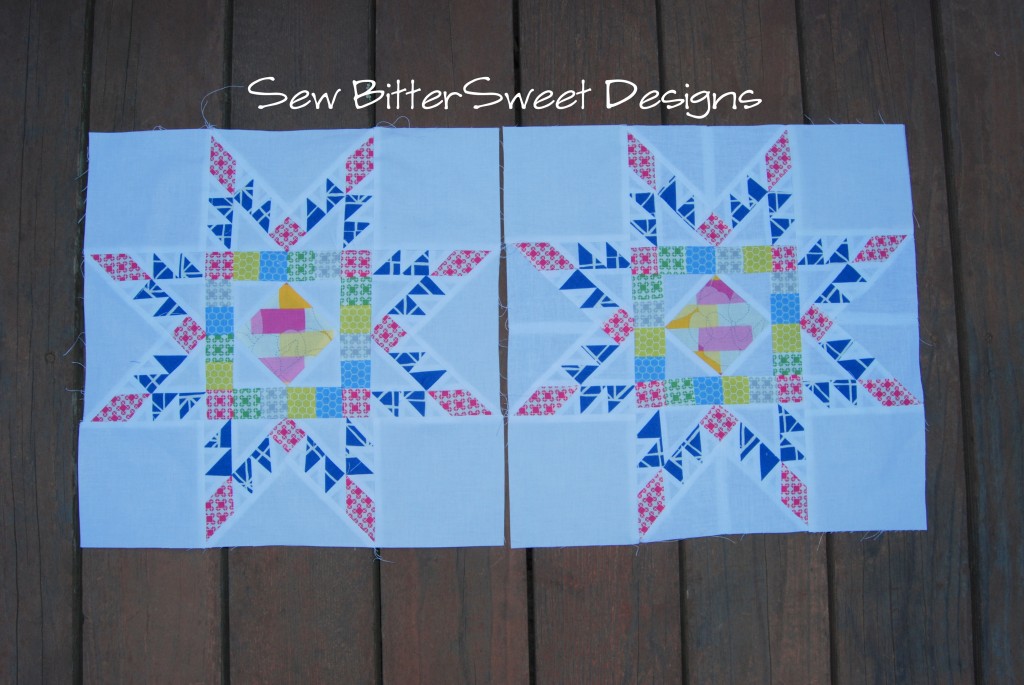
  • Designed to make HSTs sized 1″ to 4.5″ – wonderful for projects with super small HSTs like Feathered Star
  • Truth in advertising – Easy to Use

Areas for Improvement:

  • I usually have something here, but this time I have nothing. I think the product is great. I will say there is no pattern, but there really doesn’t need to be. A half square triangle can be a finished block, so there is no need for a pattern.

Final Thoughts:

The 4.5″ Easy Angle Ruler is absolutely worth every penny. If only because it will save you the time of having to trim down your blocks. There are only one set of dog ears that will need to be clipped off, which to me is a bonus.

Have you used the Easy Angle Ruler? What do you think of it? Do you have a favorite HST method?

Don’t forget to go enter to win a fat quarter bundle of Battle Over Gotham from Fat Quarter Shop – giveaway open until July 3rd!


Fat Quarter Shop Highlight and Giveaway

Happy Wednesday Everyone! Today I am wanted to share with you some of my favorite fat quarter bundles from Fat Quarter Shop.  You may notice that these are all kid prints…well, there are 5 special kids in my life all of whom will receive quilts in 2012 and Anne’s God Mother is pregnant, which means there is a 6th on the way who will also receive a special quilt. Kid fabrics are so much fun and Fat Quarter Shop has the most kid lines I have seen at any one shop!

Because all little girls could use a little “girl power”

The challenge for me this year is creating a quilt for my oldest nephew. He is going to be 10. Girls are easy, it helps that I am a girl and that the three girls in my life all love pink. Can’t get much simpler.  Boys though…it is hard to find fabric geared towards boys, especially not quite teen boys.  Check out what Fat Quarter Shop had:

I can’t tell you how excited I was to find the Batman Fabrics on Fat Quarter Shop. I just knew they would be perfect for my nephew. Would the be perfect for a little boy in your life too? Well, guess what, one lucky reader will win the fat quarter bundle above!

Enter Via the Rafflecopter Below!

I will leave this giveaway open until 9 pm Pacific July 3nd and will announce the winner Wednesday July 4rd.  Good luck!


Baby Doll Sleep Sack Tutorial

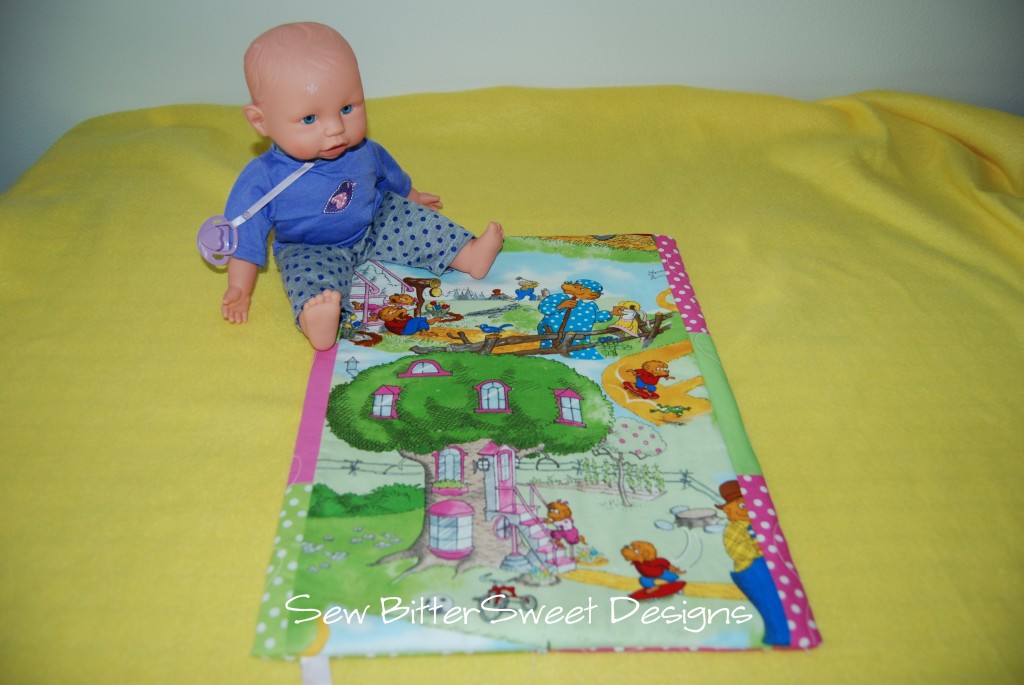
Back in the early 80s, when I was little, I absolutely LOVED the Berenstain Bears. They were my favorite books and I had them all memorized. Needless to say, as soon as I found out I was pregnant I started a collection for my baby.  Anne has a fairly decent sized collection and they are her FAVORITE books, just like mommy.  We went to the fabric shop last week for a little pick me up and this is what she picked out:

Welcome to Bear Country

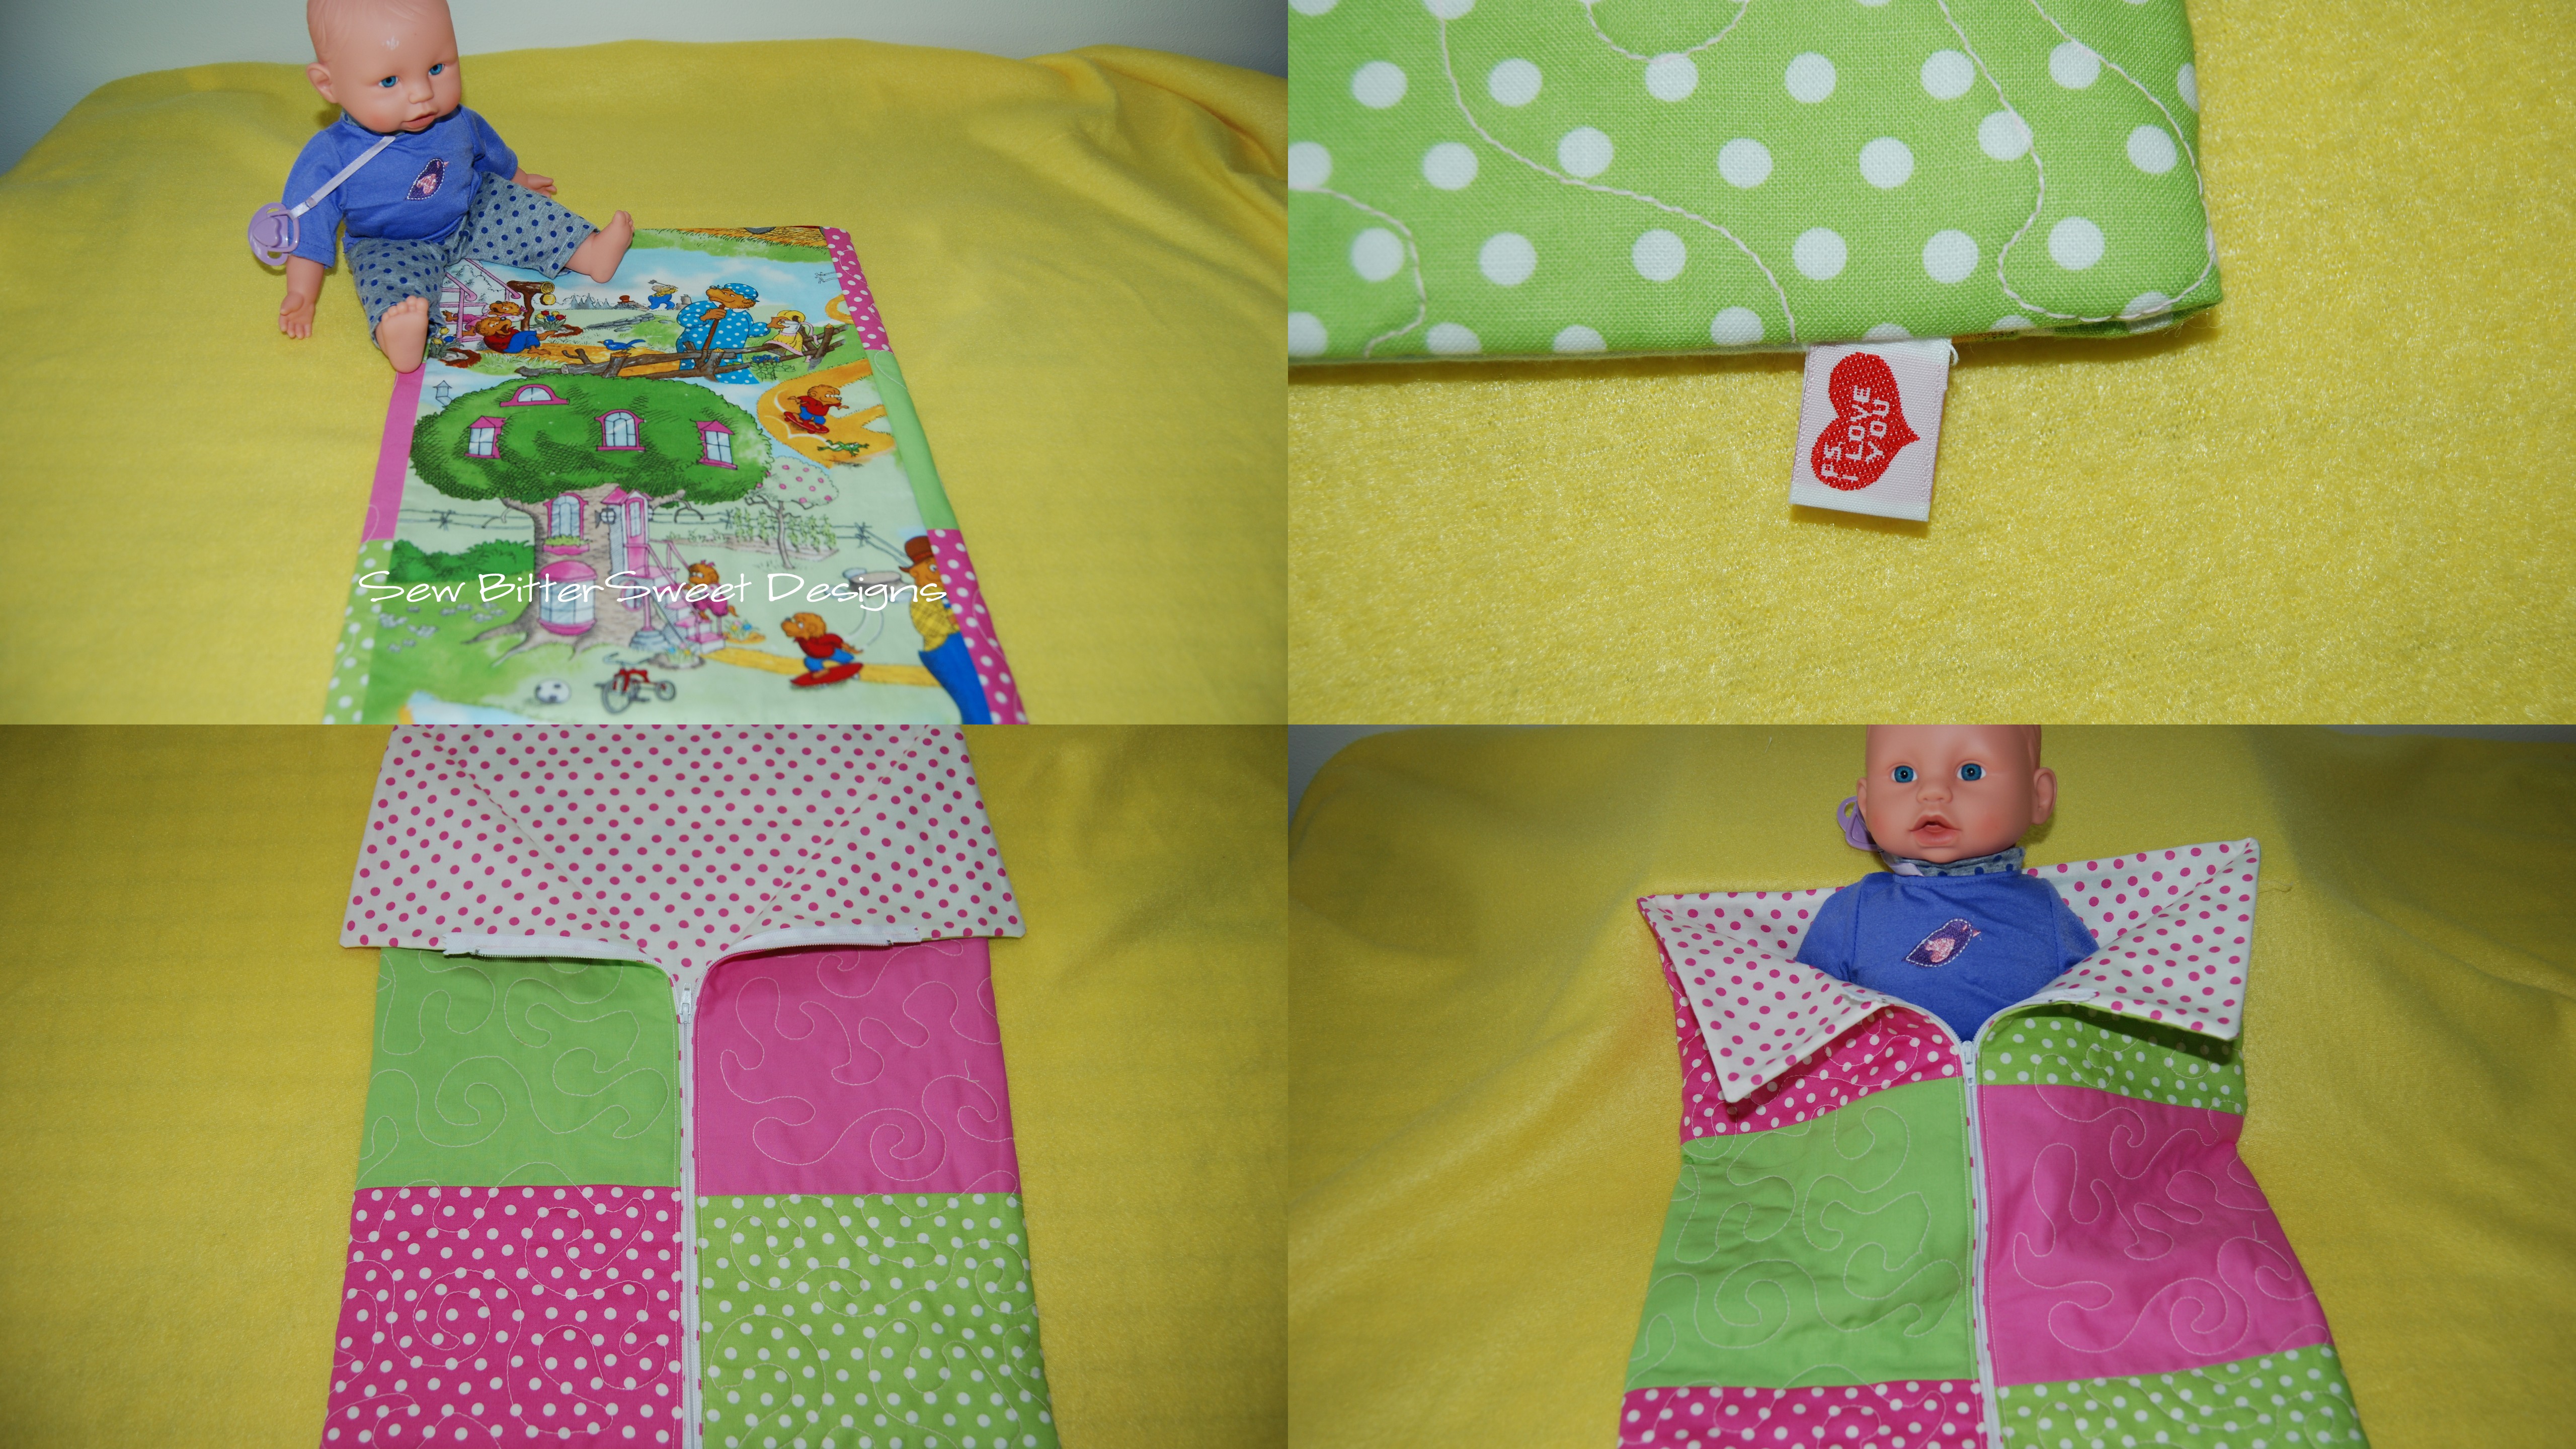
This is what I made for her:

I got my inspiration from something I had when I was a little girl that my mom had given to me, probably about Anne’s age.

You will need:

  • 14″ zipper
  • 6 rectangles (6.5″ x 8″)
  • 1 panel print (13″5 x 18.5″)
  • Pellon Fusible Fleece ( 26.5″ x 18″)
  • Inside fabric (27″ x 18.5″
  • Quilting Thread
  • Basic Sewing Supplies

Use 1/4″ seams throughout

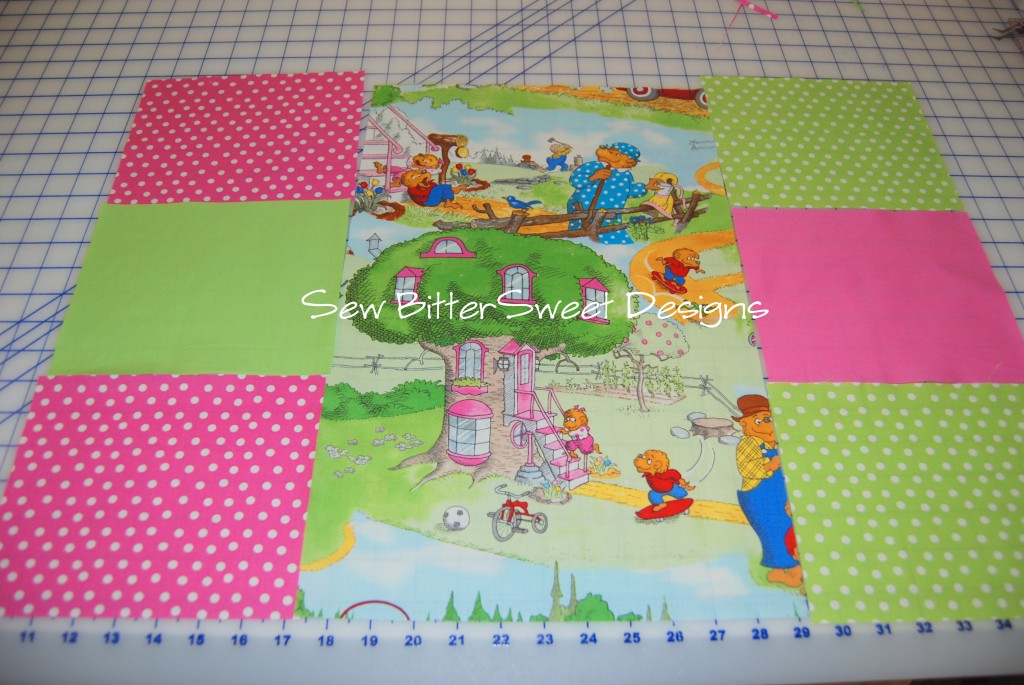
Outside of the Sleep Sack Layout:

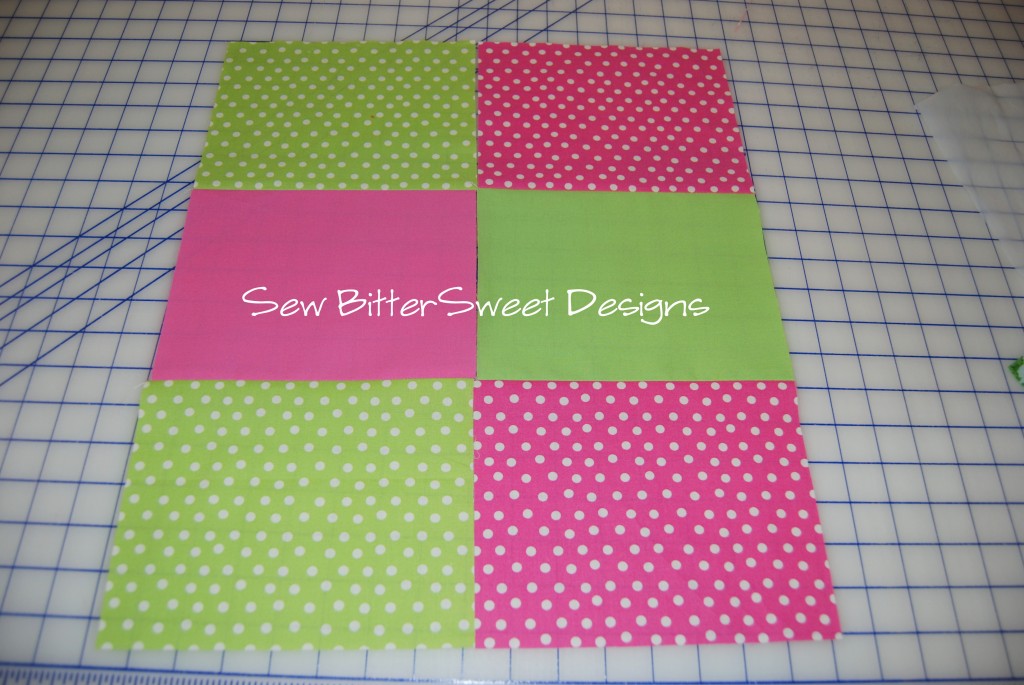
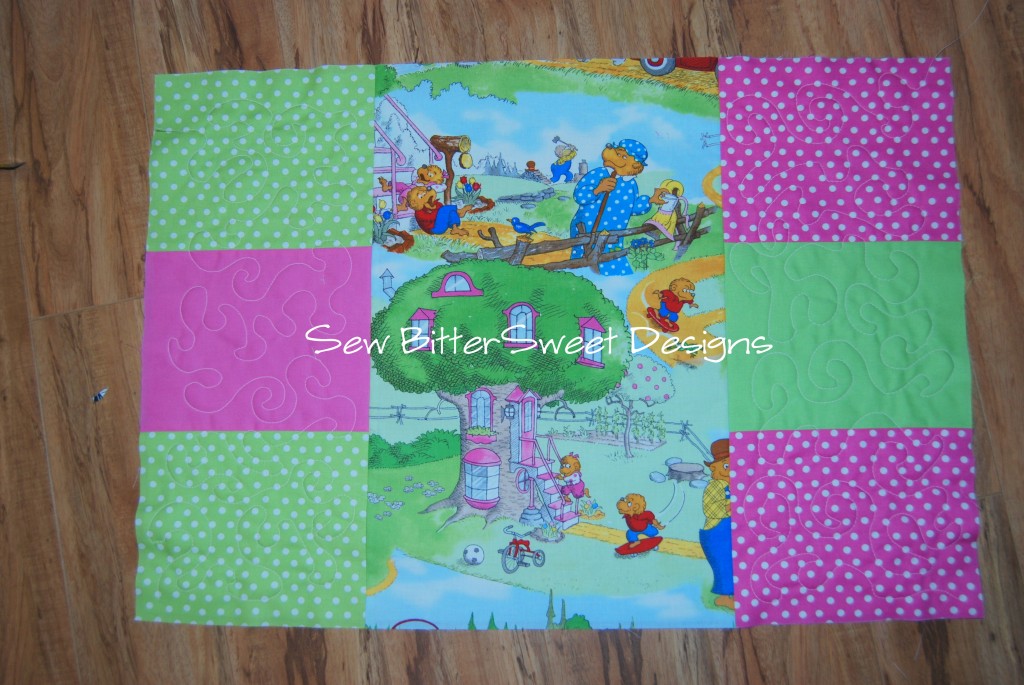
Sew your outside sections together:

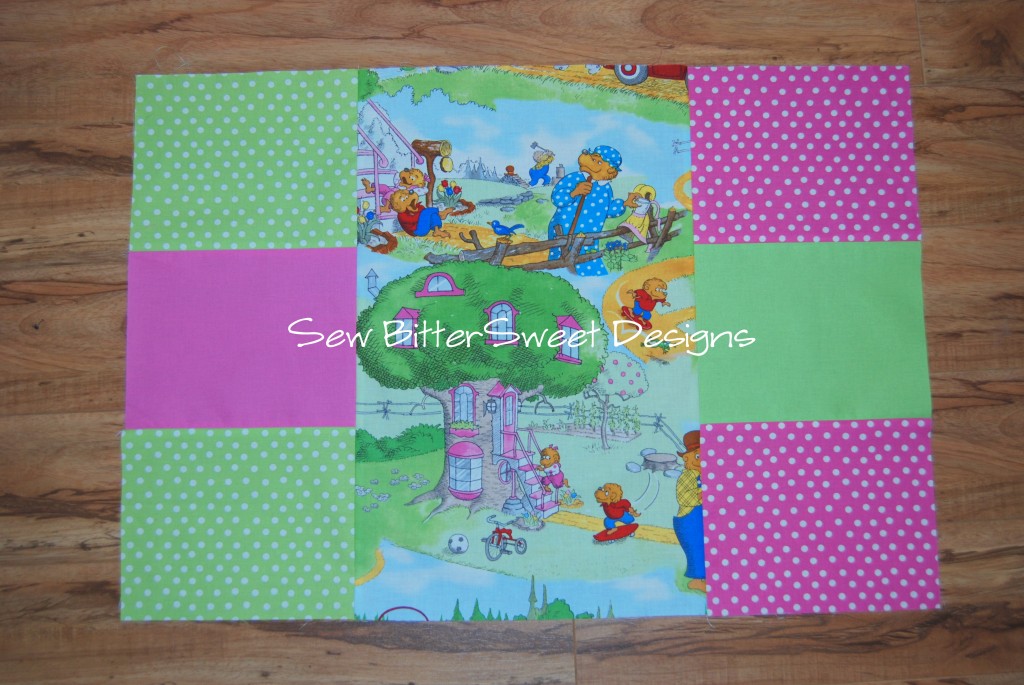
Sew outside sections to the center panel:

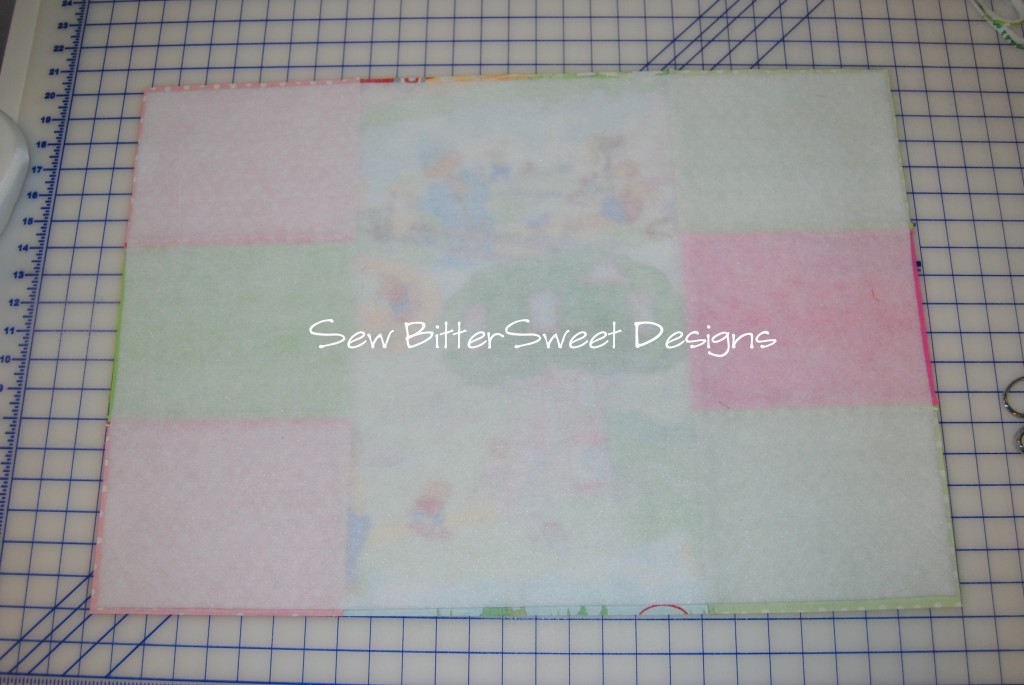
Following the Pellon Fusible Fleece directions – center the PFF to the back of the piece you just assembled.  You want to make sure that the PFF is 1/4″ smaller on all sides. You may have to trim it a little.

Next, quilt the panel however you would like to. I quilted in the side panels only and left the center print without any quilting. I also used NiteLite Thread by Superior Threads when I quilted. I couldn’t get a picture in the dark, but it glows so beautifully and Anne loves going to sleep with it in her room glowing away!

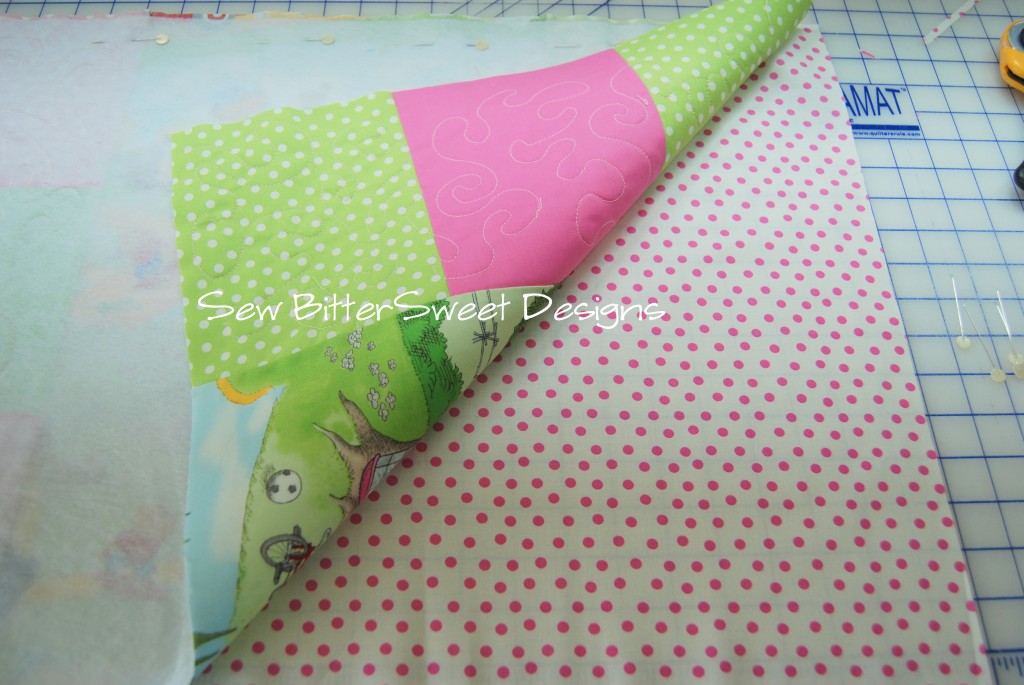
Next, place the inside fabric right sides together with the quilted panel. Pin 3 sides, leaving bottom open.

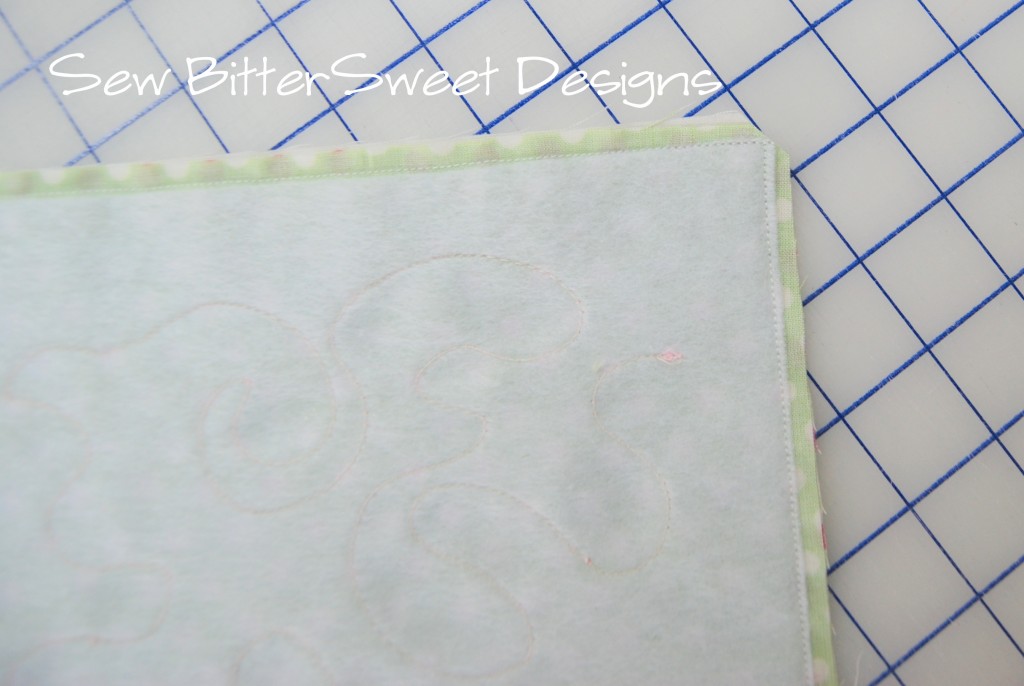
Sew the 3 pinned sides with a 1/4″ seam. Clip the corners.

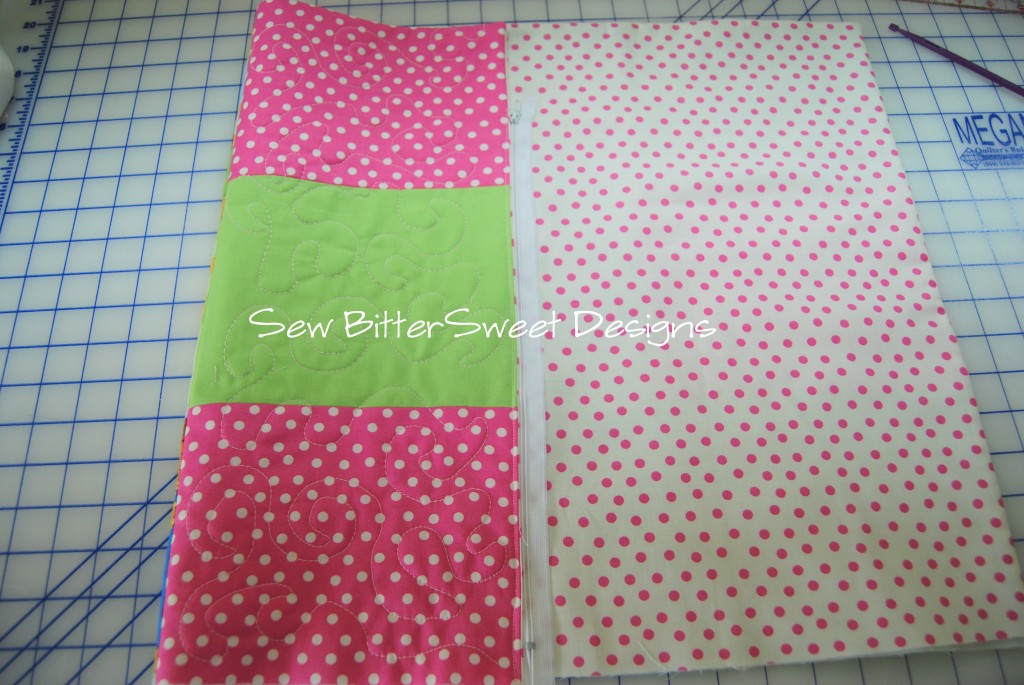
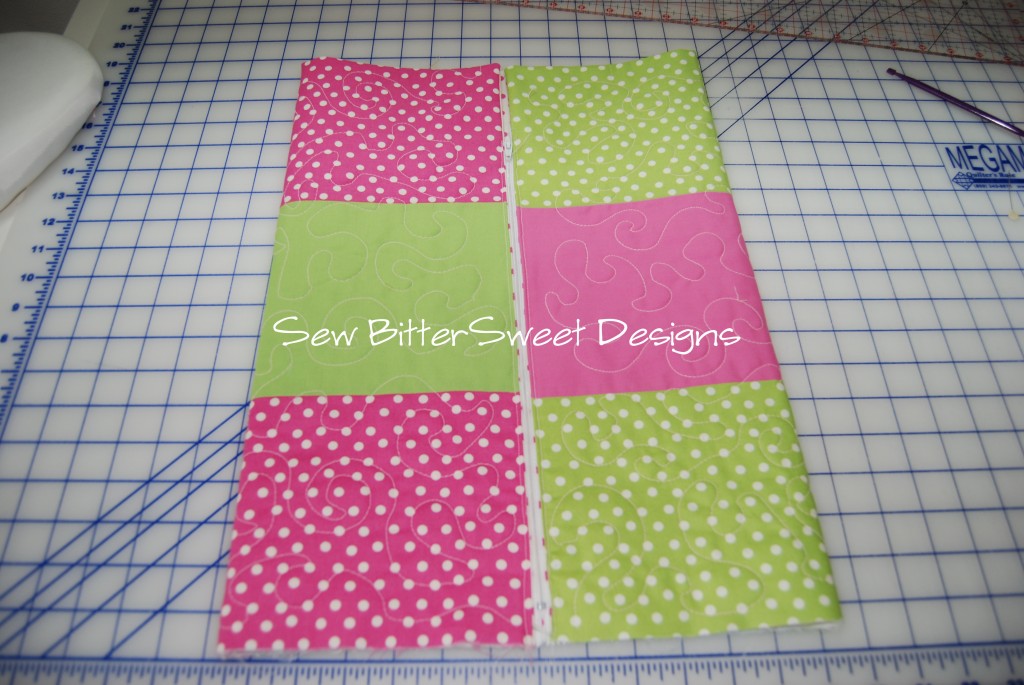
Turn right side out, pin one side of zipper into place and sew down.

Unzip the zipper and pin to the other side, be careful when sewing the zipper down that you don’t sew through the back of the sleep sack. You should now have a tube when the zipper is zipped.

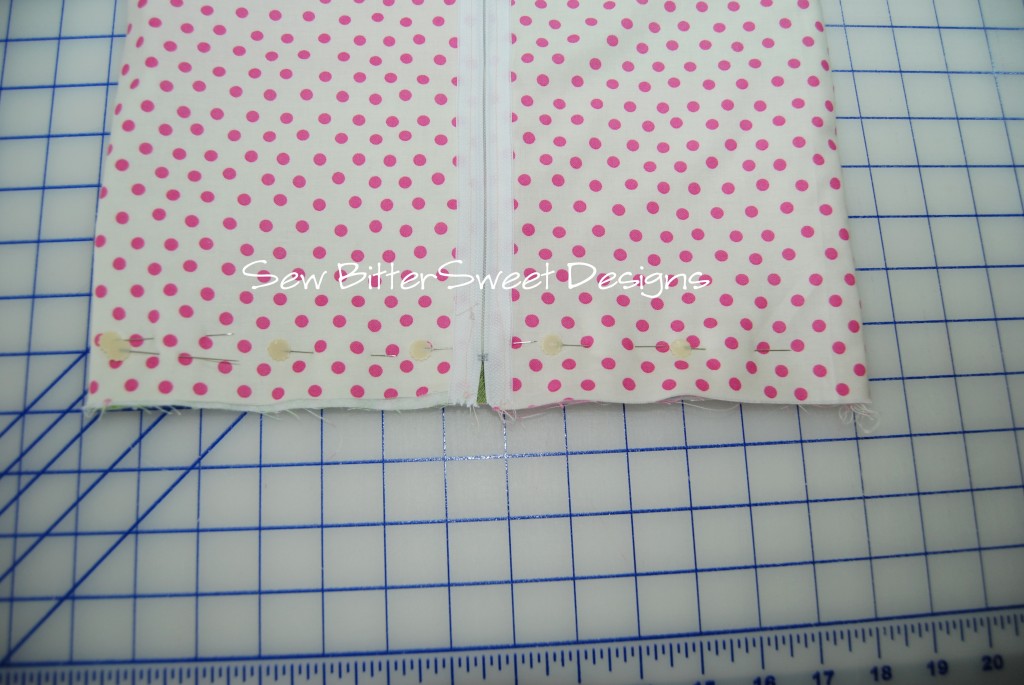
Turn sleep sack inside out, pin across the bottom and sew bottom closed, if you would like to add an “I love you” tag, this is the point to pin it in. You will want to sew this final seam close to the stopper on the zipper.

Turn right side out and you’re done!

Toddler Approved!

This is my project for the Hopeful Threads June Project. I hope you enjoy, if you make one, I would love to see it!

Winner and a trip

Today Anne and I head back home to Washington. I am excited and nervous at the same time.  I am excited because it will be nice to be in my own bed, have my lovely home, and all of Anne’s toys to play with. Not to mention our wonderful neighbors to hand out with.  I am nervous because we will be very alone and that is never easy.  Luckily my in-laws are coming for a visit in a couple week and after that my bestie will be visiting from Idaho so we can take our kiddos to ride Thomas the Train in the middle of July. Fun times!

So we will be in the car for 13.5 hours today – I know, you’re jealous. 13.5  hours in a car with a toddler, I would be jealous too…NOT!  I will spend the next 13.5 hours doing my best to keep the meltdowns to a minimum – I think there will be lots of singing, coloring and possibly even angry birds in our future!

So now, let’s make sure at least one person has a great day!  The winner of the layer cake of Quilt Blocks from Fat Quarter Shop is….

Carin! Who said “I like the Gumdrop Pattern”

Carin, I will email you on Saturday, as I will be traveling all day today.

Have a wonderful Friday everyone and a relaxing weekend!

Feathered Star Tutorial – Part 2

Welcome back for part 2 of the Feathered Star Tutorial – this will be assembly.  I have done an all picture tutorial for you – I am a visual learner and for a technique like this I think it will be really helpful. If you are looking for part one (cutting) – go here.

NOTE: ¼” seams are of vital importance for this block.  Check that you are using an accurate seam allowance BEFORE you start piecing this block. ALSO! Be sure that you do not stretch the triangles when sewing them.

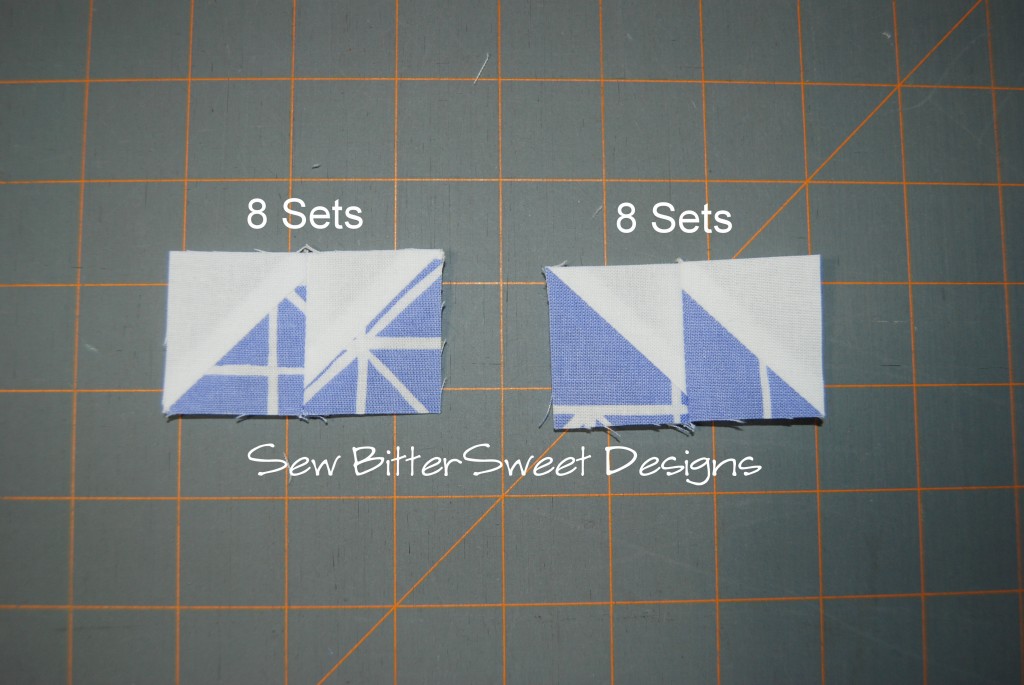
We will start with putting together the HSTs that you made yesterday following the 2 wonderful tutorials I linked to: I recommend chain piecing your pairs together for speed.


The star points are assembled in pairs. Here is the layout before for each pair, you will make 4 sets.

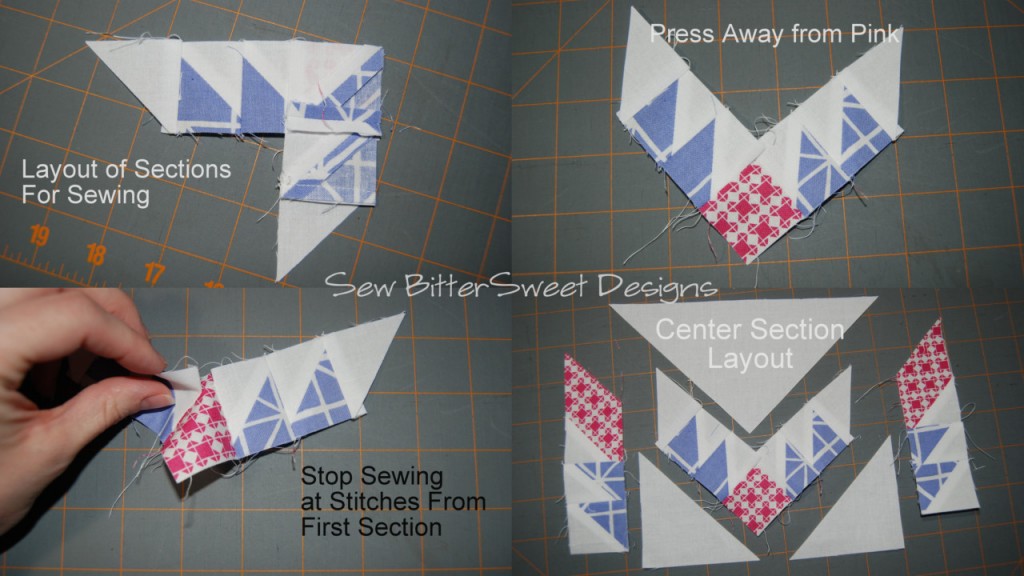
Starting with the right side point, you will assemble the diamond section first:

Assemble the left section the same way, except you will need to reverse the pieces

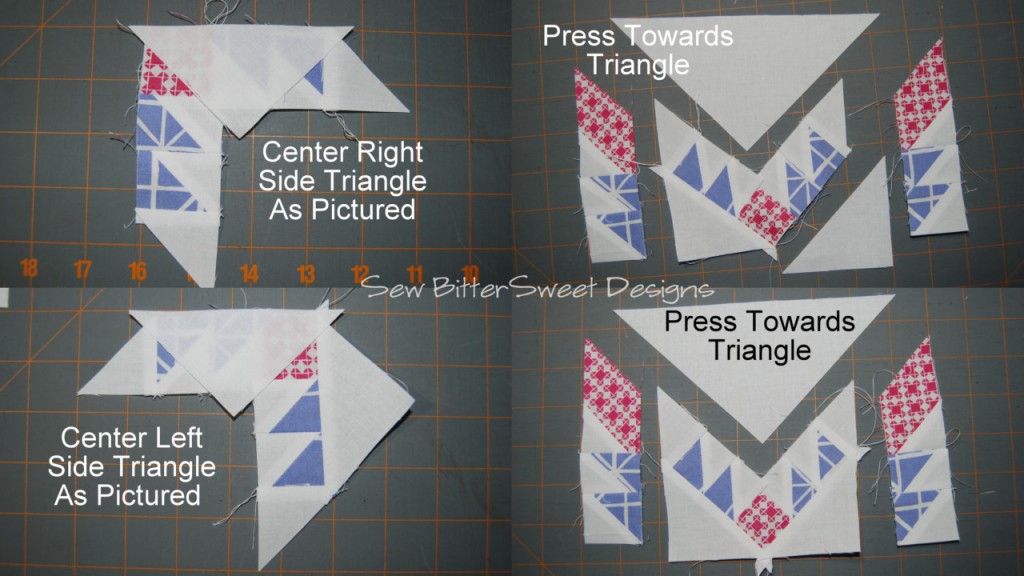
Next assemble the right side center section:

Add left side of center section:

Make sure that you stop sewing at where the sections meet (1/4” from end)

Add inside triangles:

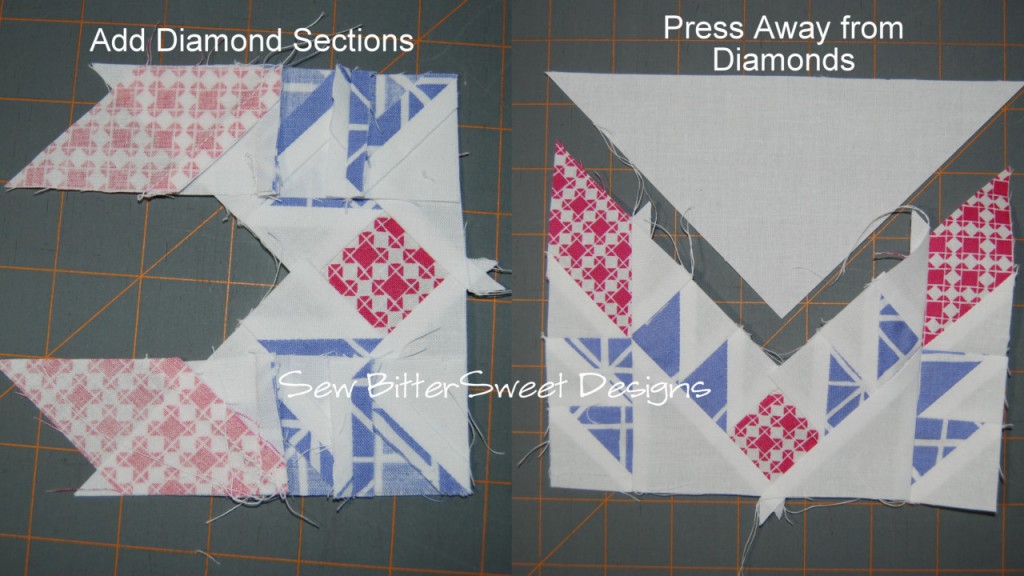
Add diamond sections:

Add top triangle, start with the left side:

Next sew right side:

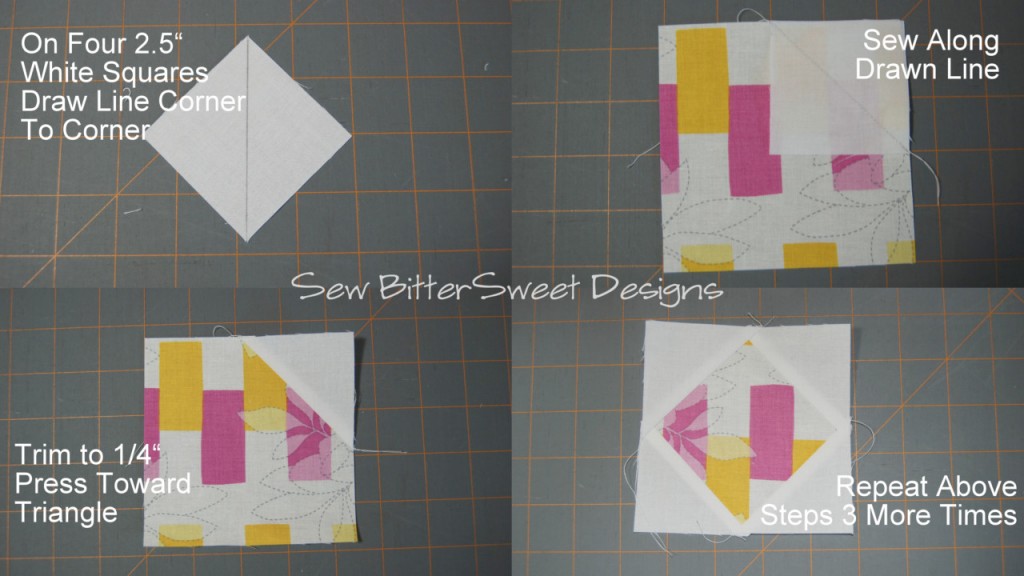
Make center “peekaboo diamond”:

Assemble the border for the center section:

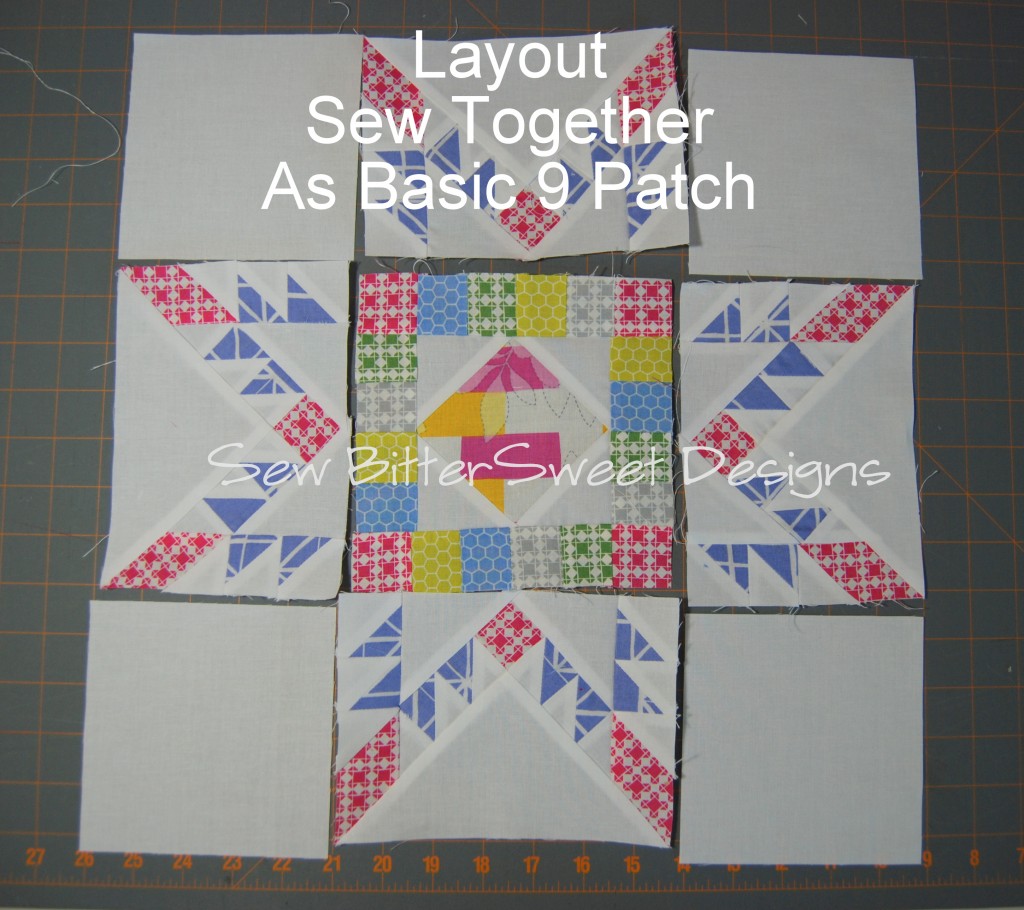
You have now assembled all of the sections – you are ready to layout your block – it is a basic 9 patch now! Sew it up and you are done!!!


The first time I assembled this block it took me 3 days, but keep in mind that I didn’t know what I was doing. I didn’t have a tutorial for the block that I designed, I just went with it.  I have now made 3 of these and the third one took me 2 nap times to assemble (that’s about 4 hours total) – 1 nap time to cut, 1 nap time to sew. I measure all my sewing time in nap times 🙂

Good luck and if you make one of these from my tutorial I would love to see it and if you have any questions, please let me know! And don’t forget to enter the Fat Quarter Shop giveaway for a Layer Cake of Quilt Blocks – which is what I am using to make my feathered stars!

I’m linking up to SewHappyGeek Manic Monday and Quilting by the River Tuesday Linky Party.

Scroll to Top