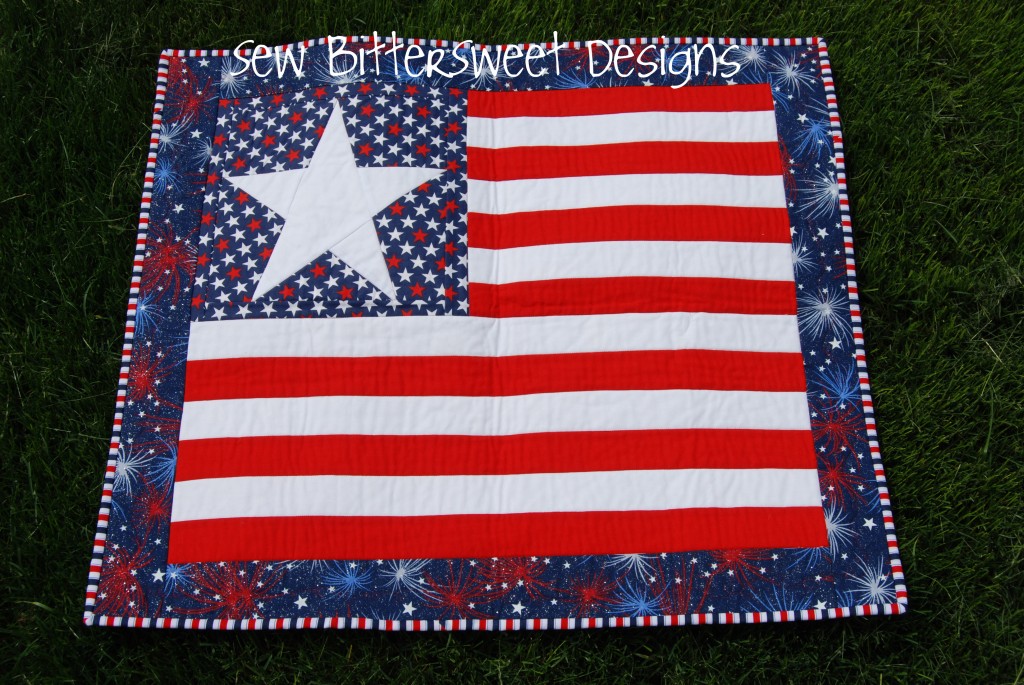
Last month Craftaholics Anonymous put up a post asking for people who were interested in participating in a handmade gift exchange with other people on the web. I jumped at the chance and I ended up with a wonderful partner, Staci from Just Sew Sassy. Let me tell you she’s got TALENT! After viewing her blog and her Pinterest Boards I knew I had to come up with something really special for our gift exchange. Staci mentioned several things she was interested in and the one that stood out to me the most was 4th of July decor.
Here’s what I came up with:
 |
| Front View |
I thought that you all might like a tutorial on how to make this patriotic wall hanging.
Supplies:
From top to bottom:
1/2 yard star background fabric
1/2 yard white fabric – I used Kona White – for stripes and star
1/2 yard red – I used Kona – fabric for stripes
1/2 yard blue fireworks for border
1/2 yard red/white/blue stripe for binding
Craft size batting
1 yard fireworks on black background for backing
1 spool metallic red thread for quilting
Cutting:
From star background fabric cut 2 – 2 inch strips
From white fabric cut 3 – 1 2/3 inch strips
From red fabric cut 4 – 1 2/3 inch strips
From border fabric cut 4 – 2.5 inch strips
For binding – following your favorite binding method cut after you have finished top and having final measurements.
Star Block: I got the pattern for my star block here – I would love to give you good instructions on paper piecing, but it was my first attempt and I have made several more attempts at it and have decided that I have a severe dislike for paper piecing. Maybe in my next life I will come to enjoy it.
Here is my finished paper pieced block – it measured approximately 8 inches with 1/4 seam allowance.
I squared my block up and then added borders from the star fabric – once done your star block should measure 10.5 inches – if it is bigger then trim it down to size
 |
| If it doesn’t measure 10.5″ – trim it down to size |
Stripes:
Sew together 6 strips in this order – red, white, red, white, red, white – cut down to 24.5″ set aside
Add last cut red strip to bottom the last white strip on the remaining panel – cut down to 14.5″
Sew this to the side of the star block:
Next, attach 24.5″ panel to the bottom of the stars and stripes – square everything up.
Borders:
Add your borders from the blue background fireworks strips (2″ each)
I used basting spray to baste the backing to the batting to the quilt top. I used both my free motion foot and my walking foot to quilt it. I went around the star and along each stripe with metallic thread using my walking foot. I did free motion quilting in the fireworks border.
Here is a close-up of the quilting on the star from the back:
What do you think? Would this quilt brighten up your Fourth of July?
Good luck making it and let me know if you have any questions. This is the third quilt that I have “designed” on my own and the first one that I have written instructions for. How did I do? I know they are not the best but I am hoping with time I will get better! Happy 4th of July!
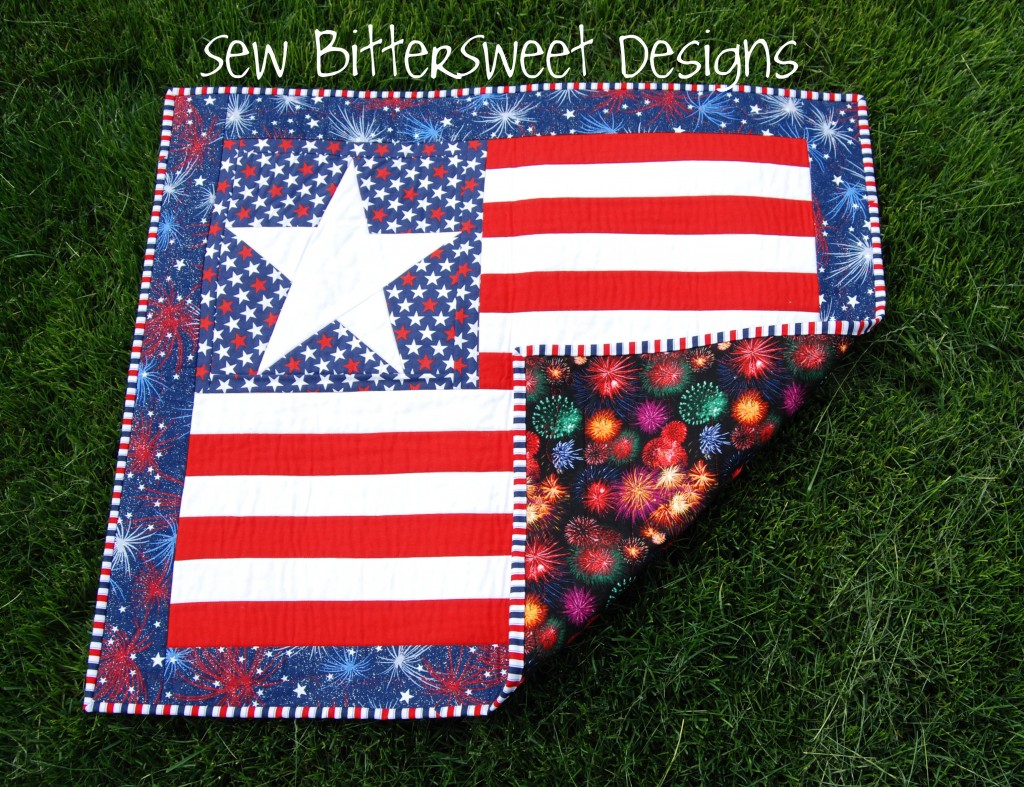
 The backing I love because it is a solid piece of fabric but it totally looks pieced. I like to call this “Cheater Fabric”.
 My label ended up being wonky instead of straight because I forgot to add it until the binding was already sewn to the front of the quilt. OOPS!


