Guest Post

Guest Post – How to Photograph Indoors

Today I have a special guest post for you, Kristin from Kristin Holt Photography and Modjeska Designs (check out her button on my sidebar).  We were talking a couple weeks ago about how I struggle to take pictures in doors during our long wet winters up here and I finally asked her if she would do a tutorial. She is a fantastic photographer!  She is also the one who put my new blog header up and she designed my awesome new watermark and taught me how to use it! You really need to check her out!

___________________________________________________________________________________________

You have an item you want to take pictures of for your blog but, you’re having a problem with lighting. Maybe you’re limited to only taking photos indoors because of the weather. Maybe you have a piece of fabric that you’re trying to take pictures of but, the pictures make the fabric look like your wadded it up and threw it on the table? Are you getting a lot of harsh shadows in your photos? Maybe the colors are true to what you’re seeing? Sound familiar? Then, this tutorial is for you!

What you’ll need:

  • Window with sunlight (preferably north or south facing window)
  • Portable surface to place your item
  • Step stool or small ladder
  • Reflector*
  • Camera

*A note on the reflector: A reflector can be purchased from a general photo supply store. However, if you do not want to spend the time or money, there are quite a few inexpensive ways to create a reflector. One way is to use white foam core. This can be purchased at most big box or office supply stores. You can get the science project tri-fold foam core boards. You can also use a plain piece of cardboard and cover it with aluminum foil. I have also been known to use a white cutting board for a reflector. If you have a car window sunshade with a silver or gold reflective surface, that will work, too! Use what you have!

This is a pullback of my setup. This is a south facing window. These photos were taken in the afternoon. I am right up against the window.

CoffeePullback3

This is a pullback of my setup with my trusty tri-fold foam core. In this photo, I do not have the foam core close enough to the objects I will be shooting. I will adjust the distance between my reflector and my focal point to get the effect I am looking for.

CoffeePullback

This is a photo of my subject without the reflector. Let’s face it, I love flat linens but, it’s not always easy to find time to iron. LOL

The cloth napkin is wrinkled. There are harsh shadows from the cup and the cinnamon stick. The colors aren’t really true. I’m seeing something lighter than what this photo represents.

CoffeeTut5A

Then, I add the reflector into the mix. I push that reflector right up to the subject I’m shooting. I want the light from the window to reflect off of the foam core and fill in the shadows and brighten my scene. Check out those wrinkles! Hee hee hee. Magic. They’re almost gone and I didn’t have to break out the iron. LOL

The shadow of the cup has lightened considerably. The dishes seem closer in color to what I’m seeing.

CoffeePullback2

You will have to adjust the reflector to your object. Here are two similar photos. One has the reflector far and the other close. Can you see the difference a simple reflector can make?

CoffeeTut1 CoffeeTut

That’s it. Simple.

You can do this!! Give it a try! I’d love to hear how it went for you. If you have any questions, please don’t hesitate to ask.

Thank you,

Kristin 🙂

Kristin Holt Photography

www.kristinholtphotography.com

www.facebook.com/kristinholtphotography

_______________________________________________________

I fully plan on applying these tips to my quilts and quilting tutorials from now on! My fabric always looks wrinkled and…I’m always ironing it, this might be the solution to my problem!

Guest Post – Vicki from Quilting Lodge

I have a great treat for you today, my wonderful friend Vicki from Quilting Lodge. She knows I have a thing for Flying Geese and has a fantastic review of a new ruler for you. If you have time make sure you hop on over and check her blog out, she has great tutorials and she will be hosting a QAL coming up soon!
________________________________________________________________________

I’m so honored and excited to be a guest on Melissa’s blog today.  My name is Vicki and I normally blog over at Quilting Lodge with my mom (when she has time).  I love to design patterns and quilt.  I hope you will stop by our blog and say hello.  I’d also love to do a little shameless plugging for my newest adventure, the Texas Teardrops Quilt Along.  This is my first QAL and it starts April 1st.  I’m very excited to share this pattern with everyone.  Check it out!    
I have to admit I picked today’s topic because I know Melissa loves flying geese blocks and so do I.  What’s not love about them?  I found a pretty cool ruler that makes 4 at a time.  It’s called the Flying Geese x 4 “no math” ruler by Lazy Girl.  The ruler comes with great directions that are very easy to follow.  I whipped out 16 flying geese units in no time.  

Let’s take a look at how easy it is.  The ruler has all the markings to make flying geese from 3/4″ x 1.5″ all the way up to 3.5″ x 7.”  This ruler is clearly marked and very easy to use.

First, you use the ruler and cut 1 large square and 4 small squares.  I cut 4 large squares and 16 small squares because I wanted to make 16 flying geese units.    

Then lay 2 small squares on top of the large square, right sides together, as pictured below.

I used some stitching lines to lay across the squares instead of drawing the diagonal line.  I’m not a fan of drawing lines on the fabric.  I never can get them straight.  The stitching lines make life easy because I can simply sew along the dotted lines and then tear the paper off. 

If you don’t have stitching lines, simply draw a line down the middle and stitch a 1/4″ from the drawn line on each side. 
Cut the square in half along the line.

Press the triangles.   You will end up with 2 units that look like hearts.

Add a small square to each unit as pictured below.  Again, I used stitching lines but you could simply draw a diagonal line on the small square.  Stitch the square 1/4″ from each side of the line. 


Cut the units apart.  You will have 4 units now.  


Press.  Ta da!  You now have 4 flying geese units.


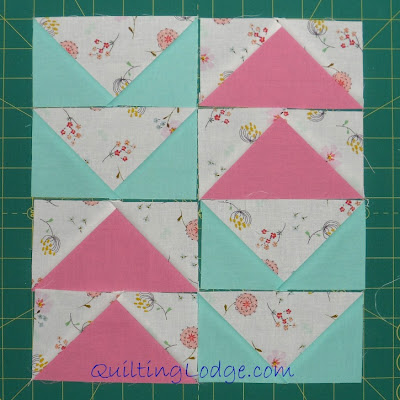
One of the benefits of flying geese is all the layout options.  I tried several layouts.


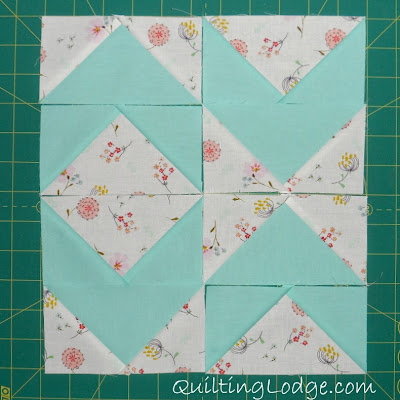
This is the one I finally settled on.  I love how the geese form little chevrons and a diamond in the middle.  I would love to do a whole quilt like this.  I see lots of possibilities.  

I hope you enjoyed my mini tutorial as much as I enjoyed sharing it.  Please stop by my blog sometime to say hello.  And a huge thank you to Melissa for letting me take over her blog today.  It’s been a pleasure.

Guest Post – Kim from Project Quilting

Hi Everyone! Today I have my wonderful blogging friend Kim here. Kim blogs at Persimon Dreams and also runs Project Quilting!
______________________________________________________________

Happy Friday everyone! I’m so excited to be doing a guest blog post for Melissa! Melissa was gracious enough to let me squeeze in here to tell you about something really exciting that will be starting on my blog this Sunday, January 6th!

Now that I’ve got your attention it’s time for me to tell you more about ‘Project QUILTING’! Project QUILTING is a quilting challenge that I run on my blog. It’s based off my love for Project RUNWAY but since I don’t know how to make clothes I thought, “Why not make quilts?”  I immediately called up my mother-in-law, Diane Lapacek, and recruiter her to be the ‘challenge giver’. She always jokes with everyone that when I get an idea, she gets a new job.Project QUILTING Mosaic

How does it work?

During the seasons of Project QUILTING (we’re about to start Season 4) my mother-in-law, Diane Lapacek, posts a challenge every other Sunday at Noon, CST. You have exactly one week to FINISH the quilt to fit the challenge. Yes – finish it – piece it, baste it, quilt it, bind it. I know it sounds scary and maybe even undoable, but trust me – it’s very doable and only a little scary.  Then you get a week to ‘rest’ before the next challenge goes up.

The first project QUILTING Challenge went up on April 11, 2010.  Since then I’ve hosted 28 Project QUILTING Challenges and 372 quilts have been created. Many participants have discovered that the key to finishing your piece is to think small.  I have created 24 wall hangings, 1 diaper cover, 1 kite, 1 mug rug, and 1 bag.

I completely realize that ‘things happen’ and you can’t always finish a quilt during a particular week (although we’ve had quite a few hand stitched ones entered too…). If that happens – no big deal! Just join in again when you can and use the challenge you missed as an inspiration for a future challenge.

What types of challenges are there?

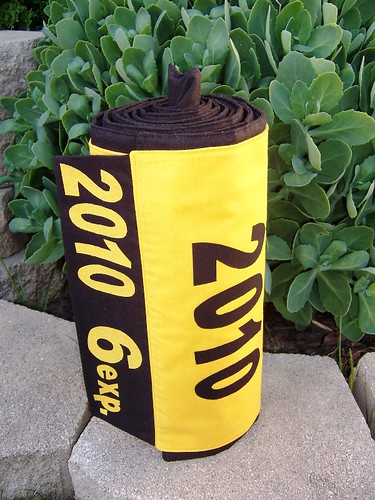
The challenges each week range greatly – sometimes it incorporates a classic quilt block, like the shoofly or log cabin.  RoadTrip1

‘Ebby and Augi Drive to Pensacola’ by Ebony Love (definitely recommend clicking on the picture above.  Ebony made a quilt like a roll of film sharing memories from her road trip)

Other times the challenge is a theme – architectural elements, road trip, or Stars Over America for example.

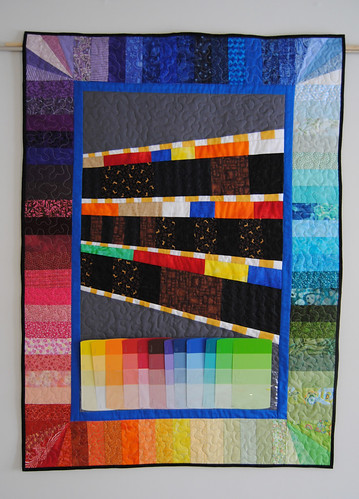
Palettes‘Palettes’ by Quilties inspired by a trip to the Hardware Store

And then, my favorite challenges are the times we get to go on a little trip to an office supply store or hardware store to find inspiration.  I don’t know how my mother-in-law comes up with these great challenges but I sure have enjoyed them.

What do I love about Project QUILTING and why would you love it?

Inspiration!  These 28 challenges have inspired me to create some pieces I never would have dreamed of without the inspiration.

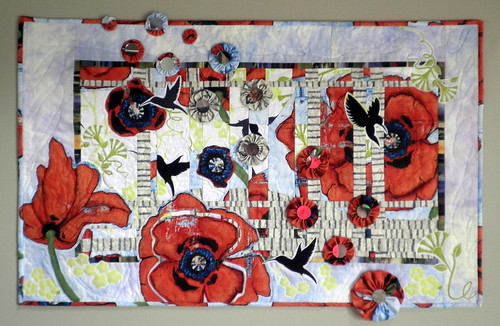
ENTRY for Project QUILTING - Large Scale Print - Spring Converges

The quilt I made for the ‘Large Scale Print’ Challenge was accepted and displayed at the Madiso Quilt Expo in 2011.

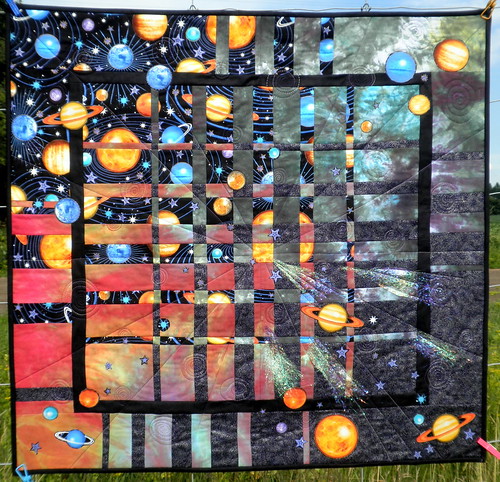
Galaxies Converge - Entry

The quilt inspired by ‘Stars Over America’ made it to the finals in the NASA/Etsy contest and now hangs on the wall of the Kennedy Space Center.  Others have been purchase and are happy in their new homes.

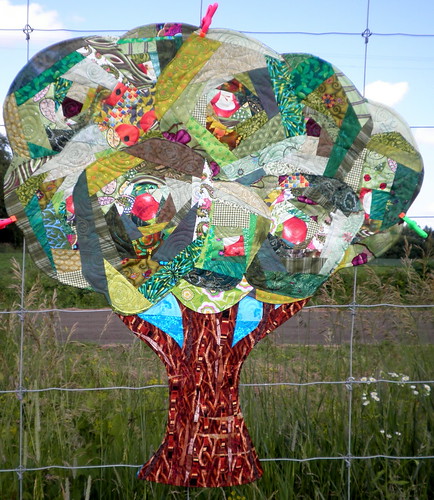
Project Quilting Log Cabin Entry - Apple Tree - Submittal

I was very excited to have the Apple Tree quilt I made inspired by the Log Cabin challenge purchased for a child’s nursery.  These challenges have inspired me to ‘think outside the square’.  I had been in a rut before Project QUILTING started and was focusing on making what I thought ‘would sell’.  It turns out, when I create by inspiration, I’m more likely to actually sell!

Why do people love Project QUILTING?

It gets my mojo running again as it sets an attainable goal for each challenge – I LOVE participating to get the creative juices flowing again!Kristin H.

Love having a finish line to work towards. Plus, it pushes me to try new things with the different challenges. Can’t wait for it to start again! – Carolyn D.

It encouraged me to work daily, think outside the “quilt”, met incredible friends, and motivated me to move away from patterns to find my voice…xoxo – Jennifer R

It was a great “jump start” to the year! – Lizz P.

Hope I’m not too late, but seeing everyone else’s interpretation of the theme is probably the best part, plus it really got my creative energy going!! Loved it!! – Becky J.

Since I haven’t been able to do a challenge yet, I love seeing the creativity of everyone who participates – always blows me away! – Melissa D

How do I join in?

Simple.  Just head to PersimonDreams on Sunday, January 6th at NOON CST to see the first challenge.  Take the challenge, be inspired by it, make and finish a quilt in the week time frame, post pictures of the quilt (or email me pictures and I’ll post them for you) to the Project QUILTING with Persimon Dreams Flickr Group.  Once you’ve done this your name will get put into a hat (literally) and you may be randomly chosen to win one of the great prizes from our sponsors that week!  In just over a week you’ll have a quilt and maybe a great prize on it’s way to you – seriously, how can you beat that?

Also – these challenges fit in really well with Melissa’s A Lovely Year of Finishes.  With the schedule of Project QUILTING you will have 2 quilts FINISHED each month for three months!  A great way to enter into her fun challenge and possibly win prizes too!

I hope I’ve sparked some interest in Project QUILTING with you and you decide to join in the fun!  Feel free to help me promote this fun challenge by grabbing the button below and adding it to your blog.

Project QUILTING Season 4


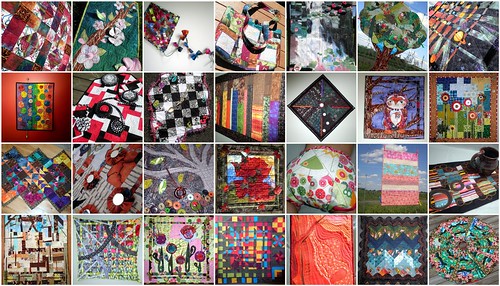
28 quilts made by Persimon Dreams for Project QUILTING Challenges

All 28 of the quilted pieces I made during the 28 Project QUILTING Challenges. I’m so excited to be adding 6 more quilts to this mosaic by the end of March!

Find Project QUILTING on

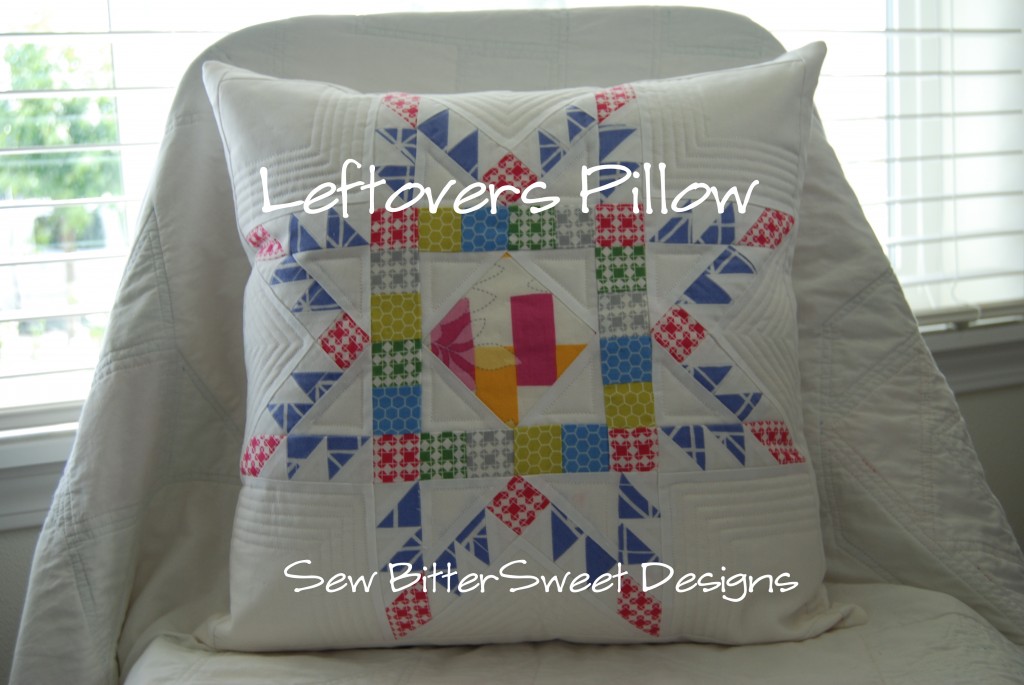
Leftovers Pillow Tutorial

Feathered Star Leftovers PillowHappy Monday and Happy October Everyone!

Today I have a great tutorial for you but it isn’t here, it is over at Quilter in the Gap!

As it is October 1st it is time for everyone to link up what they finished this past quarter as part of the Finish-A-Long that Rhonda is hosting. I actually didn’t make a list for the 3rd quarter. I knew I was going to blow all my goals, so I didn’t set myself up for disappointment, but my list for the 4th quarter is definitely going to get written up!

For the next 7 days, Rhonda is going to have tutorials from some of your favorite bloggers and designers:

10/1 – Melissa (that’s me!) – Sew Bitter Sweet Designs
10/2 – Kelly V – Before School Starts I Quilt
10/3 – Sarah – Fairy Face Designs
10/4 – Cindy – Fluffy Sheep Quilting
10/5 – Sarah – In Stitches
10/6 – Jana – Studio 3 Twelve
10/7 – Sarah – Pings & Needles

Make sure you stop by here tomorrow too! It is my day on the Let’s Get Acquainted Blog Hop hosted by Beth of Plum and June.

Plum and June

Guest Post – Susan from The History Quilter

Today I have a special treat for you, Susan from The History Quilter.  I met Susan on Twitter – gotta love that social networking thing! We quickly discovered that we had so much more in common than just quilting. Susan is working on her master’s degree in education to teach High School History…and oddly enough before my wonderful daughter was born, I was doing the EXACT SAME THING!  Susan does a regular podcast that you can download and it is so much fun, I usually listen to it while I am cooking dinner – make sure you check it out!  One of my favorite things that Susan does every week is a food post – and she just hits it out of the park every week!
_______________________________________________________________________

Hello fellow quilters and fans of Melissa of Sew BitterSweet Designs!  My name is Susan and I blog at The History Quilter and host a podcast called The History Quilter Podcast available on Podbean and iTunes.  Melissa and I discovered each other via Twitter and not only do I enjoy her blog but her wonderful support via Twitter has been invaluable these last few months.
As Melissa enjoys my dessert posts so much I thought I would share with you a Chocolate Streusel Cake recipe that I’ve been making ever since I was a teenager when my mother first shared it with me.
First the recipe:
Chocolate Streusel Cake
1 Pkg. Yellow Cake Mix – any kind, no pudding in the mix
1 small package Instant Vanilla Pudding
4 Eggs
8 oz. Sour Cream
1/4 Cup Milk
1/2 Cup Oil
Streusel Mix
1/4 Cup Brown Sugar
1/4 Cup Sugar
3 Tb. Cocoa
1/2 tsp Cinnamon
8 oz. Chocolate Chips
Bundt Pan
Butter or Oil Spray
Cocoa or Flour to dust pan
1. Spray or rub bundt pan with oil or butter.

2. Dust with cocoa or flour.  I like to use cocoa to change things up a bit.  Plus I like the color at the end. You’ll see….

3. Mix first six ingredients together. I usually use a stand mixer.

4.  Pour in 2/3rds of the batter into the bottom of the bundt pan.

5.  Mix up the Streusel Mix in a separate bowl.


6. Sprinkle 1/2 of the streusel mix over the batter.  Then drop in chocolate chips very precisely just like a quilter would do.

7. Oh come on….forget that – add them all in haphazard.  Who cares if they look nice?  Like our mother’s have said, it all mixes up in our stomach.

8.  Pour over the remaining batter.

9.  Take a knife and go down deep enough to swirl the streusel/chocolate chip layer with the batter.  Do not over swirl.

10. Sprinkle the remaining streusel over the top.


11. Bake at 350 degrees for 1 hour.  Remember this is the bottom so cracking is just fine.

12.  Let sit about 30 minutes before you un-mold the cake.  I like to run a knife around the perimeter of the cake and the center to catch any chocolate chips that might have adhered to the sides that may prevent the cake from coming out nicely.  I usually do a quick 1, 2, 3 and flip…ah success.  See how dark it is?  That’s the cocoa.

13.  After the cake has cooled I sprinkle with a bit of sifted powered sugar but sometimes I leave it plain.

14. Enjoy.  Goes well with hot chocolate (my favorite), milk or coffee.

A huge thank you to Melissa for inviting me to guest post today.  I’ll be sending her a virtual piece of cake right away. Please come visit me at The History Quilter to see what I’ve been working on – quilting, sewing, gardening and cooking/baking.

Ciao,

Susan
____________________________________________________________________

Thank you so much Susan! Everyone has to cook this and tell me how good it is because I’m allergic to chocolate and I need to enjoy it vicariously through all of you!

I will officially be back tomorrow and I have some really special things up my sleeve for you that you won’t want to miss out on!

Scroll to Top