This tutorial is part of the Baby Love November Project at Hopeful Threads. Please read more about the project and consider joining us and sew along!
For this quilt I took a simple panel (21″x21″) and added borders and backing to turn it into a 36×36″ NICU Quilt. I will show you how to use batting scraps for the batting and I have links 2 binding techniques and a labeling technique for the brave!
Supplies include:
Panel you love
Coordinating fabrics for borders
Matching thread for the quilting
Batting or batting scraps and backing (I like 5″ extra on all sides for the backing and batting but you can make do with less than that).
To quilt I recommend a walking foot for straight line quilting or a darning foot (also called a free motion quilting foot) if you want to do free motion quilting (FMQ).
Step 1: Pick a panel
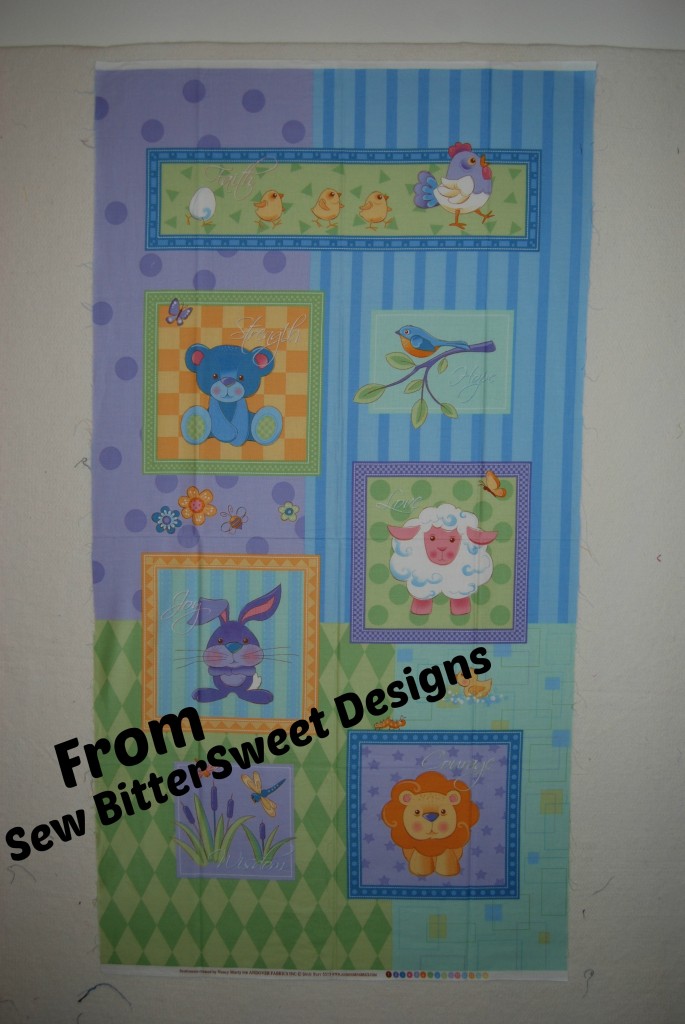
 As this panel measures 21×21 inches I decided I would add three borders and pull colors from the main panel. I selected a pink and yellow right off the bat. As each panel will differ in size I am not going to give measurements. Remember for a NICU quilt, and ideal size is right around 36×36 (roughly 1 yard by 1 yard).
Remember when quilting, to use a 1/4″ seam allowance.
My first border measures 2.5″ wide.
 I forgot to take picture of how I attached the first 2 borders, but I have pictures for my 3rd border (I was really in a sewing groove). I cut my strips 2.5″ x width of fabric (wof) and trimmed them after they were attached to the panel.
For my next border I used 4.5″ strips of a beautiful yellow fabric (this fabric was donated by Sondra from Contemporary Cloth).
 For my final border I did a lot of auditioning of fabrics. As part of my process I emailed a bunch of my favorite quilty friends for their opinions and I landed on a beautiful green dot.
 I did a 2″ border and I started by sewing on both of the vertical sides:
 Next I pressed my seams towards the green and I trimmed them to the correct size.
 Then I added the horizontal strips
 I pressed these two seams towards the green and trimmed again. Finishing off my top.
Continue to add borders until your quilt top measures 36″ x 36″ (I only needed 3).
 Next you will need to prepare your batting. I normally press mine, though sometimes it needs pressing with steam. I only have a bolt of batting at my house and as I didn’t fancy a trip to JoAnns, I improvised and pieced some batting scraps together. You can either line your batting up and zig zag stitch the scraps together or you can use fusible batting tape.
The final step is to baste your backing, batting and top. I use the Pinmoors I bought from Quilting Lodge (Pinmoors are awesome and I will soon have a review for them). After you baste your layers you can quilt to your hearts content. Use your walking foot or free motion foot for this and coordinating thread.
 To bind this quilt, I used my backing fabric and my tutorial for turning the backing over to the front for binding. I also have a tutorial on how to make binding strips and machine sew them down.
Super easy! Let me know if you have any questions.

 If you live in the United States, I hope you and your family have a very blessed Thanksgiving. If you are outside the United States, I hope you have a very blessed Thursday.