quilt

A Finish – Kinda Feels Like a Win!

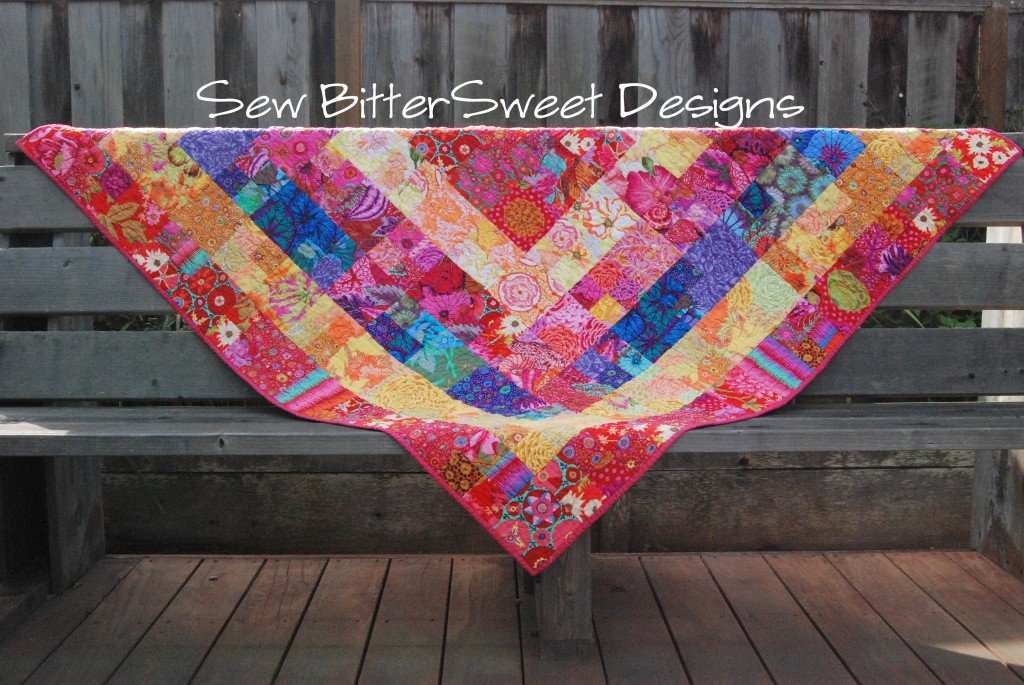
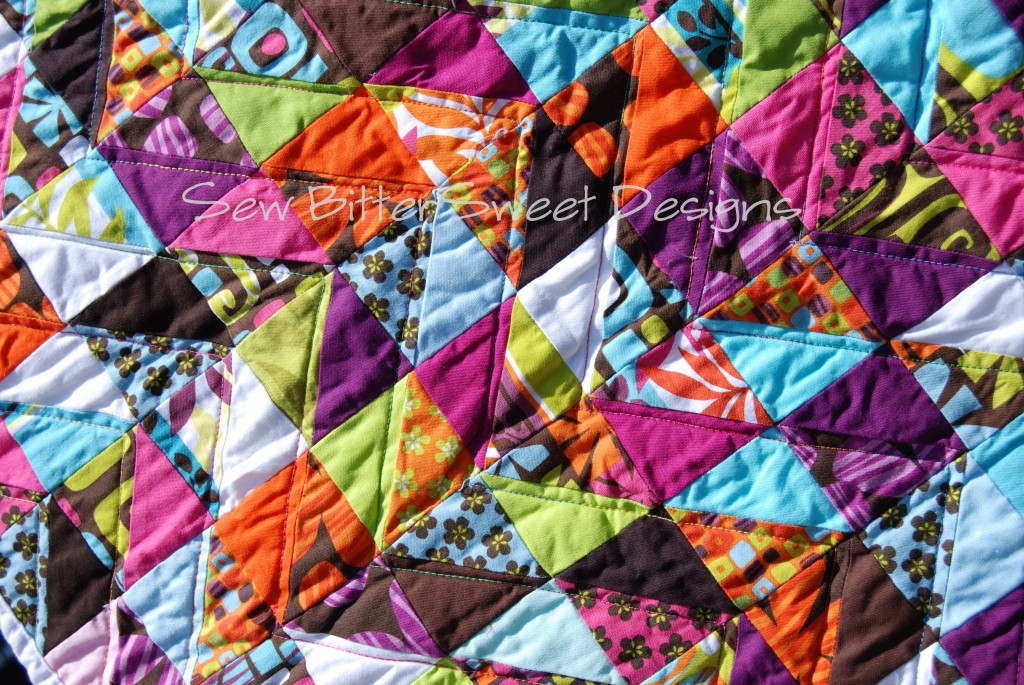
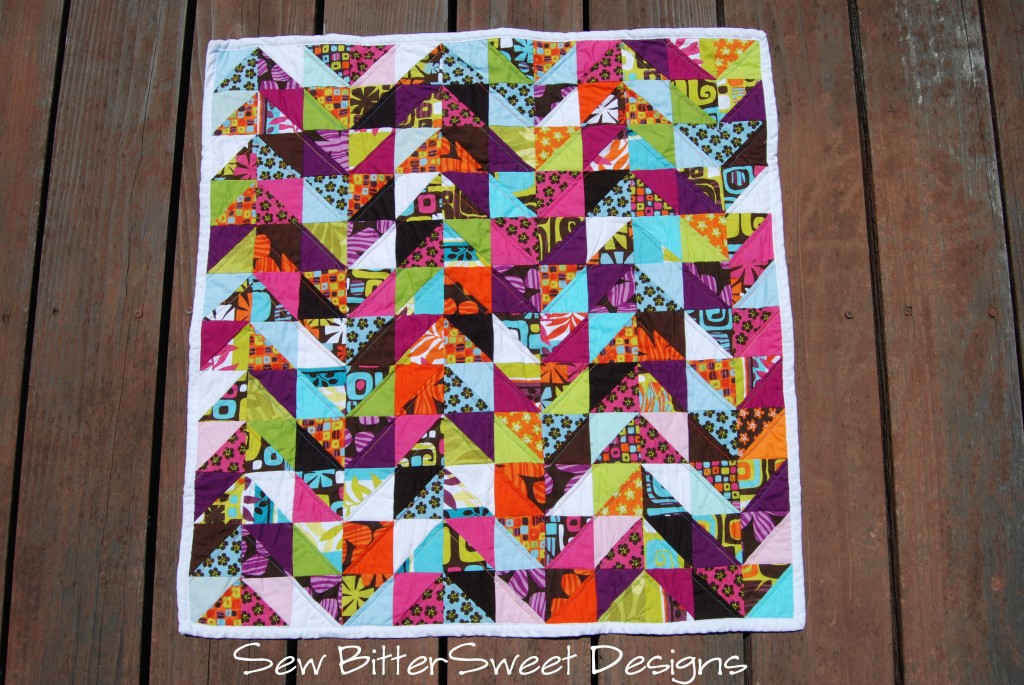
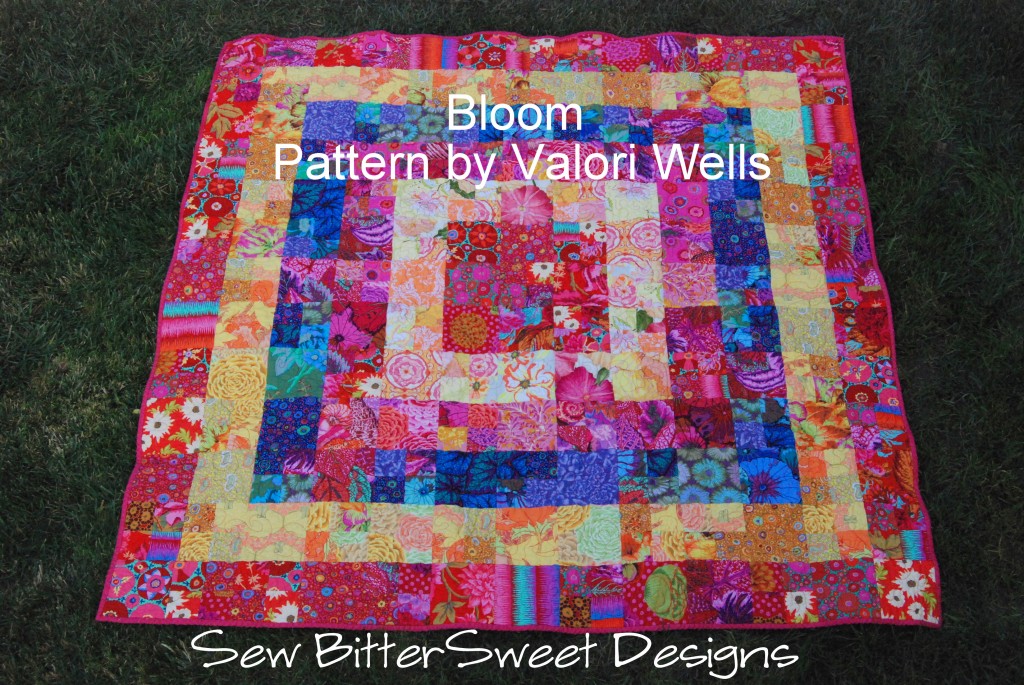
I started a quilt back in July, it is my first ever commission. The bad thing is that I have actually have had it 95% done since July except the binding…which is my least favorite part of the quilting process. I am supposed to give it to its future owner at the end of this week, so needless to say it moved to the top of the finish it fast list.

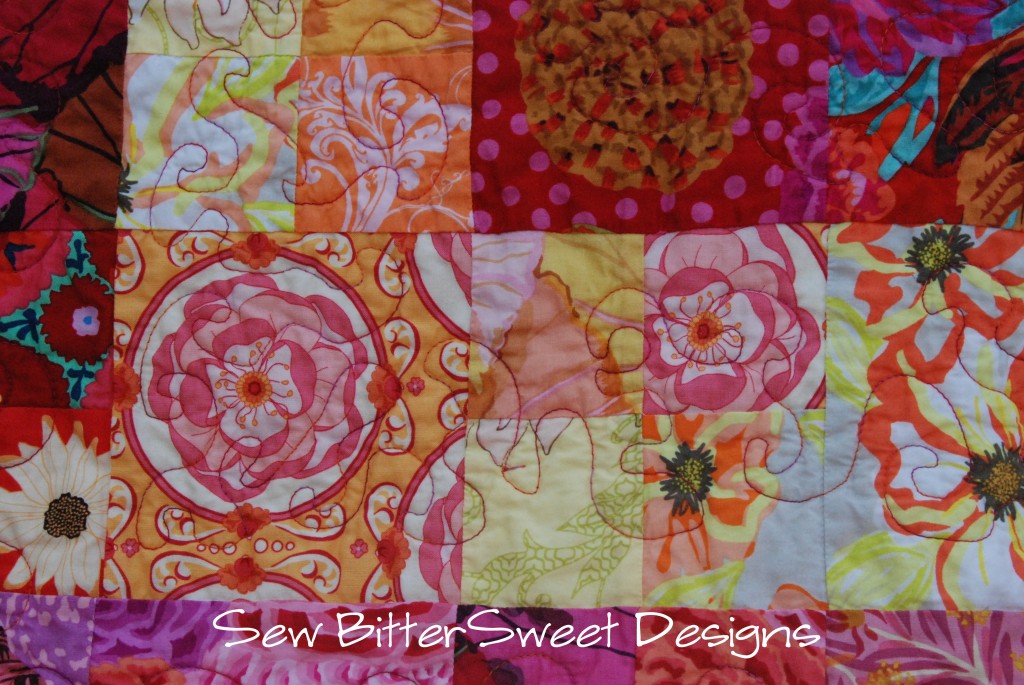
The quilt pattern is Bloom, by Valori Wells. I was provided with the kit and asked to assemble it.

How about a few more lovely pictures?

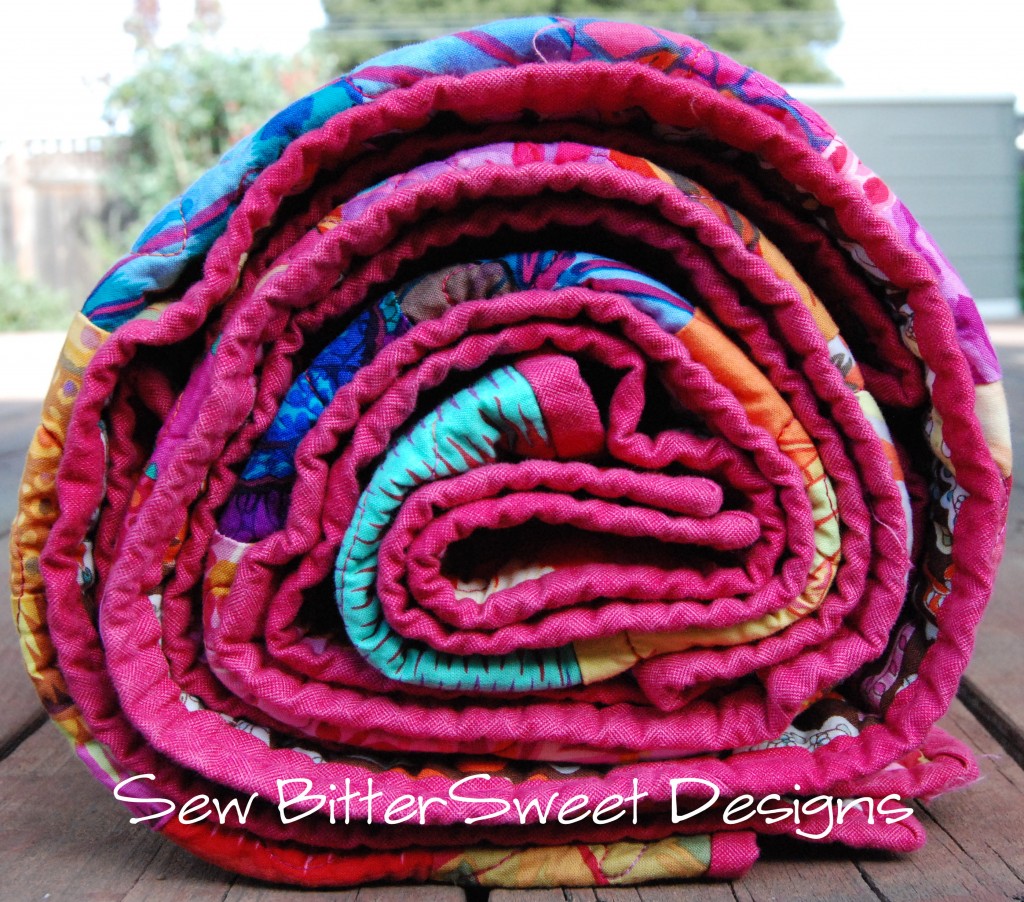
All wrapped up and ready to deliver!

As we are traveling my sewing time is slightly more limited. This week I need to make 3 bee blocks and hopefully mail them off by Friday and then it is all holiday sewing. Blankets for my nieces and nephews and….hopefully pajamas for Anne. Wish me luck on the bee blocks!

Still Sewing

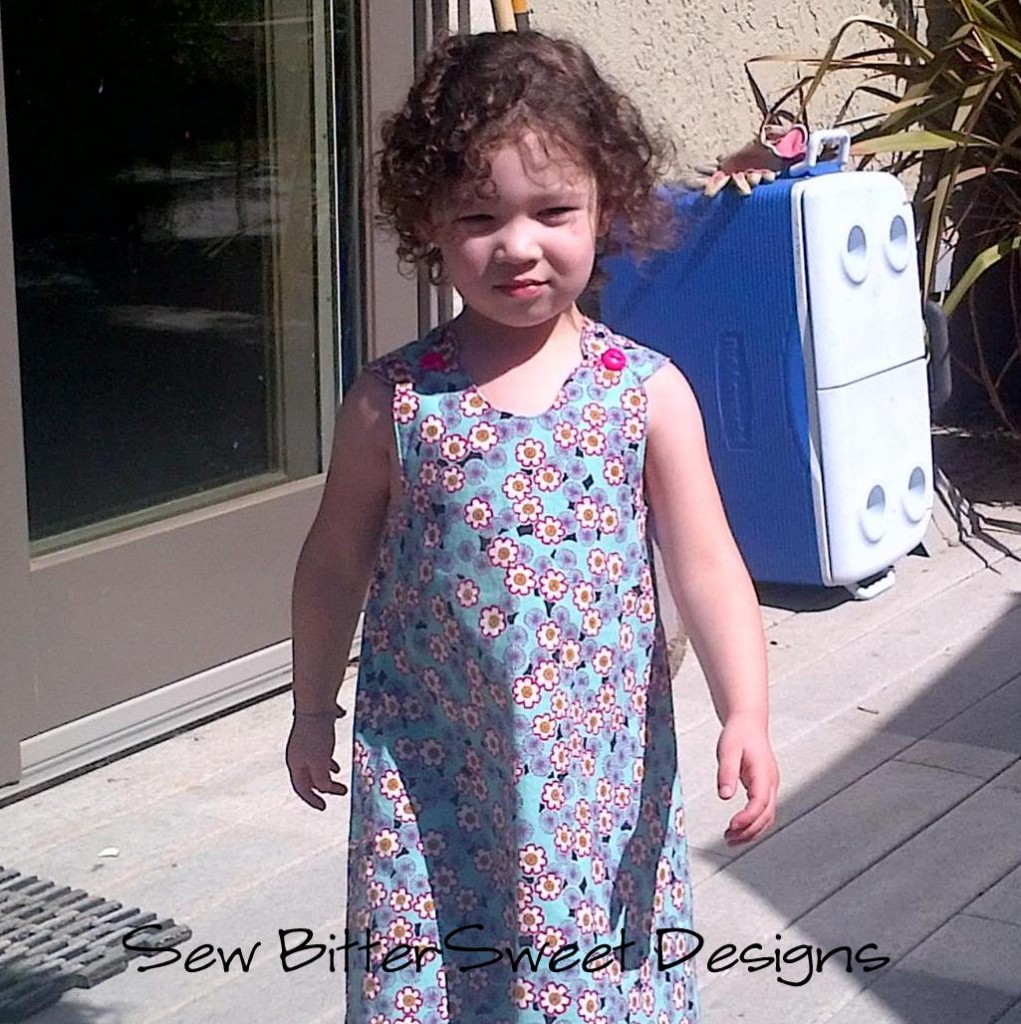
Did you notice I said “still sewing” and not “still quilting”?!?  No, I haven’t given up quilting, I am just adding a little something new to my repertoire! With the encouragement of a very wonderful friend who I have truly come to treasure I have not made just one dress, but I have made 2 dresses in the last month!  Kristy from Hopeful Threads has been encouraging me to make a dress for Anne for months now, and last month I took the plunge and made a dress for her Dress A Girl challenge.

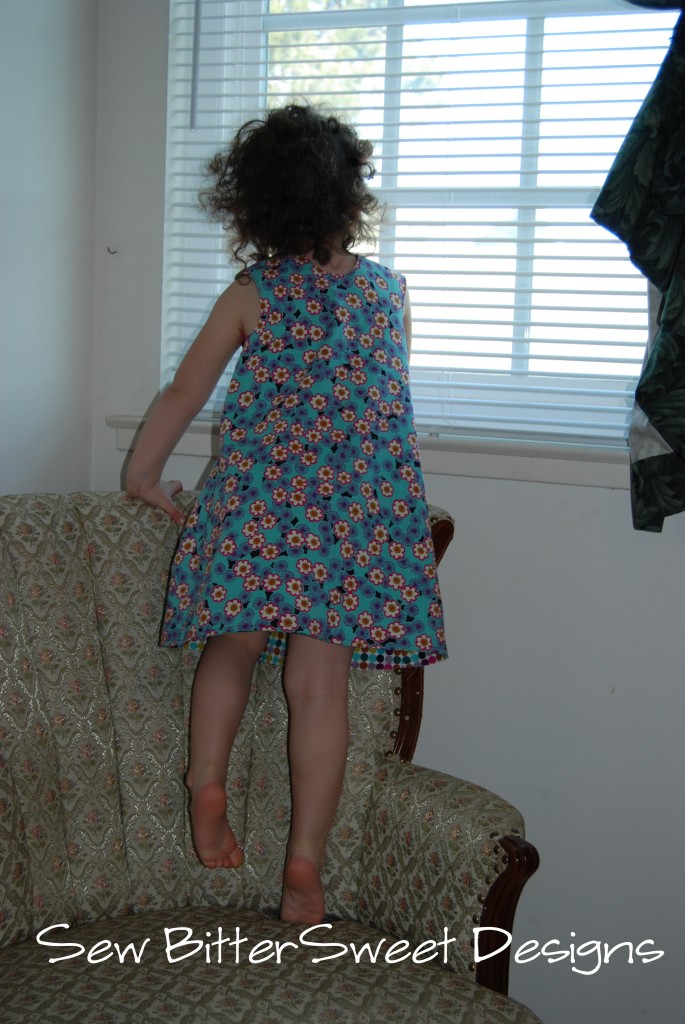
I read Kristy’s review on the Little Comet Tails – Gemini Jumper and I thought to myself…”I can do that”. Before we came down to California, I ordered the pattern and shipped it to California so it would be here waiting.  Now, keep in mind the only dresses I have ever done have been all straight line sewing AND neither have had pattern pieces!  I have to say, Kristy got her review spot on, I was actually able to do this pattern.  Now don’t get me wrong, I had to email Kristy with a slew of questions and at one point uploaded a picture to Facebook and tagged her in it just to make sure I was doing everything correctly.  She is so wonderful for helping me like she has!  What do you think?

The fabric is from 2009 and is Alexander Henry – I just love his fabric and I have to say I have been drooling over at Contemporary Cloth on the Alexander Henry that Sondra has in stock right now!

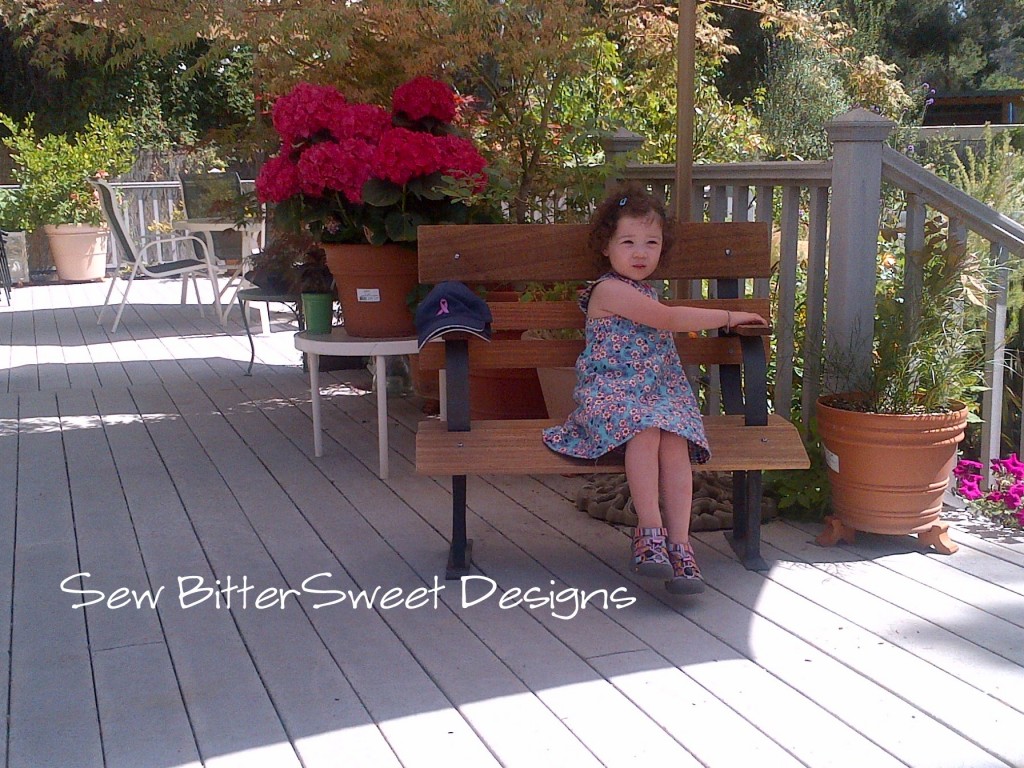
(Here’s Anne sitting in my Aunt’s garden!)

And now for the quilting! Since I have been here for the last 2.5 weeks, I have managed to get 3 quilts finished – the tumbler Flock quilt, my mom’s Mother’s Day gift, and a special gift for a special friend.

Please don’t ask me the fabric line…I have no idea, sorry!

This is my May Care 4 Caregivers project from Hopeful Threads.  Oddly enough, the caregiver that I chose to give this beauty to, is Kristy. The parameters were to pick a caregiver in your community and use your sewing talent to find a way to honor them. This community has become a huge part of my life and while I have only participated in 2 of Kristy’s challenges, I have been following her blog since last August and she just blows me away. I decided to recognize Kristy for all she has given to not only our community but to communities around the world. She has literally impacted lives around the world. Thank you Kristy for all you do!

What have you been sewing? This week I have been working on a Feathered Star block, it is going to be the center for a mini quilt I am working on, hopefully pictures for you next week!


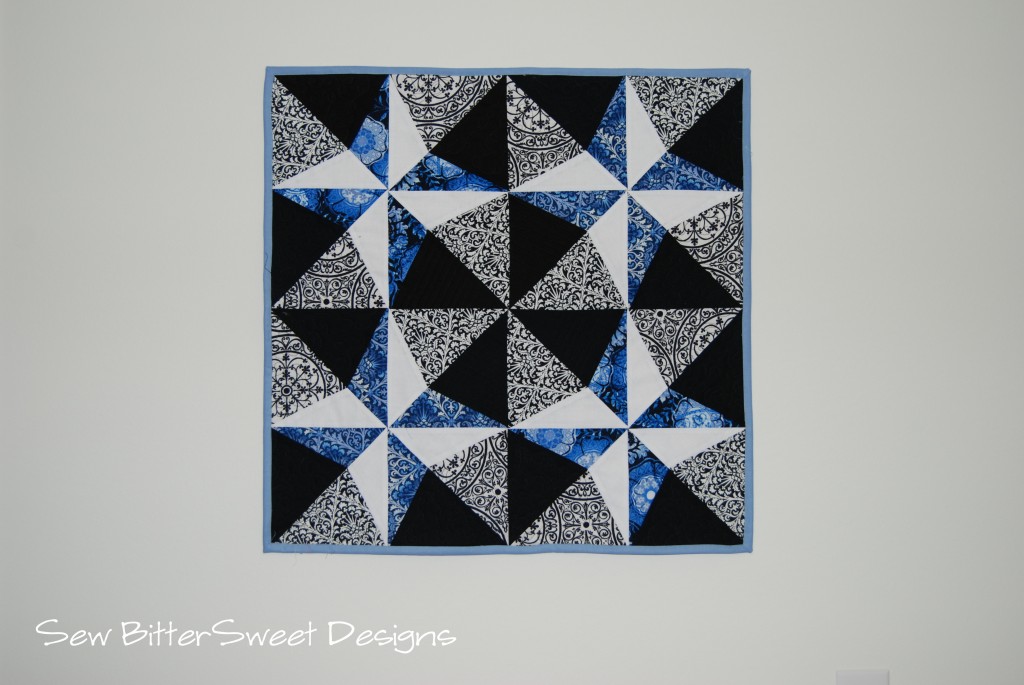
Star & Dot Wall Hanging Tutorial

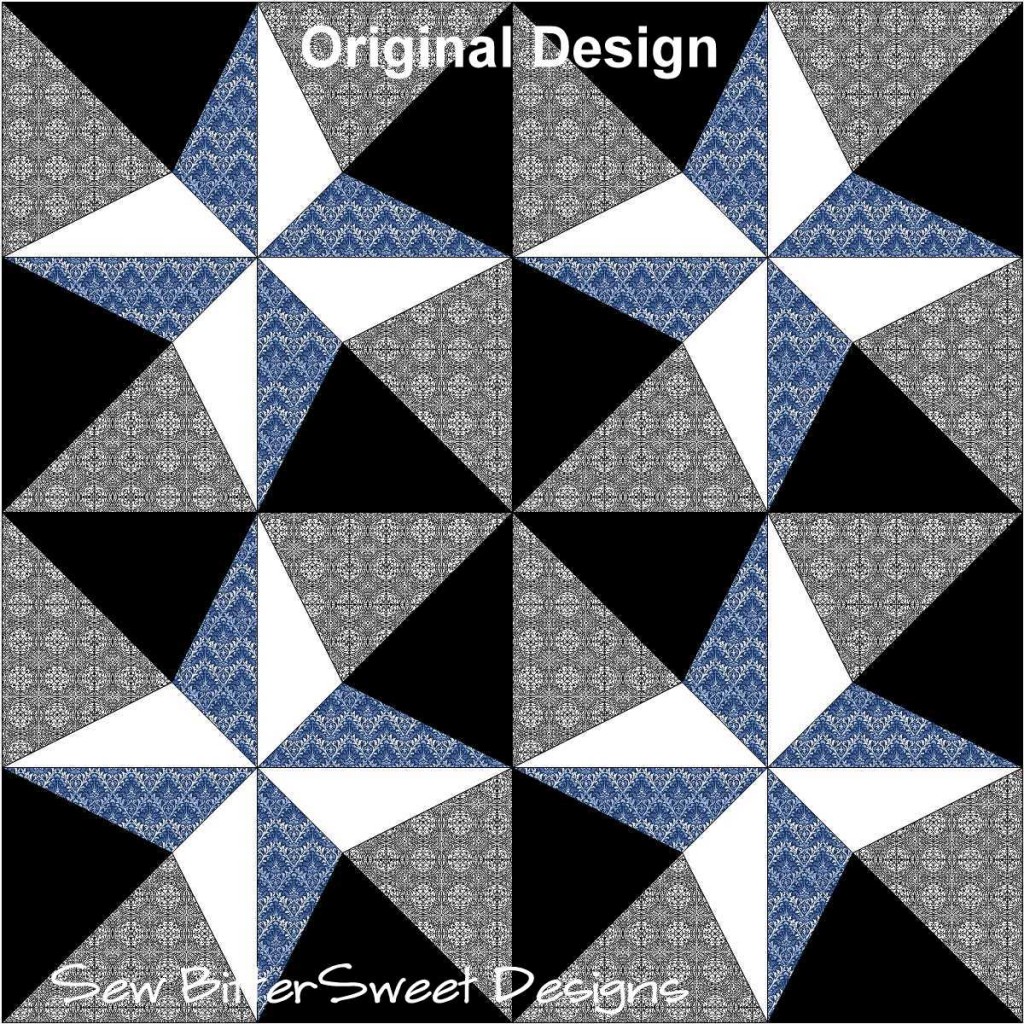
This is block is called Star & Dot and is attributed to “Comfort” from the year 1910.

You will want to download the cutting templates and the paper piecing templates.
(Please let me know if you have any trouble downloading these files – I would be happy to email them to you as well.)

You will need:

Helpful Supplies Include:

  • Fabric Glue Stick
  • Pins
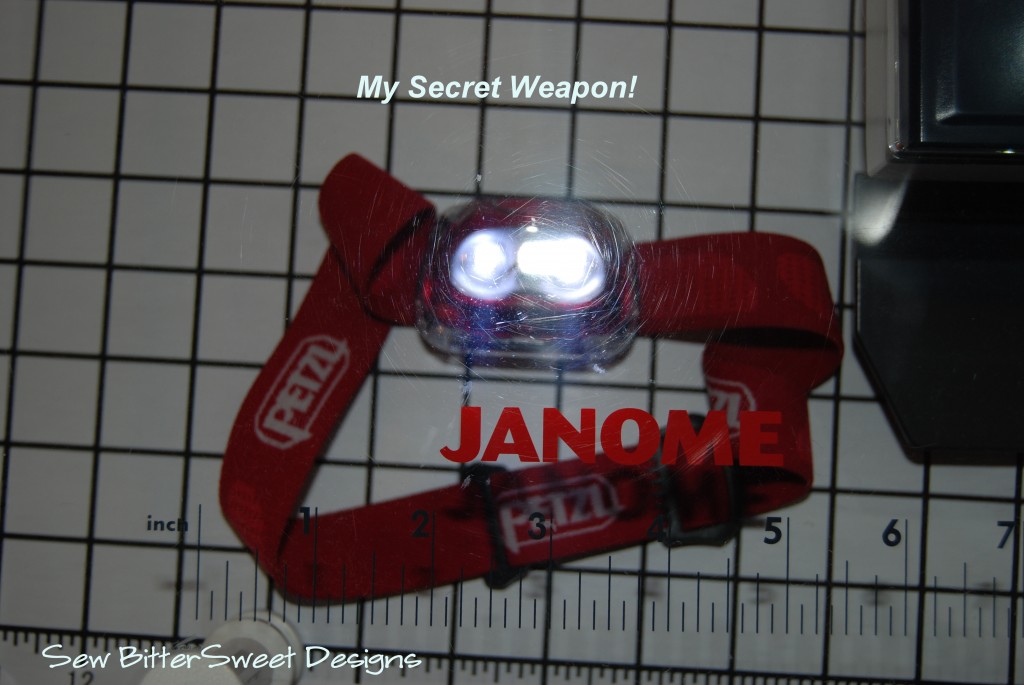
  • Light Box or hiking head lamp

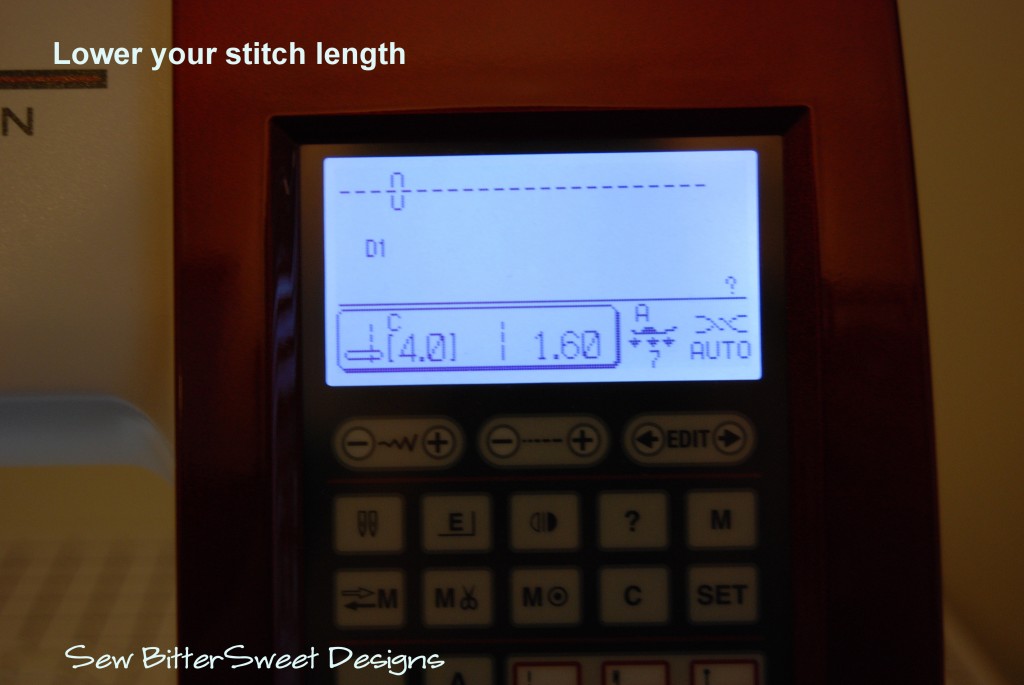
I like to start by lowering my stitch length; this makes it easier to tear off the paper when you are done with your piecing. I lower mine down to 1.6.

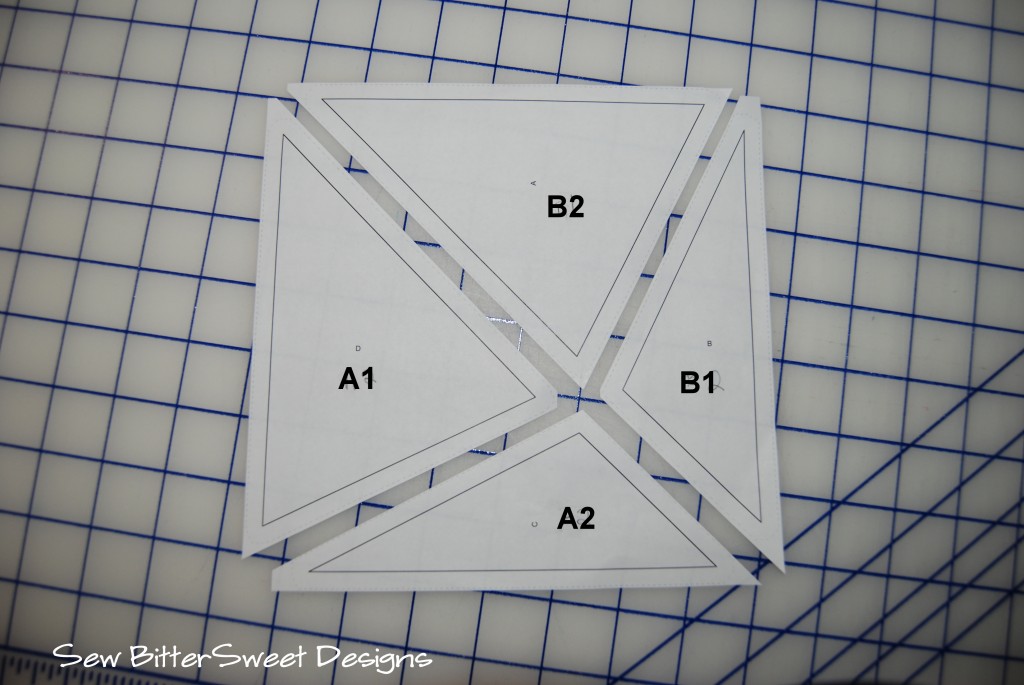
Using your cutting templates, with the fabric right side up, cut the following (I like to cut mine slightly larger (about 1/8”) than the templates – gives you a little wiggle room):

White – 16 pieces with A2
Black – 16 pieces with B2
Black Medium Diamond – 8 pieces with A1
Black Medallion – 8 pieces with A1
Blue Medium Diamond – 8 pieces with B1
Blue Floral Medium – 8 pieces with B1

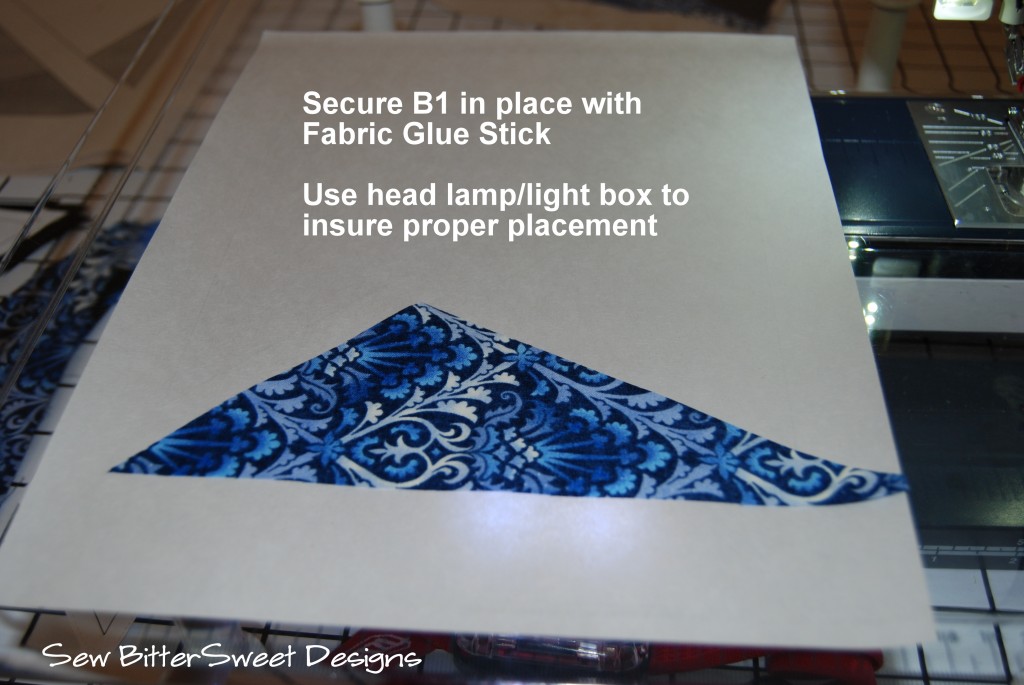
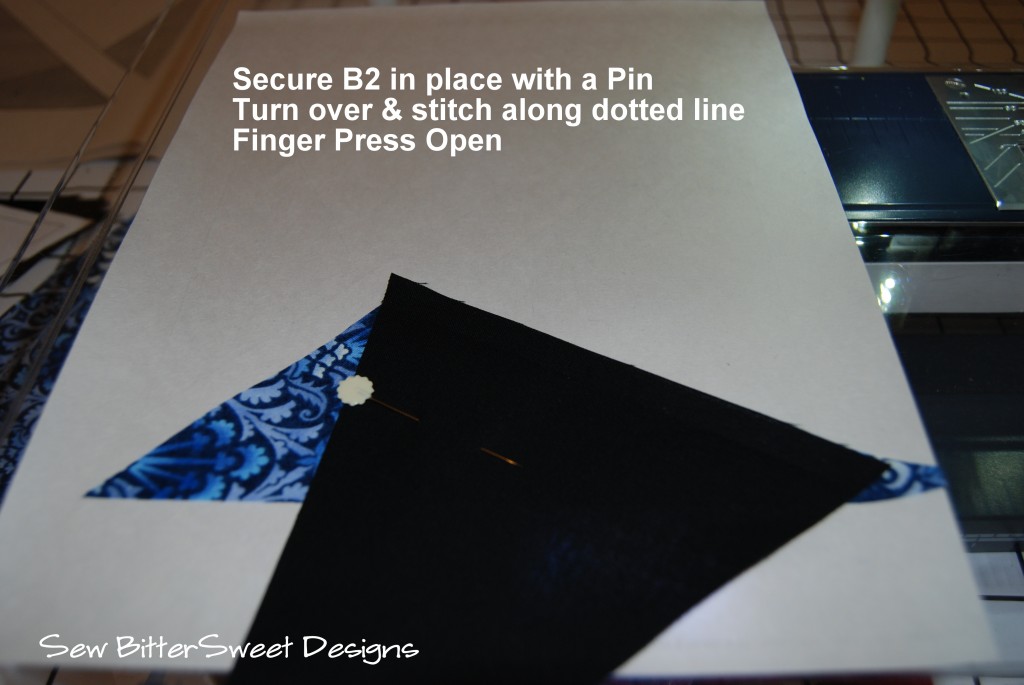
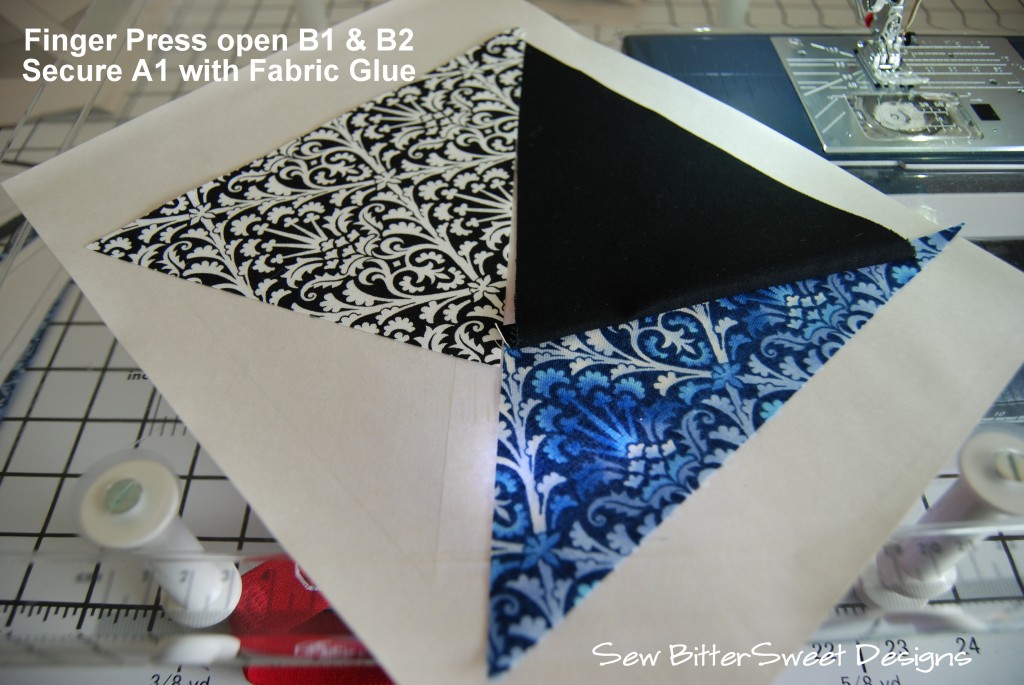
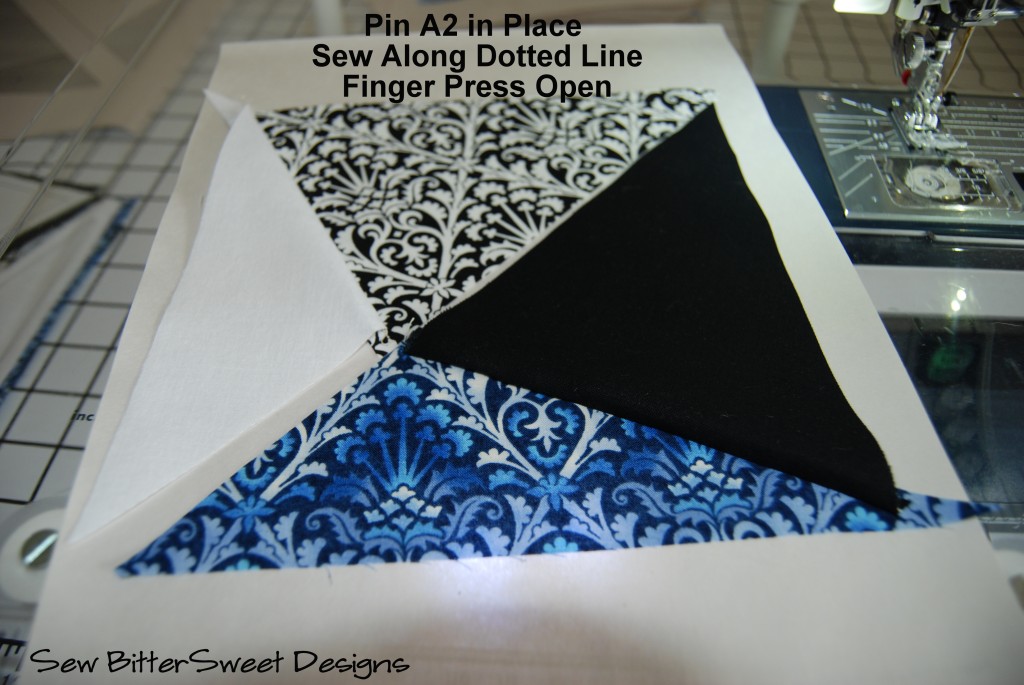
Starting with the B Sections follow the picture tutorial:

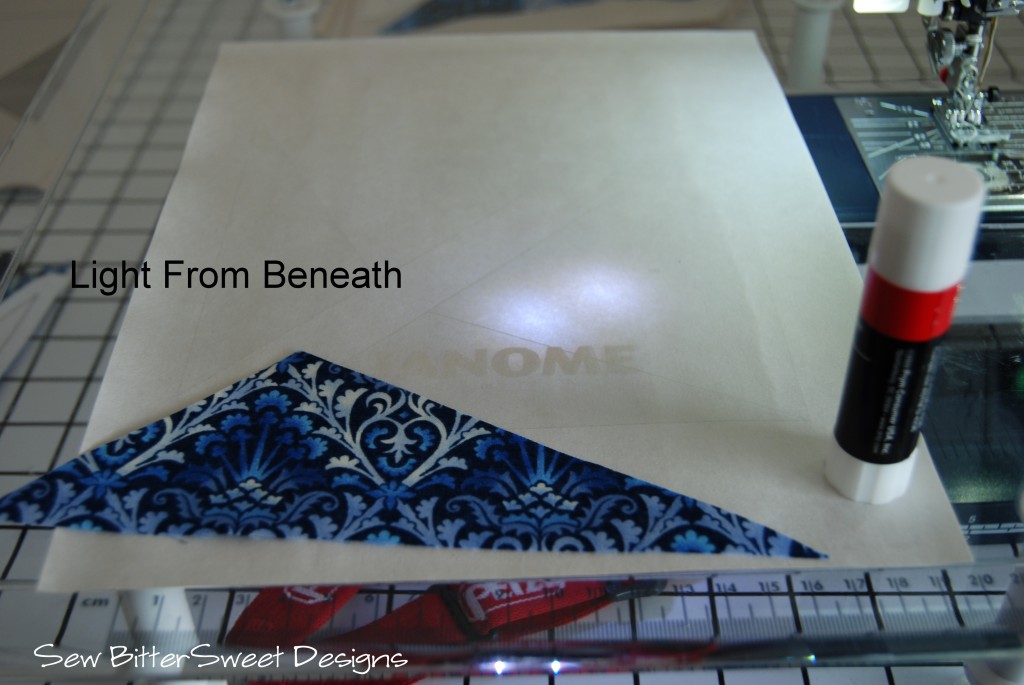
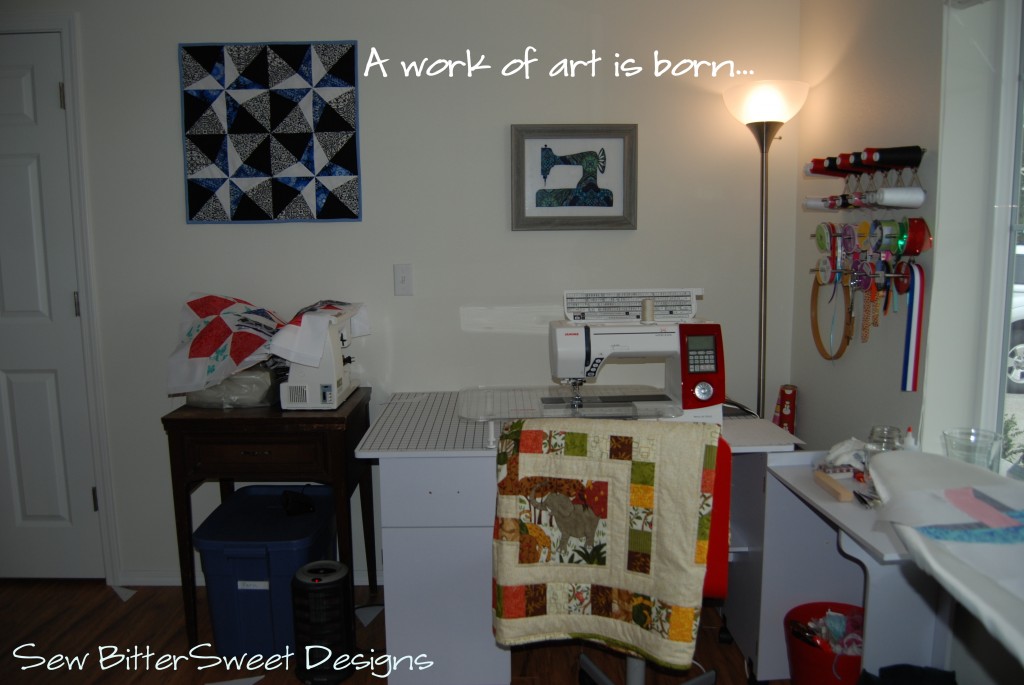
If you have a clear plastic sewing table – like the one that came standard with my machine, I recommend putting a light underneath it – this will help you arrange your pieces to be perfectly in line with your paper piecing template.

As you can see in the picture below, the bright light from underneath will help you align your pieces and it allows you to not only sew at night when you can’t look out your window for natural light, it also saves fabric – you can more precisely line things up and won’t have to use big pieces.

You are now ready to sew!

NOTE: It is important that you sew each piece in the order, I’ve listed – this will help you match up your seams when you piece your sections together!

Make all 16 of the paper pieces.  Then bust out your iron and press the sections down.

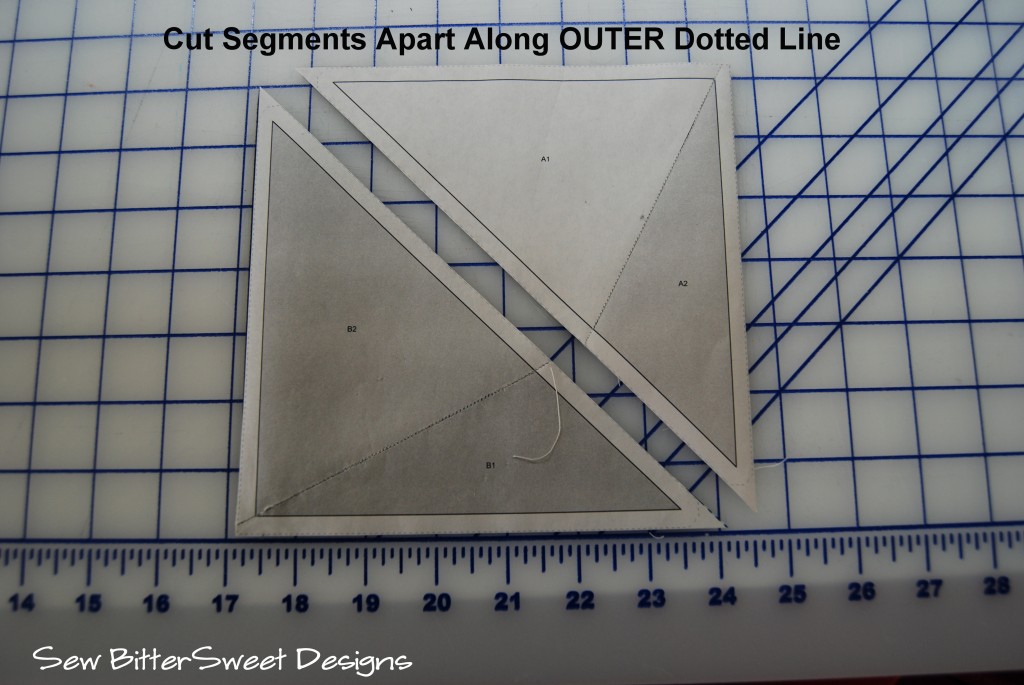
Cut your sections apart along the outer dotted lines.

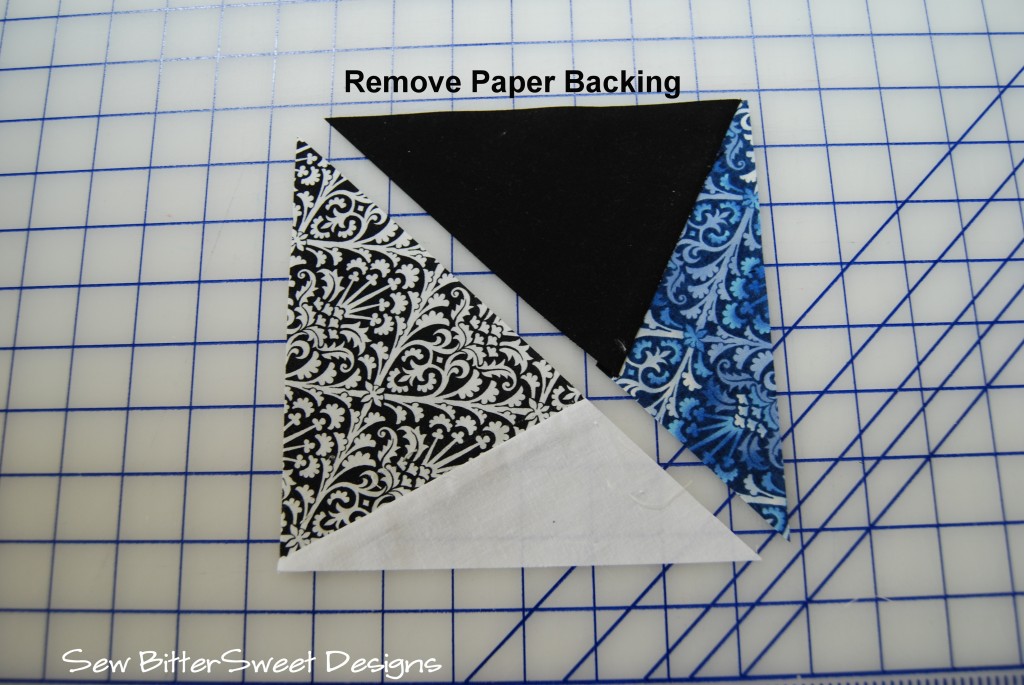
Remove your paper backing – if you are using the Carol Doak’s Foundation Papers, they will virtually fall off!  Don’t worry, with a small enough stitch length regular printer paper will come off fairly easily too.

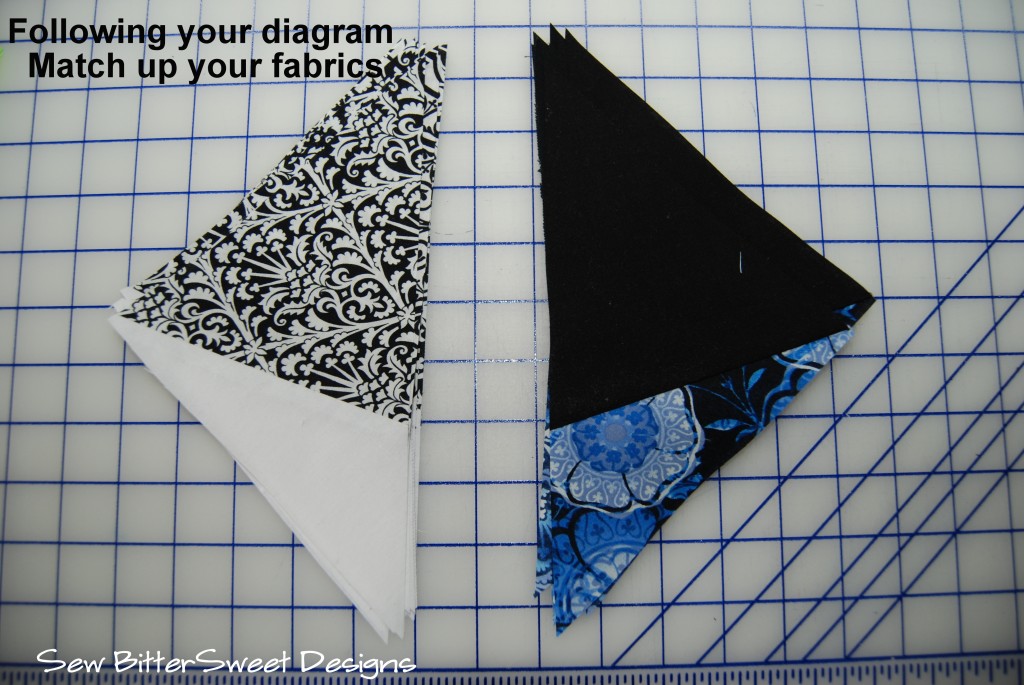
Next, pull out your diagram and match up your sections, place them in two piles – white pile and black pile.

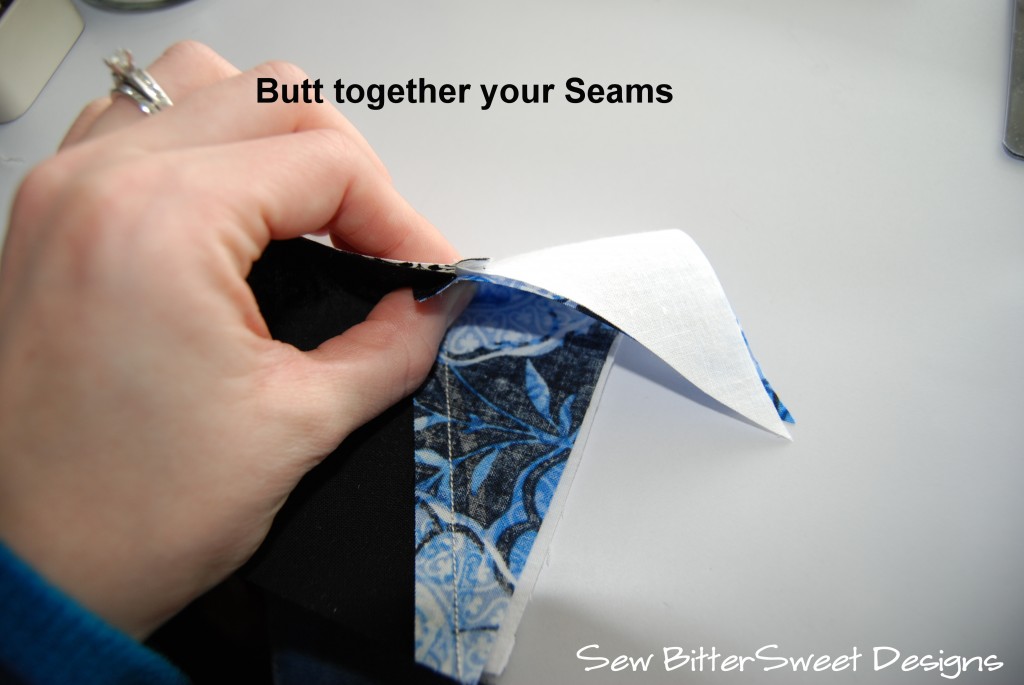
Remember how I had you sew your sections together in a VERY specific way…this is because it will make joining your sections super easy. Your seams will lock together.

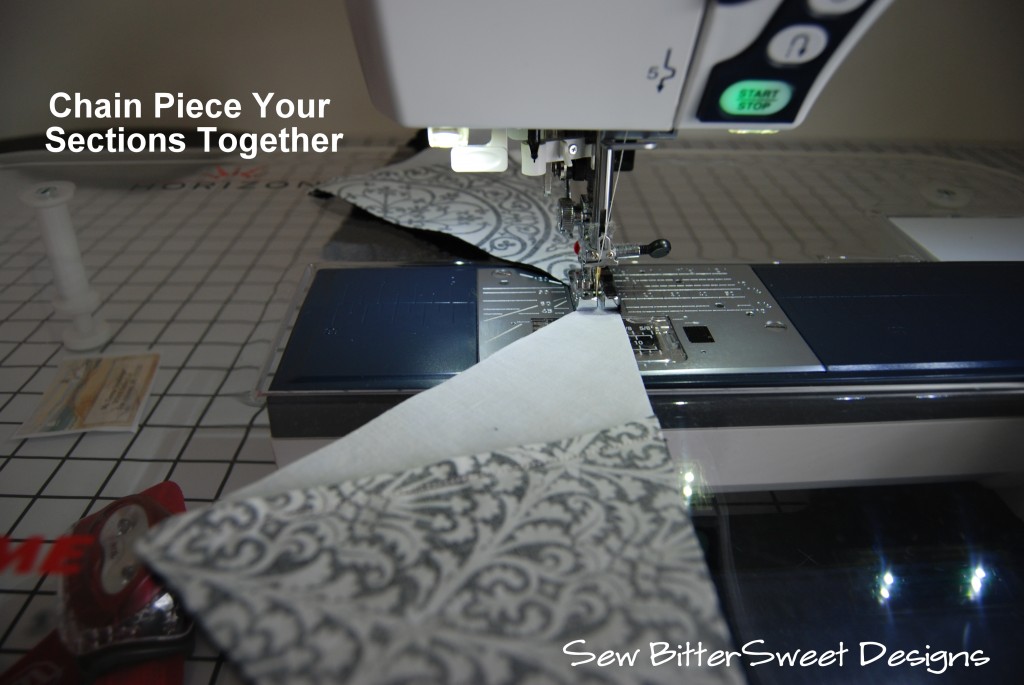
I love chain piecing, I think I have said that about 10 other times on this blog, and here again I am employing it. If you don’t already chain piece, I would highly recommend it! Saves lots of time!

You will have sixteen 6 inch blocks, I press mine open and trim the dog ears.

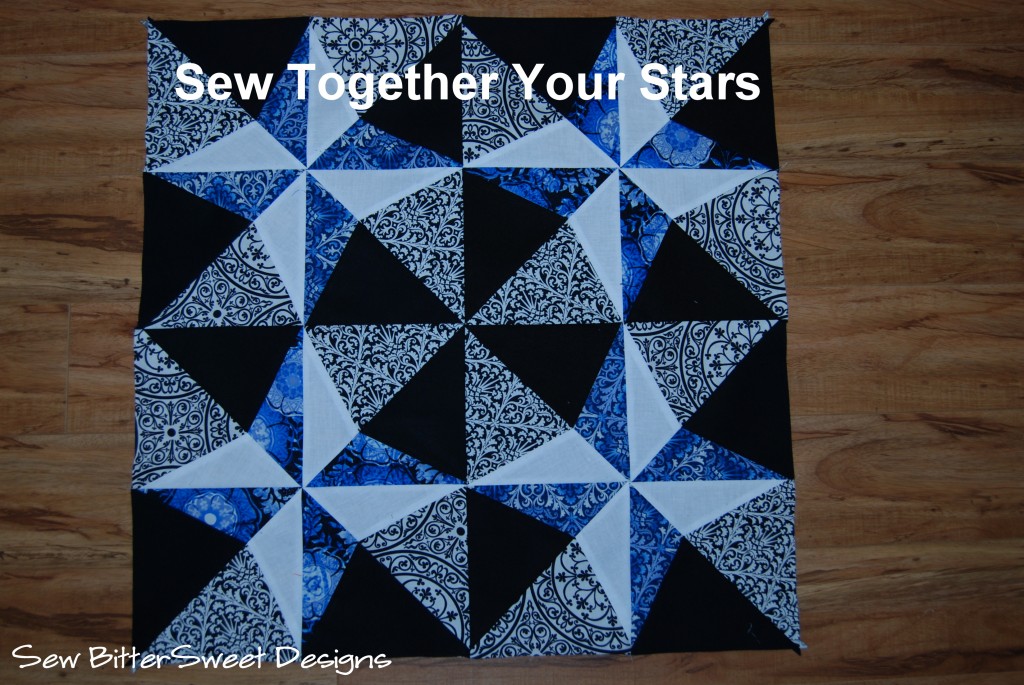
Next layout your blocks and sew your stars together.

NOTE: When sewing your squares into blocks – it is more important that seams match up rather than the squares fit perfectly together. The seams matching up (interlocking together) is what will give you the perfect star points!

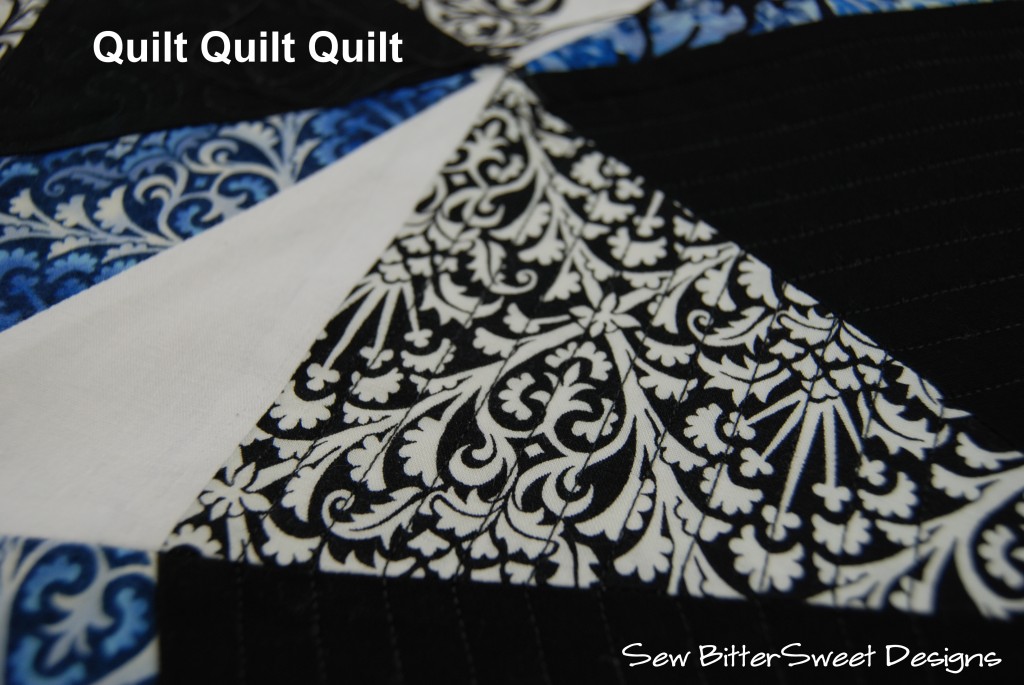
Time to quilt! I used black thread to quilt mine so it would blend in nicely. White would have stood out beautifully and made a great statement, but I wanted the quilting to blend.

You will need three strips for the binding in a solid blue. Feel free to follow my binding tutorial.

Bind and voila!

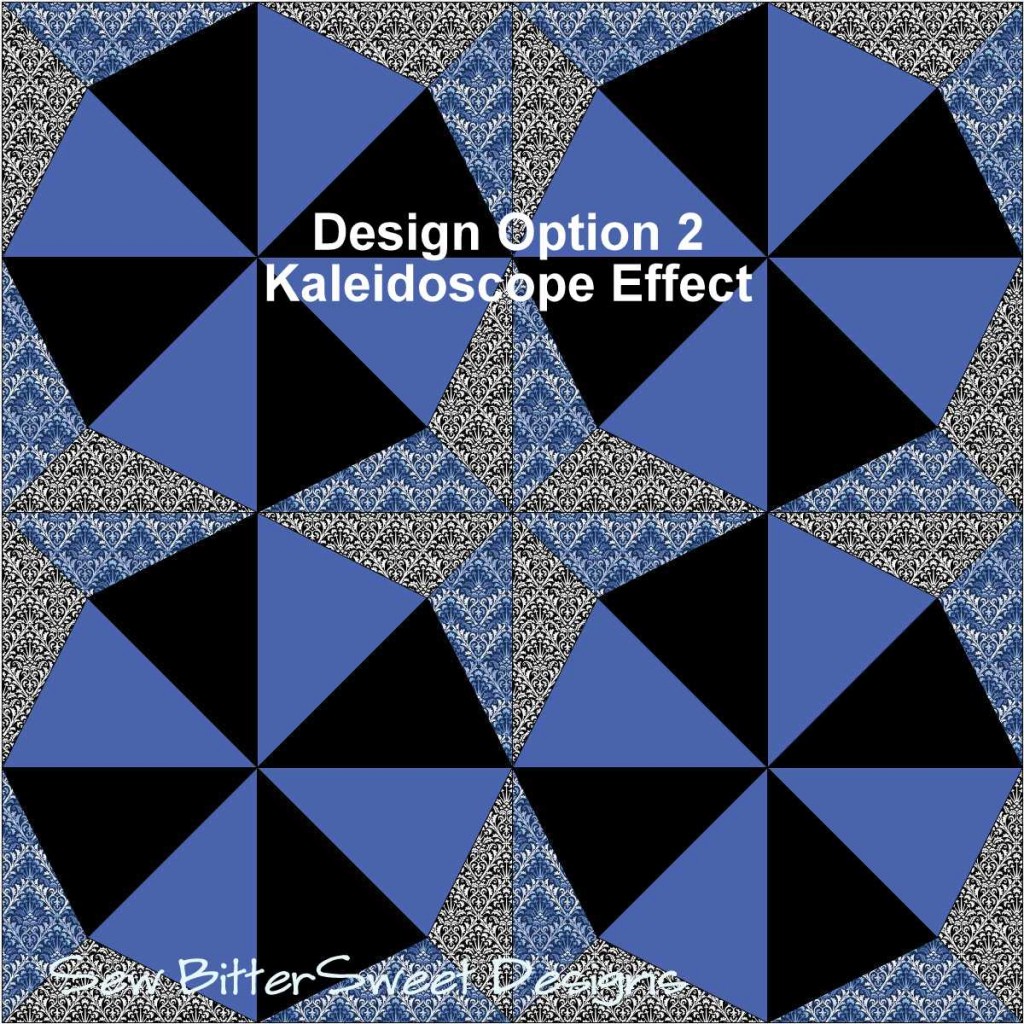
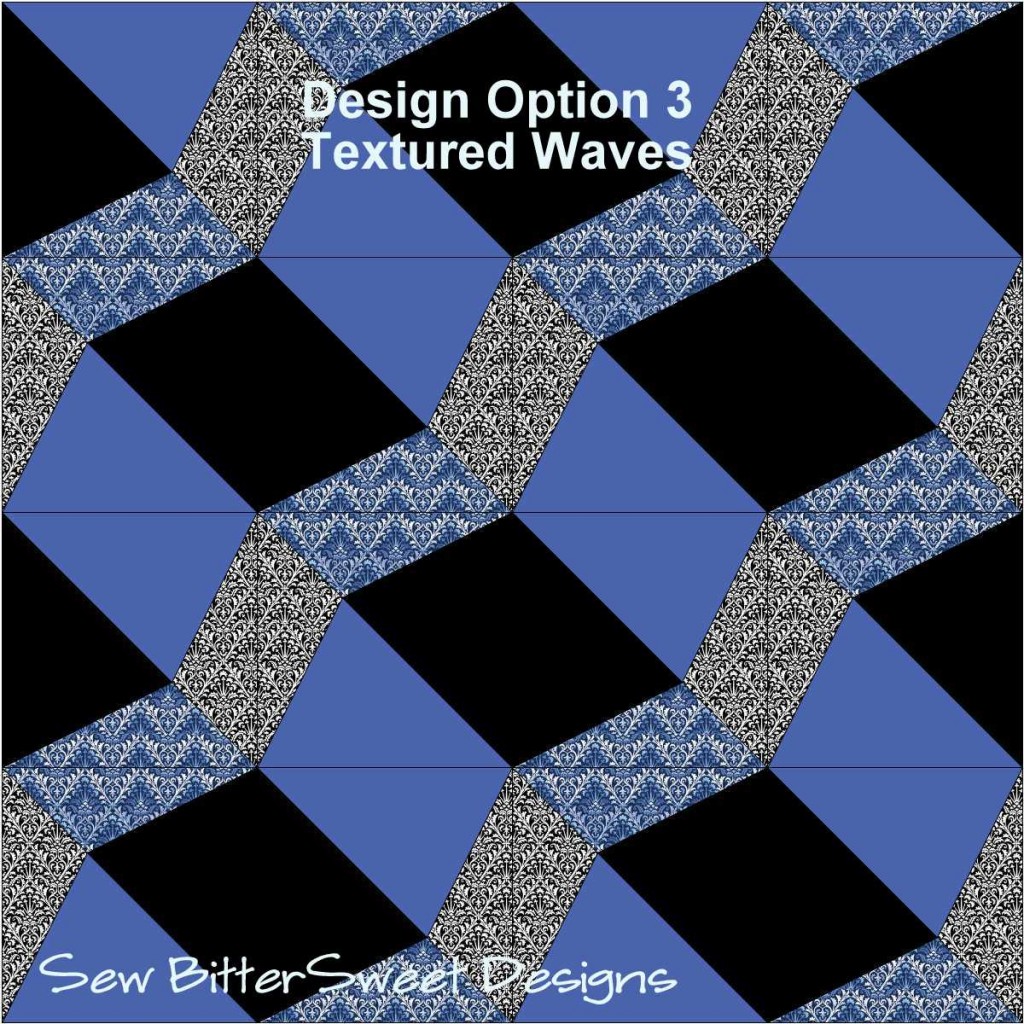
If you are not a fan of this particular design, here are a few other options, all made with the same paper pieced template and the same number of segments.


Enjoy! And if you end up making anything from one of my tutorials I would love to see it!

Make sure you enter to win the Fat Quarter Shop giveaway that I am hosting – you could win a Fat Quarter Bundle of Avalon AND a set of Carol Doak’s Foundation Papers.

2 More Finishes!

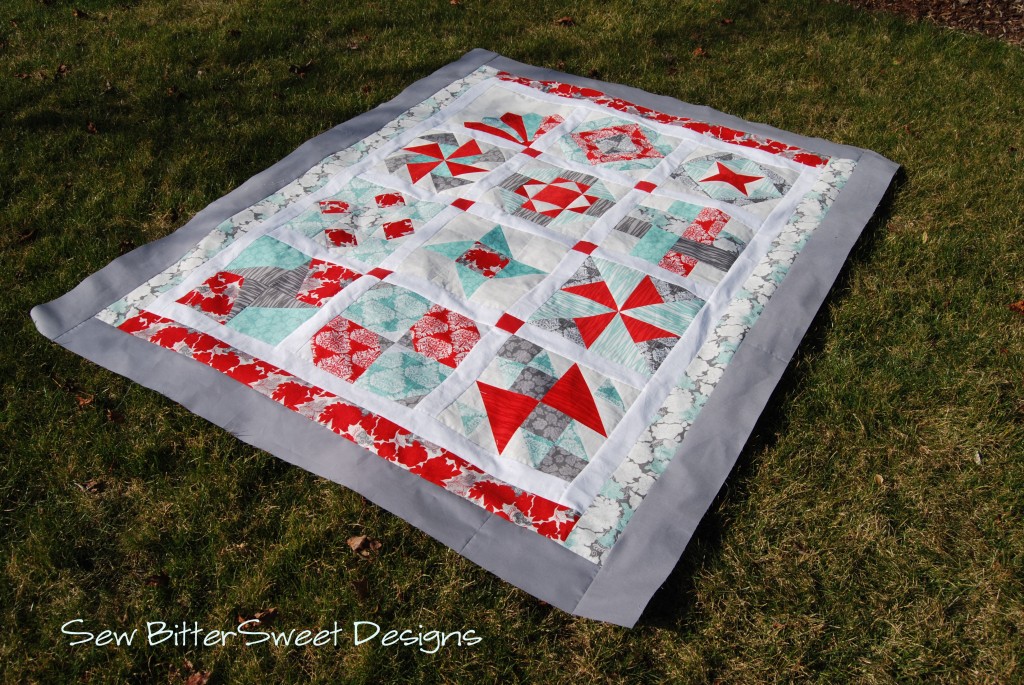
Well, I am calling one of these a finish, but it still needs to be quilted. I completed my first ever Quilt-A-Long! I can’t tell you how excited I am to have actually finished it AND finished it in time.

I would like to start with a huge thank you to Jenna from SewHappyGeek, for designing such a gorgeous quilt and having amazingly easy to follow tutorials. She is so talented! If you aren’t already following her blog you really should! My second thank you is to my dear friend Dawn, who surprised me with the gift of Rendezvous in November – my favorite fabric line from this winter. As you can see, it makes a gorgeous quilt!

(As a side note, I finished the top last Friday and I’m super glad I took pictures that day because since then we have had nothing but rain and snow here!)

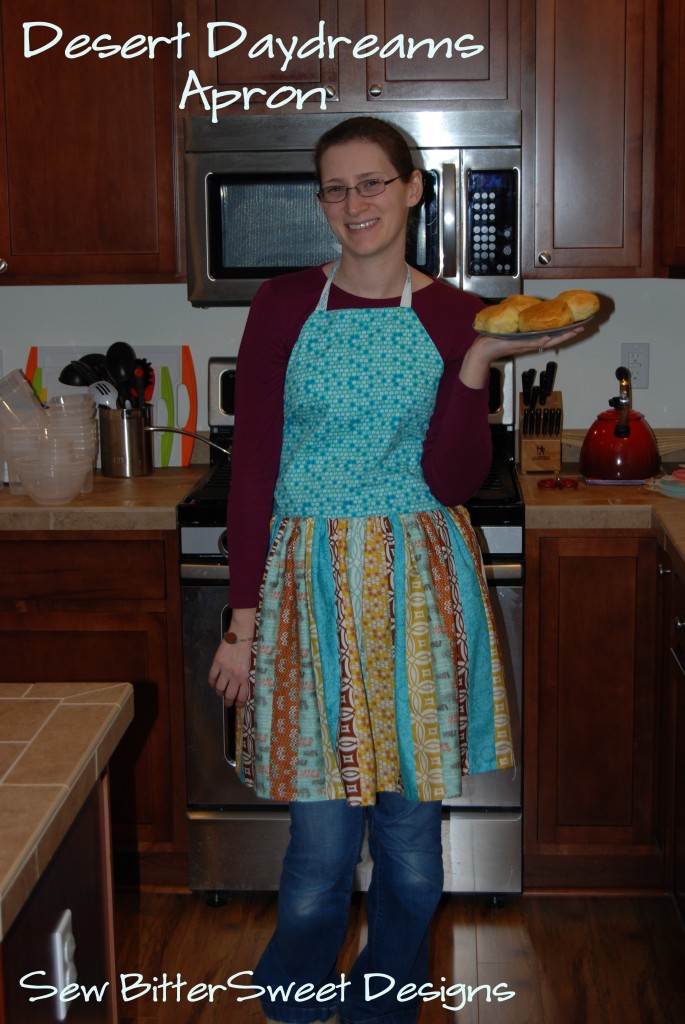
I have one more finish to share…my first ever APRON! And…it is my own design!

I am calling this the “Desert Daydreams Apron”. The fabrics are designed by Khristian Howell (who also designed Rendezvous – yes I love her fabrics!). Julie from Intrepid Thread sent me a fat quarter bundle of Desert Daydreams in Santa Fe Sky and this is what I came up with. Do you like it?!? If so, make sure you are signed up to receive Julie’s newsletter, it goes out tomorrow and my tutorial for the apron will be in there (you can sign up from the Intrepid Thread Blog)!

In case you are wondering, this is how I keep myself out of trouble…it helps that Anne has been taking 3 hour long naps lately! I am really going to miss nap time when it goes away, which everyone keeps telling me is going to happen any day now.

Are you keeping busy and out of trouble?


Zig Zag Zoomed!

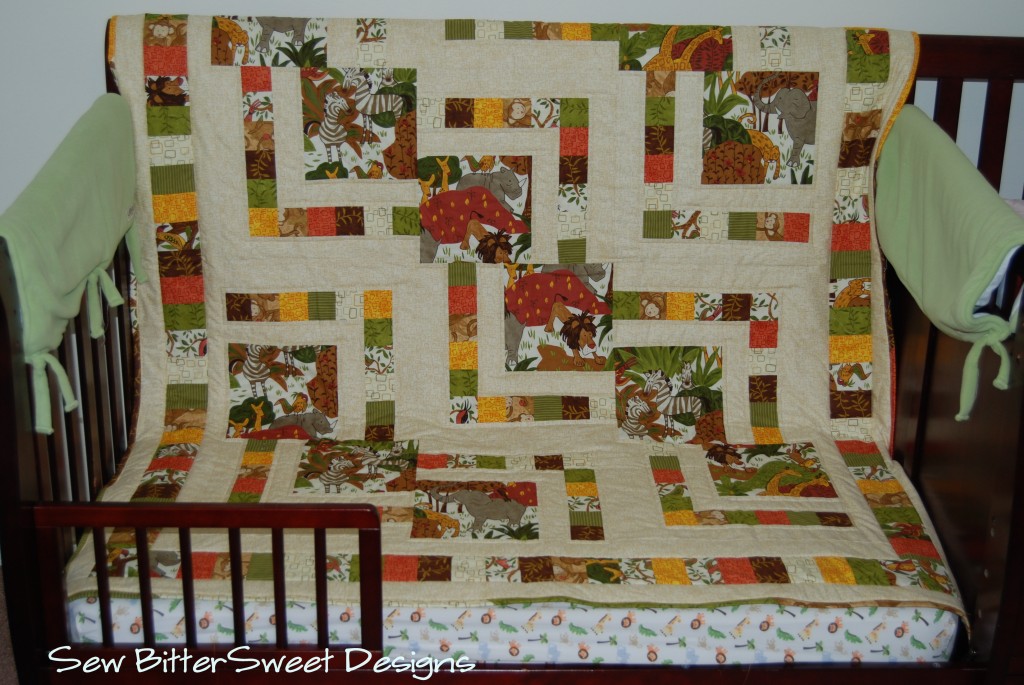
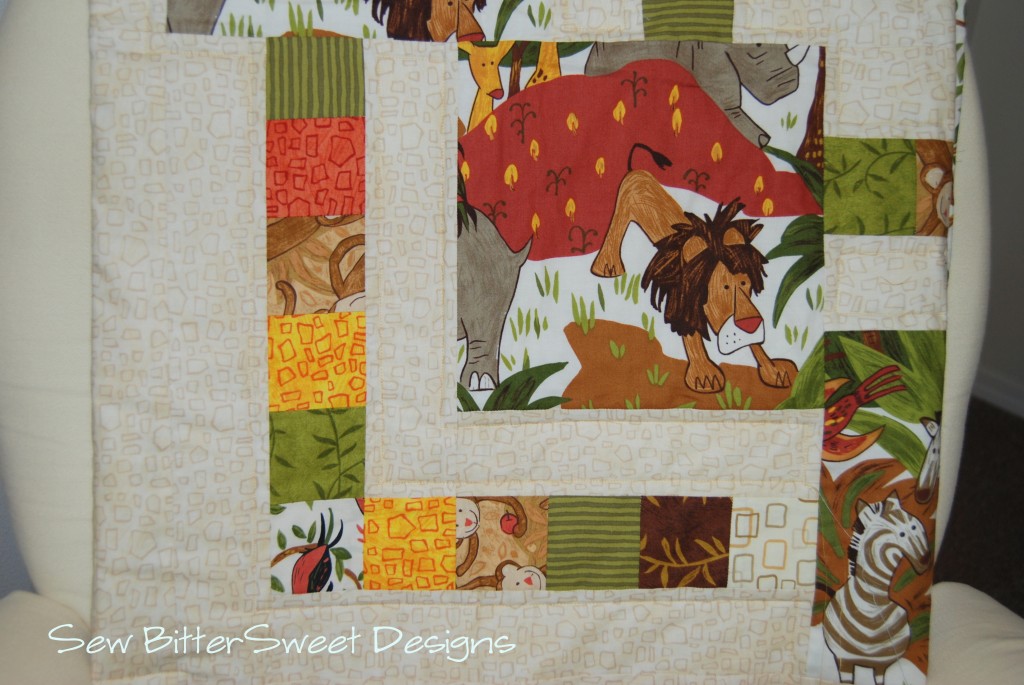
I have a finish! An important finish! I finished the baby quilt for my Sister-in-Law! She is having her baby in about a month and I needed to get it done because I now have to ship it to Albuquerque, NM. I have threads left to bury, which I will be working on tonight.

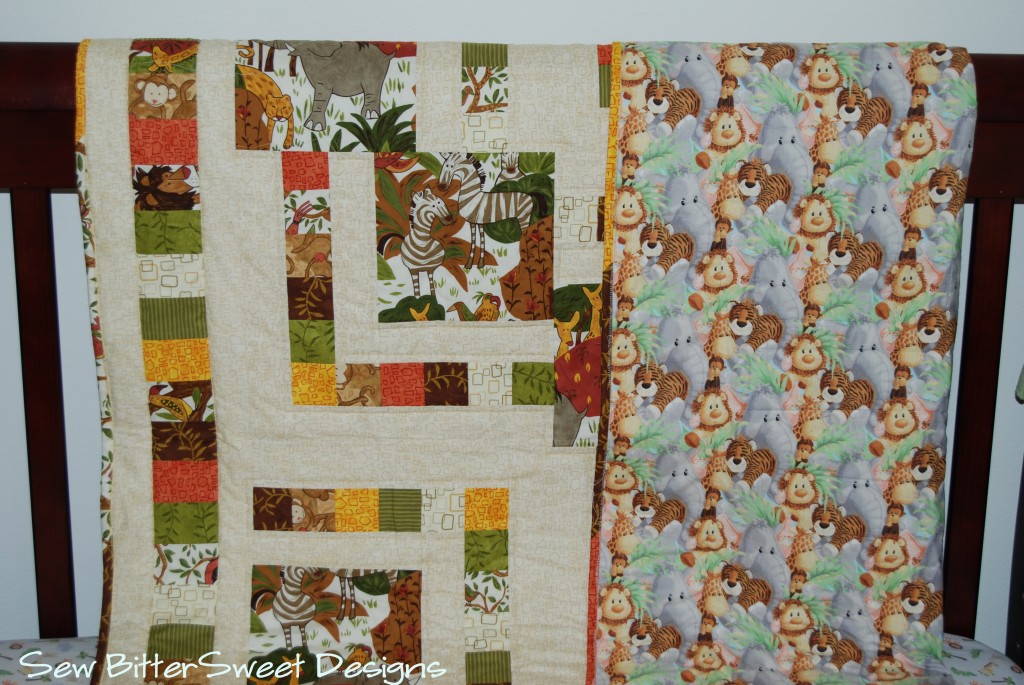
I used Jungle Babies for the backing

Here’s a close-up of the quilting. I used my 1/4″ Accufeed foot and did some straight line stitching

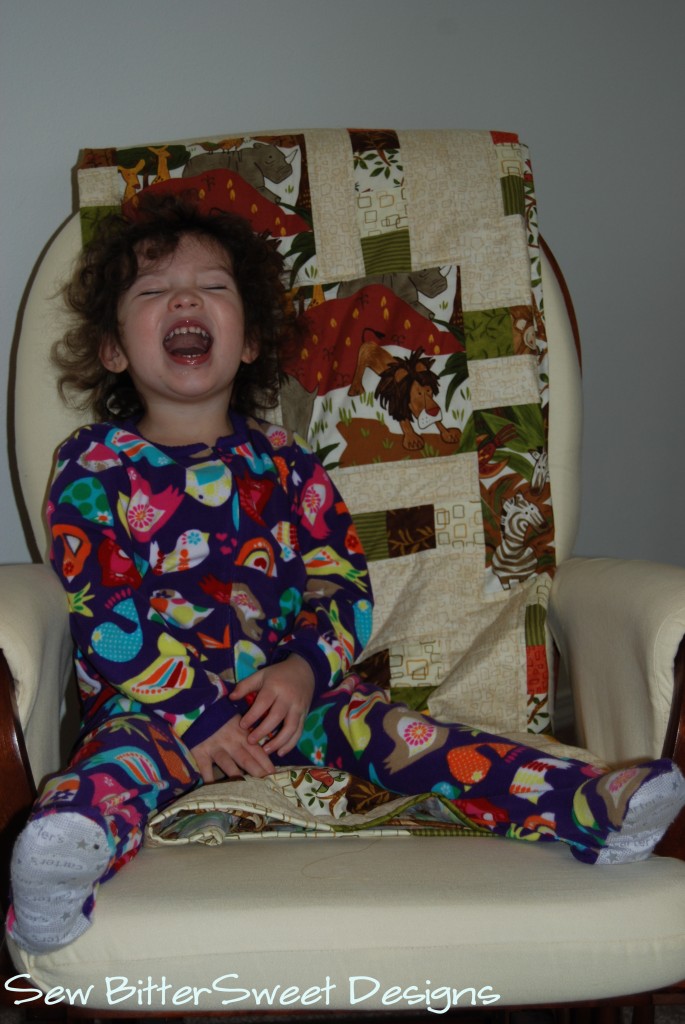
Anne LOVED the quilt too – thankfully she has lots of her own quilts, so I don’t think she will miss this one too much!

Oh yeah! It is also my first ever scrappy binding!

This is one of the projects I wanted to finish this quarter for Rhonda’s 2012 Finish-A-Long over at Quilter in the Gap.

I love a good finish, don’t you?!?

I am linking up to Quilting by the River, SewHappyGeek – Manic Monday, Richard Quilts

Scroll to Top