Sew BitterSweet Designs Patterns

Week 19 Goals

I designed a new block on Saturday for my bee mates in the 4×5 Modern Bee on Flickr.

Stacked Pyramids - https://test.sewbittersweetdesigns.comMy goal is simple, make 6 more of these and also photograph my process to do a tutorial!  I love the way this block looks and bonus, my bee mates do too!

My weekend sewing was cut short because Anne ended up back in the hospital with hives everywhere. My husband is gone doing army things right now, so that was interesting, doing everything alone. Luckily I have another army wife friend who came and kept us company with her daughter. Having friends and family here really does help!

I hope everyone has a great Monday, make it a great day!

signature

Eyes Crossed Spied Pattern Launch

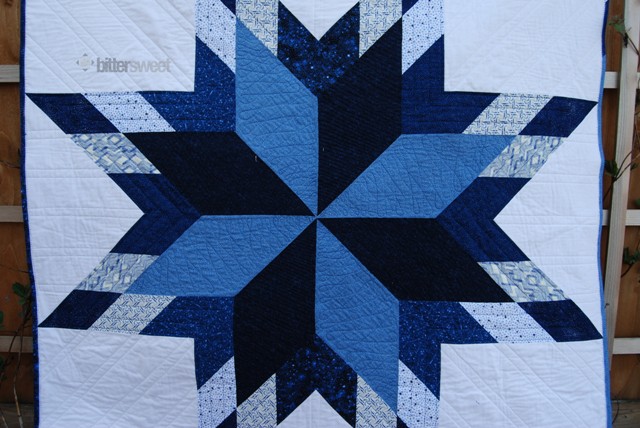
I am sew very excited today to be launching another new and fun pattern!  The Eyes Crossed Spied pattern!

Eyes Crossed Spied - https://test.sewbittersweetdesigns.comI didn’t make just a top, I quilted it too!

Quilted Eyes Crossed Spied - https://test.sewbittersweetdesigns.com

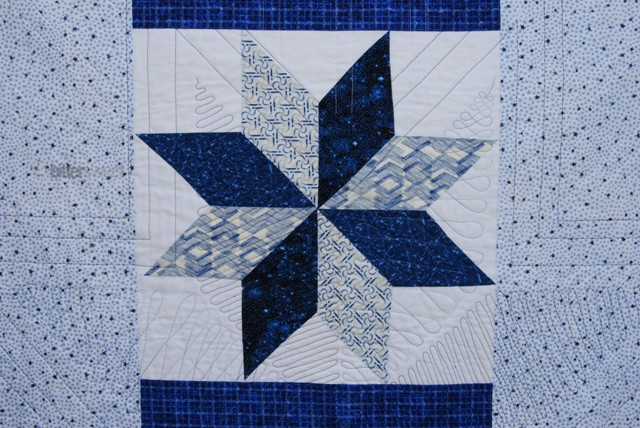
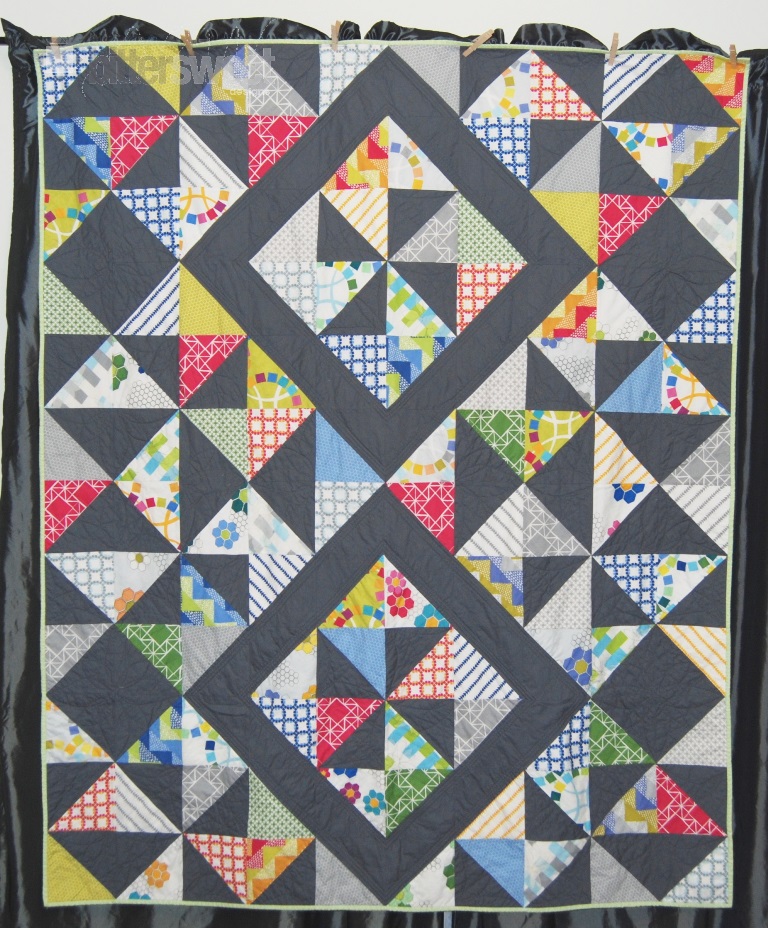
I actually designed and sewed this quilt back in 2012 and just never got around to writing the pattern until March of this year when my friend Jessica from Noguchi Designs lit a fire under me. She was one of my wonderful testers and you can see her version below:

Jessica - Eyes Crossed Spied - https://test.sewbittersweetdesigns.com
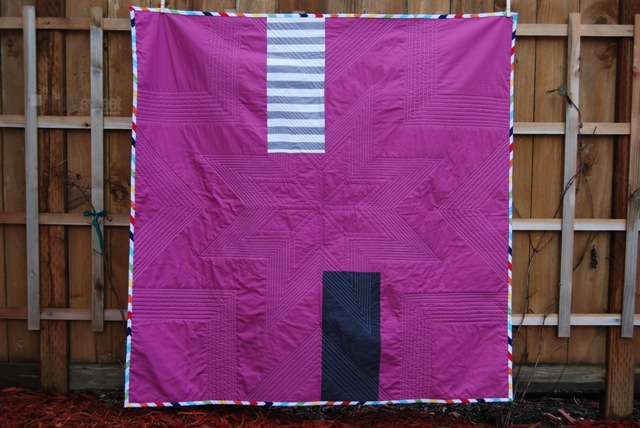
My friend Carolyn from Sweet Boater Chick also agreed to test for me again! She is so talented, check out the pictures she sent me:

CBraun Eyes Crossed Spied - https://test.sewbittersweetdesigns.comView 2 – I love how she stages her quilts!

CBraun Eyes Crossed Spied 2 - https://test.sewbittersweetdesigns.com
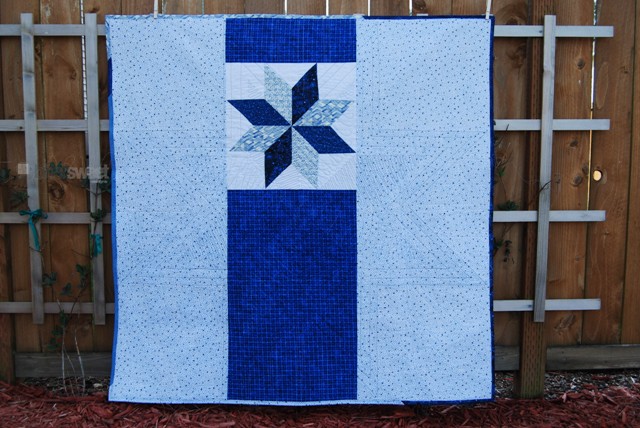
The wonderful CeLynn from CeLynn’s Sunflower Patch also was kind enough to test for me AGAIN! I am so lucky all these talented people are willing to help me out!

Celynn 1 Eyes Crossed Spied - https://test.sewbittersweetdesigns.com
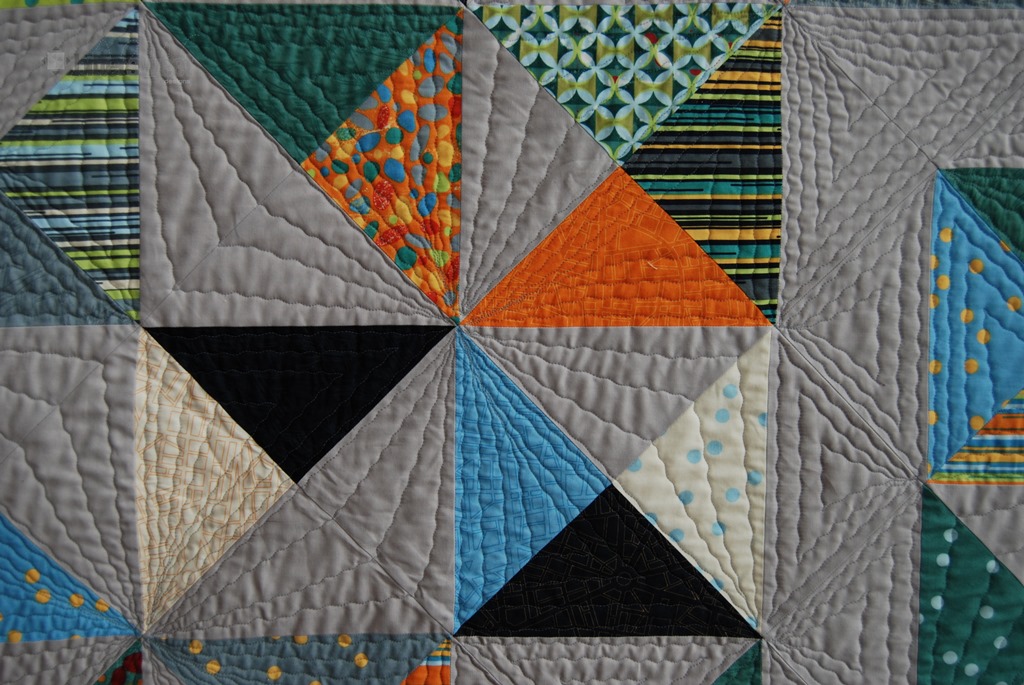
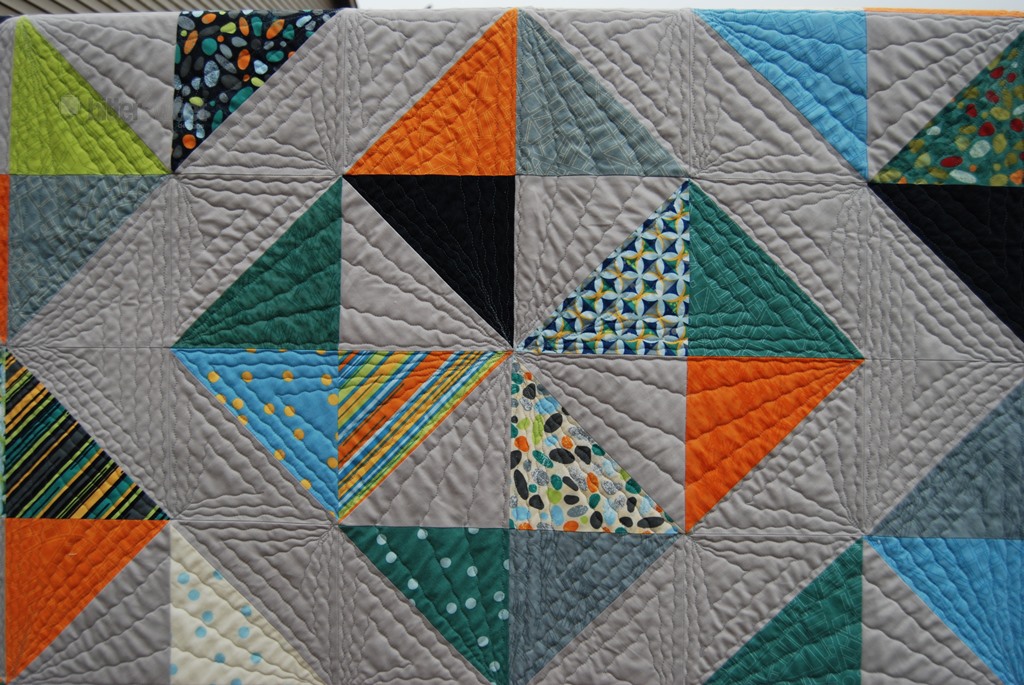
Her version is slightly smaller than the pattern, and I totally love it!

Celynn2 Eyes Crossed Spied - https://test.sewbittersweetdesigns.com
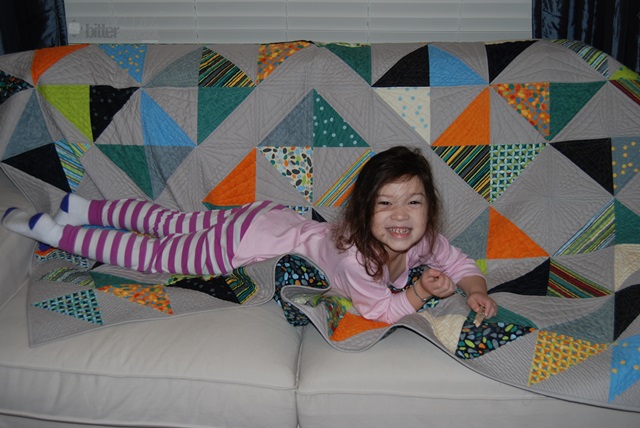
A friend Beth, who I meant through a swapping group on Facebook, also made the quilt. The cool part is that this was only Beth’s second quilt and can I just say that she did an AMAZING job!!

Beth1 Eyes Crossed Spied - https://test.sewbittersweetdesigns.com

About Eyes Crossed Spied:

Have you been hoarding a favorite fabric line because you haven’t known what to do with it? This is a great pattern for you. It is designed to feature large scale prints, surrounding them with solids and small scale prints – perfect for a complete fabric line.

It makes a great I Spy baby quilt. In the sample the baby is able to find all things associated with Robots. This pattern will also work well for a scrappy quilt, lending itself to I Spy block swaps.

The pattern is perfect for the confident beginner pattern as you start with a partial seam. (Don’t let the partial seam scare you as this was only the second quilt that one of my testers made and her’s turned out beautifully!!!) There are 100% full color photographs to walk you through block construction, as well as a blank diagram to allow you to fill in and personalize your lay out (especially handy if you opt for a scrappy version!).

The finished quilt measures 60″ x 60″.

The pattern is for sale on Craftsy for $7.50. It is an instant PDF download. As always, I am available if you have any questions!

Make sure you visit my testers as they will be sharing their experiences with the pattern today too!

Flowering Lone Star – ALYoF March Reveal

Flowering Lone Star Front - https://test.sewbittersweetdesigns.comHere is my March finish for A Lovely Year of Finishes!

I have to say that I am so proud of this quilt! I haven’t been able to find another lone star quilt like this on Pinterest so I have named it “Flowering Lone Star” and I will be making a pattern for it!

I did some free motion quilting in the center “flower” of the star. A different design in light blues from the dark blues. Straight line quilting around the outer star and more straight line quilting in the background.

Close Up Flowering Lone Star - https://test.sewbittersweetdesigns.comOn the back I made a small lone star block with my leftover diamonds from the outer star on the front.

Back lone star - Flowering Lone Star - https://test.sewbittersweetdesigns.comI really do love the back of this quilt. I hope the recipient likes it too!

Back - Flowering Lone Star Quilt - https://test.sewbittersweetdesigns.comI am going to make a second one of these quilts in more modern fabrics and use that to write the pattern.  I am so excited!

If you finished your March goal, go link up here and if not yet you have until March 31st so get busy!

This was one of my goals for the Finish-A-Long Q1 with Katy from The Littlest Thistle. You can see my goals here.

signature

Rainbow Star Burst Quilt

As a member of The Modern Quilt Guild I got to participate in the Riley Blake Basics Challenge.  I have to say when the fabrics arrived at my door I had absolutely no idea what I was going to make with them. In fact I believe that they were on my design wall, staring me in the face, for 2.5 months before I decided it was time to make something.

What I loved about this challenge is that we were allowed to add in any solids and any other Riley Blake fabrics. It turns out that in my stash I have a HUGE collection of Riley Blake Fabrics. I had no idea just how much Riley Blake I owned.  Below is the quilt I came up with, designed in EQ7.

Rainbow Star Burst Quilt - https://test.sewbittersweetdesigns.comI truly love my quilt. The only fabrics that I had to buy to complete this one were the red chevron and the chevron binding. I had the six fabrics provided (4 of which I used on the front, the other 2 are on the back) and I added in 3 more from my stash plus my solids.

I think I am drawn to rainbows because when I was younger I was in a youth group called Rainbow Girls. Also, Anne loves them too!

Here is the back, it really shows off the quilting. Someone mentioned on Instagram (I’m SewBitterSweetDesigns if you want to follow me) that I could use the back for the Radiant Orchid Challenge.

Back - Rainbow Star Burst - https://test.sewbittersweetdesigns.comI love how the quilting pops on the back of the quilt!

So this is what I came up with!

Quilt Stats:

Measures: 51″ x 51″Designed by: Melissa Dunworth (Me) Sew BitterSweet Designs
Quilted by: Melissa Dunworth
Thread: King Tut by Superior Threads
Fabrics: Riley Blake Basics

I’m contemplating writing a pattern for this quilt, I just haven’t gotten that far yet…

This was one of my goals for the Finish-A-Long Q1 with Katy from The Littlest Thistle. You can see my goals here.

signature

Dizzying Diamonds Pattern Release

Dizzying Diamonds Pattern - https://test.sewbittersweetdesigns.com
Today I am releasing my latest pattern, Dizzying Diamonds. It does make you just a tad dizzy looking at it doesn’t it? That is all party of my secret plan to hypnotize you into buying this pattern!

The fun thing about this pattern is that it is a layer cake pattern. It is time to cut into those precious layer cakes I know you have been hoarding and start sewing some beautiful quilts!

The quilt above is the large size version of the pattern using a full layer cake – 42 10″ squares. It measures 72″ x 84″ and was made using Barcelona by Zen Chic for Moda.

Small Dizzying Diamonds - https://test.sewbittersweetdesigns.comAbove is the smaller version – measuring 60″ x 72″ and requiring only 30 squares from a layer cake.  The smaller pattern was created first because I had a partial layer cake left of the Quilt Blocks line. This quilt was my November goal for A Lovely Year of Finishes and was gifted to a wonderful family friend on Sunday. She loved it!

Fabric Requirements (Large Version):

  • 1 Layer Cake (with 42 squares) – for main fabric
  • Option One: 1 layer cake of solids for background fabric
  • Option Two: Solid background fabric – 3 ⅛ yards. Sub-cut into forty-two 10” squares
  • Batting
  • Backing Fabric – 5 ¼ yards
  • Binding Fabric (for 2.5” strips) – ⅝ yard

Fabric Requirements (Small Version):

  • 30 squares of main fabric – 10”x10”
  • 30 squares of background fabric – 10”x10”
  • Batting
  • Backing Fabric – 3 ½ yards
  • Binding Fabric (for 2.5” strips) – ½ yard

 Other Supplies:

  • Rotary Cutter
  • Rulers: 1 measuring at least 15” long, one square 6.5” or larger ruler
  • Basic Sewing Supplies

I was very blessed because Vicki from Orchid Owl Quilts quilted my larger version – which is a Christmas gift for someone.  Check out her amazing quilting on my dizzying diamonds and pinwheels. She managed to bring so much movement into the overall design. You can see more of her quilting and the quilt here on this post.

Pinwheel Dizzying Diamonds - https://test.sewbittersweetdesigns.comPinwheels 2 - dizzying diamonds - http://staging.sewbittersweetdesigs.comEven Anne loves the pattern!

Anne Dizzying Diamonds - https://test.sewbittersweetdesigns.comHere are the quilts side by side – It is amazing how different they look just by simply changing the fabric!

Dizzying diamonds side by side - https://test.sewbittersweetdesigns.comThe pattern is now available for purchase in my Craftsy Shop is $7.50 for the pdf instant download. I hope you enjoy!

To see other versions of the quilt please check out my wonderful pattern testers! CeLynn from CeLynn’s Sunflower Patch and Debbe from Pieces to Love.

Scroll to Top