Sew BitterSweet Designs Patterns

Modern Mini Challenge – Quilted Crossroads Mini
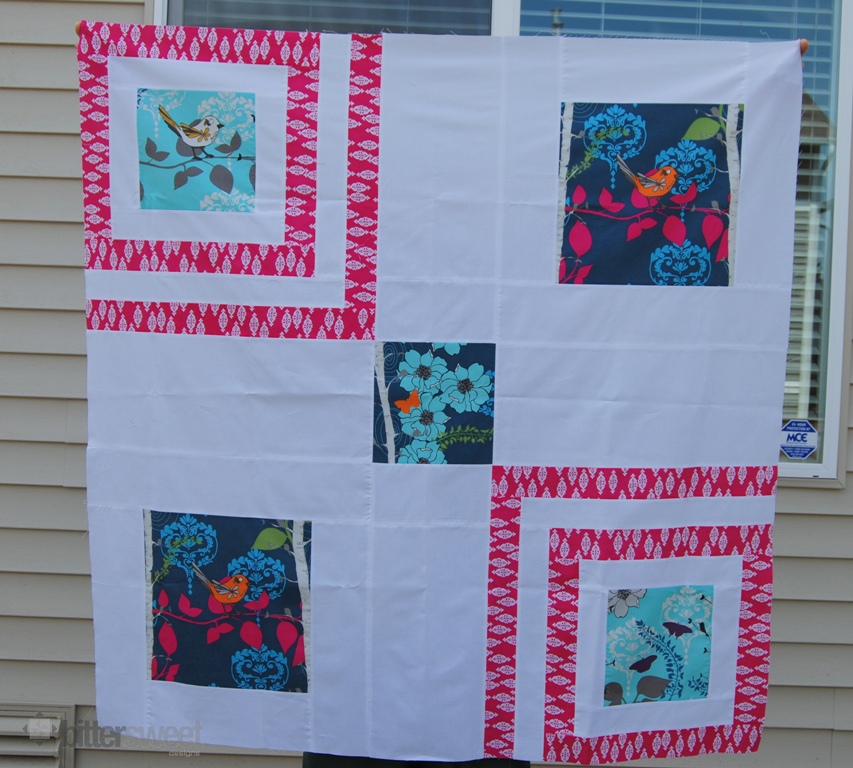
I was thinking I would link up to the Modern Mini Challenge with the mini below over at Ellison Lane Quilts…until I realized that it had to be made within the last 6 months. Since this one is older than that, I’m not going to link up, instead I thought I would simply share it with you. I love this quilt as this one helped me determine the final layout for my Quilted Crossroadspattern now available on Craftsy.

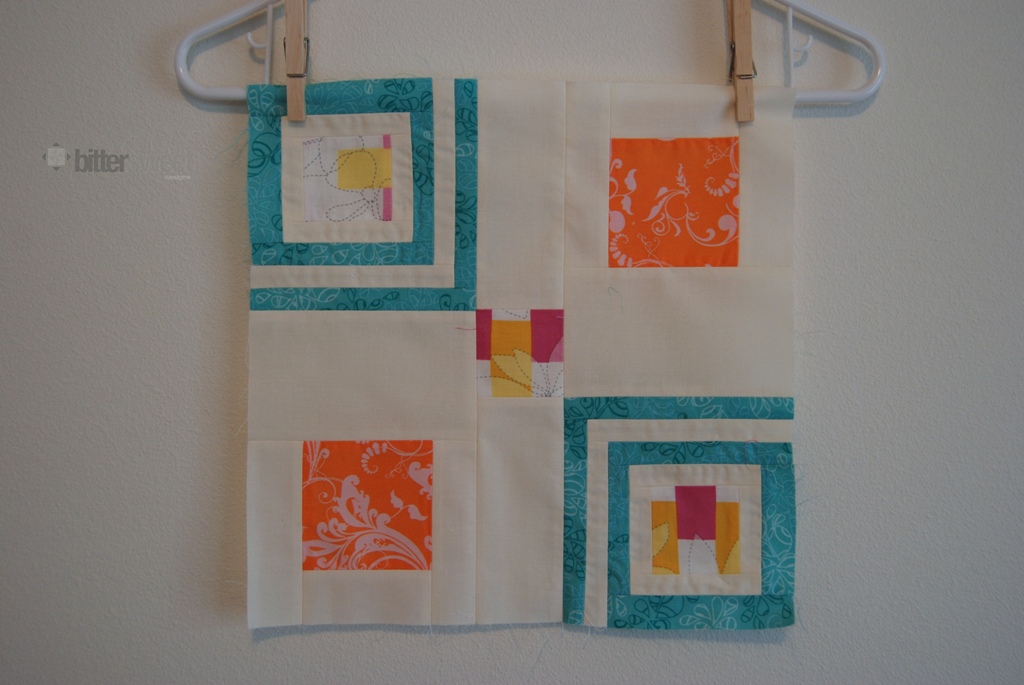
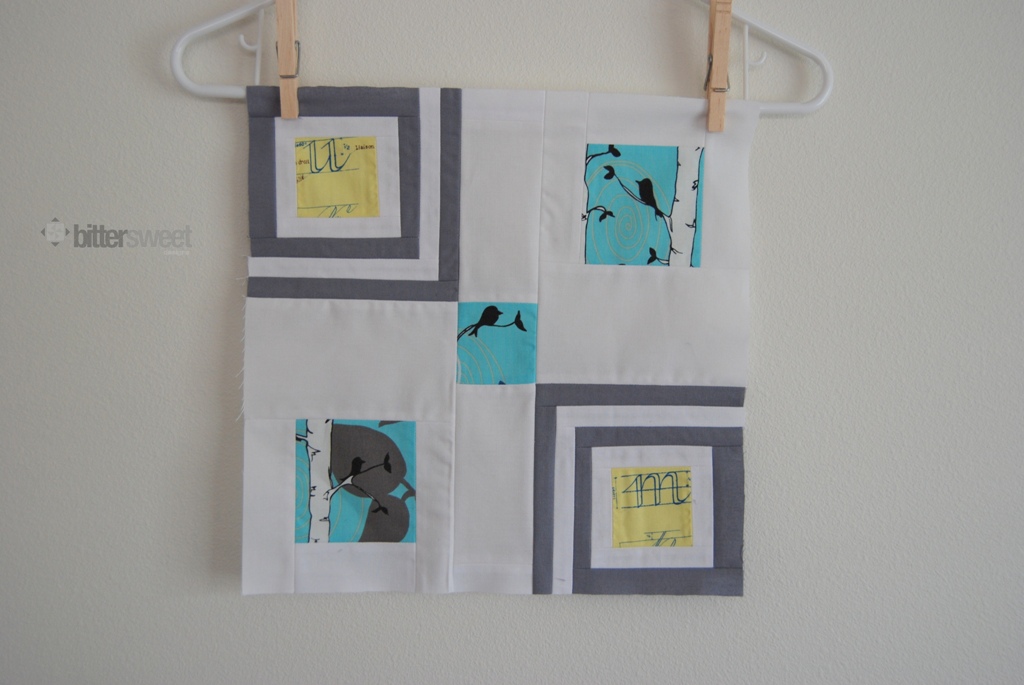
I had two different blocks in mind when I was designing Quilted Crossroads, and whipping them up and seeing them made and quilted is what helped me decided on the final layout.

Sometimes it is hard to believe I went from the first picture to the second picture, but I do love both versions of the design.  The mini currently lives in my daughter’s room. When I took the quilt down to photograph it at nap time she said to me “you can’t leave an empty hole in my wall, I need my quilt!” I don’t think I have ever received a better compliment!

This is a picture of her room from about 6 months ago, she has a big girl bed now 🙂

Final Stats:

Name: Quilted Crossroads Mini
Pattern & Design By: Melissa Dunworth, Sew BitterSweet Designs
Size: 24″ x 24″
Quilting: King Tut Thread, Free Motion Stippling by me
Fabrics: Amy Butler and solids from my stash

Even though I’m not entering this mini into the challenge, please make sure you go check out the Modern Mini Quilt Challenge and see all the amazing minis that were created in 2013, and make sure you stop by tomorrow and see what I am actually entering into the challenge!

A Whirl of Swirls

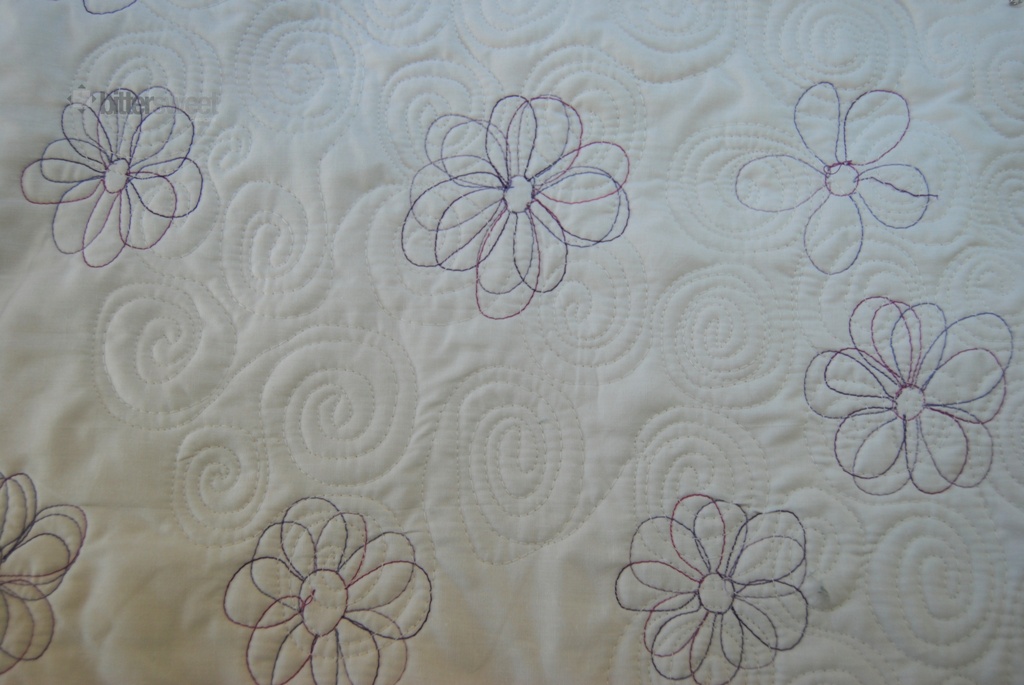
My weekend, at least my sewing time this weekend, went by in a whirl of swirls! I decided that I was going to quilt my Lovely Year of Finishes June project with swirls. I’m doing them in all of the negative space, which for this particular quilt, means a whole lot of swirls.

When it comes to Free Motion Quilting I am just not ready yet to jump in and go, so I always bust out some practice muslin and batting and get going. You might recognize this practice piece because it has been used before, for my last FMQ project.

To learn how to swirl without beating my head against the wall, and really, why recreate the wheel, I headed on over to The Free Motion Quilting Project by Leah Day and watched one of her videos, then I was off and running. I am extra excited about FMQ these days because I just signed up for Leah Day’s Craftsy class, Free Motion Fillers, Vol. 1.  So far I have only completed lesson one, but I am excited to learn more about using my machine to quilt a large quilt and even more designs.

After I felt confident I went to town. Here is a pic of my quilt in the machine:

Here is a pic out of the machine. I now know what I am going to do with the rest of the areas. I will be starting with the white frames and doing Leah’s Design for Spiral Chain.

I am so excited to be not only making progress on my June goal, but also conquering another FMQ design. My goal is to work up the confidence to quilt a couple of my larger quilts on my home machine. Hopefully all this practice will help me meet that goal.

What has everyone else been up to? Conquered any sewing fears lately?

A Lovely Year of Finishes – June Goal Setting Party

Well now how do you like that! June just snuck right up on me! I thought for sure, based on the weather here in beautiful Olympia, WA, that it was still February!  We had such low temperatures last week that my 2 basil plants got FROST damage!  Here’s hoping for a warmer month this month!

It is now time to set our goals. I have have an adorable quilt that I would like to get quilted up and a pattern written for! You might recognize the design, but this is a much larger scale. I will be writing the pattern for a baby/lap quilt size and also for a king size. The king size will consist of 4 blocks total, let me tell you, it looks super cool all mocked up!

Your turn! Shanna and I are excited to see what you have planned for the month of June!

As always, we have some amazing prizes offered by our fantastic sponsors, please make sure you take the time to visit each one and give them a little love. This challenge wouldn’t be near as much fun without them!

Remember, to be eligible for prizes you must link up to the party and the end of month party showing off your finish. We have a mid-month party too but it is not required, more for fun and cheering each other on!

June Prizes Include:

 1. Choice of $15 or 2 charm packs from Stitch n’ Giggles

2. Loving Pieces donated from Paper Pieces

3. $20.00 Gift Certificate from the Quilting Lodge

4. A Fat Quarter Bundle from Moda United Notions

5. $15.00 Gift Certificate to Fat Quarter Shop

6. $25.00 Gift Certificate to Superior Threads


Framed – Quilt block tutorial

 “Framed”
Quilt Block Design by Melissa Dunworth
Block Size: 12.5″ x 12.5″
Sew BitterSweet Designs

Cutting:

 Cut the following:

Background fabrics:                                                             Blue Frames:

4 pieces: 2.5” x 1”                                                                   4 pieces: 3.5” x 1”
4 pieces: 3.5” x 1”                                                                   4 pieces 4.5” x 1”
2 pieces: 4.5” x 1”                                                                   2 pieces: 5” x 1”
2 pieces: 5” x 1”                                                                      2 pieces: 5.5” x 1”
2 pieces: 5.5” x 2.5”
2 pieces: 5.5” x 3.5”
4 pieces: 4.5” x 1.5”
2 pieces: 3.5” x 1.5”

Orange Squares:                                                                   Pink/Yellow Squares:
2 Pieces: 3.5” x 3.5”                                                                3 pieces: 2.5” x 2.5”

I realize you just cut a ton of crazy small pieces, do not be intimidated! This block is super easy to put together!  Please remember to keep a very accurate ¼” seam!!!

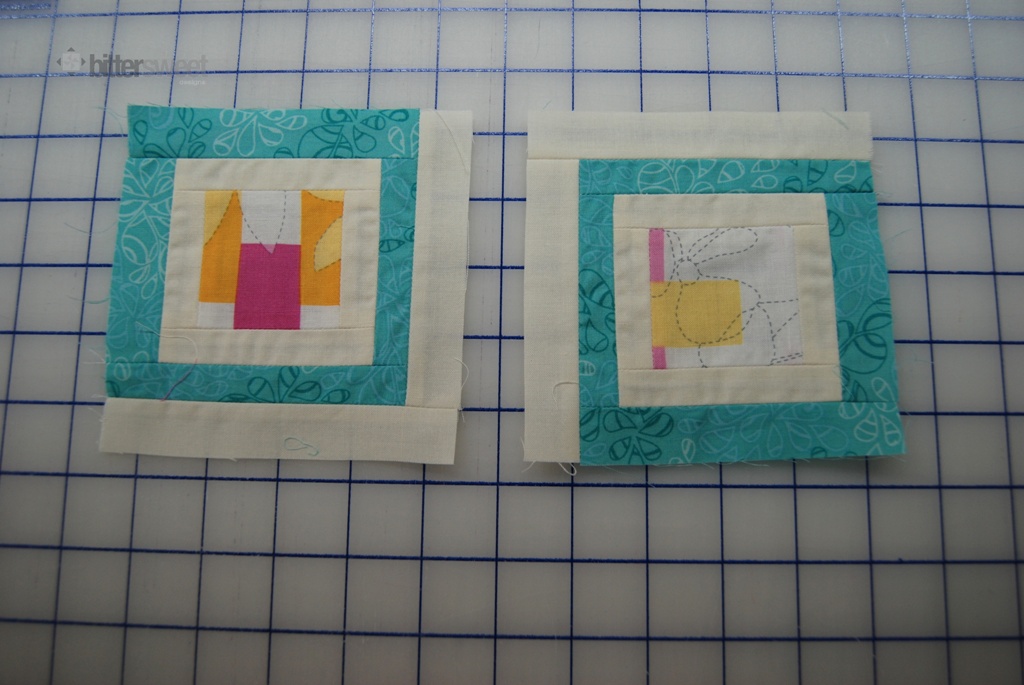
Step 1: Starting with the 2 smallest background fabrics, frame 2 of the pink/yellow squares (see below)

Step 2: Next use 2 sets of blue fabrics and add to your frame (see below)


Step 3: With the next size of the back ground fabrics add to your frame. Remember if using a directional print to pay close attention to the orientation below. This time you are only adding half of a frame.

Step 4: Using the last sets of blue fabrics, complete your frame, again, pay attention to the orientation of your fabrics if using directional prints.  This completes your framed portions.

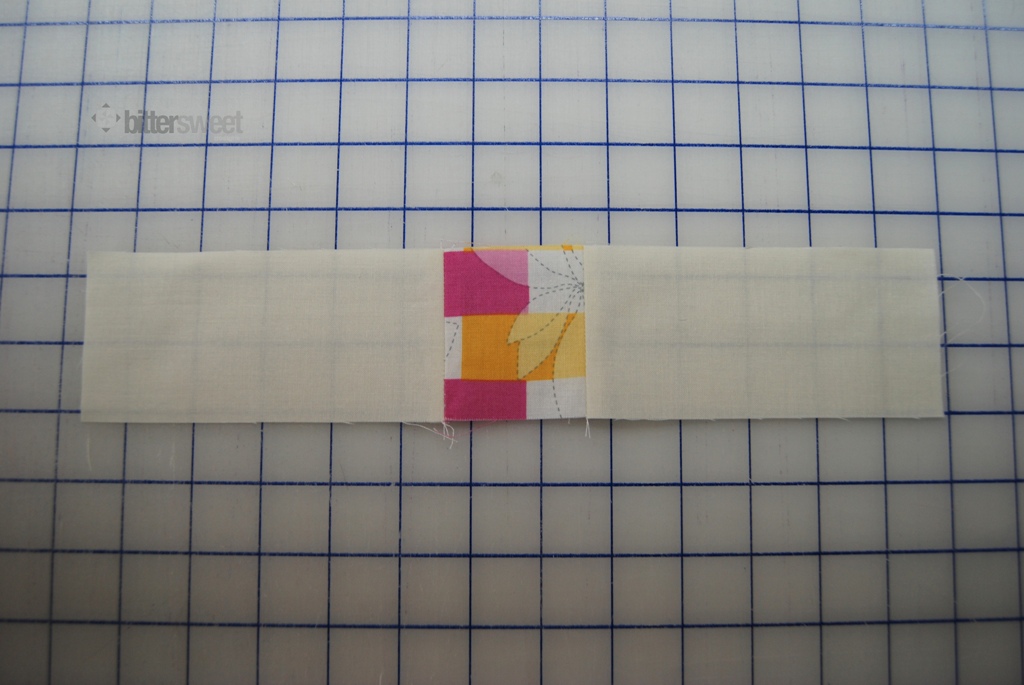
Step 5: Using the last pink and yellow square add the 5.5” x 2.5” strips on either side.  


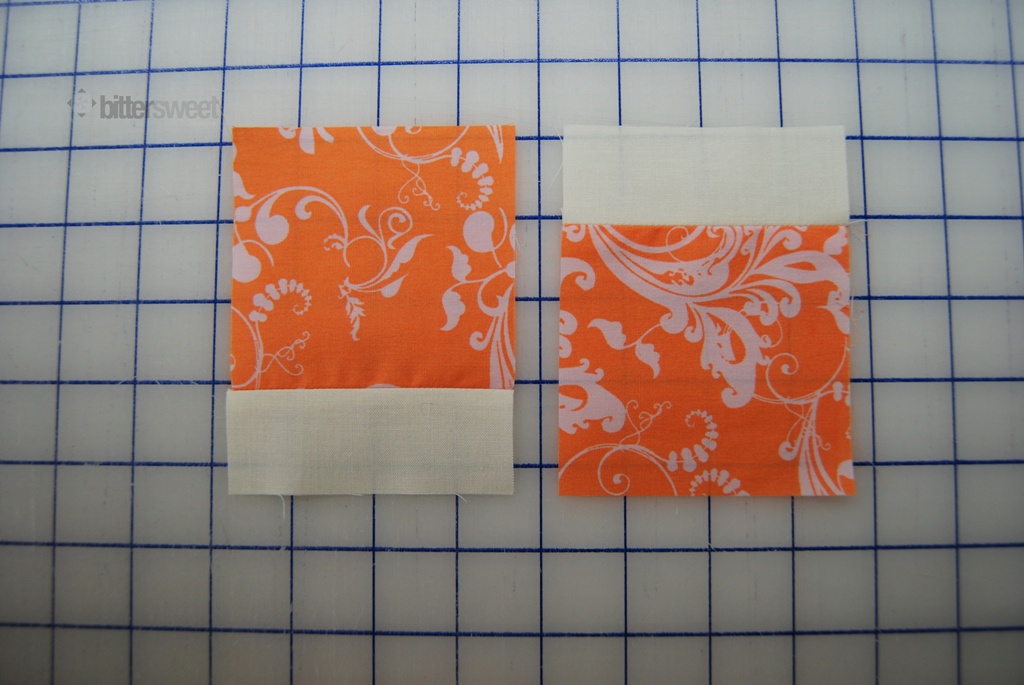
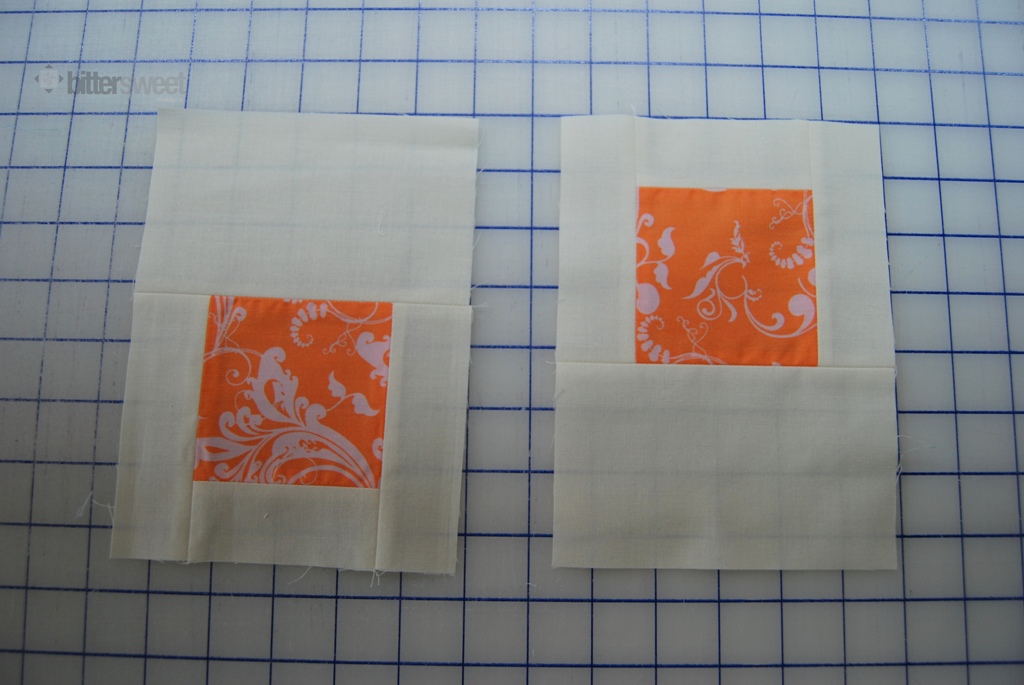
Step 6: Take your orange squares and add the 3.5” x 1.5” strips. Pay attention to the orientation if using directional prints. (how they are in this picture is how they will be in the block)


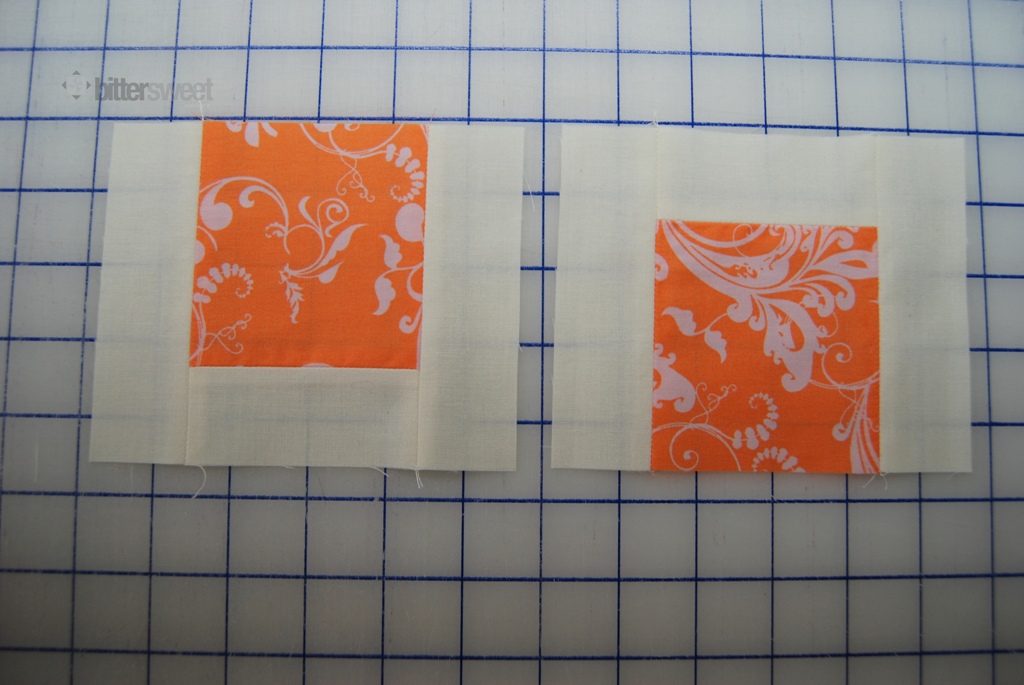
Step 7: Next add the 4.5” x 1.5” strips to either side of the pieces assembled in Step 6.


Step 8: Add the 5.5” x 3.5” strips to the pieces from Step 7.

Step 9: Block layout. Sew blue framed pieces to the orange framed pieces to create 3 sections

Step 10: Sew 3 Sections together. You have completed your block!


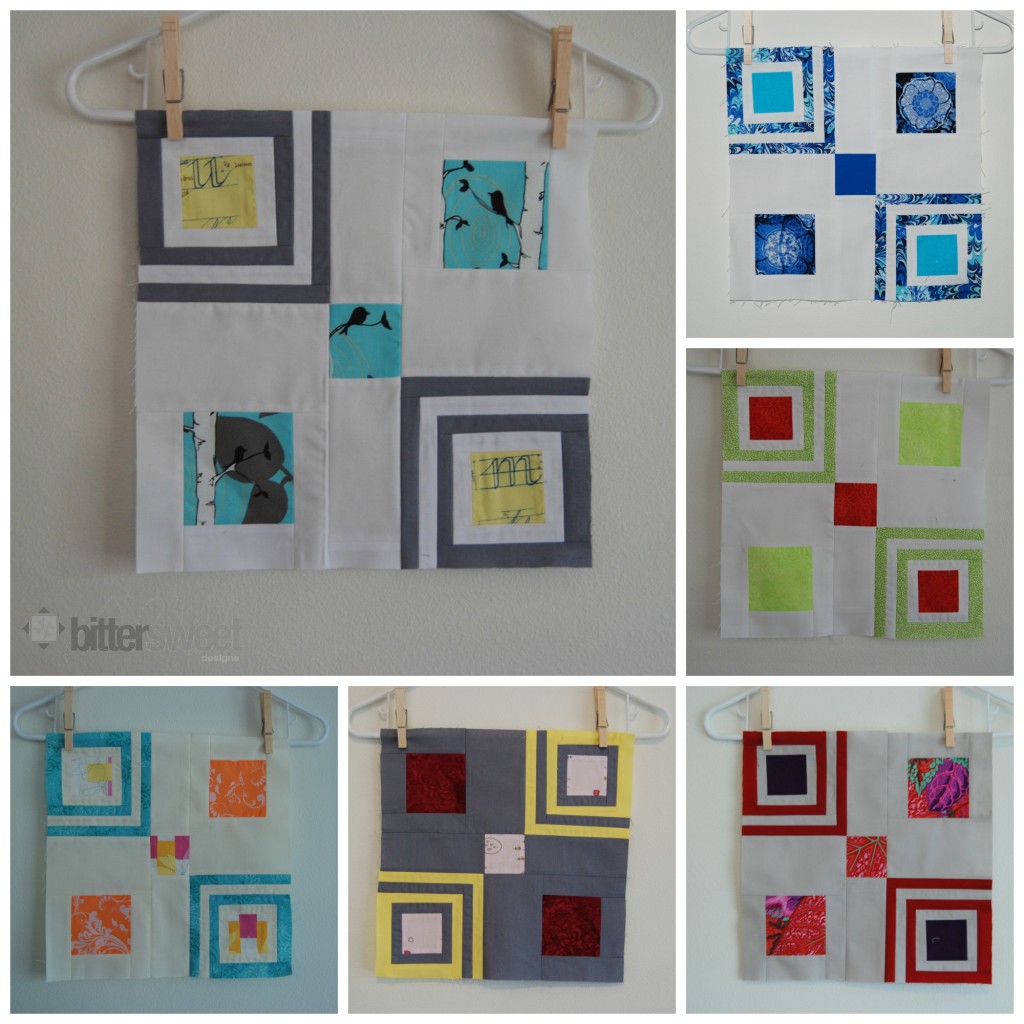
Framed Block Finished

Here’s an example with a direction print:


There you have it! Way easier than it looks! If you make any blocks following this tutorial I would love it if you put them in my flickr group!


Blogger’s Quilt Festival – Quilted Crossroads

This is my first time participating in the Blogger’s Quilt Festival hosted by Amy at Amy’s Creative Side. Make sure you head on over and visit some of the other participants. There are so many incredibly talented people out there in blog land!

AmysCreativeSide.com

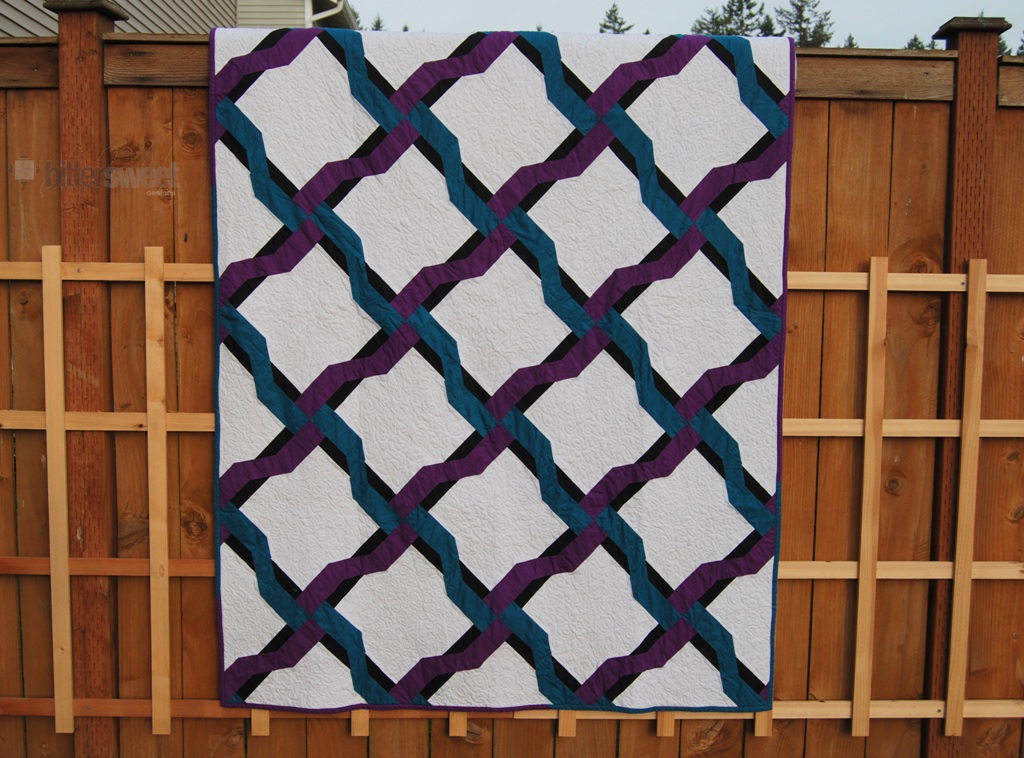
So the quilt I decided to enter I actually made last year shortly before my husband’s deployment to Afghanistan. I really felt like I was at a Crossroads in my life. He was leaving again (not by choice of course) and Anne and I had to figure out a new routine and life without him. Not an easy thing to do for a 2.5 year old. As I was playing in EQ7 one night this design came together and the quilt came together even faster.

I chose the colors teal and purple because they are calming and beautiful to me. They were the colors at my wedding and have always represented strength to me, something that the spouse and family members who stay at home during deployments need.

What I loved most about making this quilt was the fact that each night I worked on it, my husband sat in my sewing room with me and we talked and watched Mash re-runs as I sewed. It couldn’t have been more perfect (usually when I’m sewing he is off playing a video game).

I decided to keep with solids for the big version, though I did a wall hanging for Anne’s room of just 4 blocks (not set on point) and she has prints in her crisscrosses.

Here is a close up of one of the crosses.

I decided to do simple free motion stippling on my home machine in all of the background fabrics. For my backing I used a whole cloth, high thread count muslin. I love how soft muslin gets but most especially, I love not having to piece the back! And let me tell, the back looks really cool with the quilting.

This quilt just makes me happy. Many hours were spent snuggling underneath it with Anne while daddy was gone, and on mornings now when she gets up super early we still find ourselves cuddled together on her bed underneath it.

Quilted Crossroads Stats

Finished Quilt Measure: 51″ x 68″
Special Techniques Used: Block assembly from outside in
Quilted By: Melissa Dunworth (Myself)
Best Category: Favorite Throw Quilt

If you like this pattern and want to make one with your own special spin, I am happy to announce that it is now for sale on Craftsy.com at a special rate of $5.00. Please go here to purchase.

Thank you for visiting!!!

Scroll to Top