Lazy Angle Ruler Review & Tutorial
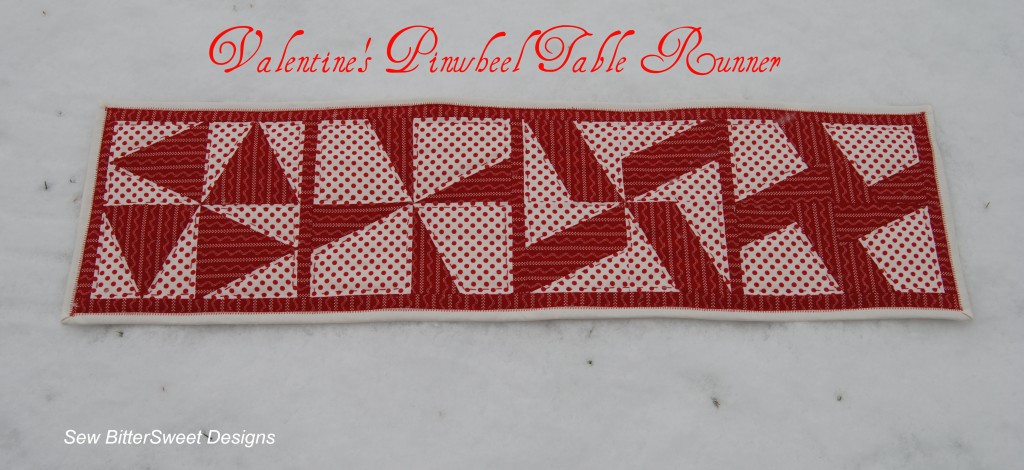
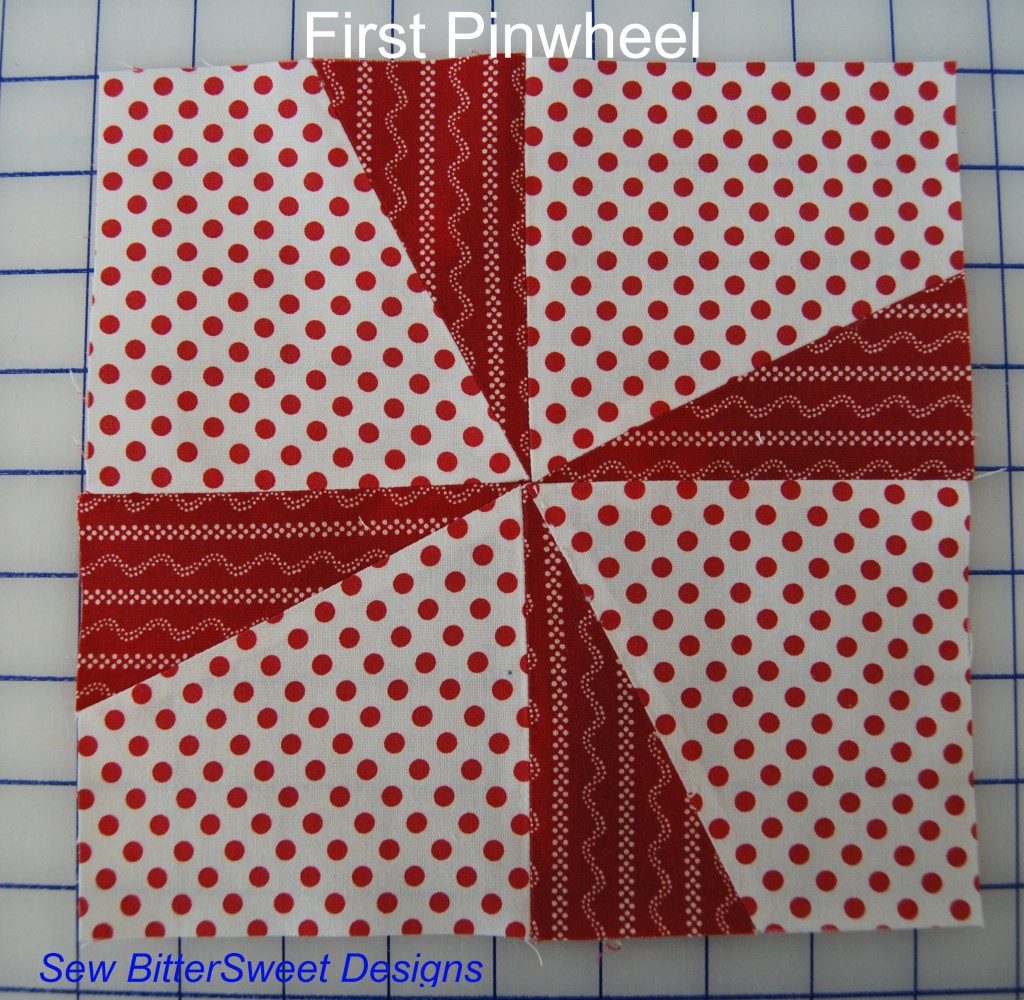
 Have you been intrigued by the Lazy Angle Ruler? I was and when the opportunity to do a giveaway and review came up with Fat Quarter Shop, I jumped at the chance and here’s why…I created the 4 blocks for this table runner and 1 additional during Anne’s nap time – all of TWO hours!
The first thing I did was head over to the Lazy Girl Designs website and download the “Getting Started” chapter from the Lazy & Lovin’ It book. If you are going to invest in the ruler – I highly recommend printing out these 12 pages. After taking the time to read it and get a real understanding I was able to create these blocks by just cutting, sewing and playing.
I decided to make 8 inch finished blocks – mainly because I have recently been intrigued with that size block. An 8 inch block requires 4 blocks measuring 4.5″ x 4.5″.
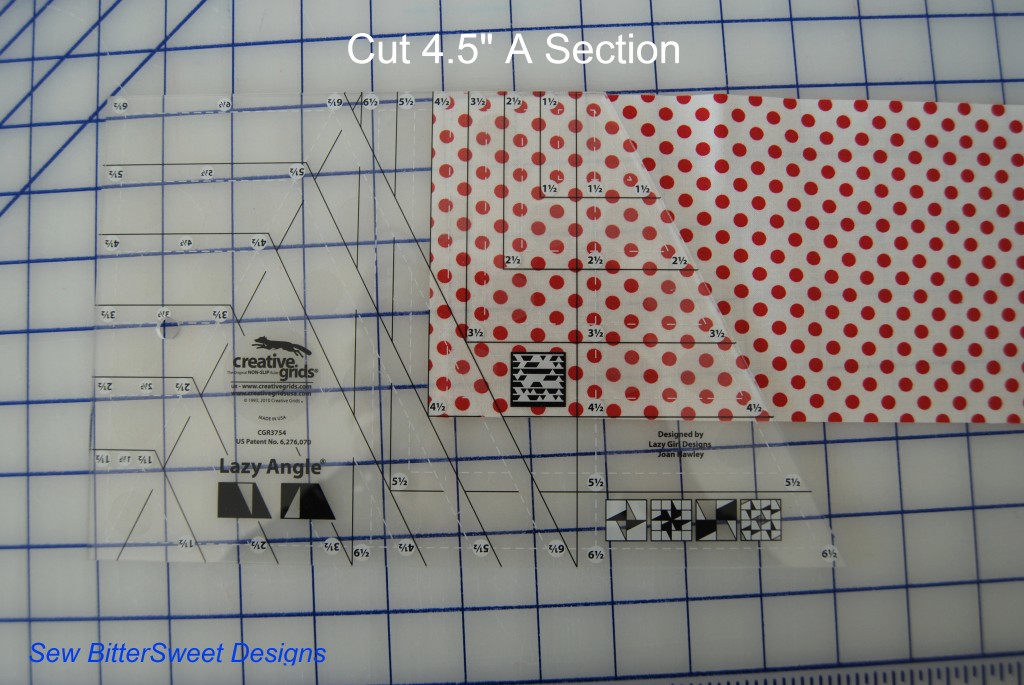
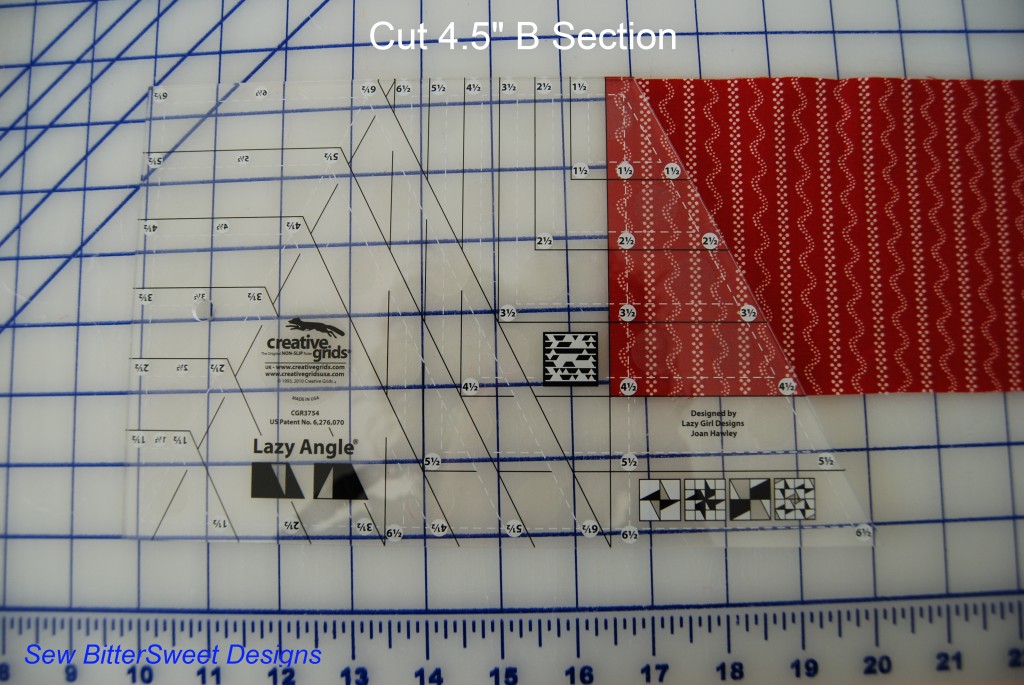
Start with two different fabrics measuring 4.5” by width of fabric.
(It is important to remember when piecing to use a ¼” seam)
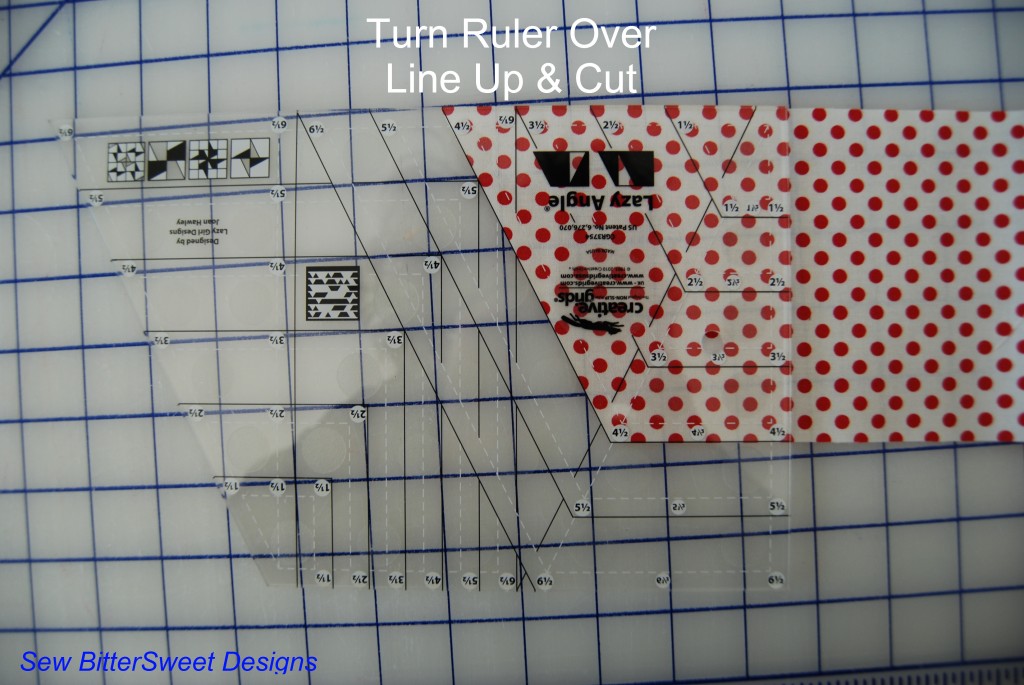
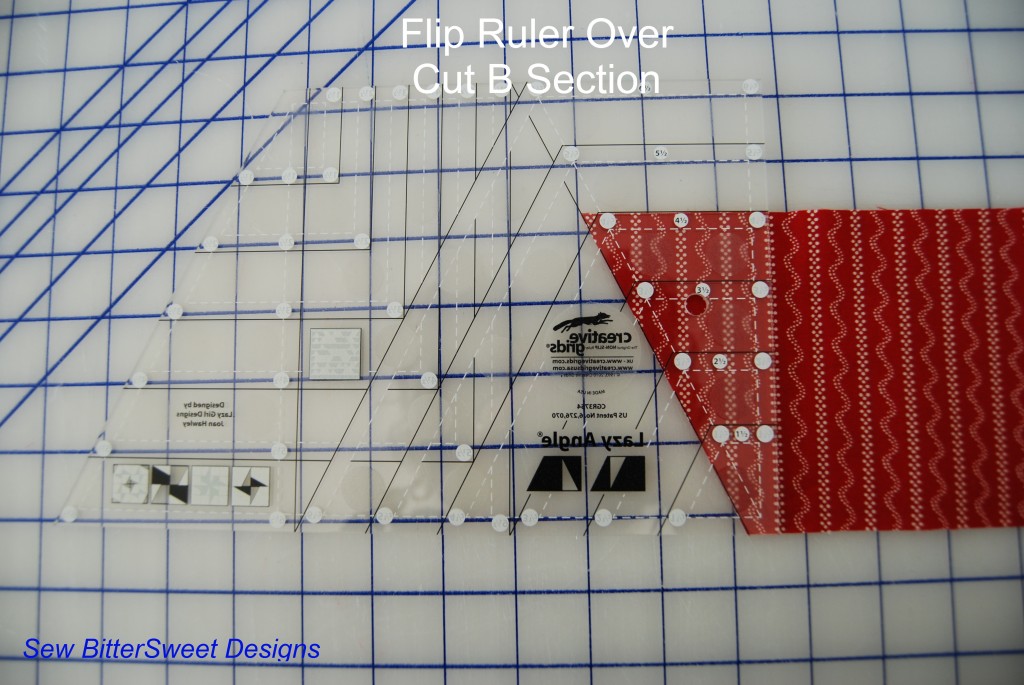
Start by cutting your A sections – for the 1st pinwheel block you will need 4 section A’s and 4 Section B’s.
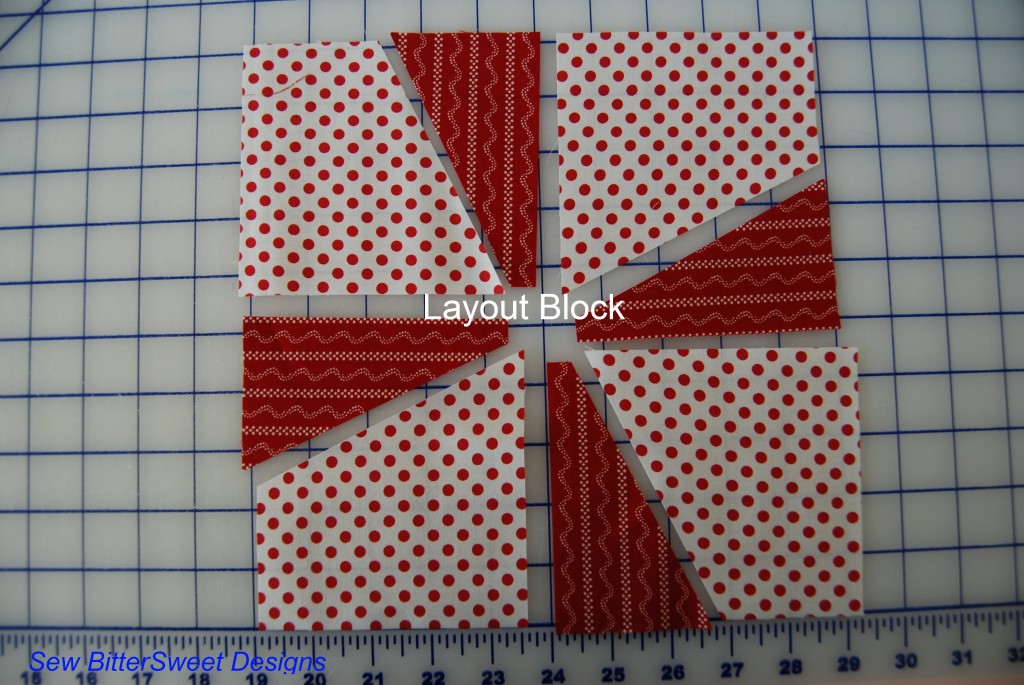
Lay out your block
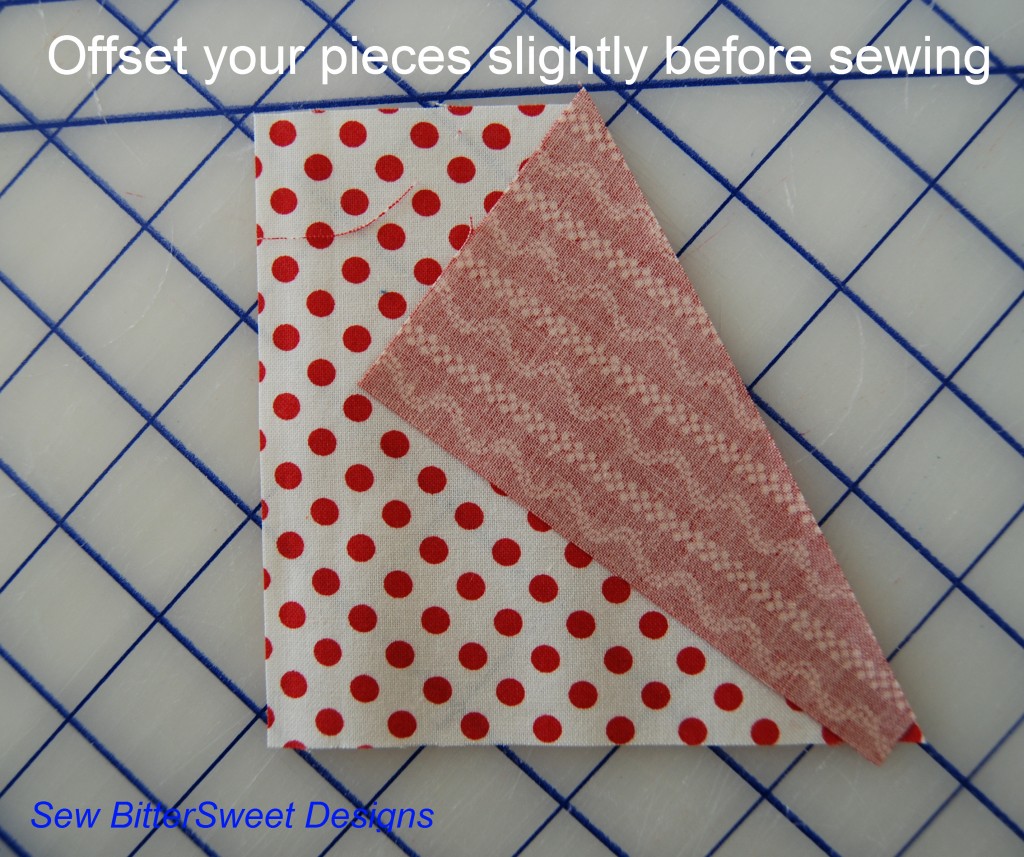
Next you will need to sew your sections together – make sure you slightly offset your pieces – the Lazy Girl Designs website describes this as making a bowtie at the bottom of your piece. Here is how my sections look:
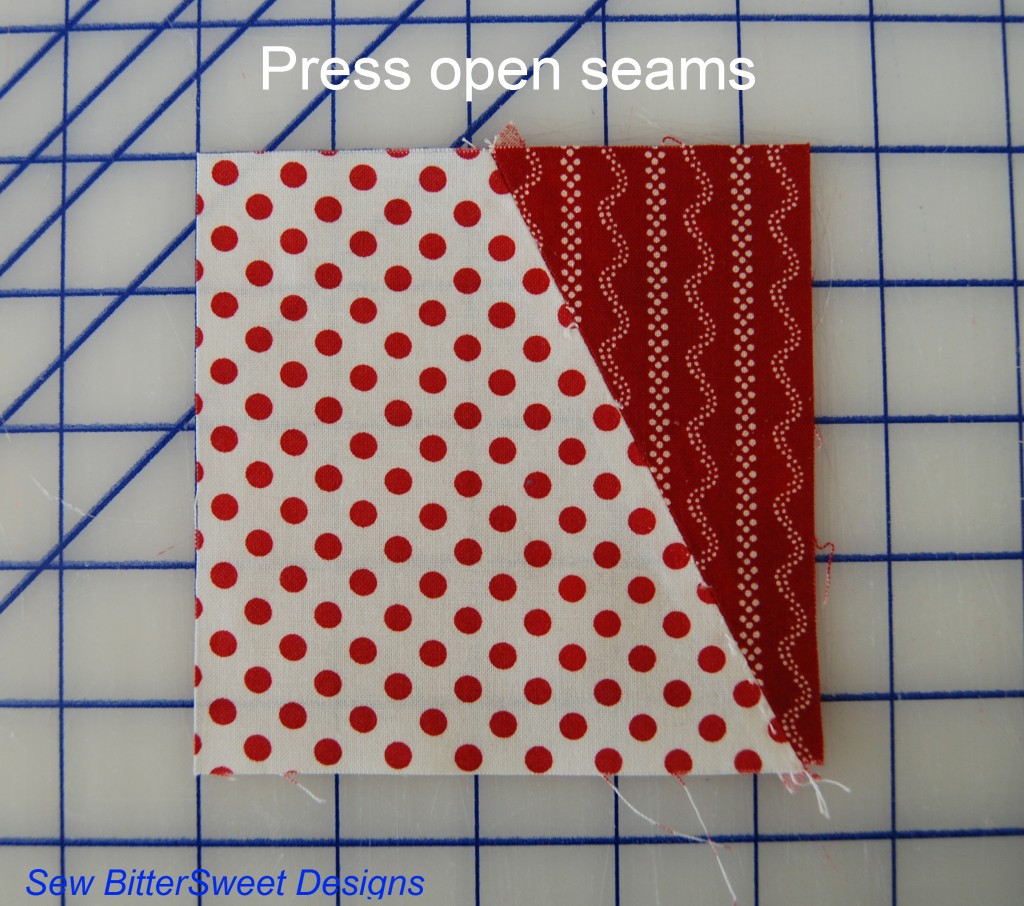
Press your seams open, trim dog ears and you have made your first section! Make 3 more and sew your block together.
Things I like about the ruler:
- Concise – Aside from trimming dog ears – I didn’t have to trim my blocks to size – they were consistently 4.5” each time (meaning – make sure your ¼” seams are ACCURATE! – if they aren’t you will cause yourself a lot more work!)
- Once you master this first block the options are ENDLESS – after I had the proportions worked out I designed 10 or more blocks in EQ7 for this ruler
- The 12 page free downloadable chapter is a wonderful font of information – READ IT!
- You can create finished blocks measuring from 4” to 12”
Area’s for Improvement:
- Learning curve – the pamphlet that comes with it was not enough for me to figure out how to use the ruler – however, the Lazy Girl Designs website had a great deal amount of information to help me figure it all out
- If the pieces are not offset just right, then your square will not line up properly – it took me 3 or 4 tries and lots of quality time with Jack (a.k.a. The Ripper) to figure out the exact right alignment
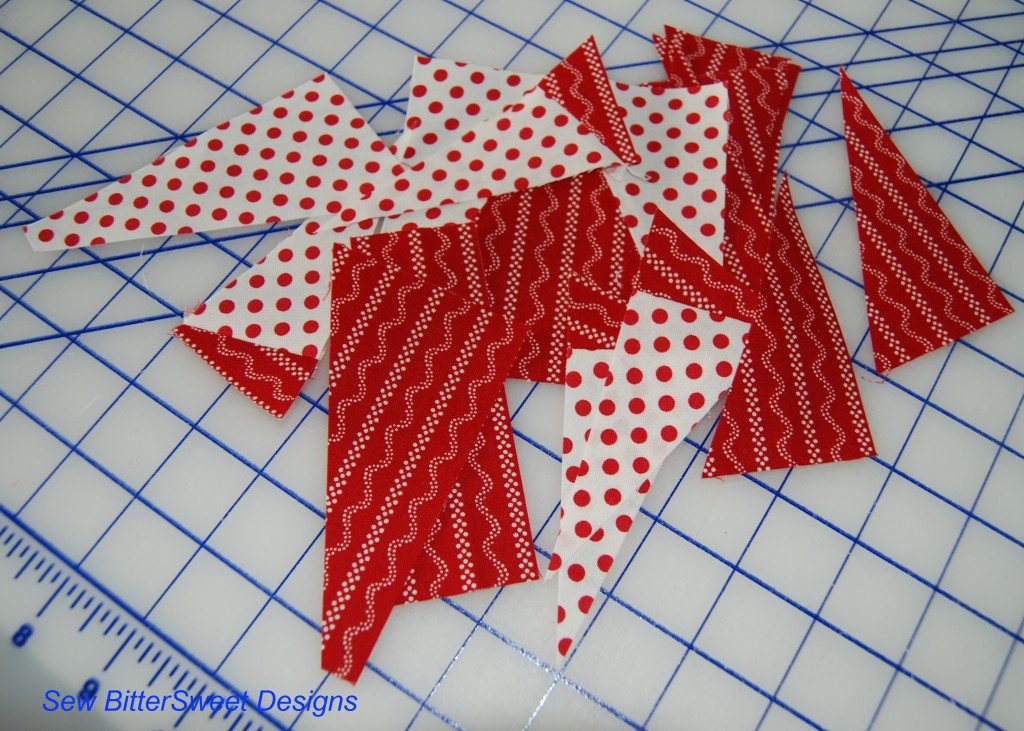
- There is quite a bit of waste when you are creating blocks with 3 or more sections – be prepared for a scrap pile
Final Thoughts:
I love this tool – I see myself using it quite a lot in future quilt designs. While there is a learning curve, DO NOT let it intimidate you. Take the time to download the free chapter and read it. If you are still struggling feel free to send me a message – I would be more than happy to walk you through using this ruler.
Come by tomorrow (internet access willing – we are still having trouble in our neck of the woods) – and I will have up step-by-step picture tutorials for the other 3 blocks in the table runner and cutting instructions for the sashing and border. The day after that I will put up a tutorial on how to do a machine binding on this quilt.
Do you have this ruler? Do you want one? Head over to my Fat Quarter Shop Giveaway for your chance to win one!
![]() NOTE: Don’t forget, I am one of the bloggers who is going to lose Google Friend Connect in March 2012, please take a moment and follow me via Bloglovin’, Facebook, RSS or networked blogs. You are important to me and I want to be able to stay in contact with you! Check my side bar for all the best ways to stay in touch after GFC goes bye bye!
NOTE: Don’t forget, I am one of the bloggers who is going to lose Google Friend Connect in March 2012, please take a moment and follow me via Bloglovin’, Facebook, RSS or networked blogs. You are important to me and I want to be able to stay in contact with you! Check my side bar for all the best ways to stay in touch after GFC goes bye bye!

