tutorial

Quickie Basting Tutorial

Seeing as I have spent the last 3 weeks doing nothing but quilting – projects big and small – I thought I would show you how I baste a quilt.

I am old fashioned – no basting sprays for me. I don’t have anything against them, they just aren’t my preference.  The one time I did use one the quilt felt really stiff afterwards and I just didn’t like the way it felt. I know tons of people do like them and use them. I think you should try different methods and see what works best for you – pin basting – while time consuming – works best for me. This is a twin size quilt, I did it in front of the TV and was done in about 30 minutes.

I start out by putting together my backing and pressing it.

Lay backing right side down onto the floor. Having hardwood floors is awesome for pin basting because I can tape the quilt to the floor. You can also do this on carpeting – I usually pin the backing to the carpet.
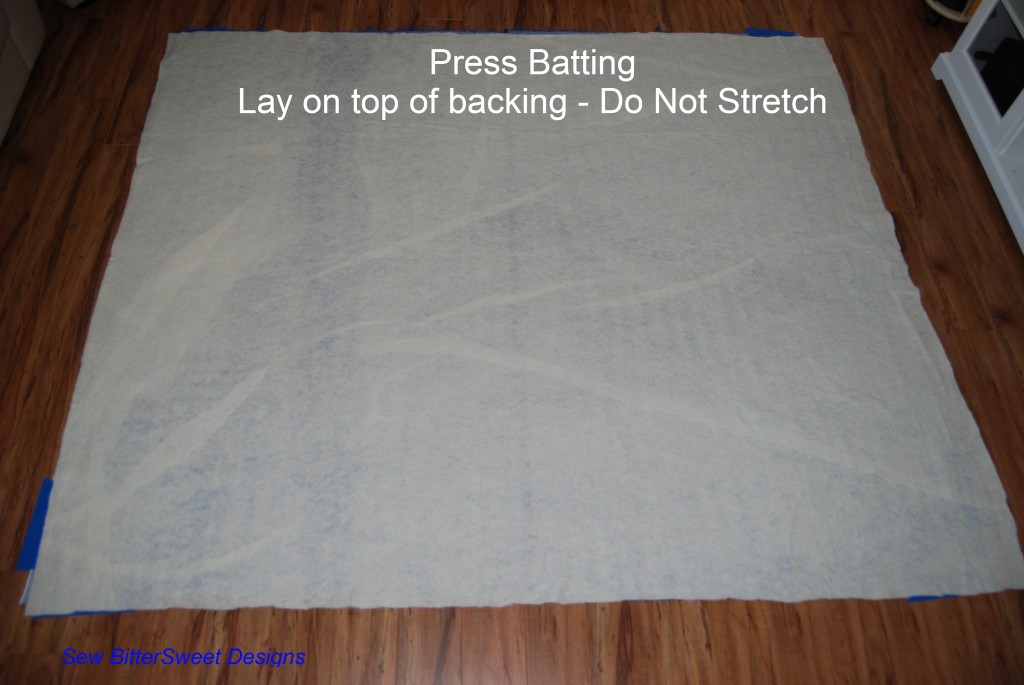
Press batting (it looks wrinkled but it really isn’t).  Lay flat on backing – DO NOT STRETCH. Trim batting down to size of backing.
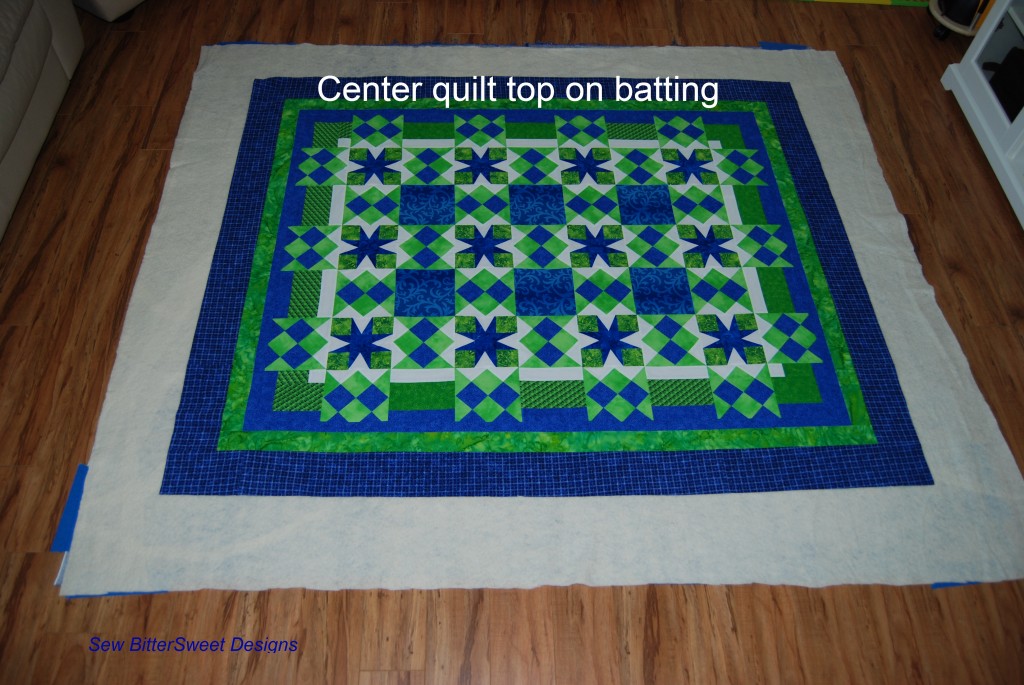
Center quilt top on the batting – you are now ready to pin.
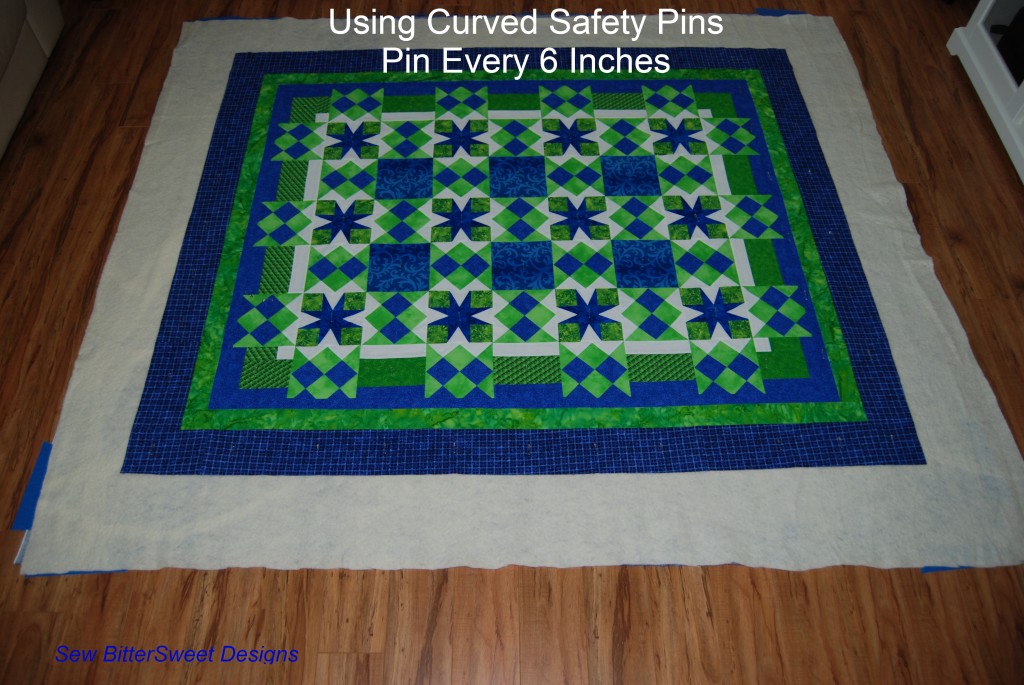
Pin every six inches – if you know your quilt pattern (I did straight line quilting following the diamond shapes) try to avoid pinning directly in the path of where you want to stitch.

Once you finish quilting – square up your quilt and trim excess batting and backing.  Bind it and you are all done!!! Let me know if you would like me to do a tutorial on how I bind quilts 🙂
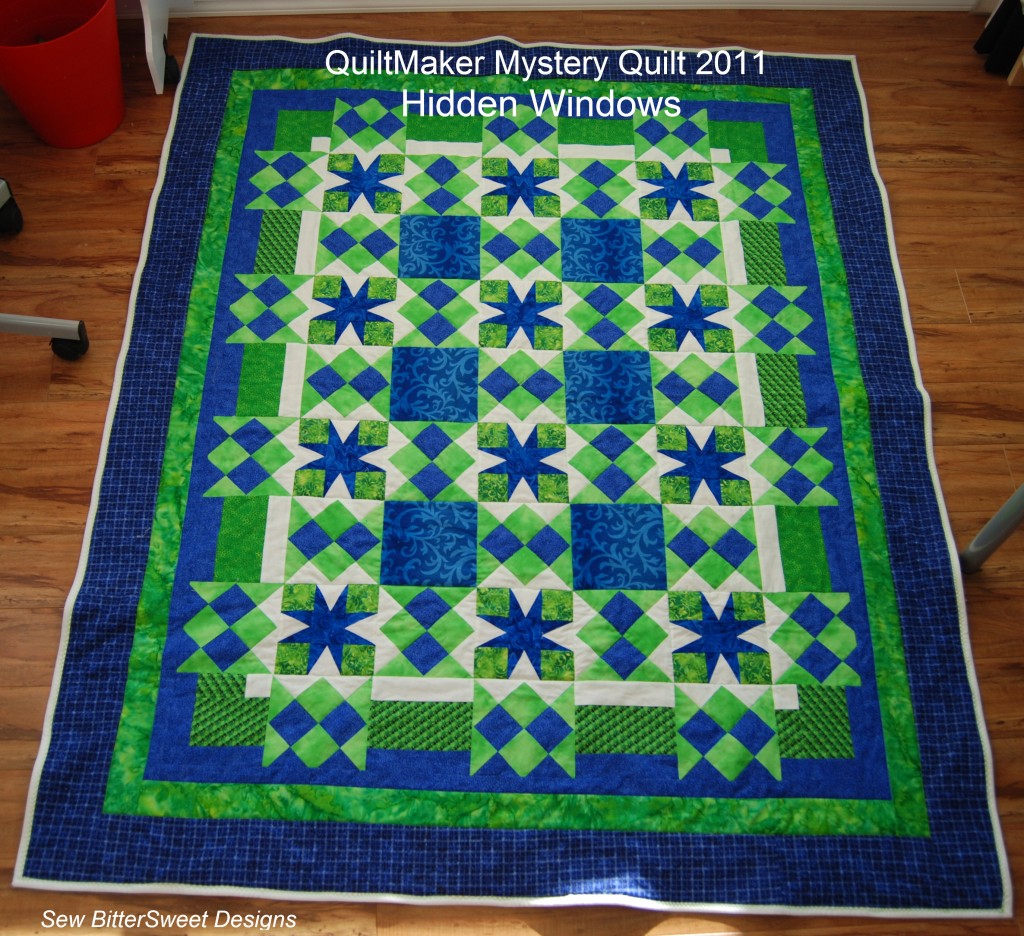
And this is where I tell you how glad I am that my hubby, while incredibly supportive, does not read my blog and for that I am grateful! This is his present and I can show it off here before giving it to him because he won’t see it!

Don’t forget to enter the giveaway for a $25.00 Intrepid Thread gift certificate!

NOTE: Don’t forget, I am one of the bloggers who is going to lose Google Friend Connect in March 2012, please take a moment and follow me via Bloglovin’, Facebook, RSS or networked blogs.  You are important to me and I want to be able to stay in contact with you!  Check my side bar for all the best ways to stay in touch after GFC goes bye bye!


Stocking Block Tutorial

Today I owe a huge thank you to my best friend Lisa. I have known Lisa since we were 11 years old. We lost contact in our early 20’s and found each other again on MySpace in 2007.  This past year I got her interested in quilting and she helped me out with this tutorial. I made the stocking block back in July and never took any pictures of how I did it. Last night I sent Lisa a picture of the block with measurements and I talked her through how to make it on the phone and she did a beautiful job – the vintage block is mine and the modern block is hers. Thank you thank you thank you Lisa! You rock!

This is the final block of the Vintage Christmas Sampler Quilt, if you have made it this far, CONGRATULATIONS!  As of this post, all my blocks are completed but I have not finished the top. My plan is to border each block alternating between red and green solid and then sew the blocks together to make the top.  I am certain this won’t actually happen until some time next year!

Here we go, cutting:

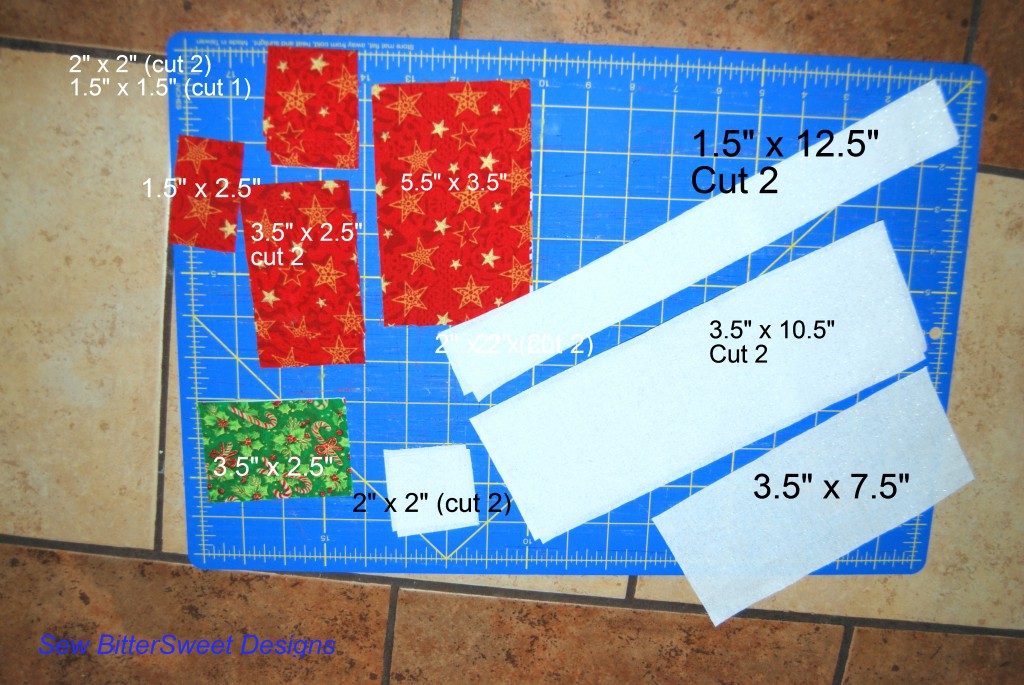
From red cut: two 2″ x 2″ squares, one 1.5″ x 1.5″ square, one 1.5″ x 2.5″ rectangle, two 3.5″ x 2.5″ rectangles, and one 5.5″ x 3.5″ rectangle.

From green cut: one 3.5″ x 2.5″ rectangle

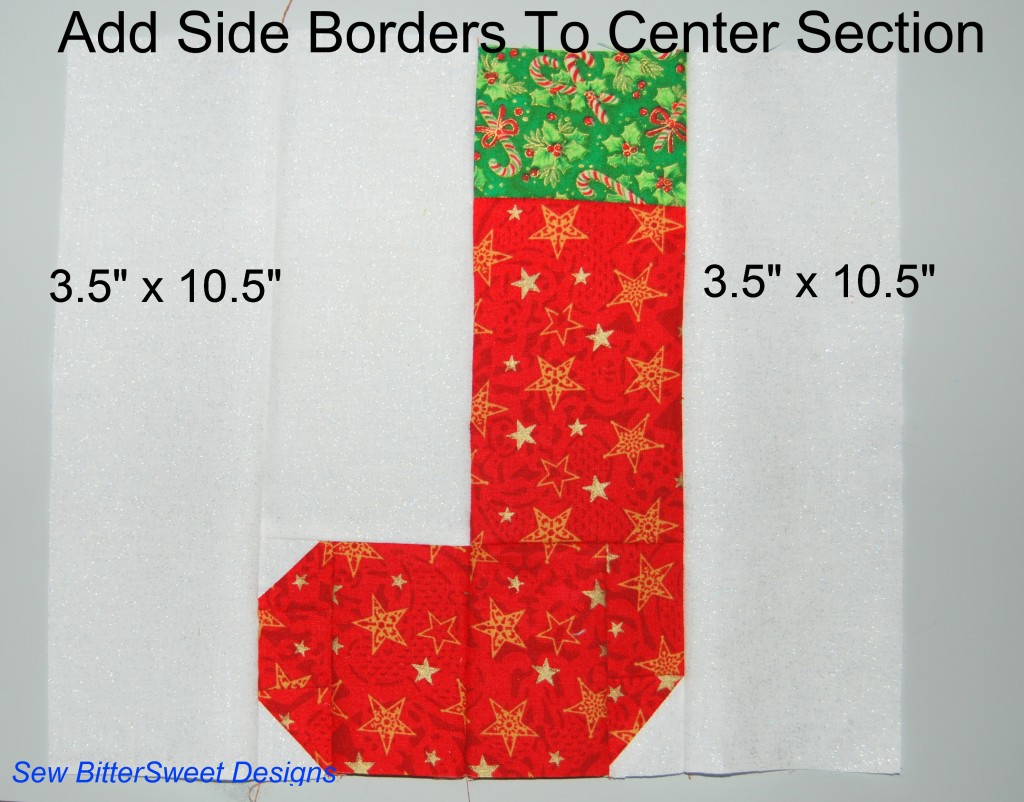
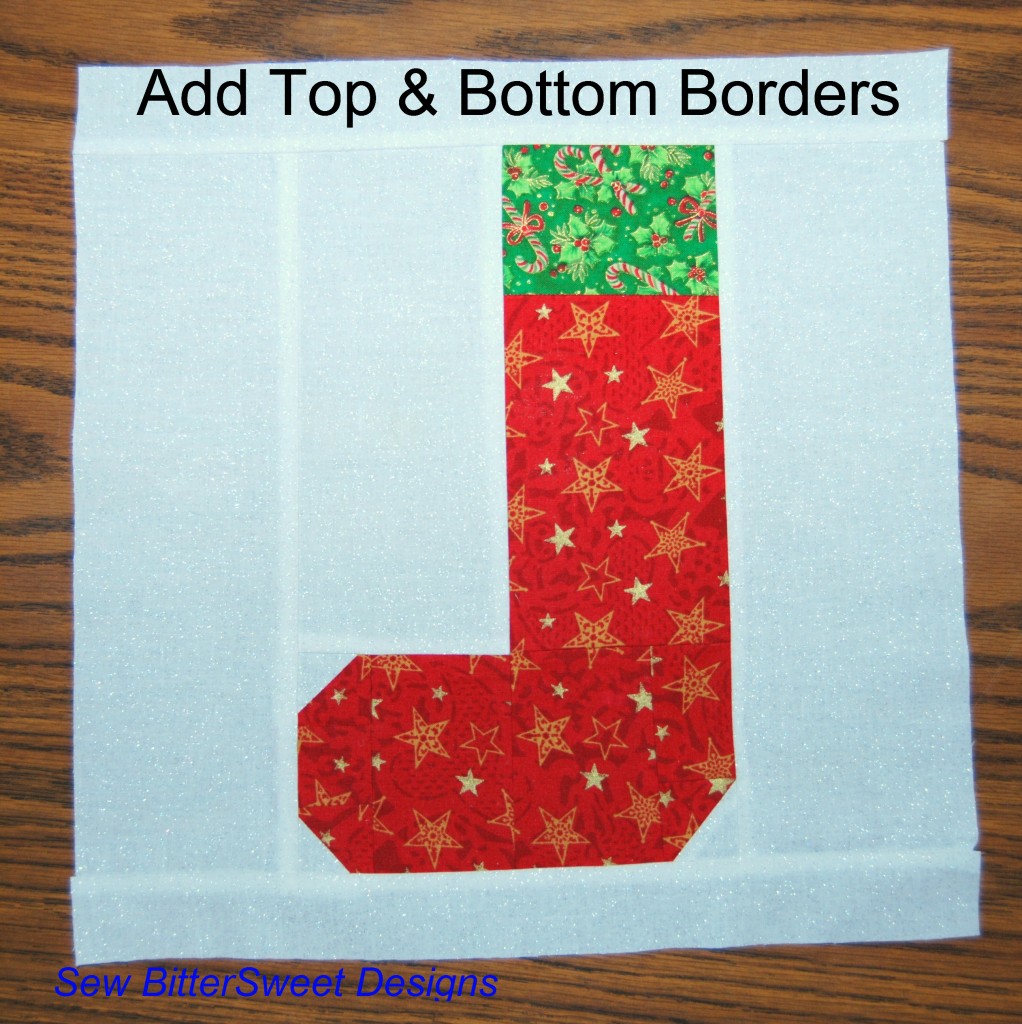
From white cut: two 2″ x 2″ squares, two 1.5″ x 12.5″ rectangles, two 3.5″ x 10.5″ rectangles, and one 3.5″ x 7.5″ rectangle.

NOTE: all seams are 1/4″

Next, using the red and white 2″ squares assemble your Half Square Triangles (HSTs) – trim them down to 1.5″ x 1.5″

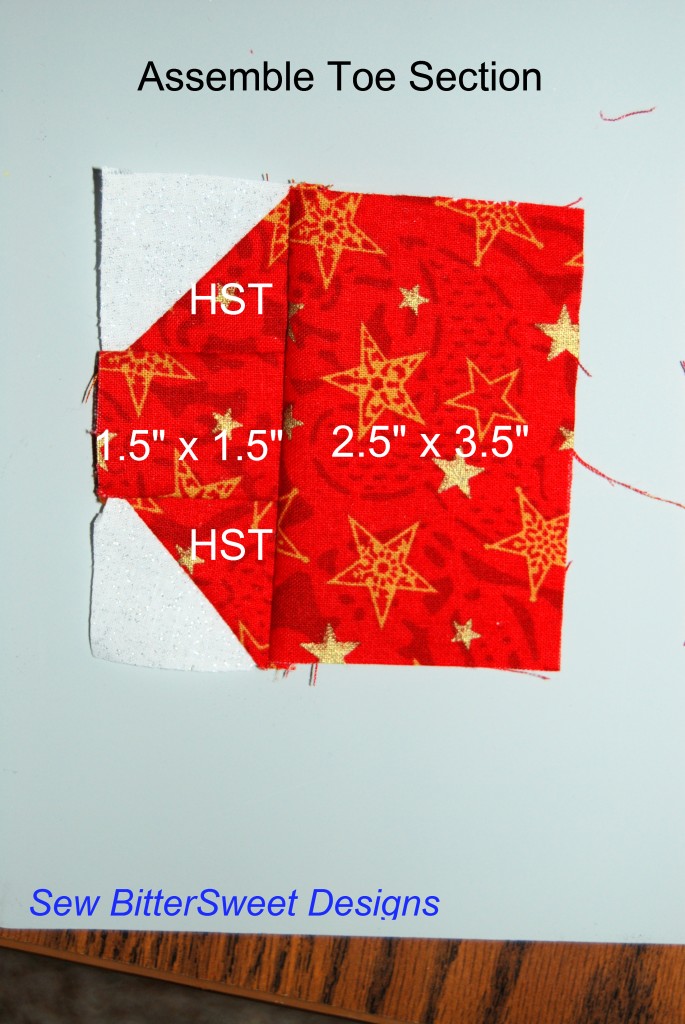
Next, assemble toe section:

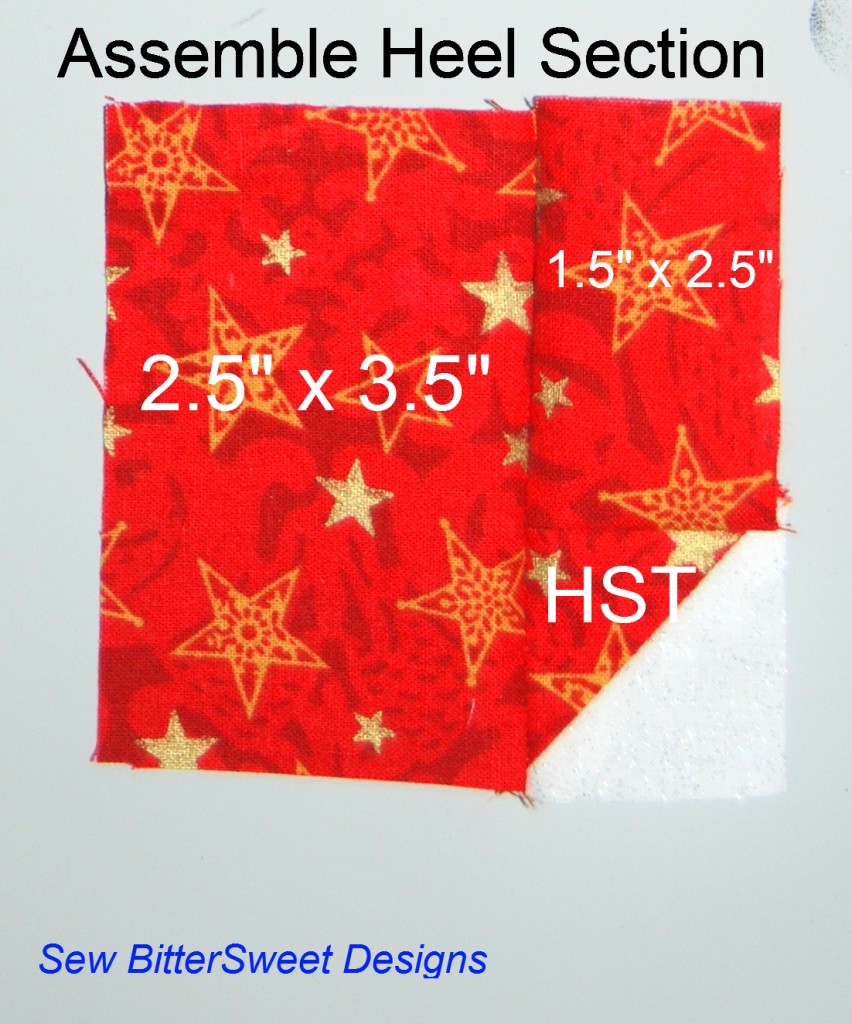
Next, assemble heel section:

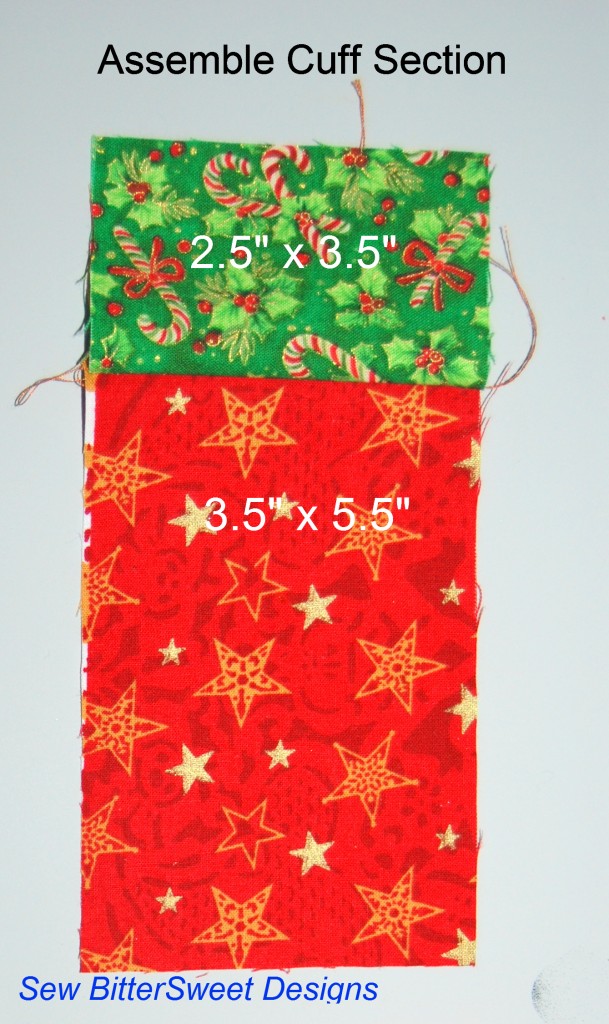
Next, assemble cuff section:

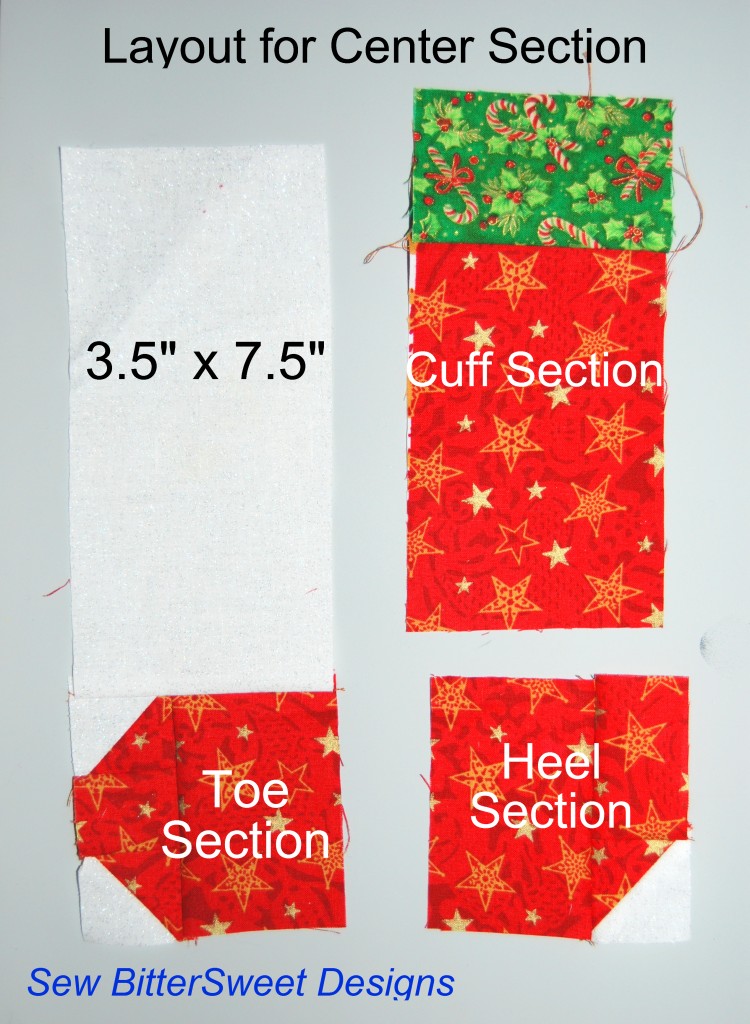
Next, assemble center section of block:

Add side borders:

Add top & bottom borders:

Congratulations! Another finished block! If you are like me and this is your last block then you have finished all the blocks for your quilt!

As soon as I finish the quilt top I will post pictures – this will not be until sometime next year, but I am really excited to get it done. This is the 4th quilt that I have designed and I am really excited about it. I would also love it if you are making this quilt and you want to share you pictures with me!

Happy Sewing!

NOTE: Don’t forget, I am one of the bloggers who is going to lose Google Friend Connect in March 2012, please take a moment and follow me via Bloglovin’, Facebook, RSS or networked blogs.  You are important to me and I want to be able to stay in contact with you!  Check my side bar for all the best ways to stay in touch after GFC goes bye bye!

Indian Mats Block Tutorial

First and foremost, I would like to start with an apology. I am sorry for not having this up when I said I would, which was before the end of November. I have been sick for the past few months and I have let a few things slide – this project was one of them. My sincerest apologies to those who have been quilting along with me this whole time.  I did not want to say anything here about being sick because this is my happy place, the place where I’m not sick.  Ok, enough sick talk – let’s sew!

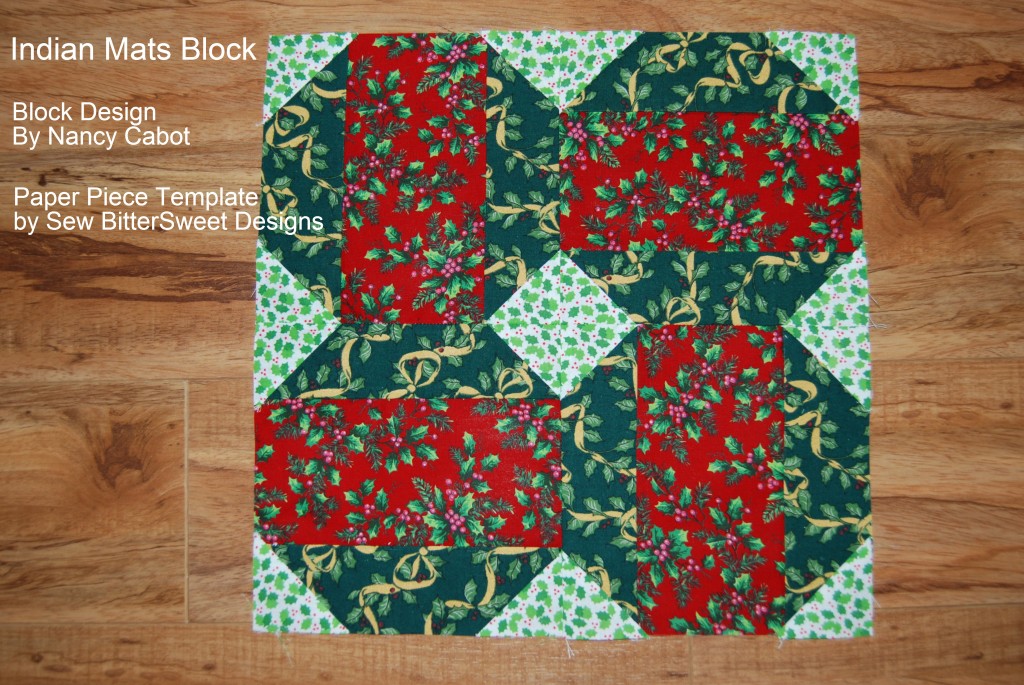
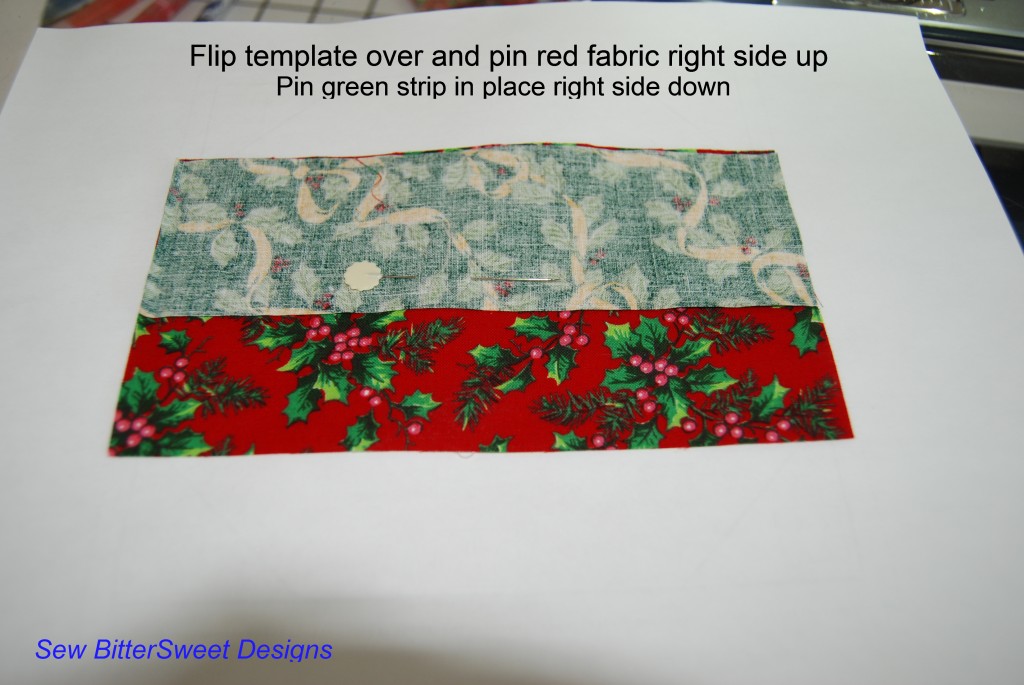
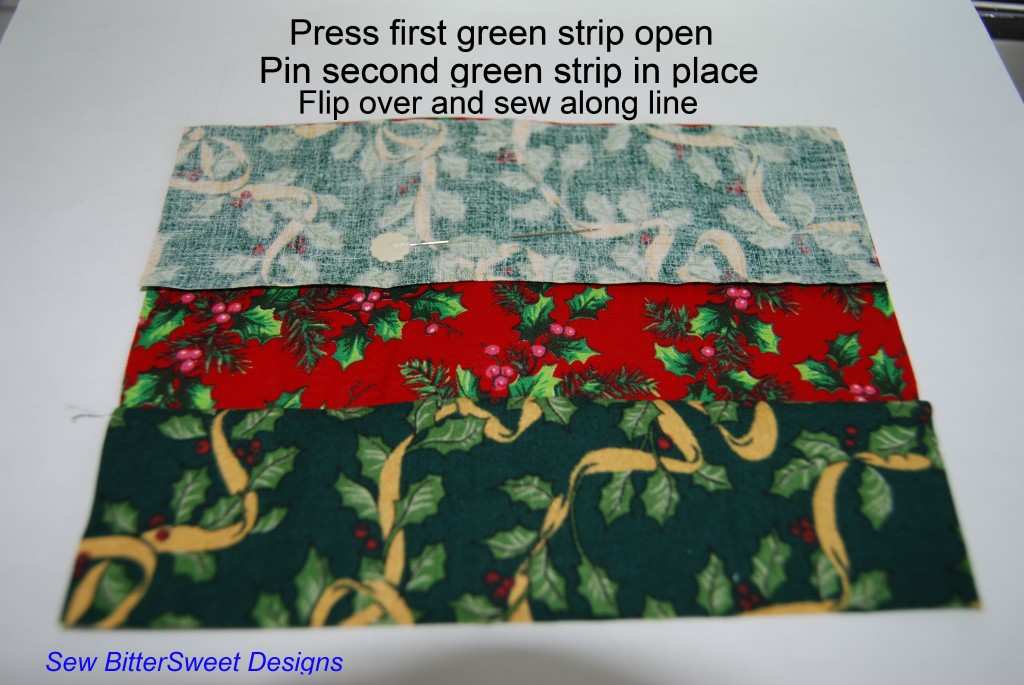
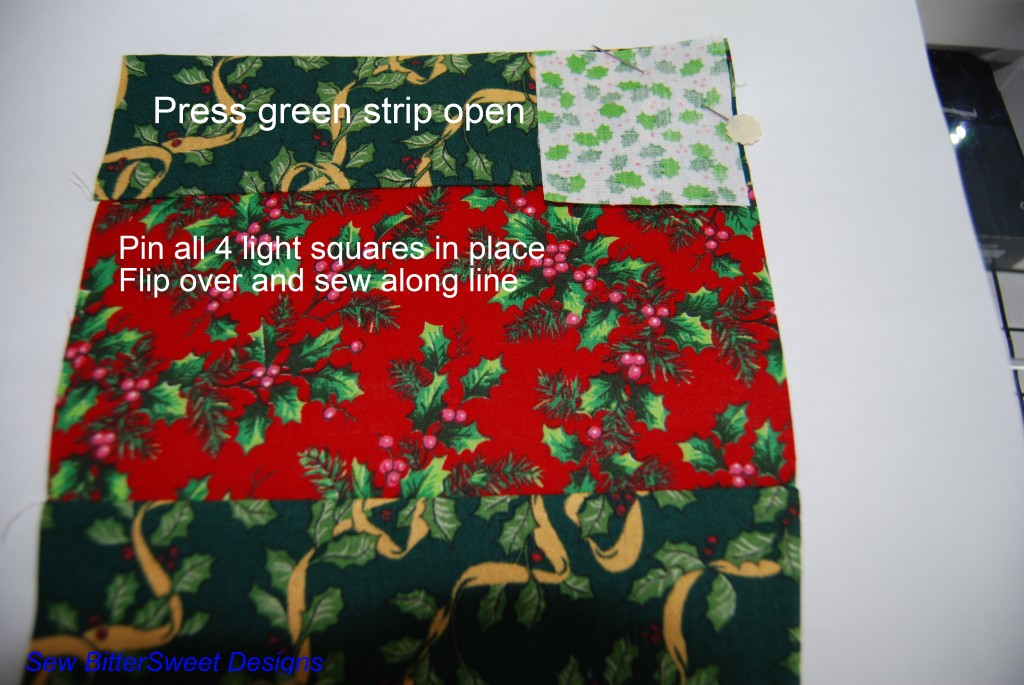
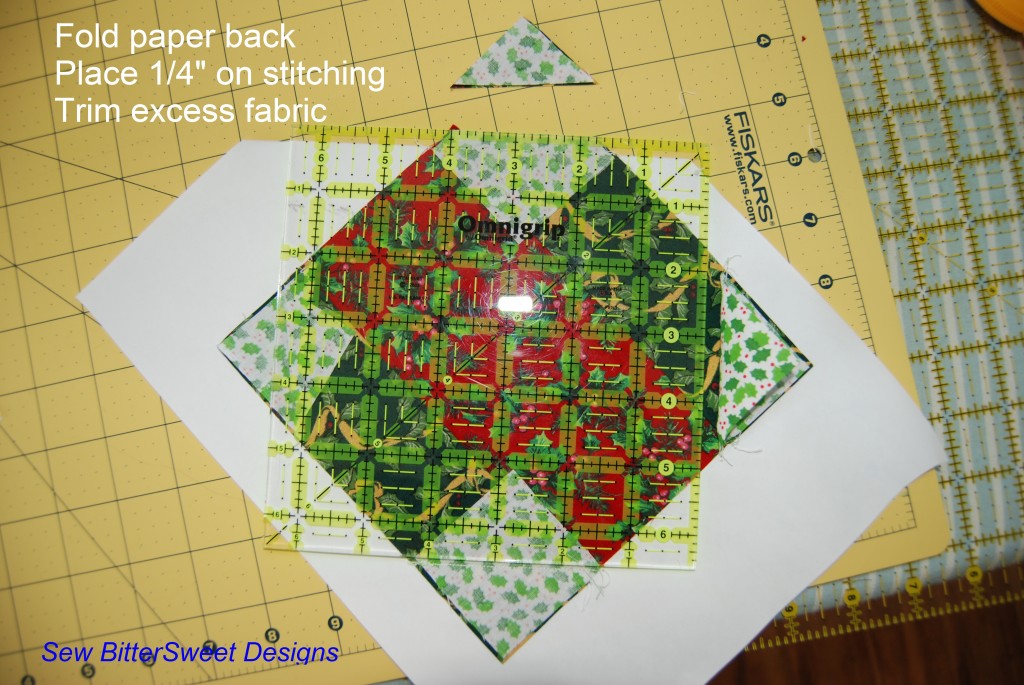
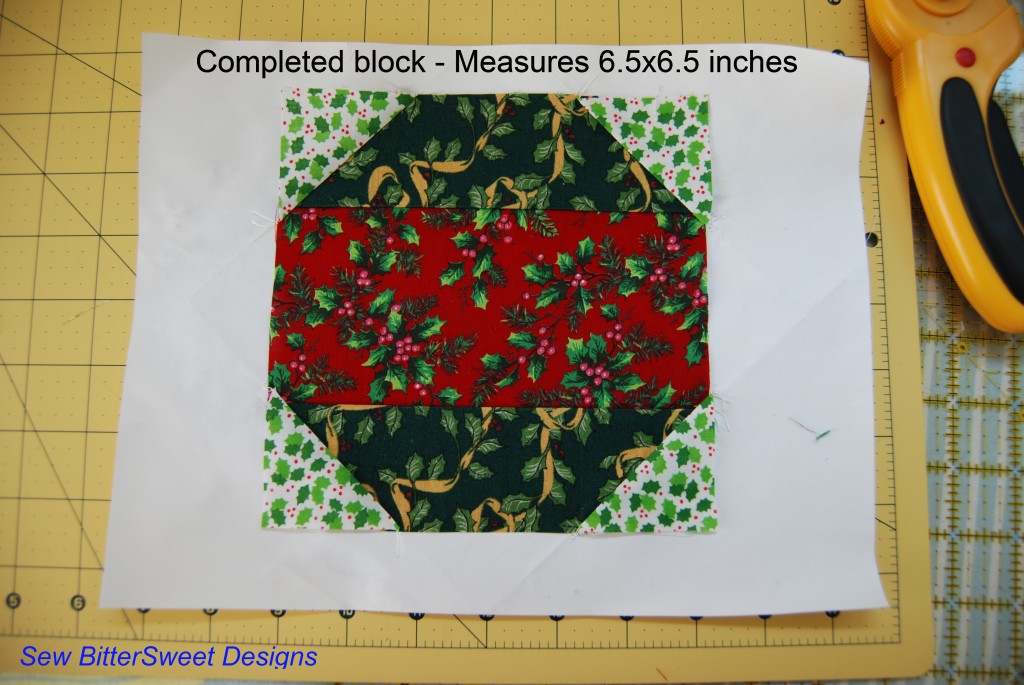
This is block number 7 from my Vintage Christmas Sampler and it is attributed to Nancy Cabot (I think she must have designed practically every quilt block known to man!).  To make this block you will need to download my paper piece template. I am sure there are other ways to do this, but I really wanted to practice paper piecing with simple patterns and this seemed like a good block to do that with.

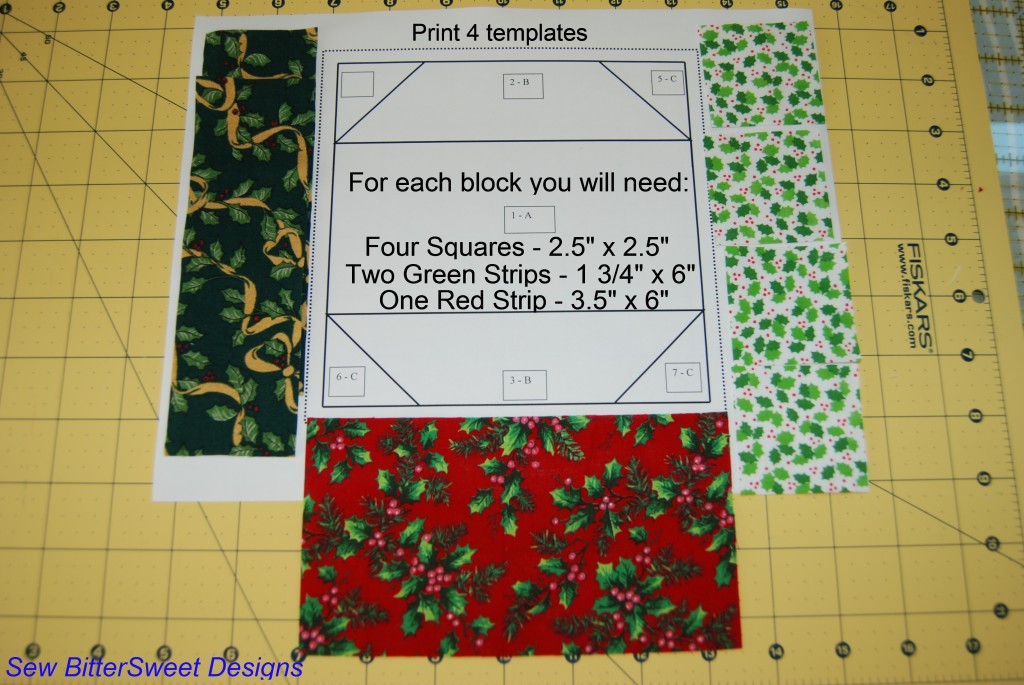
Please print 4 templates – make sure that the square with the dashes measures 6.5 x 6.5 inches.

This is a picture tutorial, please let me know if you have any questions or if you cannot download the template – I will be happy to email it to you!

Tip: when I paper piece I like to reduce my stitch length to 1.5 – this will make it easier to tear the paper away after trimming the block at the end!

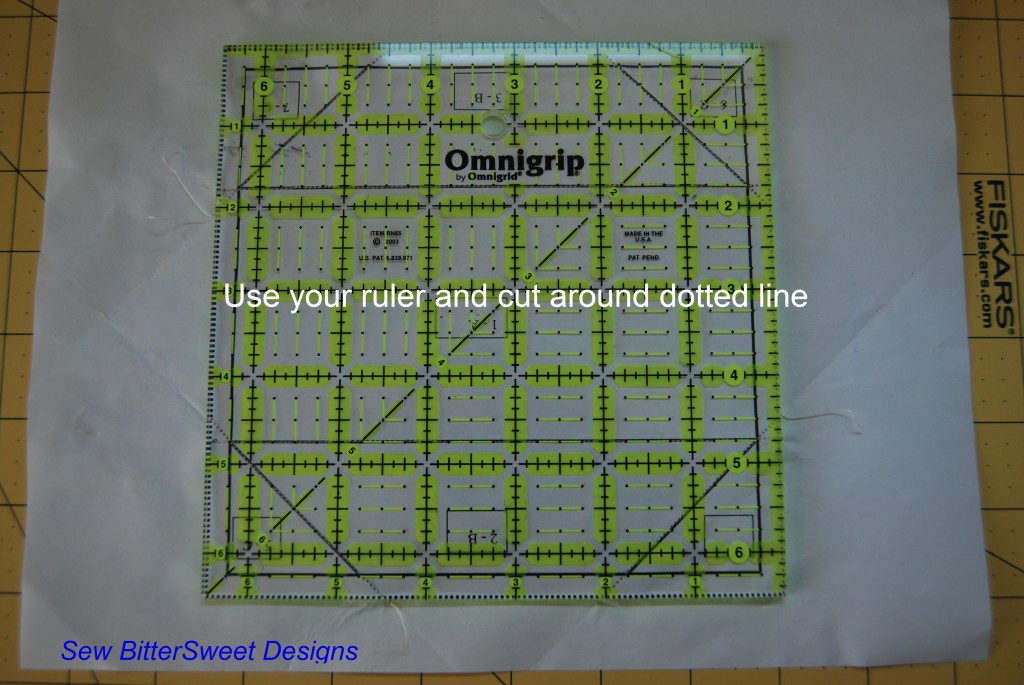
Tear paper away after cutting along dotted line

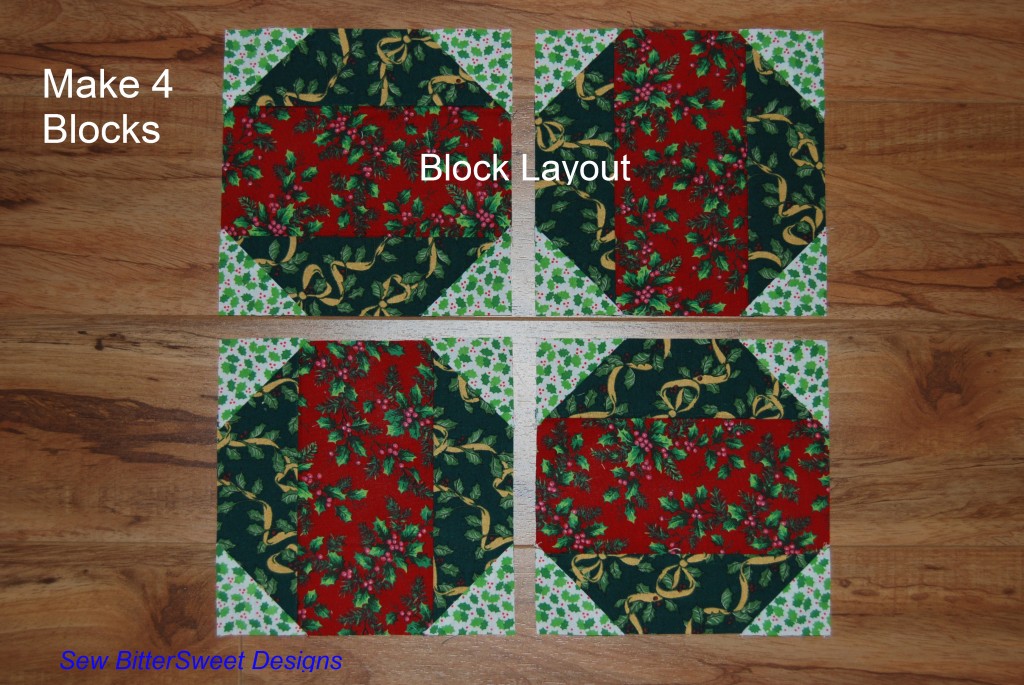
Sew blocks together using a 1/4″ seam and you are all done!

If you are new to my blog and to my Vintage Christmas Sampler – the rest of the blocks can be found here along with links to all the tutorials. The final tutorial will be posted in the next few days, again I apologize for the delay.

If you haven’t already – make sure you enter the two giveaways I have going on, one from Fat Quarter Shop and one for the SewMamaSew Giveaway Day.

Have a happy day!

NOTE: Don’t forget, I am one of the bloggers who is going to lose Google Friend Connect in March 2012, please take a moment and follow me via Bloglovin’, Facebook, RSS or networked blogs.  You are important to me and I want to be able to stay in contact with you!  Check my side bar for all the best ways to stay in touch after GFC goes bye bye!
 

Jelly Roll Flying Geese

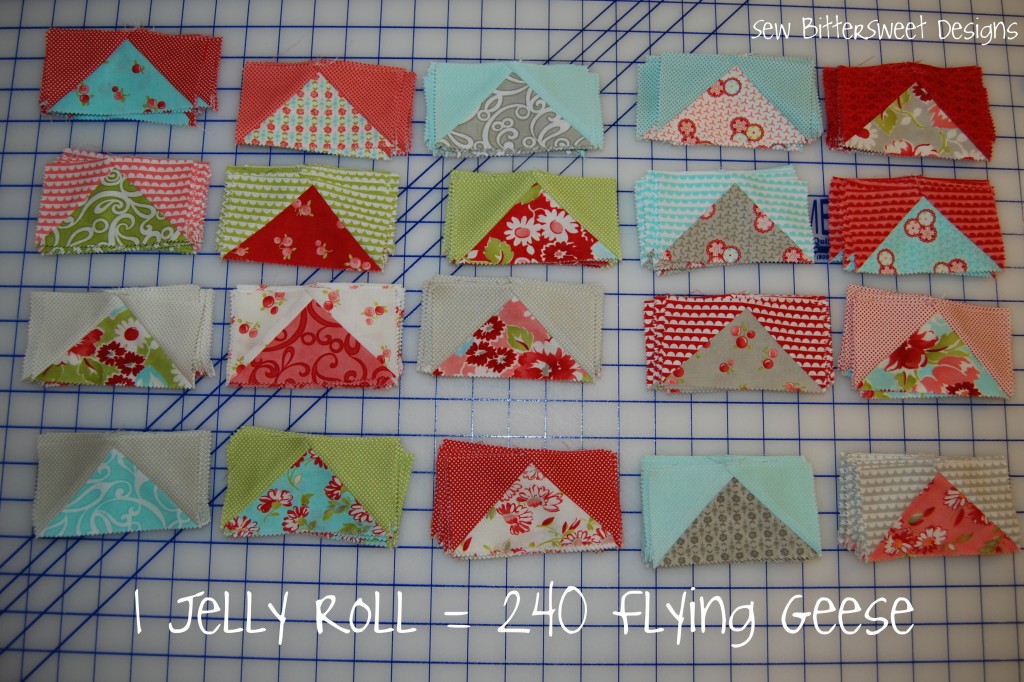
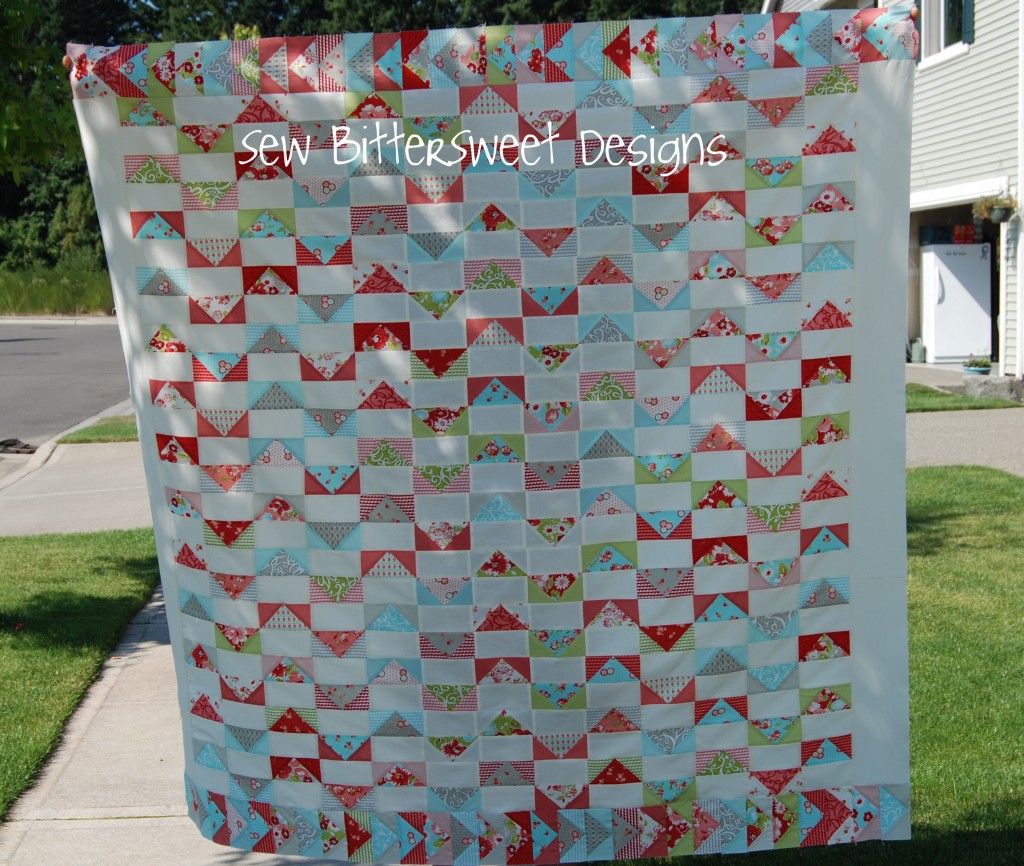
How do you make Flying Geese? Do you use the no waste method that involves cutting squares and sewing them to each other as seen on this PDF?  I recently bought a new toy that has made flying geese so much easier for me, the Easy Star & Geese Ruler. It has made all the difference – believe it or not using this ruler I was able to make 240 geese in ONE day!

When Fat Quarter Shop sent me a Jelly Roll of Ruby by Bonnie & Camille – I just sat and stared at it for a day or so, I truly didn’t know what I was going to do with it.  Then I realized it would make the cutest quilt for my bestie’s baby girl who turns 1 next month.

Doesn't it just scream little girl?

Learn how to make Flying Geese from a Jelly Roll after the jump! …

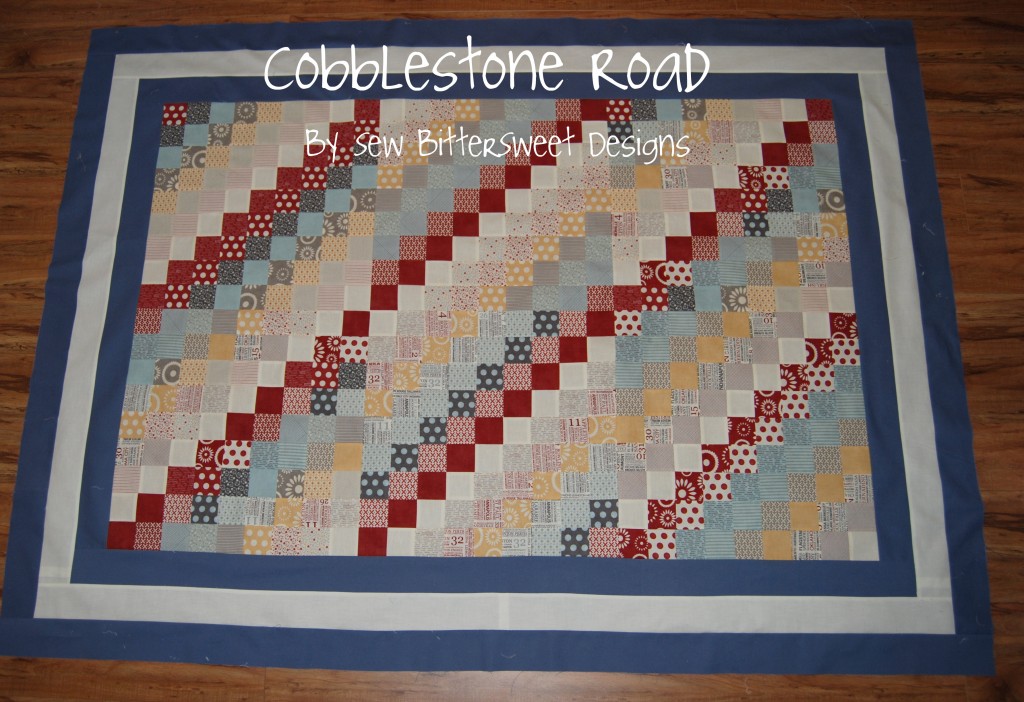
Cobblestone Roads – A quilting tutorial

Two weeks ago I received the most awesome squishy package from my UPS man – this jelly roll of the new Hometown by Sweetwater fabric. Kimberly from Fat Quarter Shop sent it over to me so that I could work on a tutorial to go with the Jelly Roll we are giving away this week – make sure you head on over to the post to enter to win!  Look at what I made with it!

You may be wondering who BitterSweet Quilt Designs is…it’s me

Fabric Requirements:
1 Hometown by Sweetwater Jelly Roll
2 Extra Strips of the cream (Sunni got a Jelly Roll two and swapped me for a couple of strips!)
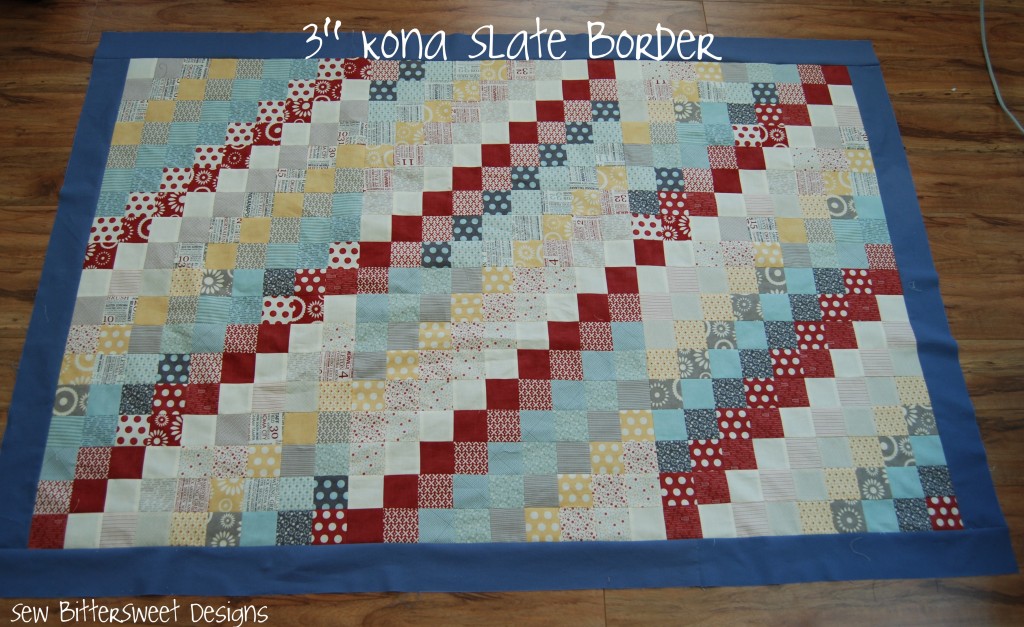
1 yard of Kona Slate for the borders – cut into twelve 3″ strips
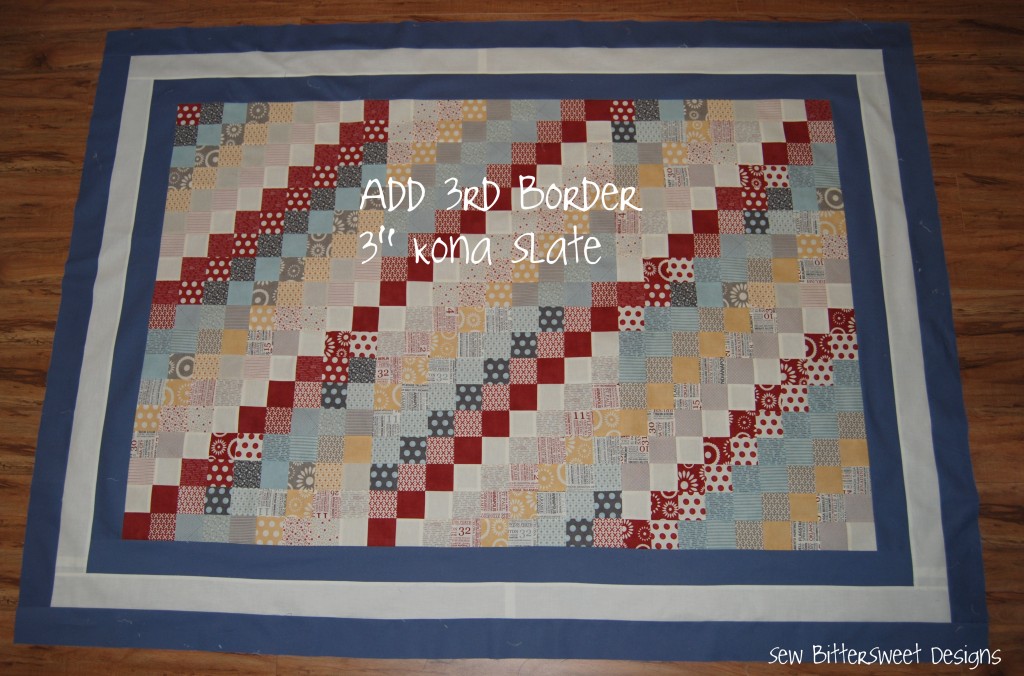
3/4 yard of Solid Cream Fabirc (I used Northcott – but didn’t look at the name of the fabric) – cut into six 3″ strips
4 yards backing fabric (42″ wide) or 2 yards backing fabric (108″ wide)

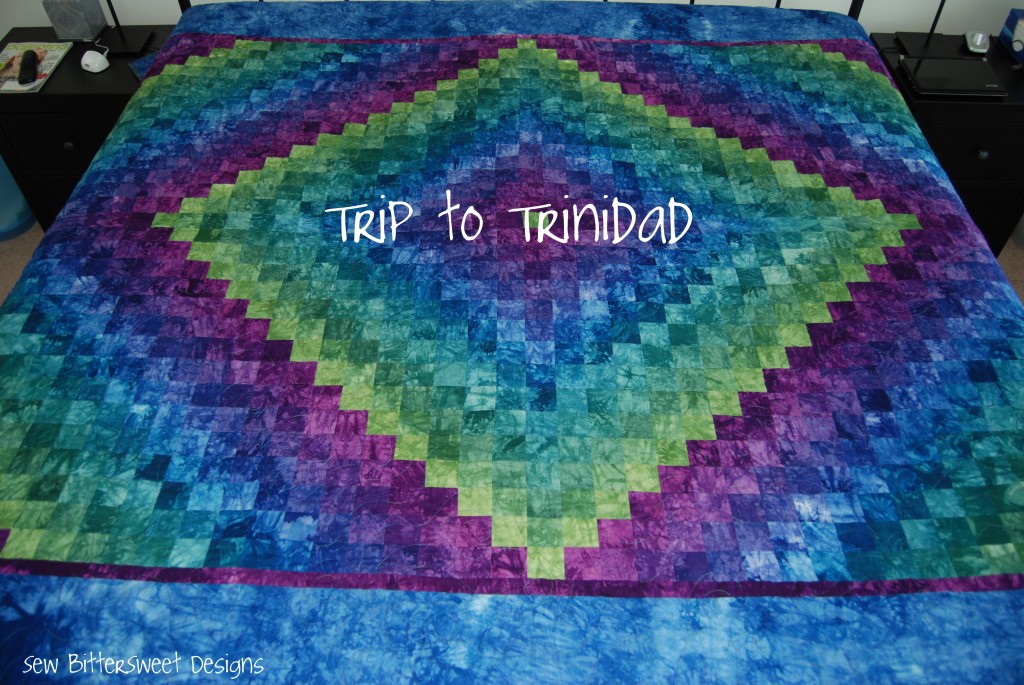
The technique I am using I learned when I made this gorgeous batik Trip to Trinidad quilt (designed by Kathleen Starr) 7 years ago – it now lives in our guest room.

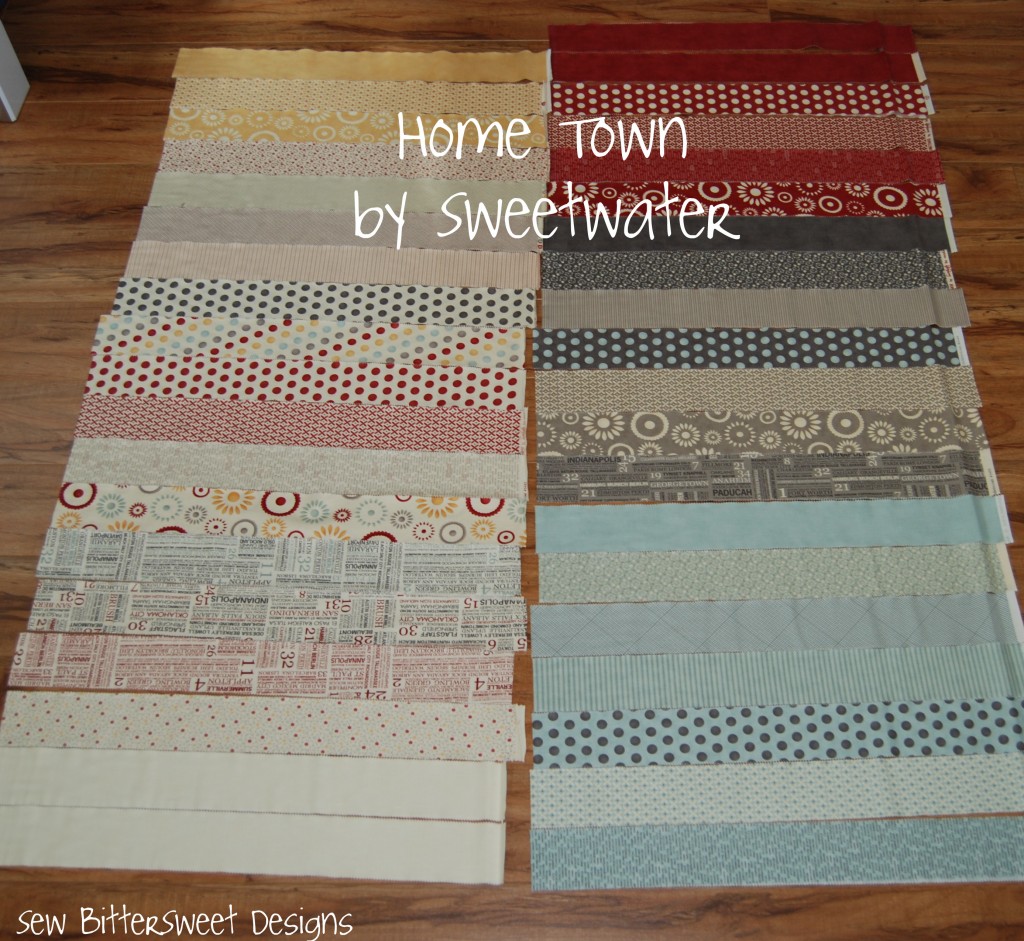
Lay out your strips:

Not pictured are the 2 extra cream strips I got from Sunni!

Layout your groups – lay them out from light to dark so you get a nice gradation of color.

[insert groups]

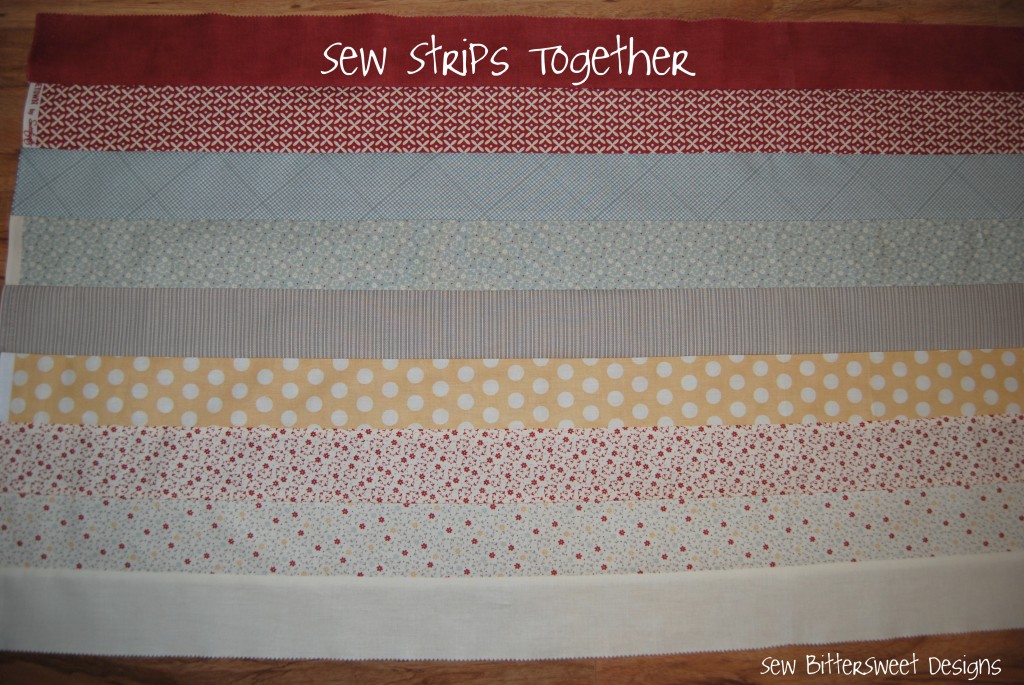
Sew each group of strips together – you should have 4 groups of 9 strips – there will be extra strips from your Jelly Roll – these will be used later!

The Front

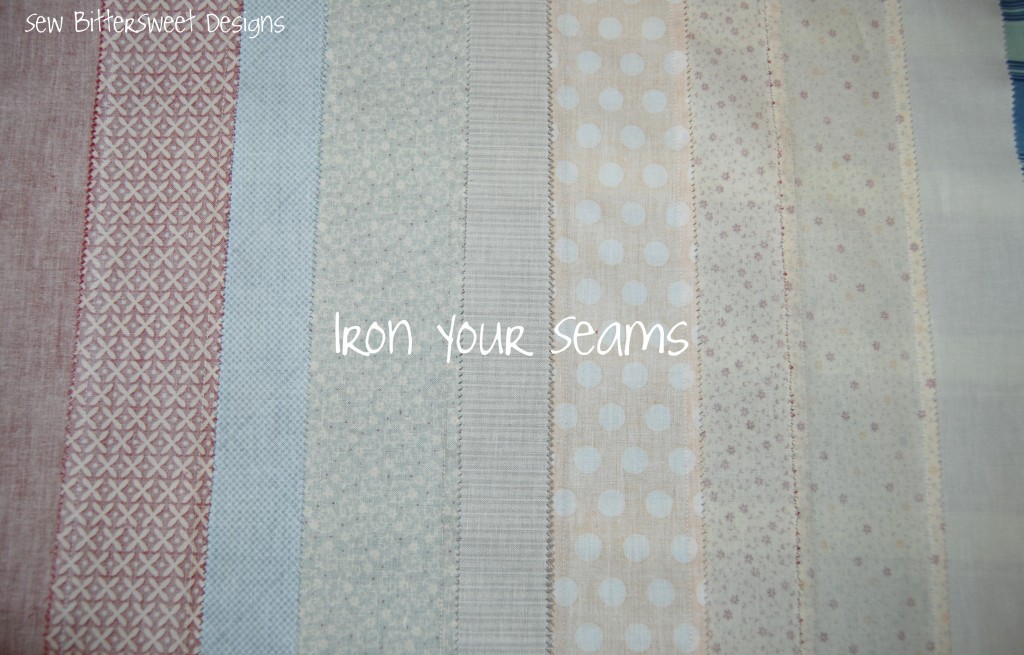
Here’s how you need to iron your seams:

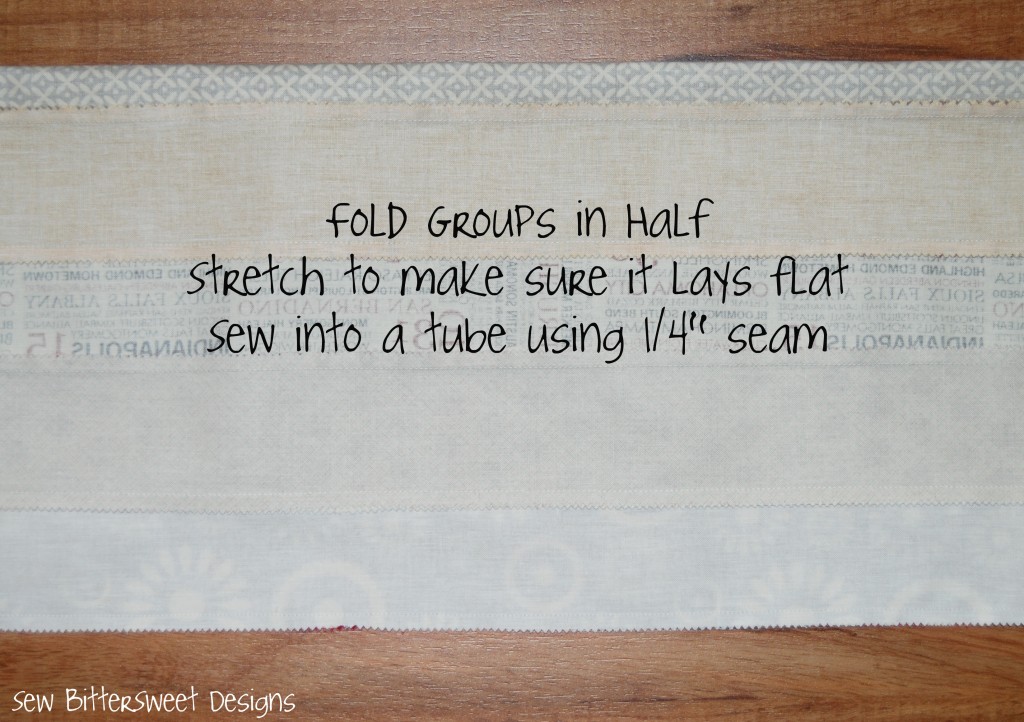
After you have sewn your 4 strips sets together – fold the sets in half – make sure they lay flat and sew them into tubes

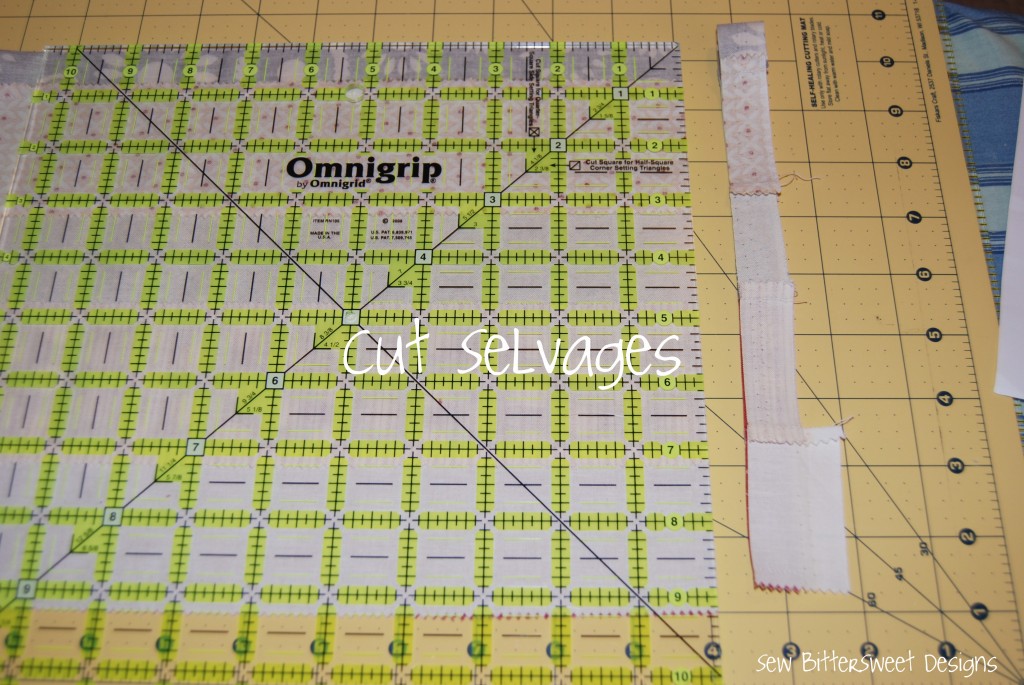
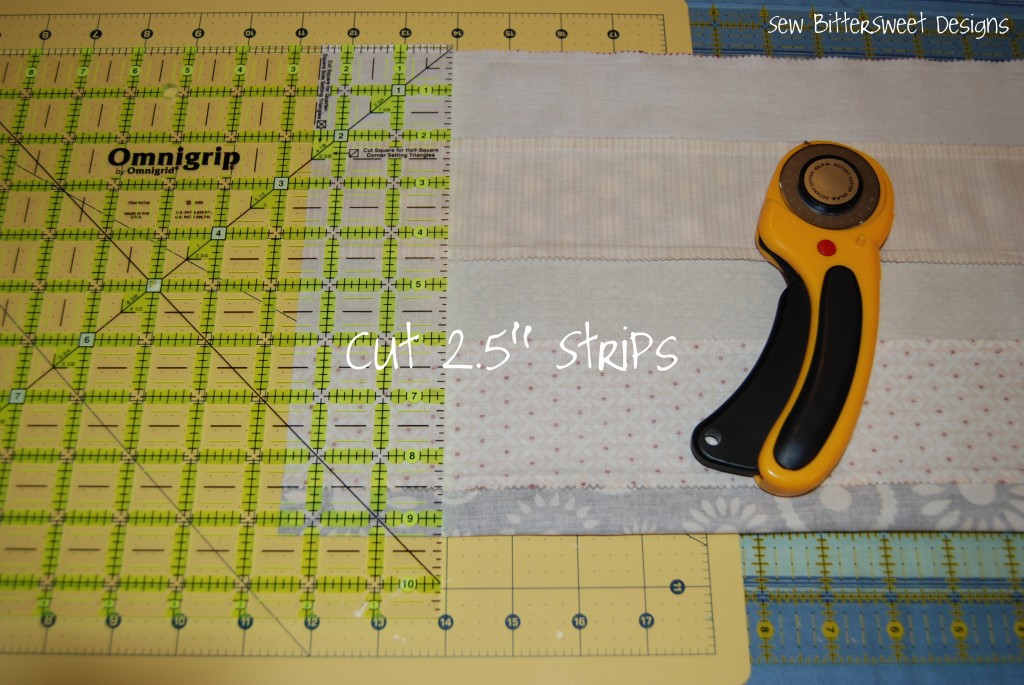
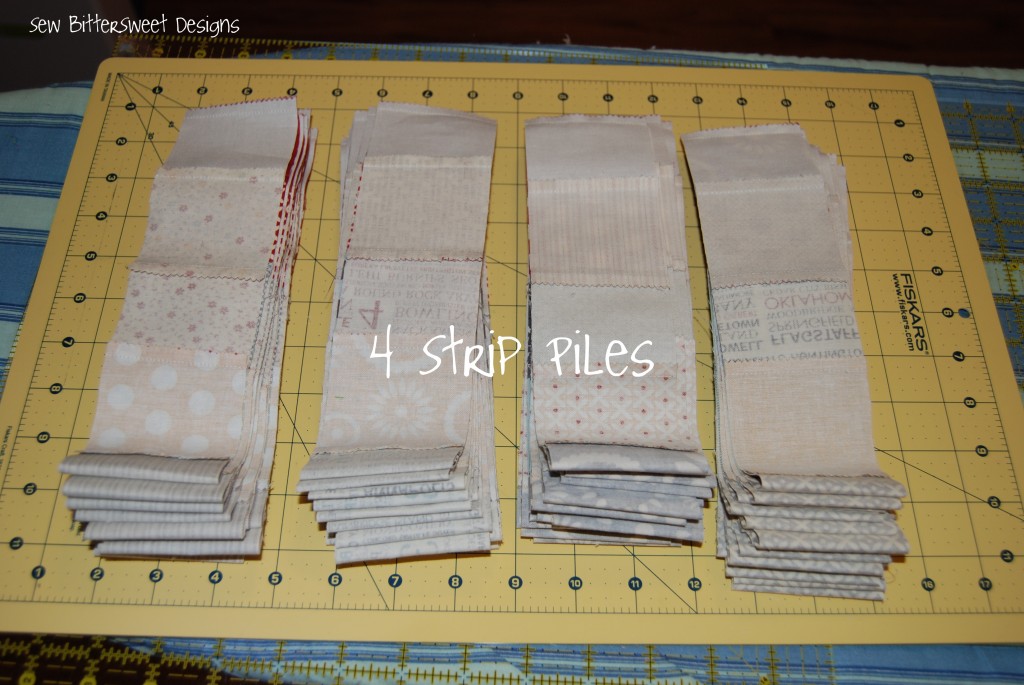
Time to start cutting!  Cut your sets into 2.5″ strips

Next – cut your strips apart – choosing a different seam each time

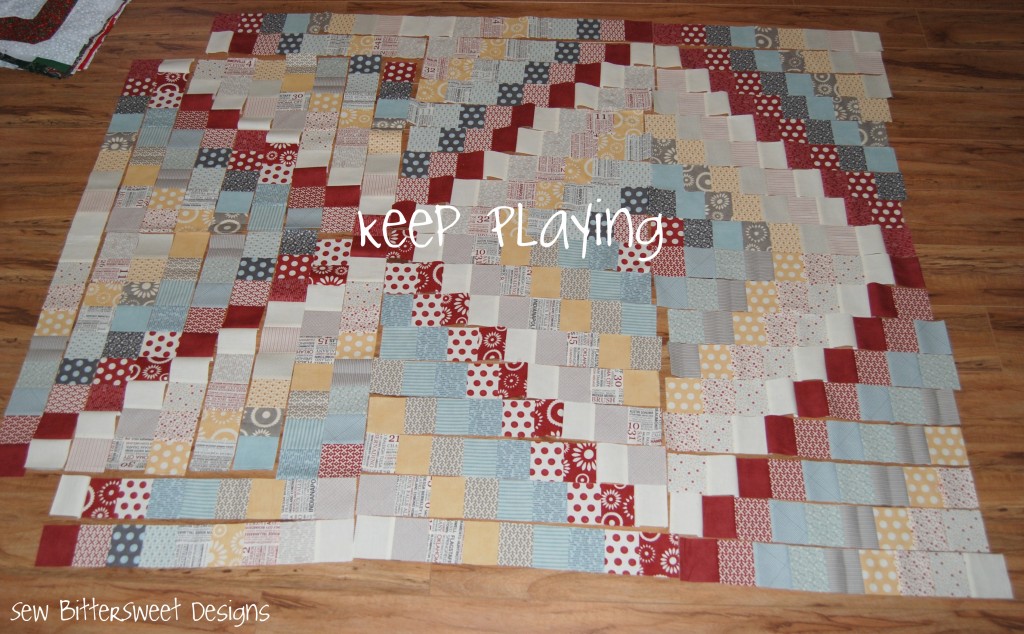
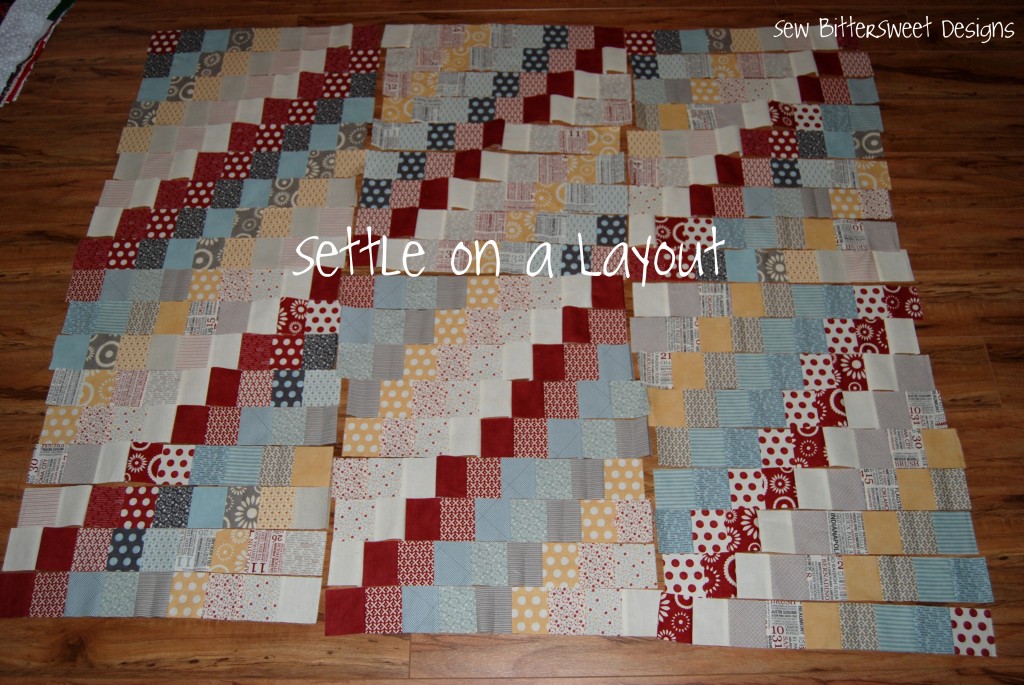
Now the fun really begins – you get to lay out your strips and chose your design! (I tried lots of different patterns – below are a few of them)

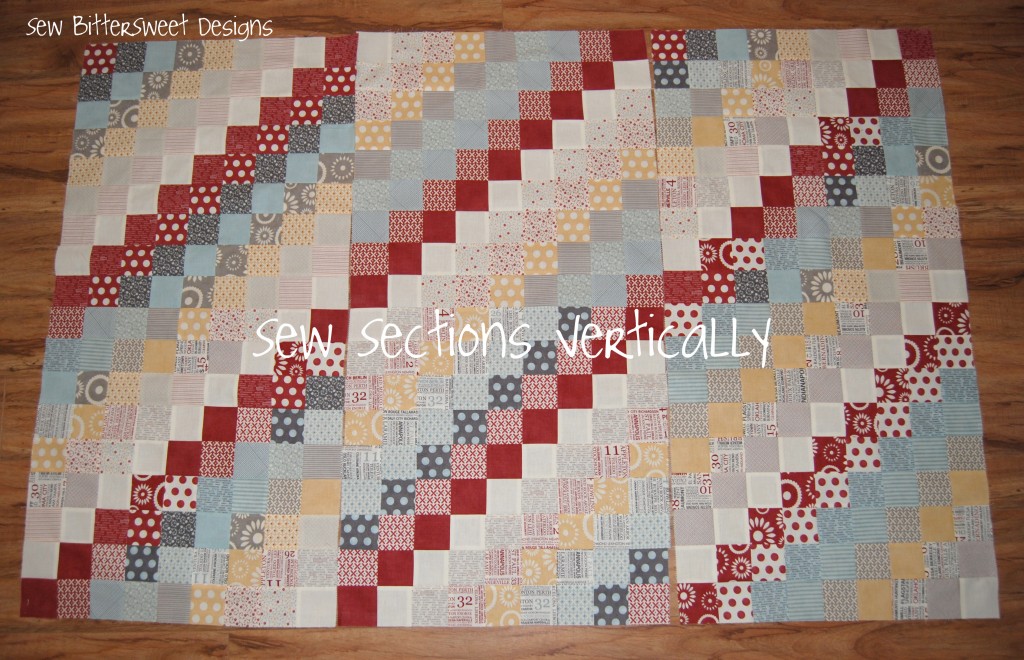
Now start sewing your strips together (this goes really fast) I did it in vertical rows – I ended up with 3 sections

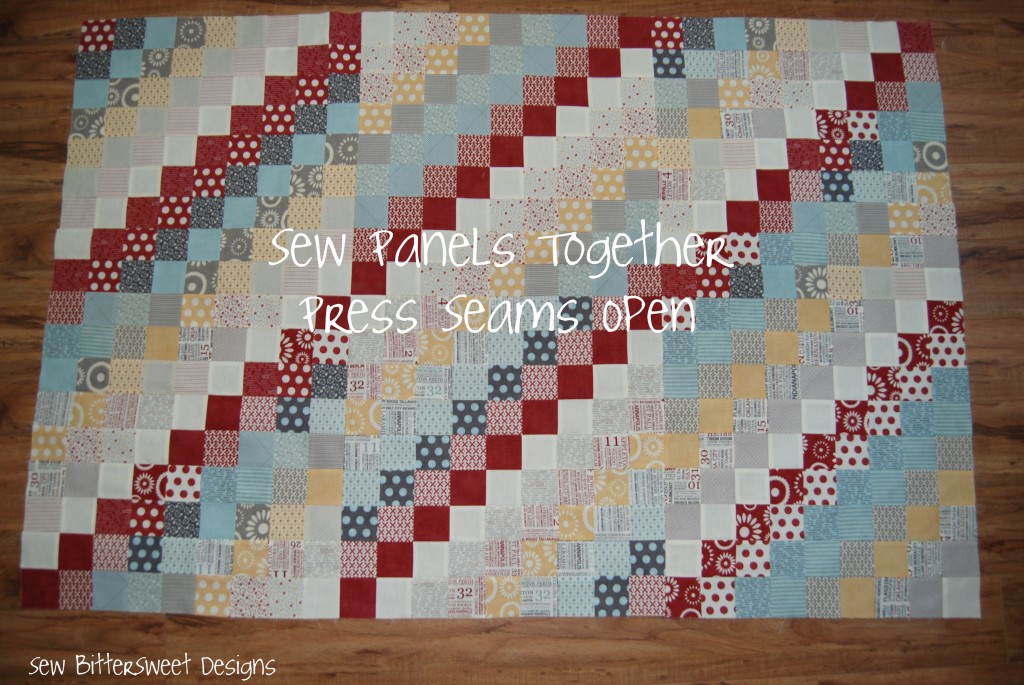
Sew the three sections together – I pressed my seams open to reduce bulk

Add your borders (these are your Kona Slate and Northcott Cream 3 inch strips from earlier):


This is where my quilt stands today – I have a backing, my threads and my batting all ready to go, but I have not had a chance to quilt it yet. Once things calm down with my baby’s sleep schedule and I can squeeze in some sewing time it will get done!

The finished size of the quilt top is 51″x71″ – it makes a very nice lap size quilt!

I plan on using my left over 2.5″ square strips as my binding and I promise to post pics as soon as this puppy is complete!  Will you be making a Cobblestone Road quit? If so, please let me know, this is the 2nd original quilting pattern of mine that I am sharing online and would love the feedback!


Scroll to Top