tutorial

Tutorial – Using the Quilt Backing as Binding

The lovely binding on the Space Quilt that I finished last month was actually serving double duty on this quilt. It was also the backing!

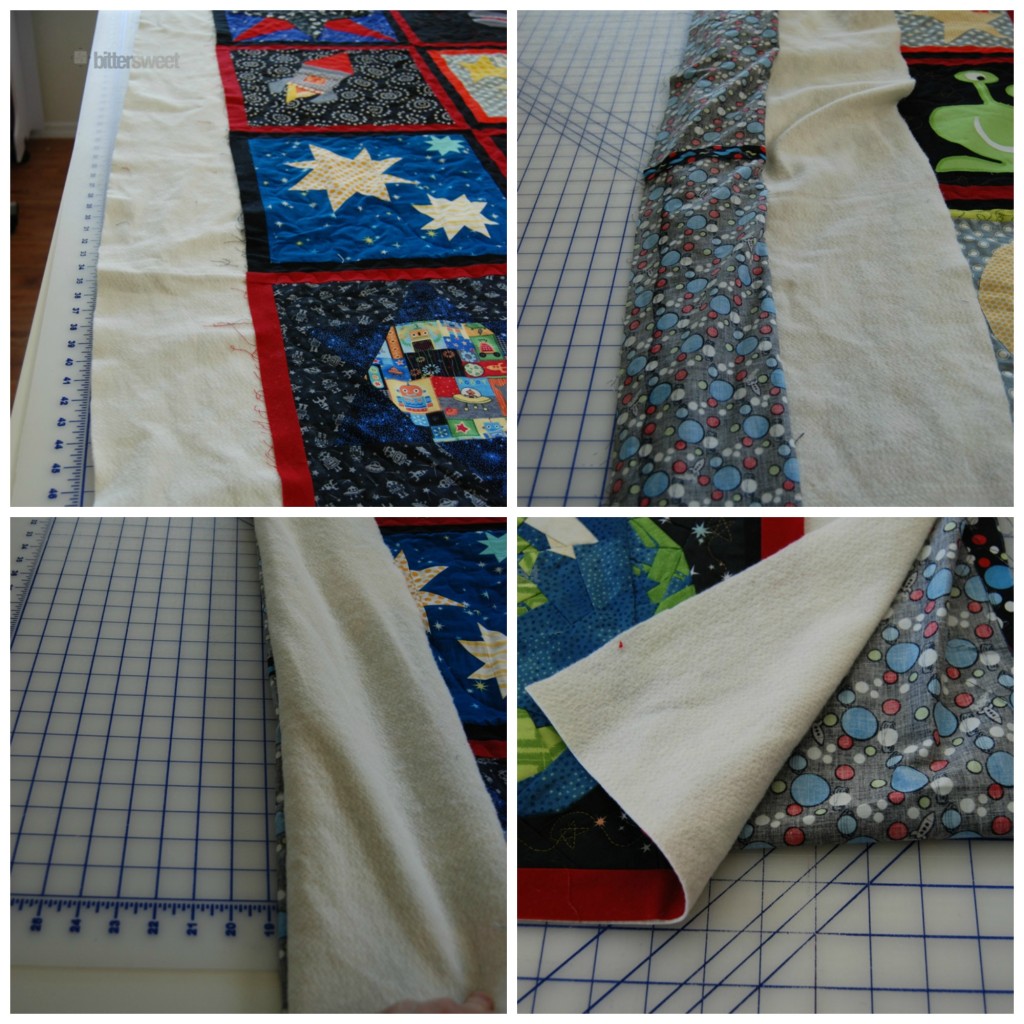
Now using your backing as your binding is quite simple if you follow a few simple rules. Do not quilt to the edge of your border. You always want to stop quilting at least 1 inch from the edge of the quilt top. This is because when you trim the quilt up you are going need to fold the backing onto itself as far out of the was as possible then trim the batting to the size of the top. If you haven’t done this you may accidentally cut your backing and then you are toast…ask me how I know!

The top left picture shows your quilt simply laid on the cutting table, top right shows you pulling the backing onto itself, right side together, pull it back as far as you can without stretching. The bottom left picture shows how the fabric is folded under the quilt. The bottom right picture shows that the batting is now trimmed to the size of the quilt top.

All the trimming is done using a large ruler and your rotary cutter. Remember to be extremely careful not to cut your backing!

Next you will trim down your backing. I trim mine down to 1.25″.Moving forward I will be referring to this as the binding. Next is the easiest part, press your binding in half.

Now you are ready to sew your binding on. I like to start in the middle of a section. I don’t know why, that’s just how I do it. Fold your binding over onto to the top of the quilt, find your favorite decorative or zigzag stitch and go for it. I do recommend a walking foot for this part!

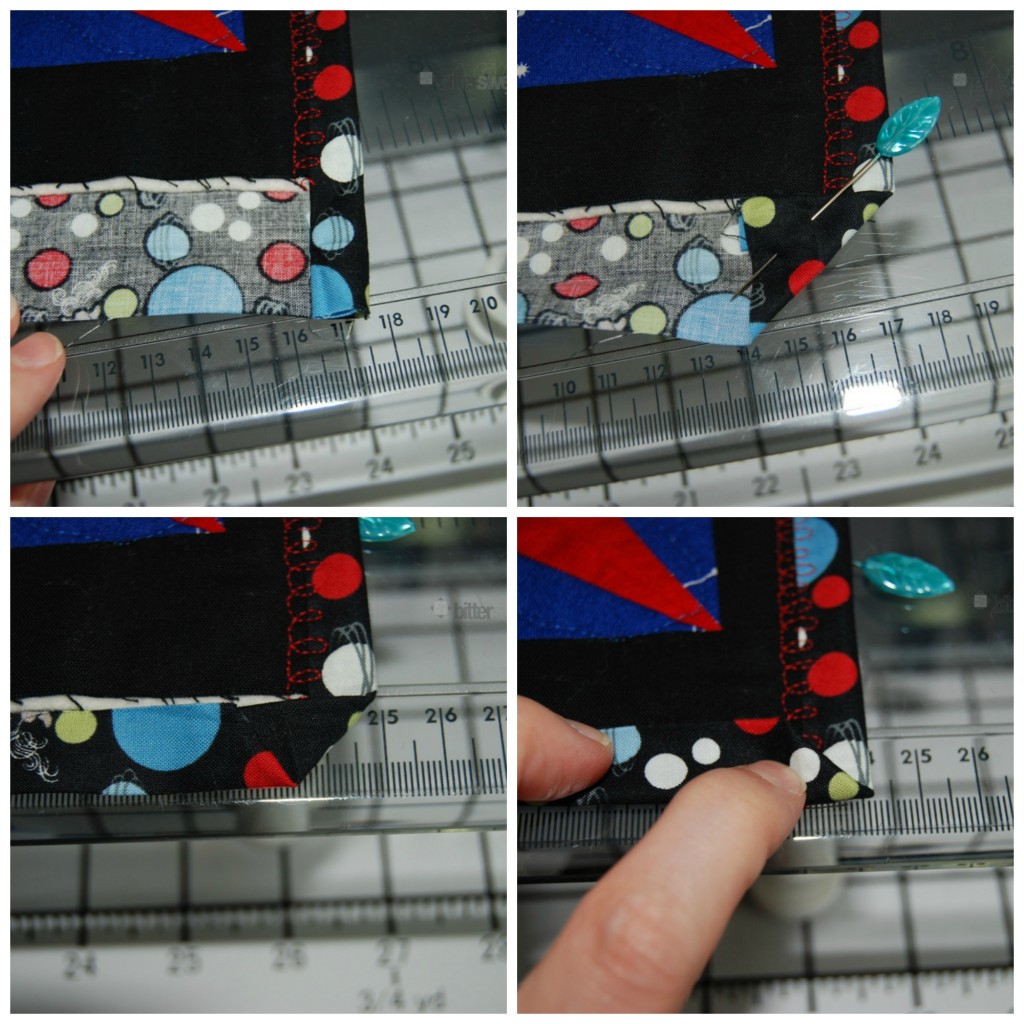
When you reach the end of the side stop. We are now going to do a mitered corner!

Image top left shows you unfolding the corner, top right shows how you will fold the corner in (you don’t need the pin but it was really hard to take the picture without it!). Bottom left shows how you refold the corner (this is where you create the miter), bottom right shows how you fold it one more time over to the top of the quilt, all raw edges are now concealed and you are ready to sew the next side of the quilt!

It is that easy!

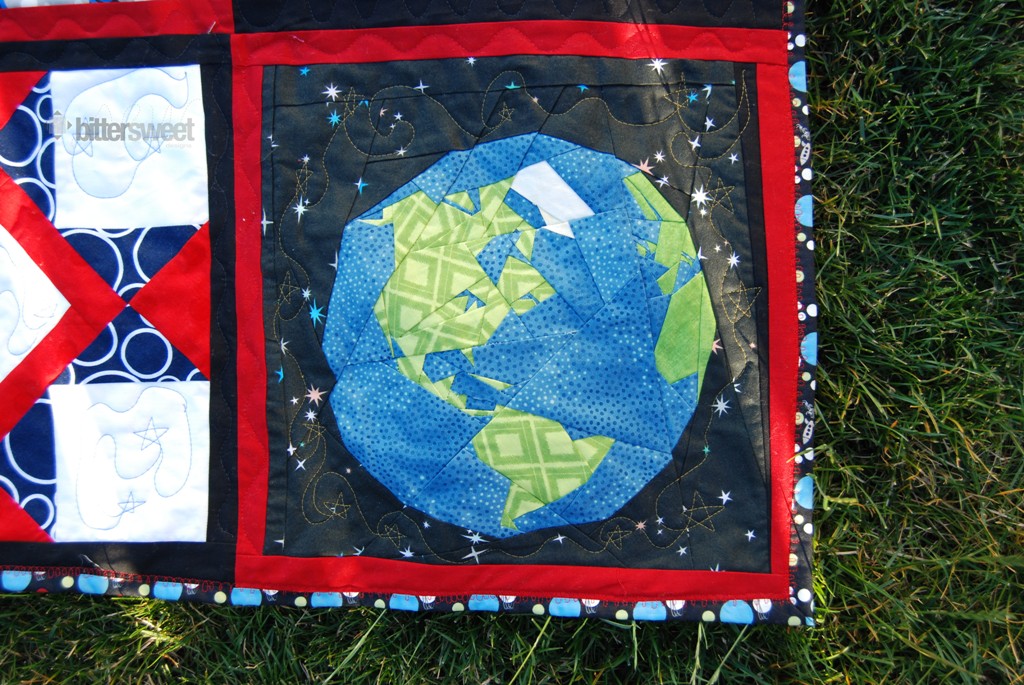
Here is a close up of a finished corner:

Let me know if you have any questions! Happy Binding!

Framed – Quilt block tutorial

 “Framed”
Quilt Block Design by Melissa Dunworth
Block Size: 12.5″ x 12.5″
Sew BitterSweet Designs

Cutting:

 Cut the following:

Background fabrics:                                                             Blue Frames:

4 pieces: 2.5” x 1”                                                                   4 pieces: 3.5” x 1”
4 pieces: 3.5” x 1”                                                                   4 pieces 4.5” x 1”
2 pieces: 4.5” x 1”                                                                   2 pieces: 5” x 1”
2 pieces: 5” x 1”                                                                      2 pieces: 5.5” x 1”
2 pieces: 5.5” x 2.5”
2 pieces: 5.5” x 3.5”
4 pieces: 4.5” x 1.5”
2 pieces: 3.5” x 1.5”

Orange Squares:                                                                   Pink/Yellow Squares:
2 Pieces: 3.5” x 3.5”                                                                3 pieces: 2.5” x 2.5”

I realize you just cut a ton of crazy small pieces, do not be intimidated! This block is super easy to put together!  Please remember to keep a very accurate ¼” seam!!!
Step 1: Starting with the 2 smallest background fabrics, frame 2 of the pink/yellow squares (see below)

Step 2: Next use 2 sets of blue fabrics and add to your frame (see below)


Step 3: With the next size of the back ground fabrics add to your frame. Remember if using a directional print to pay close attention to the orientation below. This time you are only adding half of a frame.

Step 4: Using the last sets of blue fabrics, complete your frame, again, pay attention to the orientation of your fabrics if using directional prints.  This completes your framed portions.

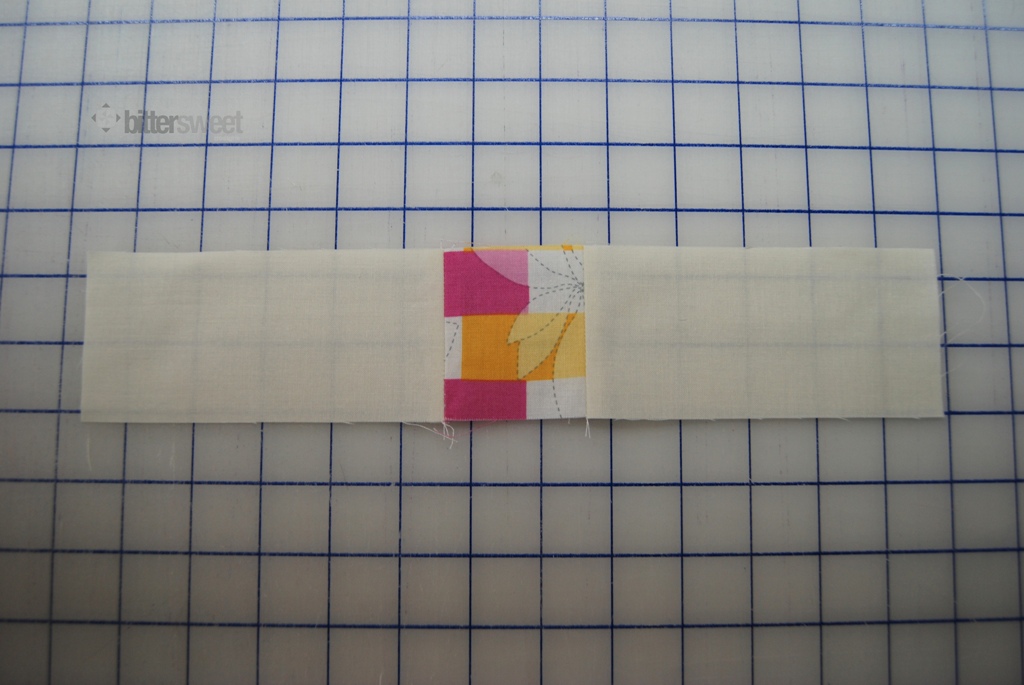
Step 5: Using the last pink and yellow square add the 5.5” x 2.5” strips on either side.  


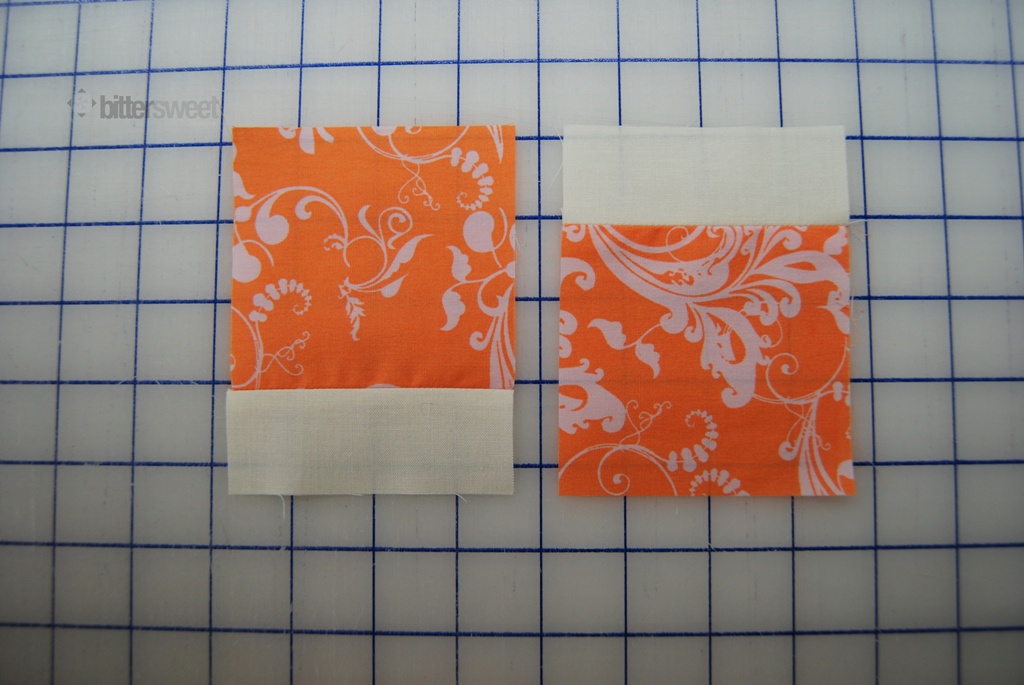
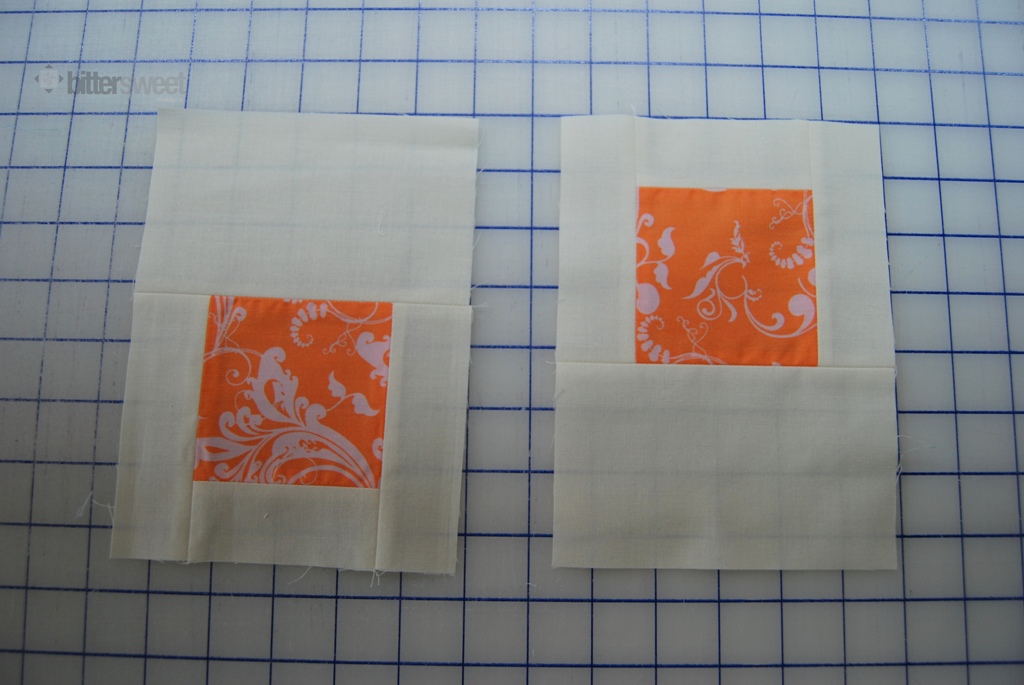
Step 6: Take your orange squares and add the 3.5” x 1.5” strips. Pay attention to the orientation if using directional prints. (how they are in this picture is how they will be in the block)


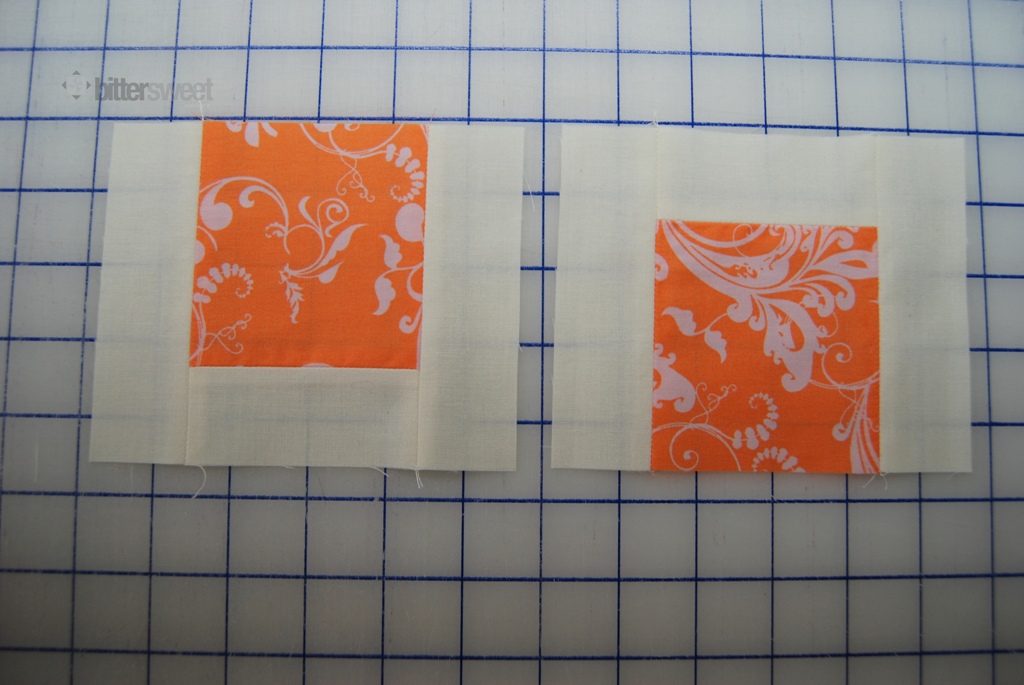
Step 7: Next add the 4.5” x 1.5” strips to either side of the pieces assembled in Step 6.


Step 8: Add the 5.5” x 3.5” strips to the pieces from Step 7.

Step 9: Block layout. Sew blue framed pieces to the orange framed pieces to create 3 sections

Step 10: Sew 3 Sections together. You have completed your block!


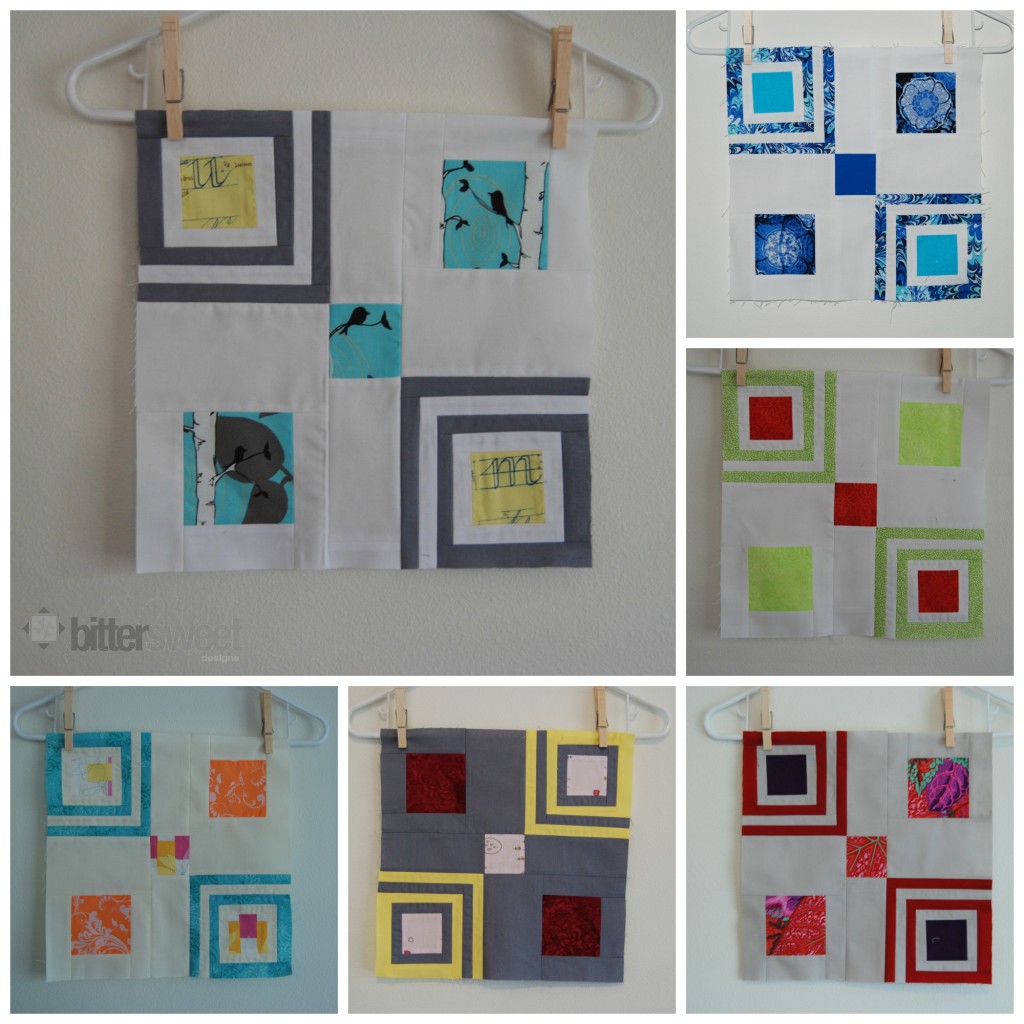
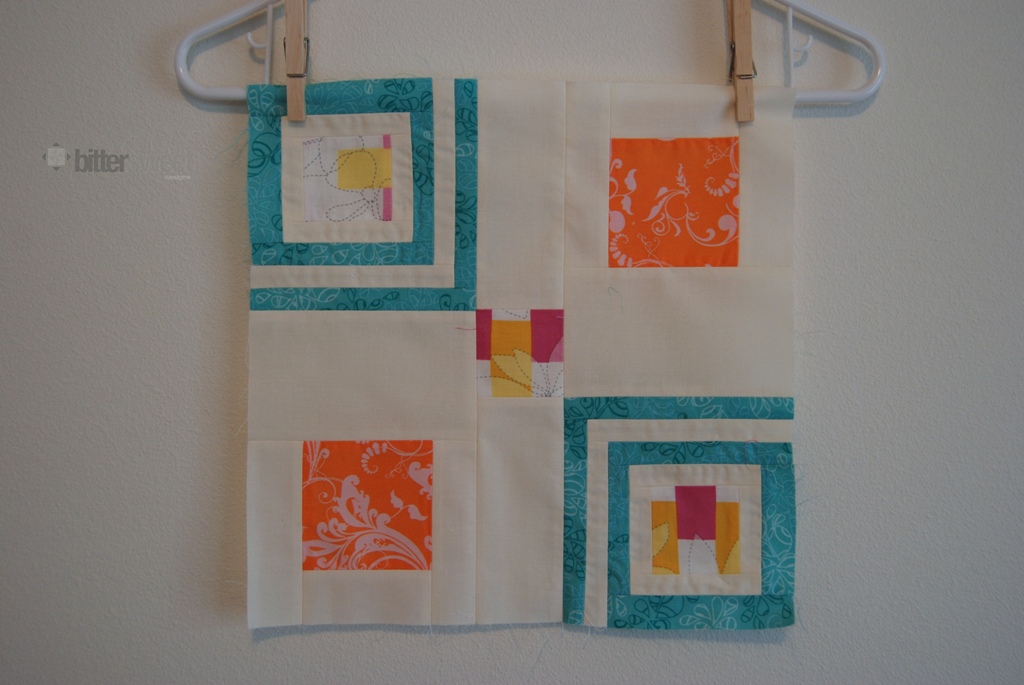
Framed Block Finished

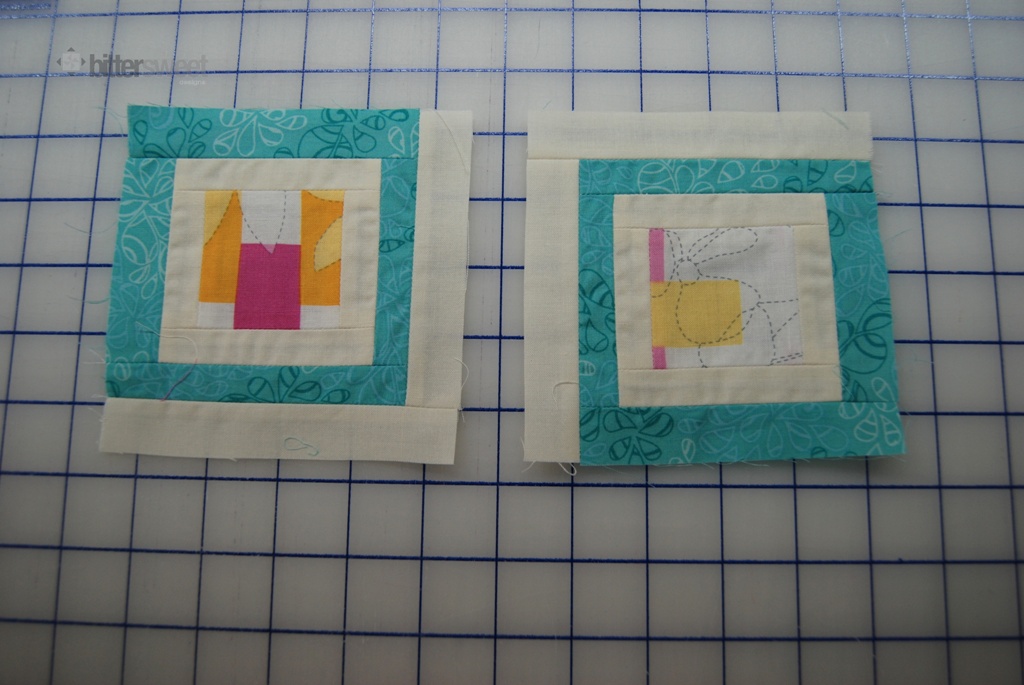
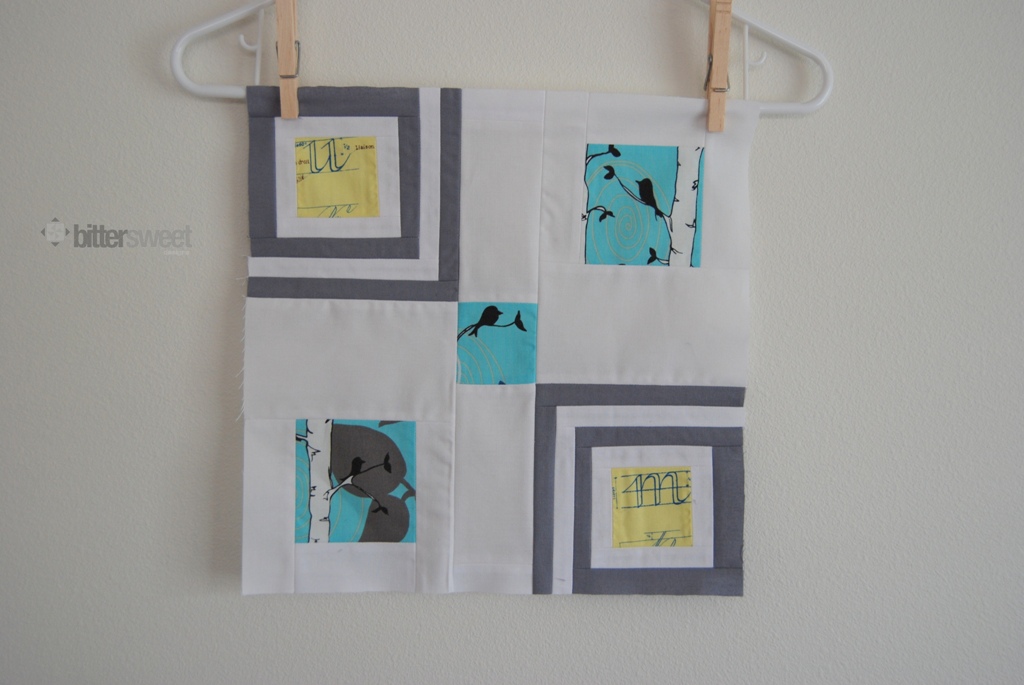
Here’s an example with a direction print:


There you have it! Way easier than it looks! If you make any blocks following this tutorial I would love it if you put them in my flickr group!


Label Your Quilts! A Tutorial

*****For this tutorial you will need to have a computerized sewing machine that is capable of doing a monogram. (Added Note: my machine is not an embroidery machine, it is a fancy quilting machine – Janome Horizon 7700)*****

I would like to start off by giving the person who taught me this method full credit, my mom, Michele Ward. She has been binding her quilts like this for as long as I can remember (she has had her current sewing machine for 20 years and it was state of the art when she bought it). Now that I have done a quilt label with this method, I am now out of excuses for not labeling my quilts and you will be too!

So to start off you will need to make your binding, I do not do a bias binding, I do a straight binding. 2.5″ strips sewn together, then folded in half and pressed.

Next you will need to program your monogram. As each machine is different I highly suggest consulting your owner’s manual if it is the first time using this feature on your machine. My manual failed to mention the max character limit and I had to do my label in two different sets.

You are ready to sew your monogram, I would also suggest that you practice this on a scrap piece of fabric cut to 2.5 inches and folded as you would fold your binding strips. This will tell you exactly where to align your fabric. My fabric is placed with the fold up against the right hand side of the foot. (see picture below)

Once your binding is monogrammed you are ready to attach the binding to the quilt.

Number one hint when attaching the binding to the quilt is to make sure that the binding is facing down toward the quilt when you attach it and also make sure that you will not hit a corner when attaching it because that will ruin the label and make it impossible to read. This just takes some simple looking ahead.

Once your binding is attached to the front of your quilt, you can now choose to hand sew it down or you can machine stitch it down (this is my preferred method because of my RA – handwork is not my friend).

Here is another close up of the stitching. This binding should last the lifetime of the quilt and the nice thing is that you do not need to worry about it washing out.

My mom uses this method on all of her quilts. For baby quilts she records the baby’s name, birth date and weight. For other quilts she says who made it, who it was made for and usually a special message.

I hope you find this helpful, especially everyone who is like me and never finds the time to label. If it is part of our binding routine perhaps it will become more routine!

Ovulating Spiral Quilt Block Tutorial

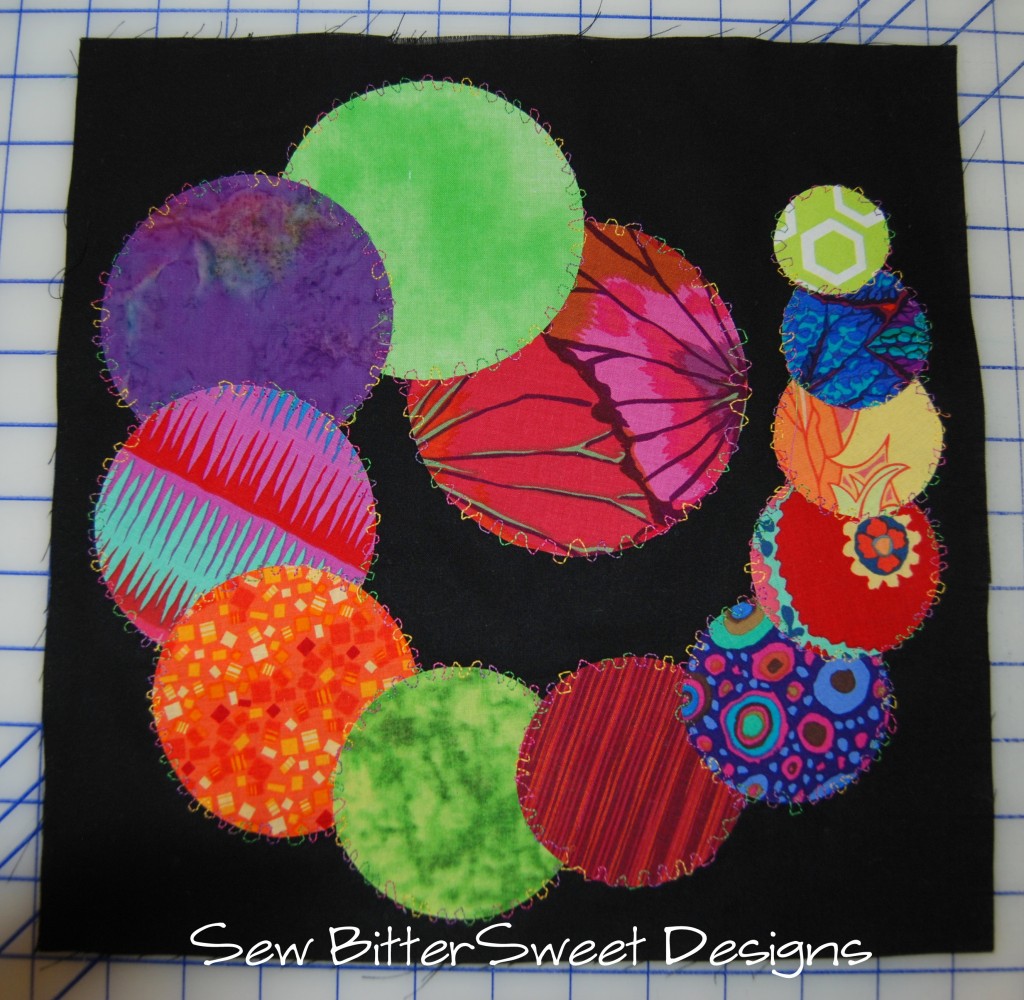
When I was working on my row for the stripper quilt entitled “Do Strippers Make More When They Ovulate” I was very inspired by the word ovulate and for some reasons I kept thinking of spirals. This is one of the blocks I designed for the row.

This block is fairly simple to assemble. You will need a 12.5″ square background fabric. Fusible web, I used Pellon Wonder Under 805, 12 scraps of fabric in varying sizes and I highly recommend the Olfa Rotary Circle Cutter (though you could draw your own templates).

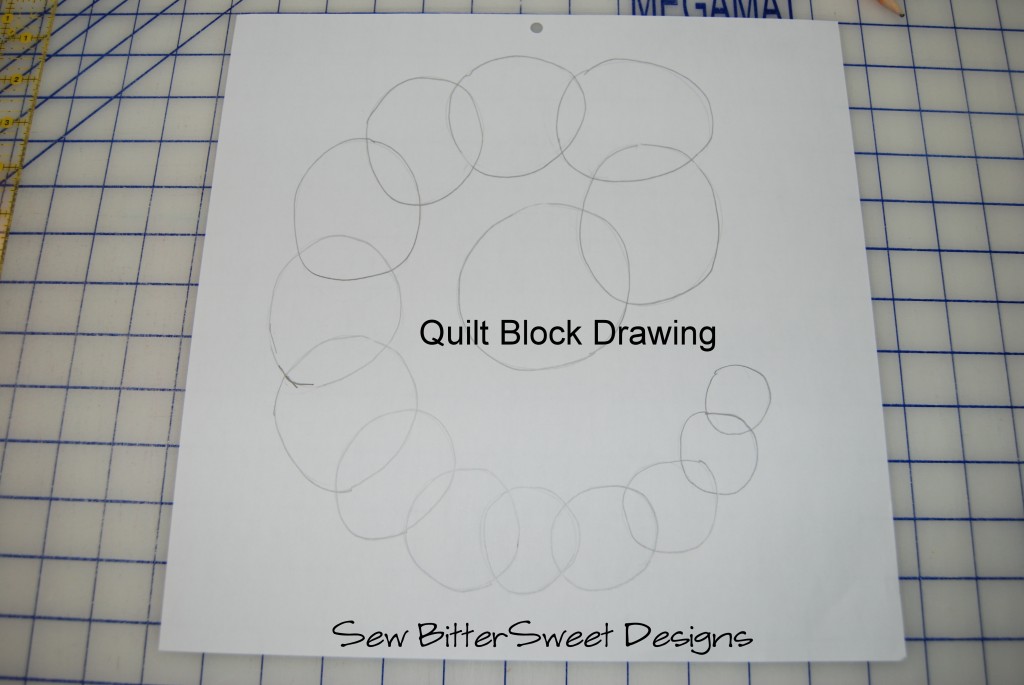
All of my blocks start out as drawings, whether it be on quilting graph paper or in Electric Quilt 7. Due to all the circles in this block I used graph paper for my design and pretty much eyeballed everything. Here’s what I started with.

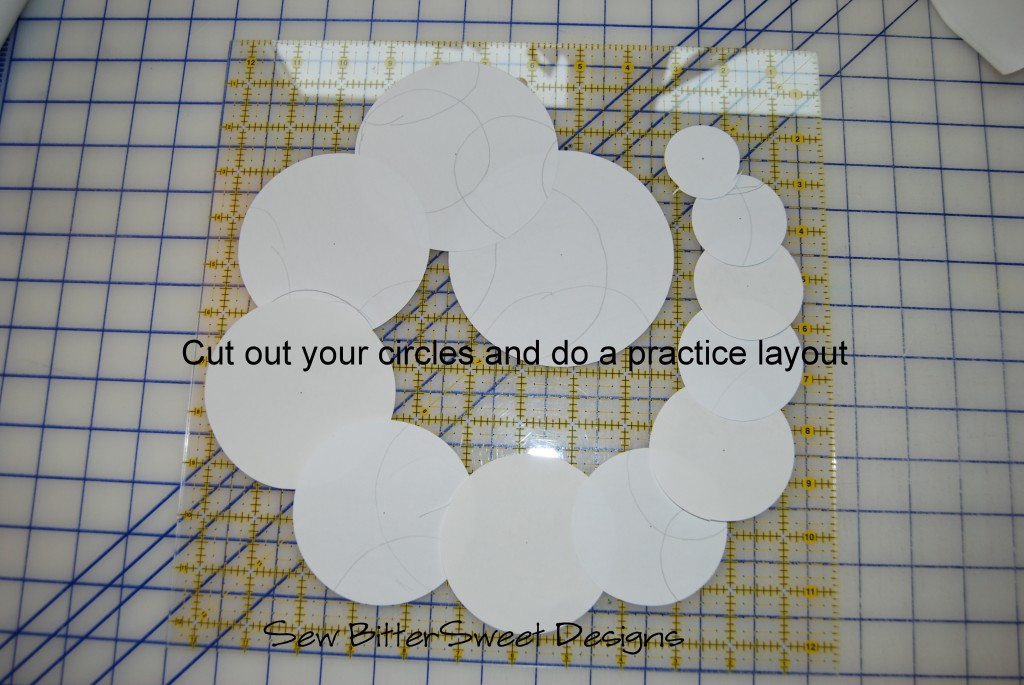
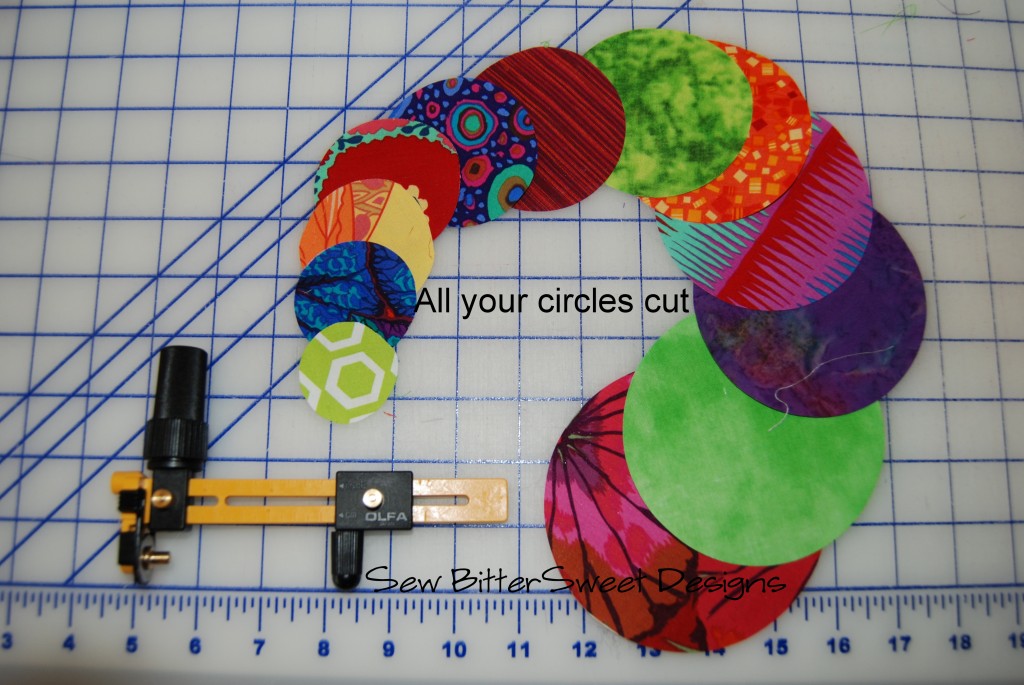
My next step was to use my Olfa Rotary Circle Cutter and cut paper circles. I started as small as you could cut and cut 12 circles making each one larger by 1/8″ (there are very easy to read grid marking for inches and metric readings on the compass). Next I took my 12.5″ quilting square ruler and laid out the circles so I could get an idea of my final layout before cutting into my scraps.

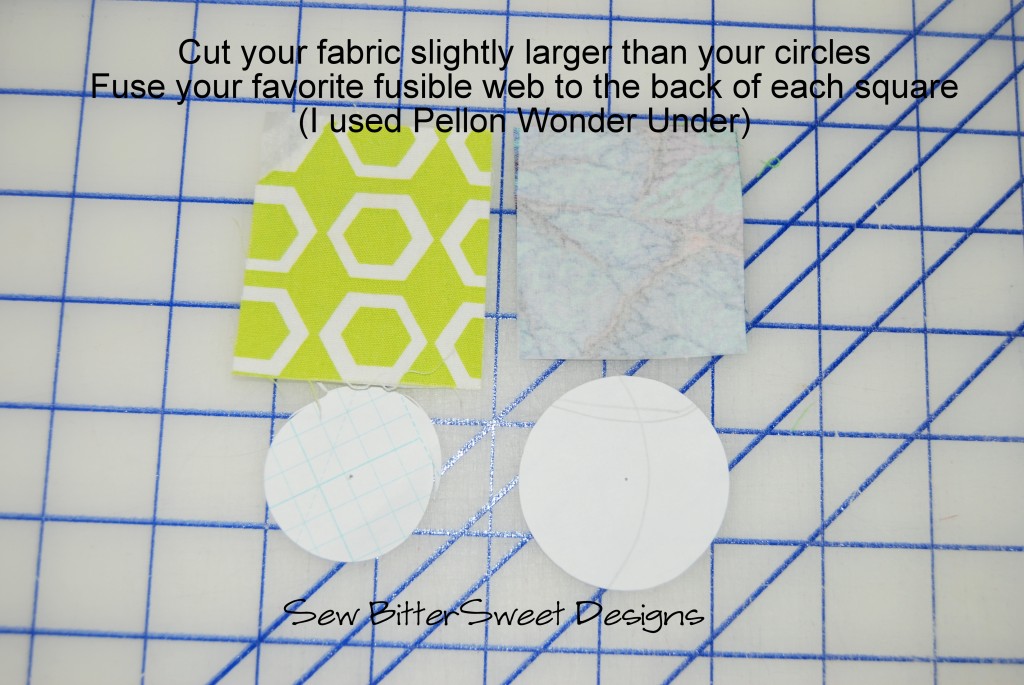
Next using my paper circles for a size comparison I cut squares that were ever so slightly larger than each circle from my fabric and the same size squares from the Pellon Wonder Under 805. Fuse the Wonder Under to the back side of your fabric and you are ready to cut your circles.

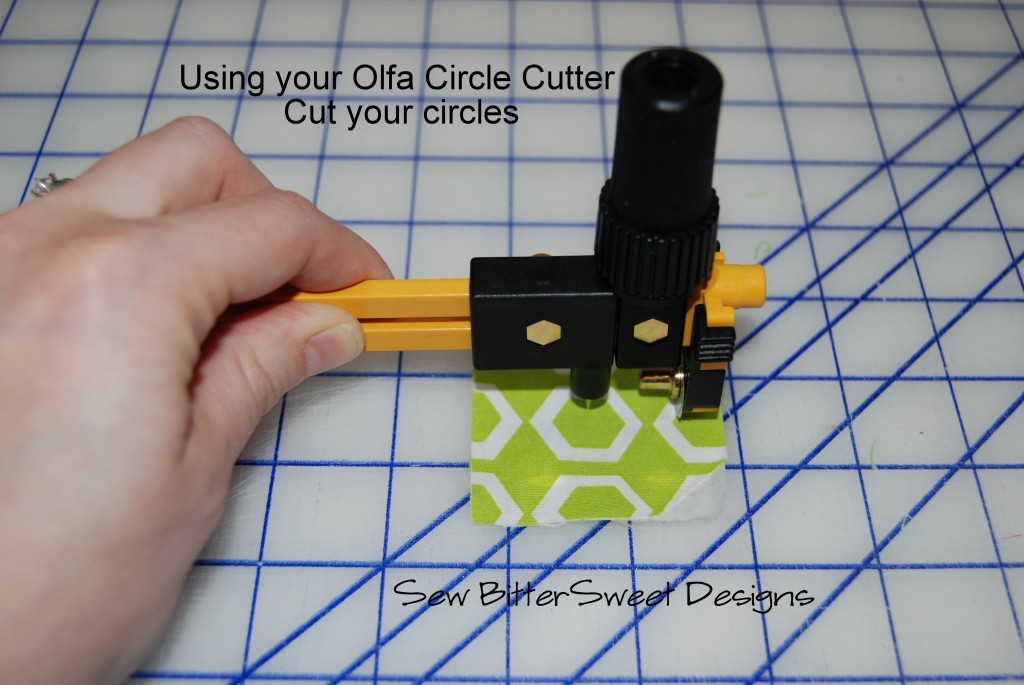
Next you will cut your fabric circles – it is very important that you fuse the fabric to the wonder under prior to cutting your circles. It will make cutting SO MUCH EASIER!

Remember, each circle will be ever so slightly larger than the last because you will be increasing the radius by 1/8″ of an inch each time.

Here is what your circles will look like after they are all cut out:

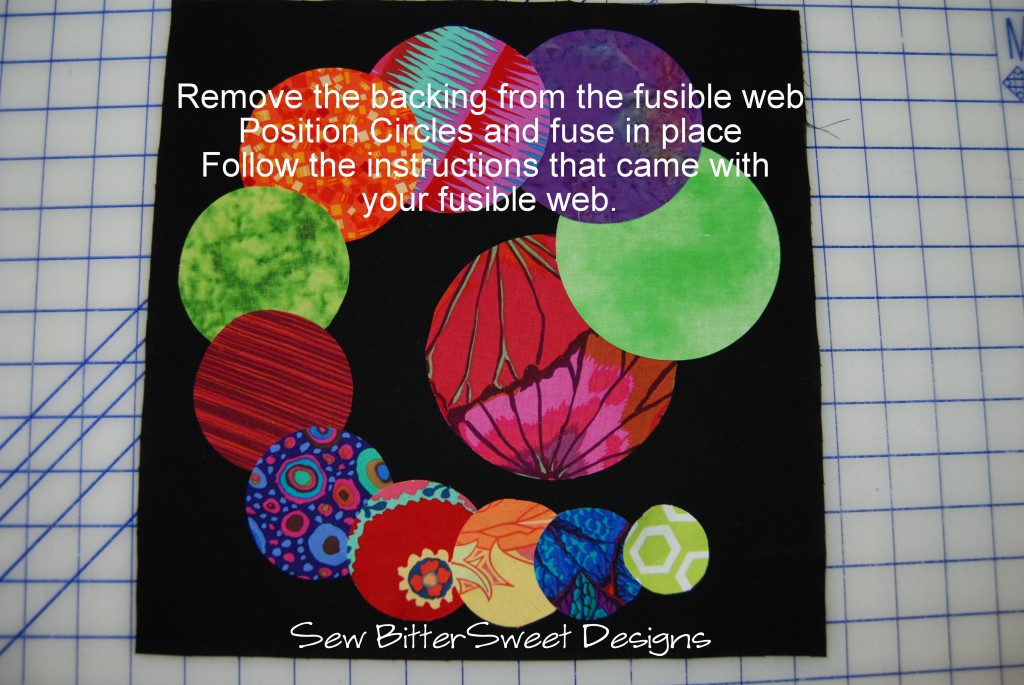
Remove the paper from the fusible web and lay your circles out on your background. This is when you want to perfect your layout, once you fuse them, you won’t be able to change the look of the block.

From here you can applique them circles down in any manner that you like. I decided to throw my Free Motion Quilting foot onto my machine and do a little thread painting of sorts. My block is definitely “raw edge applique”. I truly love how it turned out!

If you decide to make this block I would love to see a picture of it!

Don’t forget that as February is almost over it is time to link up your finish for this month! Head on over to this post to do so (and you can also see the rest of my stripper row too!) and make sure you check out Shanna’s beautiful finish over here.

How to Join a Linky Party!

Hi Everyone! Shanna and I thought that since we are hosting regular linky parties this year that we should put up a tutorial on how to link up to a party. So here we go!  I will start with linking up from Flickr.

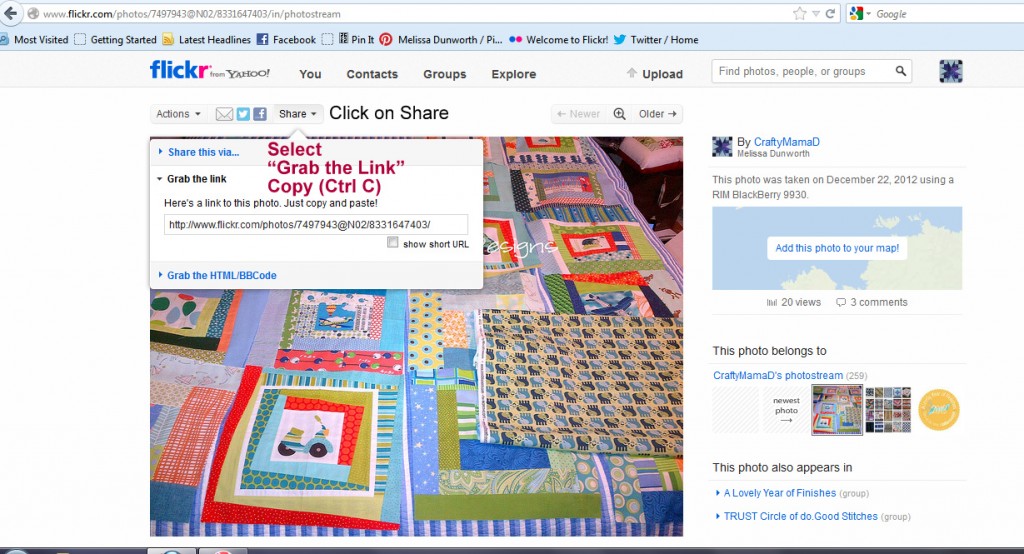
Step 1: Go to the photo you want to link up, click on “Share”, select “Grab the Link” and copy the link that comes up – this is the link to the photo itself.

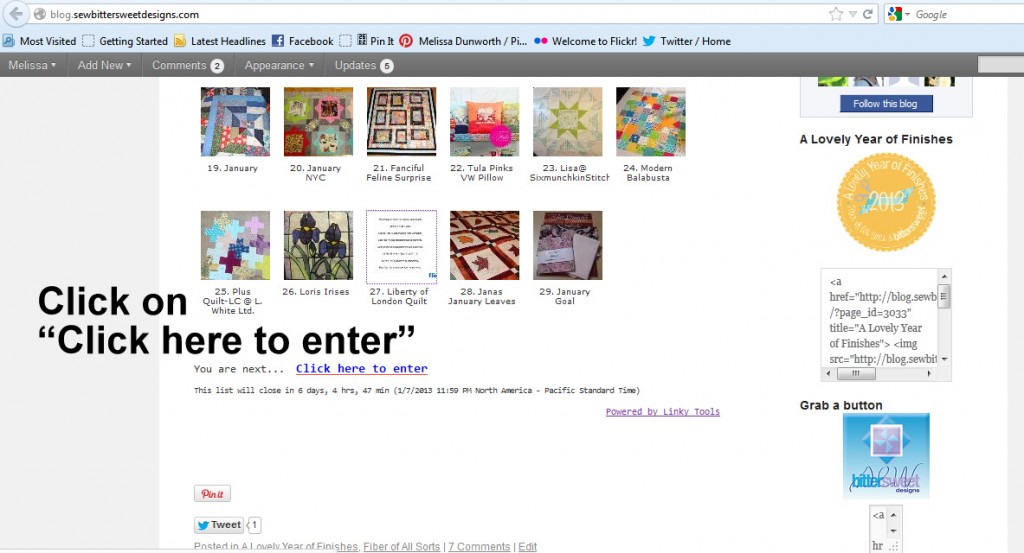
Step 2: Next, go to Shanna’s blog or my blog, scroll down to the linky party and select “Click here to enter”.

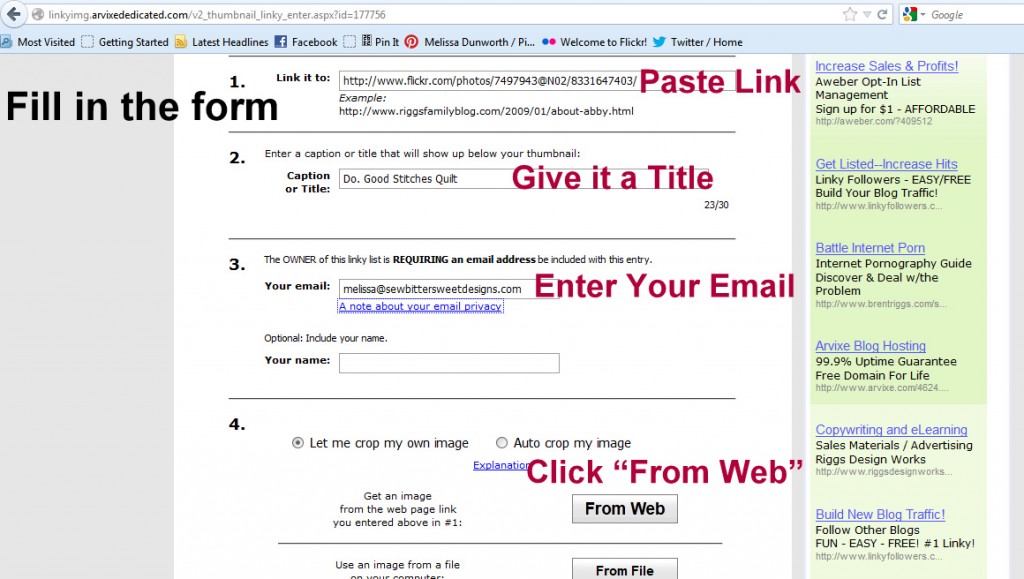
Step 3: The link above will bring you to a new page, you will need to fill in all the required information and then click “From Web” to crop your image.


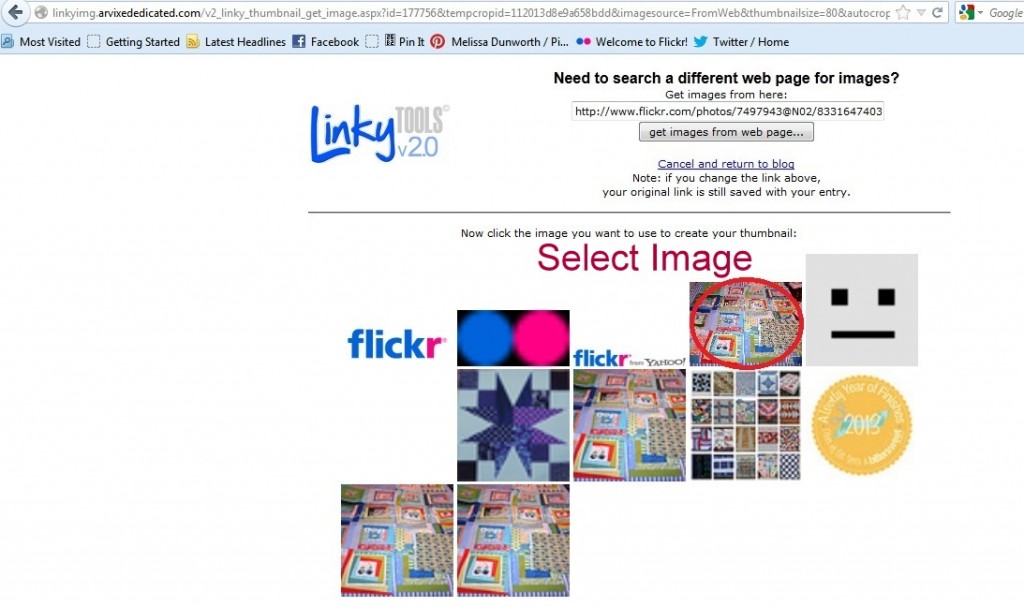
Step 4: Select which image you want to show up on the linky party.

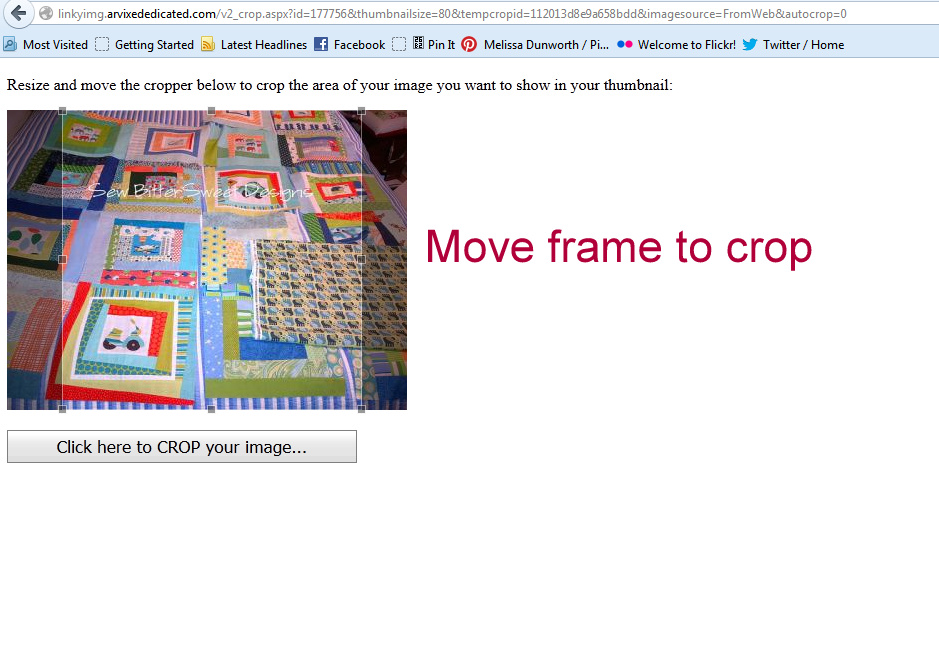
Step 5: Drag the square to crop your image. Then click ok.

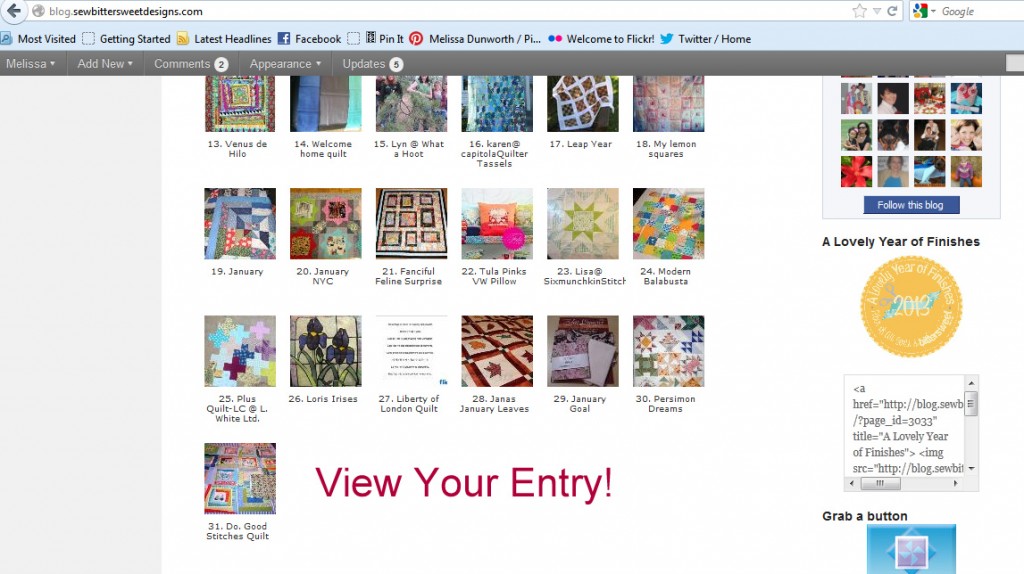
Step 6: After you have click on the “Click here to CROP your image…” button in the image above, you should be taken to another screen that will tell you that you were successful, it will also have a link to bring you back to the blog you entered the party at. You will then be able to see your image as the last one entered into the party.

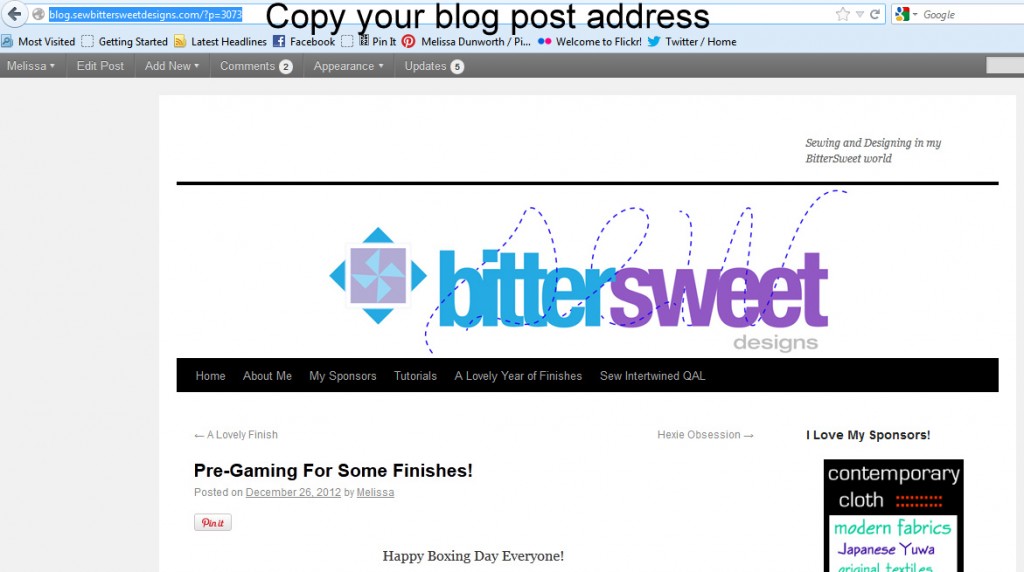
Now, if you are linking up from a blog, the steps are only slightly different. For Step 1 you will go to the blog post itself (not your homepage, but the actual post) and copy the web address.

All the rest of the steps are EXACTLY the same. Click to enter the party, fill in the form, select the image you want to show on the party, crop the image and then you are done!

We hope to see you enter into our January Goal Setting Linky Party! Let’s make 2013 A Lovely Year of Finishes!

Scroll to Top