tutorial

Feathered Star Tutorial – Part 1

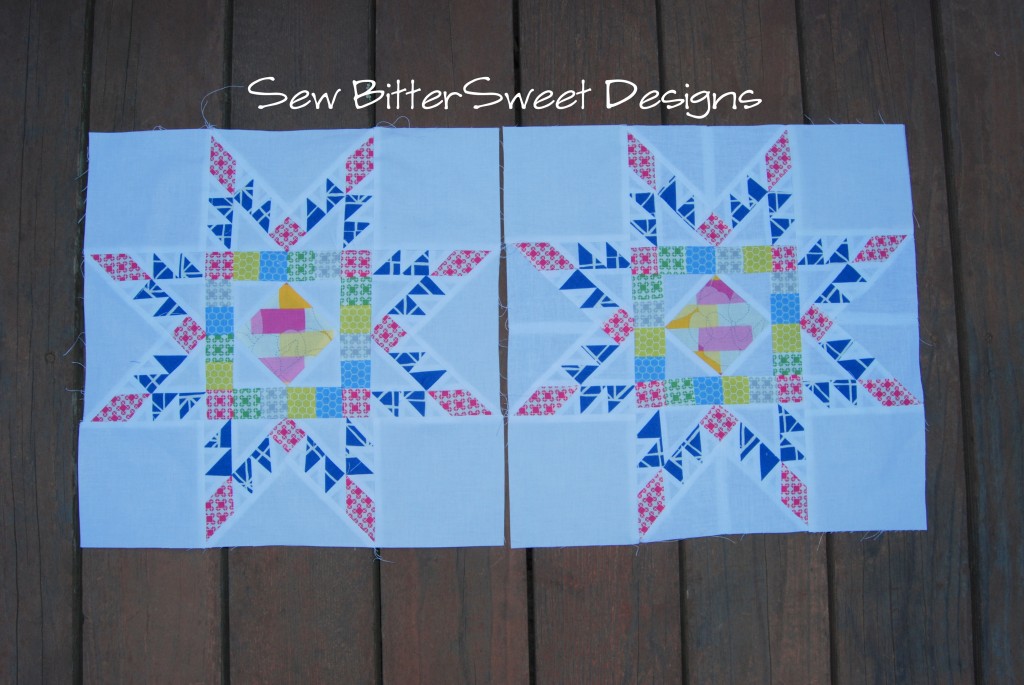
Let’s start out with a little disclaimer…this block looks intimidating and scary, but once you break it into small sections, it really isn’t that hard. Especially if you use the bias strip piecing method for the HSTs – I am sending you to 2 fabulous tutorials.

I am going to show this tutorial in 2 parts, cutting with links for the HSTs and then assembling on Tuesday. I think that will be a good break, as cutting takes me a good while.

Finished block size – 15.5”x15.5”

You will need:

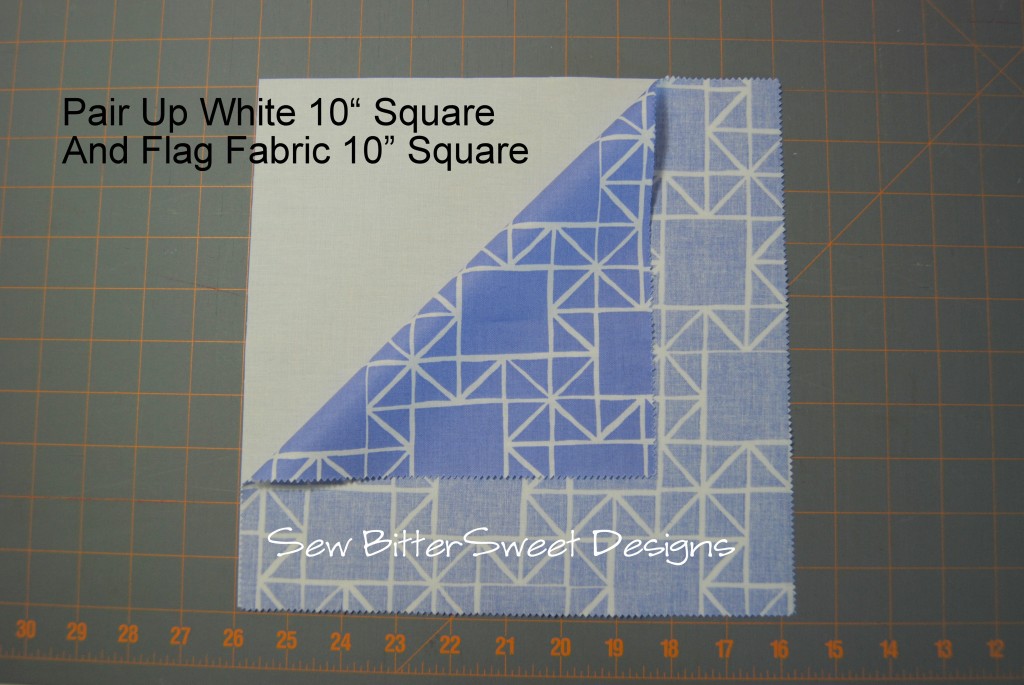
2 Squares: 10×10” of focus fabrics
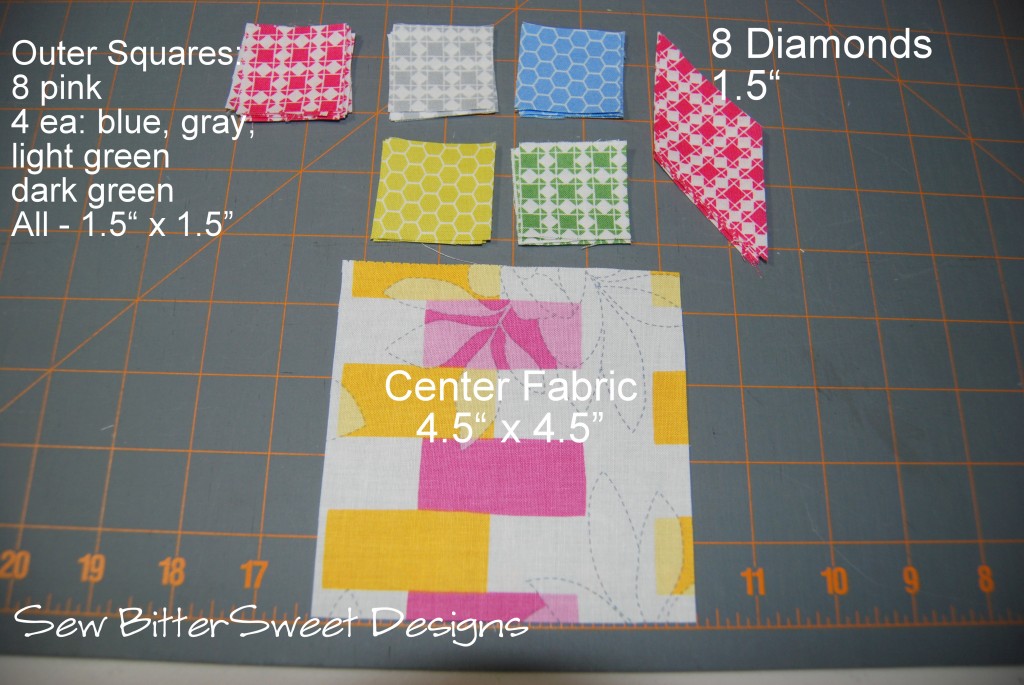
Scraps from 4 different fabrics
Peekaboo fabric for center – 4.5″ square
White Background fabric
Sewing Machine
10×10 inch quilting ruler
Quilting Ruler with 45⁰ lines on it
Nice to have but not necessary: 45⁰ Ruler by EZ Quilting or Marsha McCloskey Feathered Star Ruler

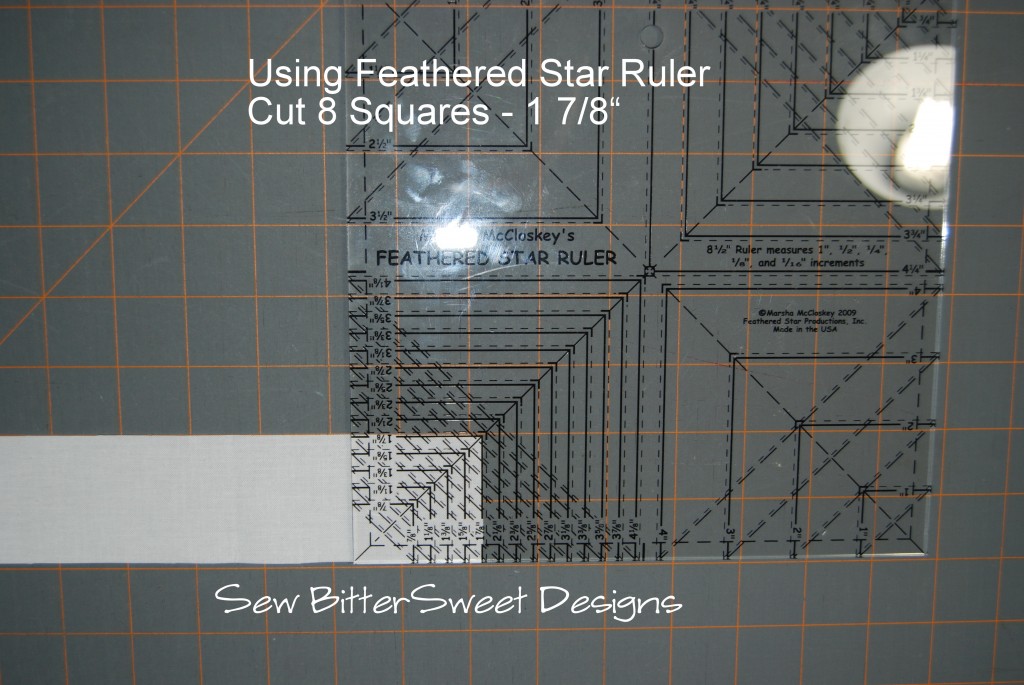
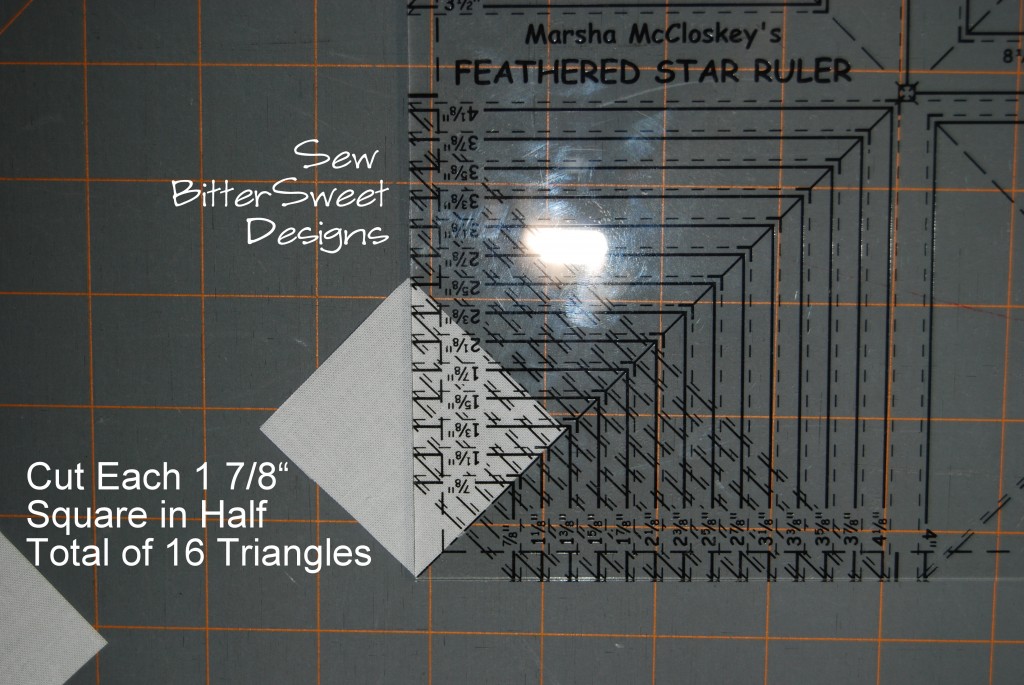
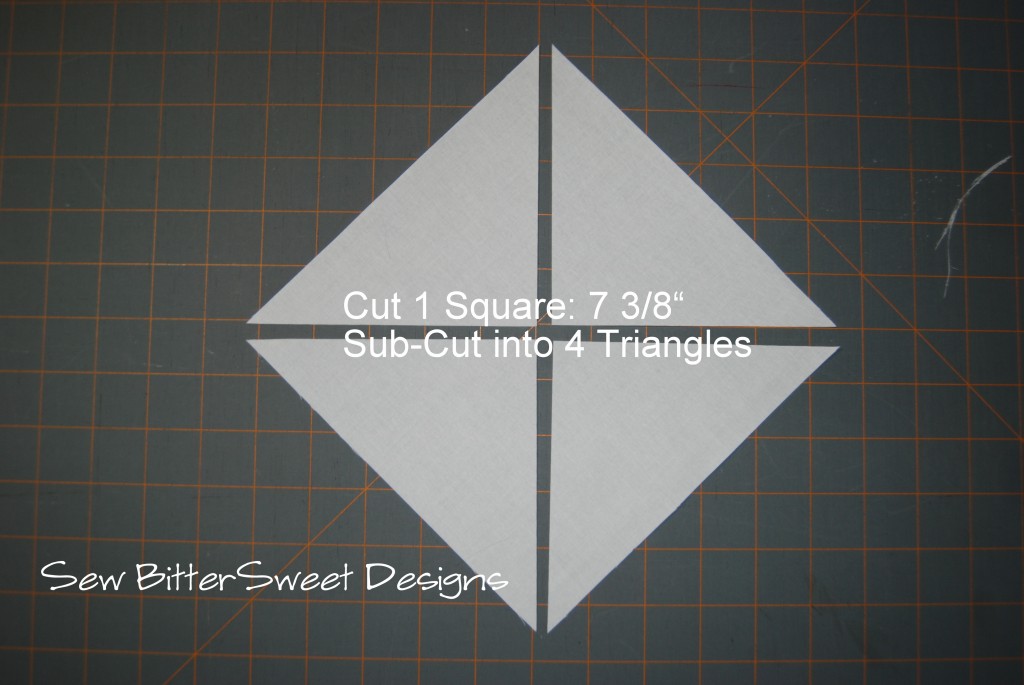
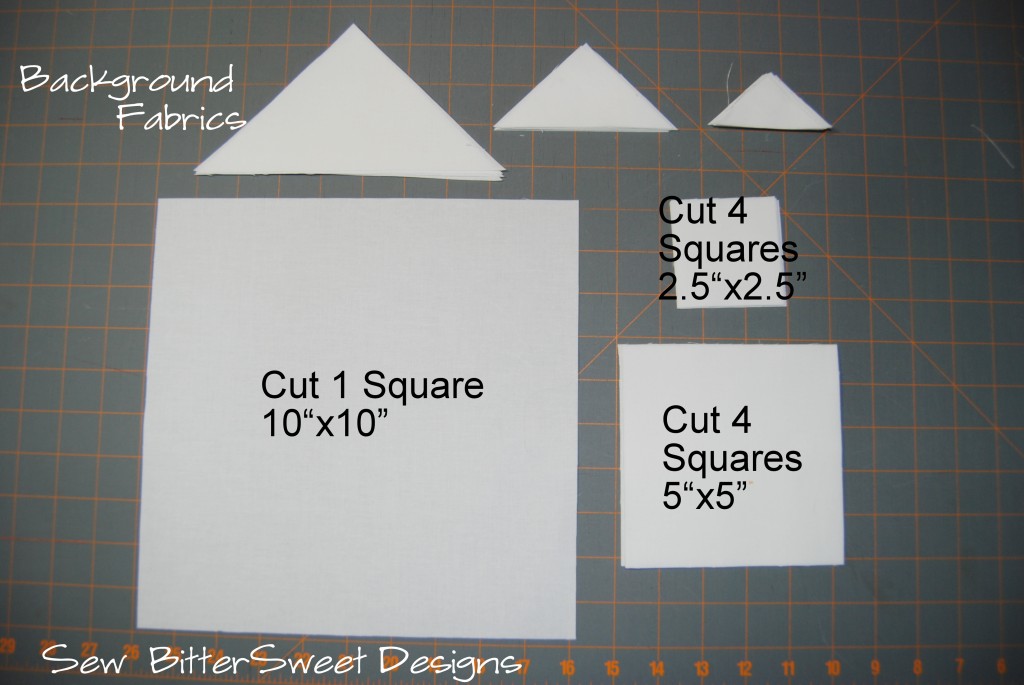
Cutting White Fabrics: Everything is pictured with the Feathered Star Ruler – but you can easily cut these with the 10” ruler listed above.

Using Larger 10×10 ruler to cut next one:

Simple Squares

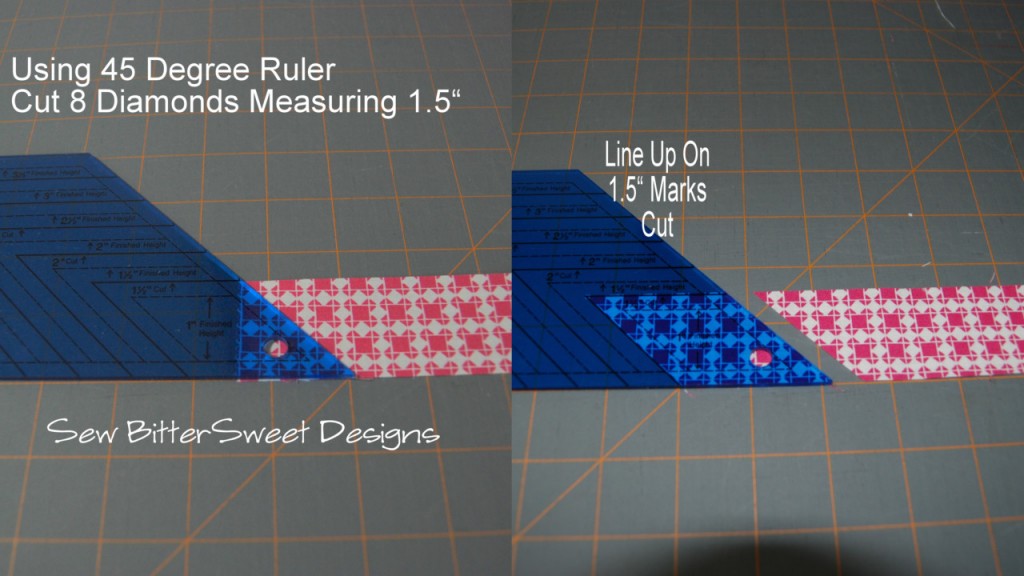
Using 45⁰ Ruler – cut diamond shapes – 8 total

Using standard quilting ruler marked with 45⁰ markings:

Cutting for center square:

Half Square Triangles (HSTs):

I used the Bias Strip Piecing method to assemble my HSTs. I learned this method from 2 fabulous tutorials. One by Erin at One Piece at a Time and the other by Molly at It’s Molly’s Place (you will need to scroll down a bit to get to the triangles).

For this block you will need 32 HSTs measuring 1.5”. You will use the two 10”x10” squares for this – the part that is confusing from both tutorials is how wide to cut your strips – follow their method for cutting and sewing and cut your strips 2” wide.

Come back tomorrow and I will show you how to put it all together! And don’t forget to enter the Fat Quarter Shop giveaway for a Layer Cake of Quilt Blocks – which is what I am using to make my feathered stars!

Guest Post – Vicki from Quilting Lodge

Hi! Today I would like to welcome Vicki from Quilting Lodge. I started blog stalking Vicki as a silent follower months and months ago, and back in March I decided to finally jump in on the conversation. Vicki is absolutely wonderful and so very very talented. Go check out the blog she writes with her mom, and make sure you check out her shop too!
________________________________________________________________________

A huge thank you to Melissa for giving me the opportunity to visit with you all today!  My name is Vicki and I blog with my mom over at Quilting Lodge.  I’m so thrilled to be here today.  However, I am a bit nervous because this is my first time as a guest blogger.

It took me forever to decide on a topic for today but I finally landed on a tutorial for a table runner that can double as a wall hanging.

You might have noticed it’s not quilted.  Unfortunately, I just didn’t have time to get it completely finished.

All seams are 1/4″

Supplies:

6 ~ 7″ square pieces of fabric {I used part of a Good Fortune Layer Cake}
5/8 yard for background & outer border {grey}
1/4 yard inner border {purple}

Instructions:

First, I cut out all of my circles.  I took each 7″ square of fabric and applied  a 6 7/8″ square of Steam a Seam to the wrong side.  It’s very important that the Steam a Seam is smaller than the fabric.  Otherwise, you will have a sticky mess on your iron.


Steam a Seam on Wrong Side
Ironing it on


Almost ready to cut circles
There are two different ways to cut the circles out.  The old fashion way…scissors.  Or the easy way….use an Olfa Circle Cutter.  I went with option number 2…I used my handy dandy Olfa Circle Cutter which made my life a whole lot easier!  First, I’ll show you how I did it and then I’ll show you the alternative way using scissors.

Before I cut my circles I peeled off the paper backing.
I laid my square right side up on my cutting board and started cutting.


Ready to cut
Cutting the 4.5″ Circle


I made a total of three cuts.  I started with the smallest circle, the 4.5″ circle.  Then I cut the 5.5″ circle.  Then the 6.5″ circle.


Cutting 5.5″ Circle
Cutting 6.5″ Circle


Check out what I did in a matter of minutes…


Alternative:
If you do not use the Olfa circle cutter you need to leave the Steam a Seam paper backing on the fabric and draw circles.
I used a compass to draw the circles and then used scissors to cut out each circle.  Then peel off the paper backing.

Next, the 5.5″ circle must be cut into fourths.  I only used 5 of the 5.5″ circles so I picked my favorites.  Cut in half and then in half again.


Line up on the 2 3/4″ mark and cut
Flip ruler and line up on other 2 3/4″ mark


All done!
Now I’m ready to lay out the circles on the background fabric.

I cut a 10″ x width of fabric strip of grey

I laid this strip out on my ironing board, right side up.  I pressed it in half lengthwise to create a mark down the center.  I used this mark to help me align all the circles that will be applied.
Right side up ready to press
Press in half lengthwise
This is the center mark used for aligning circles
The 6.5″ circle rings will be the first to go onto the grey fabric.  Also, I started with the two center rings and worked my way out.  I folded each ring in half and made a crease on each side.  This crease was lined up with the center press mark on the grey fabric.  Keep going until all 6 rings are laid on the fabric.  They should be touching but not overlapping.  DO NOT iron anything yet.
Next, take each center 4.5″ circle and fold in half to make a crease in the center.  This crease will line up with the center press mark on the grey fabric.
If you look closely at the picture you can see all the crease marks line up with the pressed line I made earlier.  This is how I made sure everything lined up just right with no measuring!  DO NOT iron anything yet…

Next, add the connector pieces.  These pieces will be tucked under the outer rings.  I used my 6″ x 24″ ruler to make sure they were all placed the same distance from the edge of the grey.  I used tweezers to move them around if I needed.  Everything is still NOT ironed down at this point.

Stand back and take a look.  If you’re happy you can iron it all down.  If something looks off, just wiggle it around until you’re happy and then iron it all down.


Here’s what you have before adding any borders.

All we have left is appliquéing the circles, adding borders and quilting!

I used my open toe foot and stitched around each circle.  It’s a little time consuming but not too bad.  Just stop and have a little chocolate every now and then!

When I appliqué I always leave the threads long at the beginning and end so I can pull everything to the back and tie off.

The two threads on top will be pulled to the back and tied off


2 bobbin threads
2 bobbin + 2 top threads
Double knot & Trim

A close up of the appliqué…

After everything is stitched down it’s time to add borders.

Almost done!

I added a 1″ inner purple border to frame the design and a 2.5″ outer grey border to finish it all off!


I know I didn’t give a step by step on the borders.  I figured you’ve had enough of me for one day.  Plus, these were standard run of the mill borders that don’t really need a lot of explanation.

Boy oh boy that ended up being a really long tutorial.  I hope I didn’t lose too many of you along the way.  It’s been a true pleasure hanging out over here at Melissa’s today.  Come check out my blog if you get a chance.  You just might see pictures of this bad boy all quilted!

Now I’m off to pack and get ready for Spring Quilt Market in Kansas City!  I’m too excited for all the quilty goodness coming my way!


______________________________________________________________

So I happen to have an Olfa Circle Cutter, a ton of fusible web, and a charm pack of the SAME fabric. I think I see a downsized version of this in my future!  Thank you so much for sharing Vicki!


Guest Post – Robyn from Bolo Heads

Hi everyone! Happy Tuesday! Would you believe I haven’t sewn a stitch in a week?!? I know! Today I have Robyn from Bolo Heads! She has a super adorable bag for you all – so make sure you stick through to the end of this wonderful tutorial!
________________________________________________________________

I am so happy to be here today, and hope all is well with Melissa.
I have a little blog called Bolo Heads.
Bolo is Hawaiian for without hair (meaning bald)
I was born in Hawaii, and had no hair, so that was my nick name growing up.
All of my children had the same condition (bald babies)
So that it explains it.
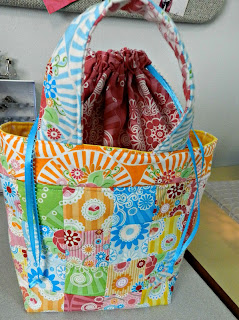
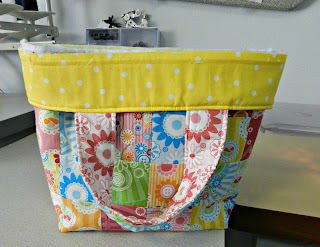
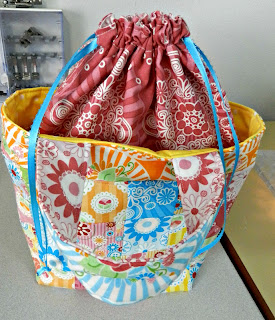
Today I am going to show you how to make the cutest little stitching bag.
I am an heirloom sewer.

Smocking, embroidery…..

There is always some stitching project following me around.
I used to take it with me in a Ziploc bag, not cute.
Then I used a bag that my daughter’s doll came in.
Still not cute.
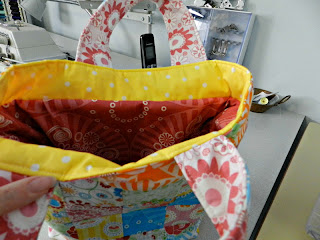
Now I have this super cute patchey bag.
I am going to give you a for warning, there are a lot of pictures,
but I don’t want you to get lost along the way.
Also I was making two bags at the same time so some of the pictures don’t match up

Are you ready? Here we go.
You will need.
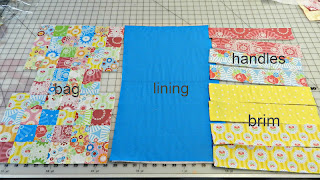
Bag                             56 – 2 1/2″ squares.
Lining (2)                           10 1/2″ x 12 1/2″
Brim (4)                             2 1/2″ x 12 1/2″
Handles (4)                        2 1/4″ x 12″

Drawstring closer (4)          8 1/2″ x 12 1/2″

Interfacing


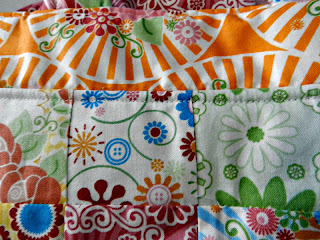
Start with your 2 1/2″ squares.
I was lucky enough to get these super cute Happy Zombie ones.
2 1/2″ square


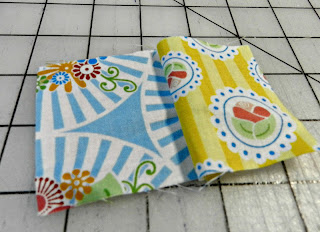
Sew them together, I chained them, and then sewed the two together,
and so on until you have something like this.


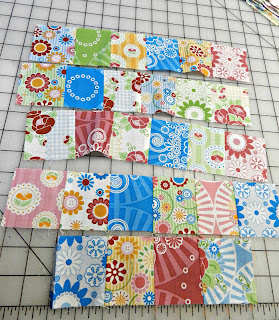
Four rows of six and one row of four.
Then sew them together.


Do it twice, so that you have a front and a back.
Then sew them together.


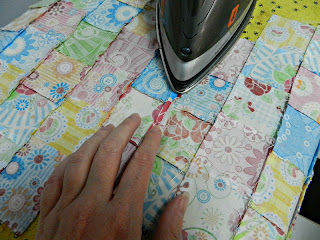
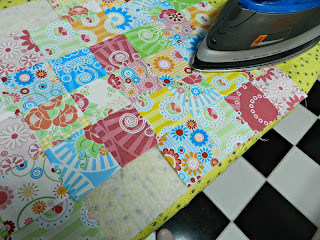
Iron what will be your bottom seam open.


Next iron it on to some interfacing.
You can use what ever is your favorite.
Fusible fleece is nice and soft.
I would like to take a minute to talk about what I used.
My sister gave this to me.
You can only get it at Joann’s in the sewing center.
If you sew bags you know that the best thing to use is fusible fleece.
If you use fusible fleece then you know that it is $7.00 a yard.
This is a little lighter weight then the fusible fleece but is only…
brace your self…
.99 cents a yard.
You can buy a whole bolt for $10.00 the same price as 1 1/2 yards of the fleece stuff.
Your welcome.
Moving on…
Sew your lining pieces together
then press that bottom seam (12 1/2″) open.
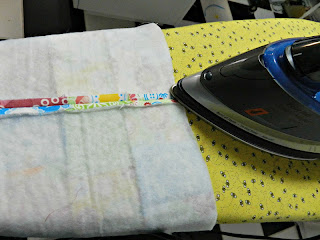
Iron your lining, brim, and handle pieces to the interfacing.


All of your prep work is done, now is a good time to take a break.
I am going to pick up my daughter from preschool I will be right back.


OK I ‘m back,
trim all of your pieces from the interfacing.
Let’s sew the whole thing together shall we.
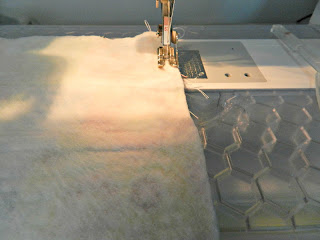
Sew down the sides.


Press the seam open.


Now you have this funny little chunk missing, this is how we are going to fix it.


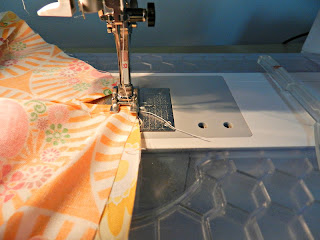
Line up the bottom seam with the side seam,


sew it together keeping the seams together.


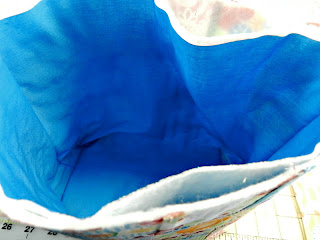
Turn it inside out and voila a square bottom bag.
Shall we do the lining next, lets go.
Sew the side seams


Line up the side seam with the bottom seam pin (on the other side)


Measure four inches across, like this.


Mark it with a line.


Sew on the line.
Now if you want you can trim off the excess, I didn’t.


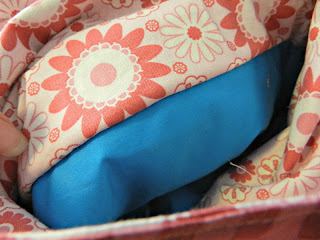
Fold the extra toward the center, and put inside the bag,
lining up the side seams.


Baste together.
You are doing great, we are half way.
Now we are going to do the handles and the brim.
Ready or not here we go.
This is a trick I learned and when I first saw it I was like
“How did I not know this!”
Maybe you will be the same, or you will think I am a dork for not knowing.
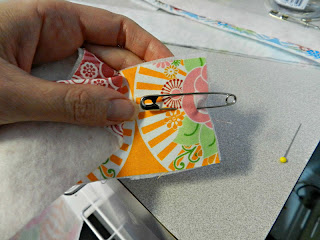
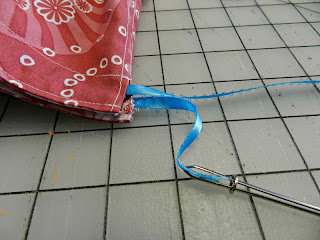
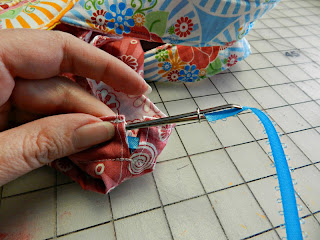
Anyway put in a safety pin like this with the head pointed in.
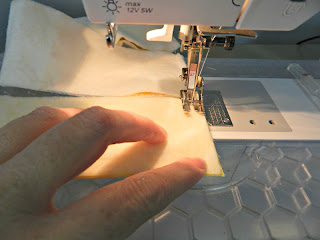
Sew down either side.


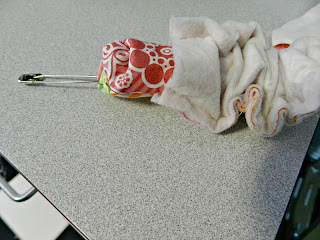
Start pushing the pin through.


Look at that totally turned inside out.
Awesome!!


Topstitch on both sides.
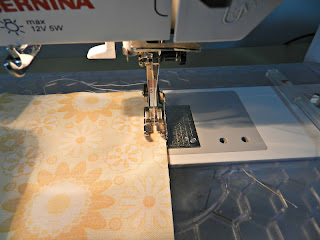
I like to use my open toe foot for this, it is a nice guide.


For the brim sew all the sides together.


Make a mark four inches from the side, on both sides.
Yes I do do this with a razor blade.
Be careful not to go beyond your seam allowance.


See look at that nice little mark.
Center your handle on the mark, pin in place.


Sew the top closed.


Turn inside out and topstitch the edge, again with the open toe foot.


Look how cute it is.


Now with right sides together, place it on the bag.
Almost done now we just need to make the drawstring closer.
Layer all your drawstring pieces together and on the 8 1/2″ side
make a mark that is 1 1/2″ down from the top.


Cute little mark, that is where we are going to start sewing.


Sew your side seam.


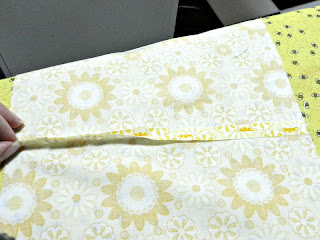
Press this seam open, if you hold the unsewn ends just right
They will lay open and let you press them down.


Topstitch down either side of the seam.
Once again using the open toe foot, start where the seam is split open.


Do both sides of both the front and the lining.


With right sides together, sew the two pieces together.


Turn inside out and topstitch around the top.


Beginning at the point where the slit stops,
topstitch around the top again, making a casing.
We are almost done I promise.
Now we are going to make a sandwich.
Like this bag, brim, and the drawstring top.
Make sure you have the right sides together.


Sew around the top keeping shy of the basting stitches.


All sewn together.


Trim off the excess seam allowance.


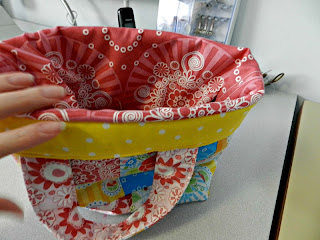
Pull up on the draw string part..


and tuck it inside the bag.


Lift up in the brim….


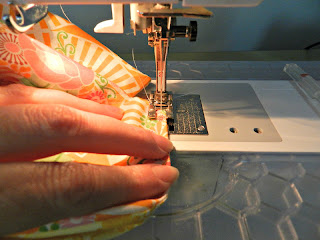
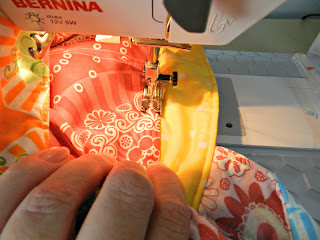
and topstitch with your quilting foot around the bag
make sure to keep it all taut, pull out on the brim and pull back
on the drawstring part as you feed it through.


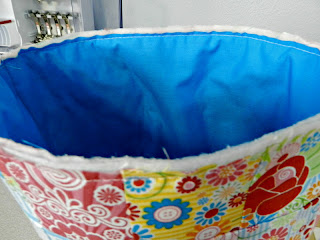
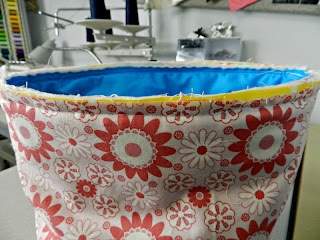
Look how nice that finishes, the outside…


the inside.


The very last step.
Thread ribbon through the casing on one side…


and then on the other side.
Tie a knot in the ends and burn the edges so that they won’t fray.


Pull them tight and you are
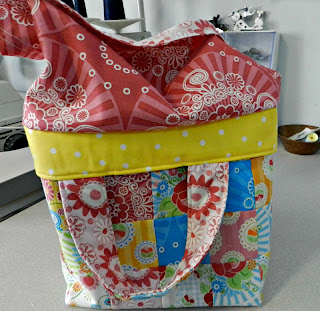
DONE!!!


I knew we could do it.
I hope you like it and I can’t wait to see if you make one.
If you do come on over and let me know.

____________________________________________________________________
Now do yourselves a favor and go follow Robyn! She has a fun blog and I really enjoy reading what she has to say, and I know you will too! Don’t worry, I haven’t fallen off the planet, just trying to get some things in order. I will be back next week!

Guest Post – Lisa’s Pink Lemonade Sandwich Cookies

Today I have one of my closest friends in the world presenting one of her AMAZING cookie recipes. I am telling you, I gain weight just listening to her talk about her creations! Take it away Lisa!
________________________________________________________________________

Thank you so much Melissa for having me on your blog today!

So lately, both out of a desire for a sugar fix (who doesn’t love a yummy treat), and a complete lack of time (thanks to two busy toddlers and school), I have been on a mission to find sweet treats that take little time to put together. The end result of this has been a lot of experimenting with store bought cake mixes. I have found if you doctor them up just a little bit, that they can be just as delicious as anything your make completely from scratch, and are done in a fraction of time. A little while back, at the beginning of “Spring,” (we have only had about a week or so of weather over 50 degrees here.) I came across the deliciousness that is Pillsbury Pink Lemonade mixes. I bought what I thought was two boxes of the cake mix, but one of them was this yummy little gem:

Image

So, when I realized I had it, I decided to make lemonade out of lemons. To be exact, Strawberry Lemonade Cookie Sandwiches. All I did was follow the directions on the package, but I added the the zest of half a small-medium lemon as well as the juice of half of that lemon. Bake according to package directions and cool completely. You should end up with some of these pretty little cookies.

Image

While they are cooling, get to work on your strawberry lemonade buttercream frosting.

Strawberry Lemonade Buttercream

Zest of half a lemon

Juice of half a lemon

1 stick butter

8 tablespoons of shortening

3-4 cups sifted powdered sugar

8-10 small-medium strawberries(pureed– I used my microplane (zester) and grated the strawberries, but you can blend them)

1. Cream together butter and shortening.

2. Add lemon zest, lemon juice and strawberries and mix completely.

3. Add sugar 1 cup at a time until desired thickness and sweetness is achieved.(I used 4 cups)

A nice little trick for preparing your strawberries is to use a regular drinking straw to core and remove the leaves from the strawberry.Image

Works like a dream!

Image

Once your cookies are cooled and your frosting is mixed up, pipe a generous dollop on one cookie, like so

Image

put another cookie on top,

Image

and ENJOY!!

P.S.

I made cupcakes using the same method I did here. The lemon juice and lemon zest in the batter gives it a little more zing, and the frosting is delicious on both!

P.P.S.

Thanks again, Melissa, for having me here. Happy Sw-EAT-ing!
_______________________________________________________________________

Sounds like something perfect to make for a Mother’s Day Brunch! And the best part is that everyone in my family can eat these! No chocolate, no peanuts, and no tree nuts! Triple play in this family!

Guest Post – Genevieve Chicka

I will be on and off the blog for the next couple weeks. We have a lot of changes happening in our lives – I will explain in the middle of May – I promise.  In the mean time I am bringing you some of my wonderful blogging friends, they will each be guest posting on various topics and I truly hope you enjoy them. Today I have Genevieve. I first met Genevieve in a block swap that I did through Flickr and we have become friends through the “I don’t have a problem, I have a well-rounded stash” group on Facebook. She is incredibly talented!

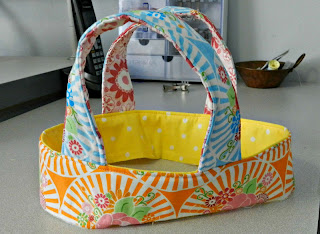
Isn’t that just about the cutest thing you have ever seen!!!

Thank you so much Genevieve!!!

Scroll to Top