Fiber of All Sorts

How to Join a Linky Party!

Hi Everyone! Shanna and I thought that since we are hosting regular linky parties this year that we should put up a tutorial on how to link up to a party. So here we go!  I will start with linking up from Flickr.

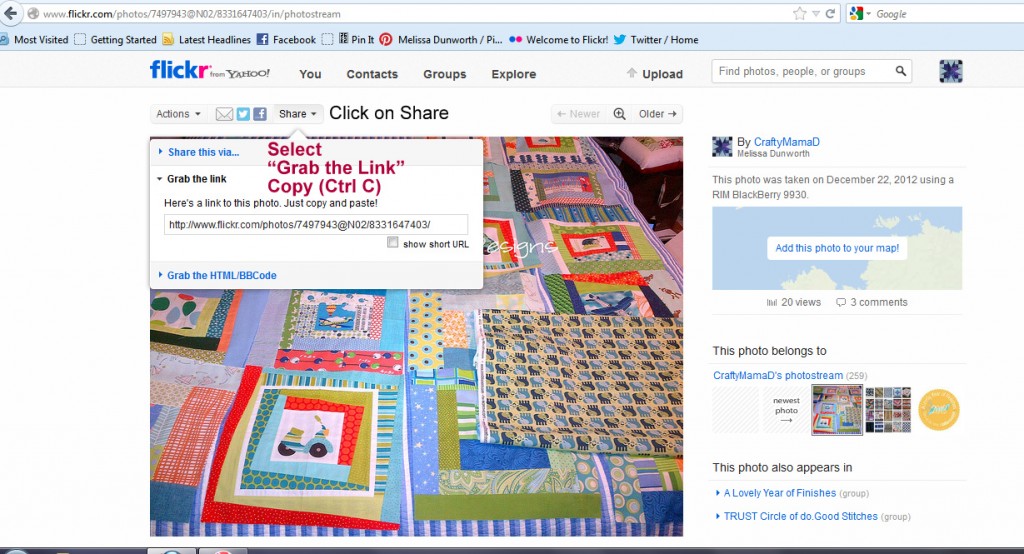
Step 1: Go to the photo you want to link up, click on “Share”, select “Grab the Link” and copy the link that comes up – this is the link to the photo itself.

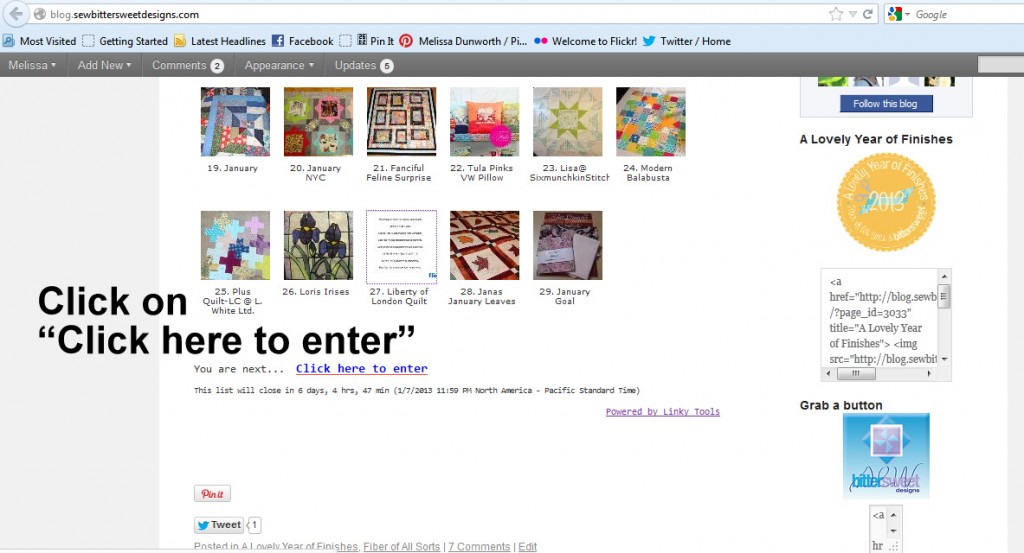
Step 2: Next, go to Shanna’s blog or my blog, scroll down to the linky party and select “Click here to enter”.

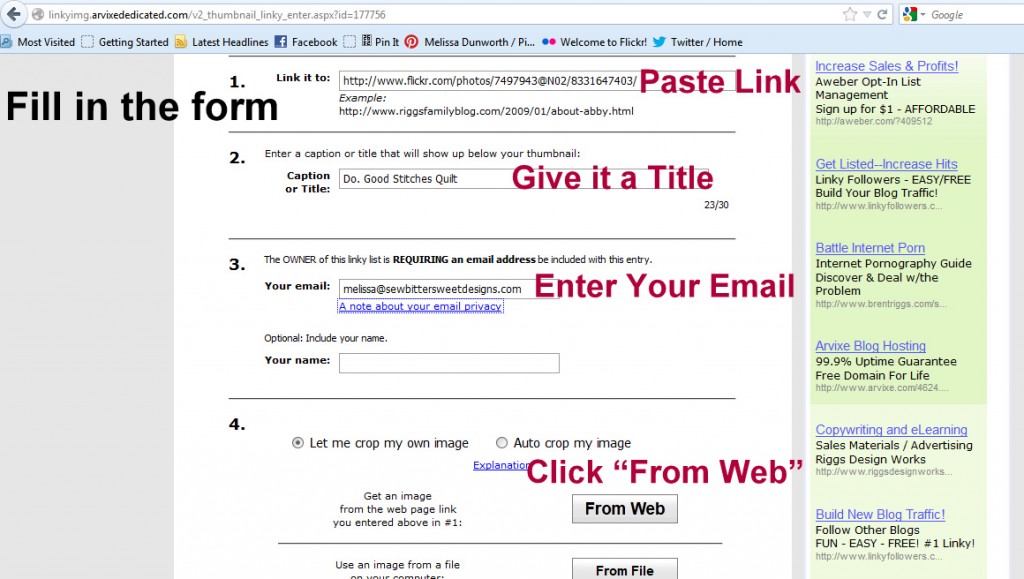
Step 3: The link above will bring you to a new page, you will need to fill in all the required information and then click “From Web” to crop your image.

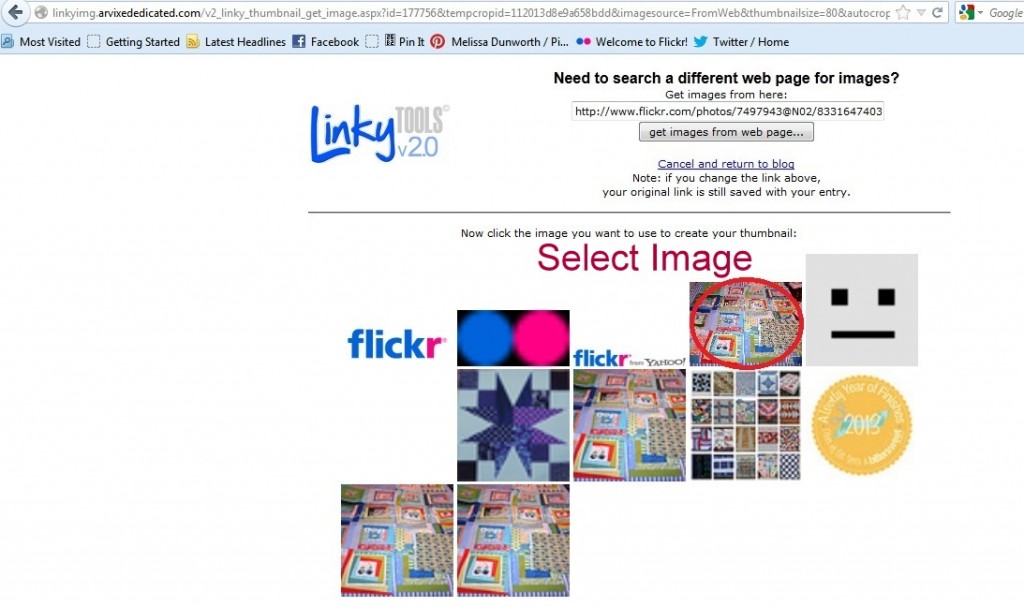
Step 4: Select which image you want to show up on the linky party.
Step 5: Drag the square to crop your image. Then click ok.
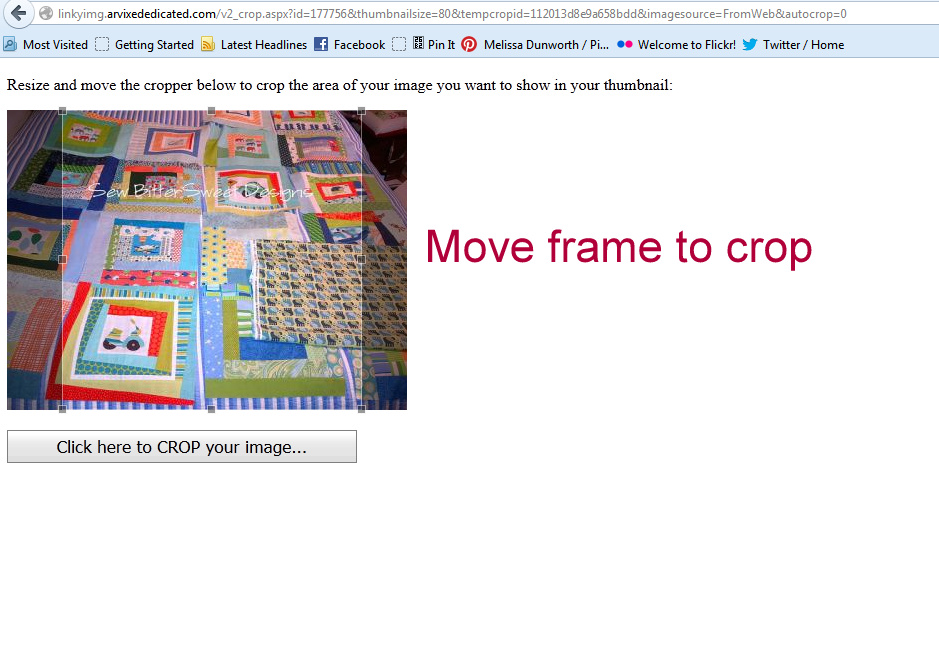
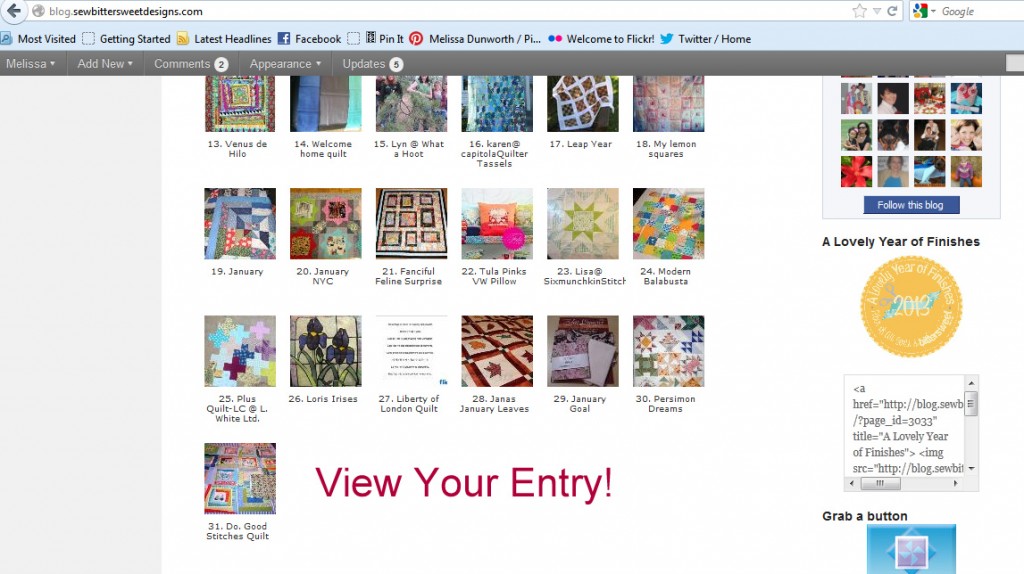
Step 6: After you have click on the “Click here to CROP your image…” button in the image above, you should be taken to another screen that will tell you that you were successful, it will also have a link to bring you back to the blog you entered the party at. You will then be able to see your image as the last one entered into the party.

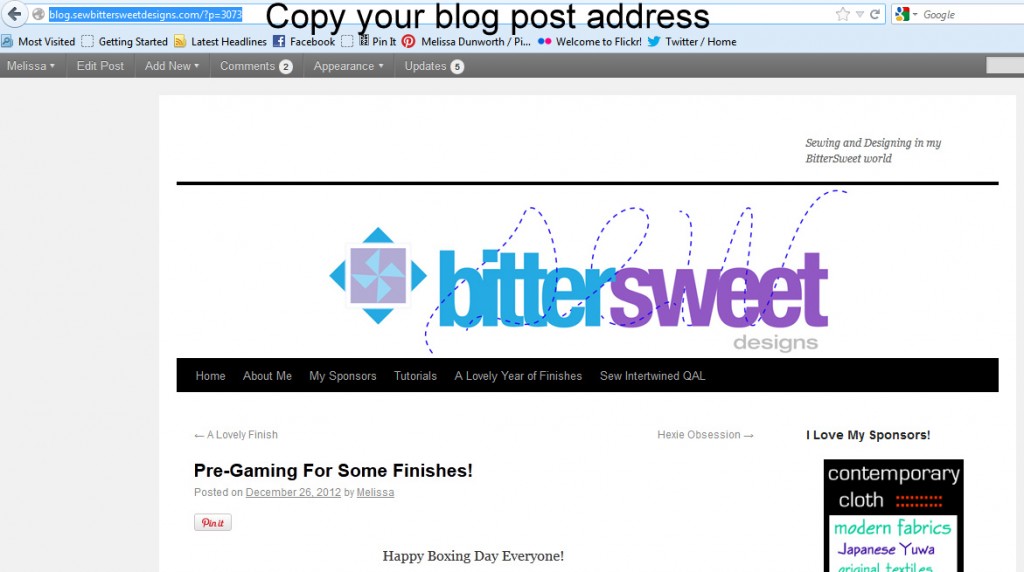
Now, if you are linking up from a blog, the steps are only slightly different. For Step 1 you will go to the blog post itself (not your homepage, but the actual post) and copy the web address.

All the rest of the steps are EXACTLY the same. Click to enter the party, fill in the form, select the image you want to show on the party, crop the image and then you are done!

We hope to see you enter into our January Goal Setting Linky Party! Let’s make 2013 A Lovely Year of Finishes!

A Lovely Year of Finishes – January Goal Setting Party

Happy New Year! It is January 1st and that means it is time to kick off the first Goal Setting Linky Party for A Lovely Year of Finishes!

Shanna and I couldn’t be more excited about the coming year! Can you believe that there are already more than 150 people in our Flickr Group?!? If you haven’t joined yet, head on over and do so! We have some wonderful mosaics in the group of projects finished in 2012 and I can’t wait to see the first “in progress” pictures!

Make sure you check out the details of 2013 ~ A Lovely Year of Finishes found here or here, we’ve also added a Q&A Page for you.

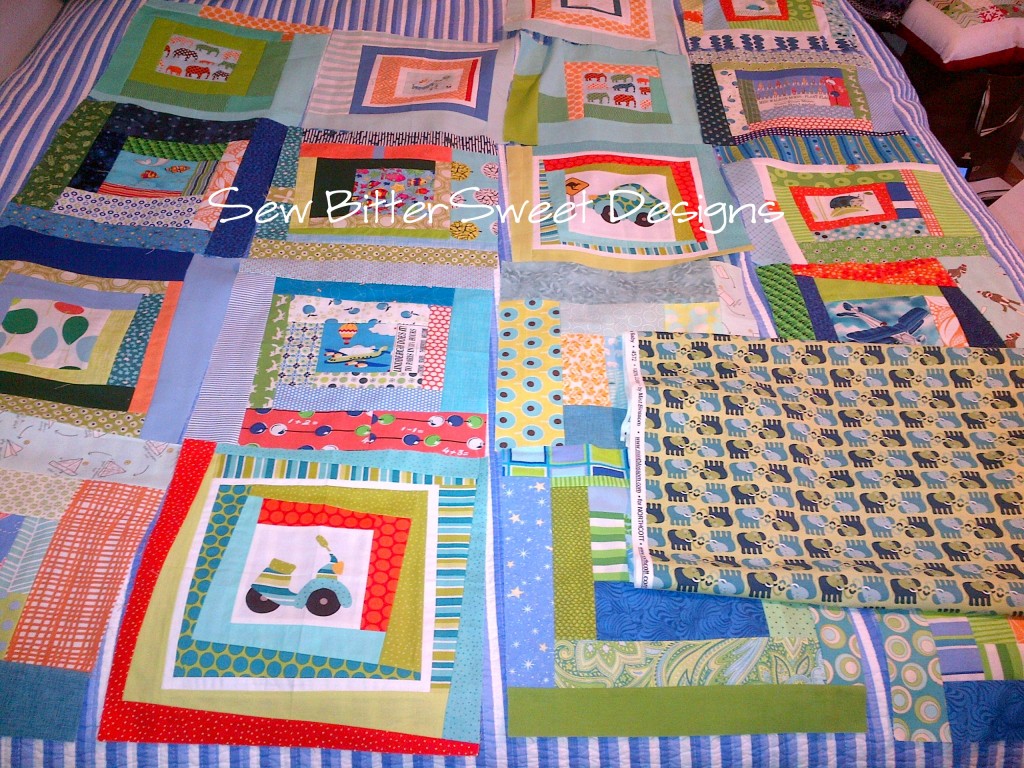
As we kick off this year my first project is going to be one that has a hard deadline of January 31st. I need to finish the piecing, quilt and bind the Do.Good Stitches Trust Circle quilt from November. We took December off, so I have January to get it done. I also have 5 bee blocks that need to be made – but I’m not counting those towards my Lovely Year of Finishes.

What do you have planned for January’s big finish?

Add your blog post or flickr photo (with appropriate descriptions) to the linky party below.

**Please note, the linky party is the same here and over at Shanna’s, so there is no need to enter twice **

For those unsure of how to link up…I will have a tutorial up tomorrow to enter from your blog and/or Flickr.  Can’t wait to see what everyone has planned!

Oh yeah! And we said there would be prizes too!

Prizes for January are as follows:

1. $20.00 Gift Certificate from the Quilting Lodge

2. $10.00 Gift Certificate from Contemporary Cloth

3. Choice of $15 or 2 charm packs from Stitch n’ Giggles

4. Charm pack donated by Shanna and Melissa

4 winners will be chosen by Mr. Random for those that post here and the wrap-up at the end of the month with a completed finish.

Looking Back and Moving Forward

This whole year (2012), right up until yesterday, I have been operating under the impression that I really didn’t get all that much done. That was until I started counting finished projects (by finished I mean 100% done, so to be counted for this particular list, a quilt had to be quilted and bound).

I now feel as though I accomplished a thing or two.

2012 Quilted Projects

2012 Finishes

  1. Twirling Around Quilt and Pattern
  2. Sew Happy QAL Quilt – it was quilted and bound by a friend but it is finished nonetheless)
  3. Zig Zag Zoom baby quilt for my nephew
  4. Crossroads Quilt and Pattern – I haven’t really talked much about this one but perhaps that will change this year… (This quilt is the last one in the bottom right hand corner)
  5. Dresden Tumbler Quilt for Anne
  6. Commission Quilt
  7. Flying Arrows quilt
  8. Navy Quilt for Susan from The History Quilter – made with Shanna from Fiber of All Sorts and Jenna from Sew Happy Geek
  9. Crossed Eyes Spied Quilt
  10. Charity Quilt
  11. Flying Geese Table Runner
  12. Pinwheel Table Runner
  13. Feathered Star Library Bag
  14. Feathered Star Pillow (aka – Leftovers Pillow)
  15. Halloween Glow-in-the-Dark Wall Hanging
  16. Pinwheel Candle Mat
  17. HST Triangle Wall Hanging for Kristy from Hopeful Threads
  18. Grab Bag for Dentist Trip
  19. Baby Doll Sleeping Bag
  20. Star Wall Hanging
  21. Star and Dot Wall Hanging
  22. Witch Hat for Anne and a dress to go with!
  23. Apron for me
  24. Apron for Anne
  25. Crossroads Wall Hanging for Anne’s Room
  26. Desk Makeover
  27. I learned some hand embroidery
  28. 2 Mug Rugs
  29. 3 Dresses
  30. 2 Pairs of Shorts
  31. 6 Cuddle Blankets
  32. 4 Receiving Blankets
  33. 4 e-reader cases
  34. 10 Pillowcases
  35. 2 zipper pouches
  36. 83 Bee Blocks

I was busier than I thought!!! Now I need to set some goals for 2013!

2013 Sewing and Quilting Goals

  1. 12 months – 12 finishes – Join me in A Lovely Year of Finishes
  2. Start My Crazy Quilt – I’ve been collecting fabrics since I was a pre-teen (and many were gifted to me by a wonderful family friend), it is time to do something with them!
  3. Do something with all my Hexies
  4. Make pajamas for Anne
  5. Learn how to use my Ruffler Foot
  6. Sew a dress for myself

That’s it – very simple, but I still think it will be a lot of work. I will be truly happy if stick to number one and finish some of my UFOs.

Are you setting goals and resolutions? How do you decide?

Happy New Year My Friends!

Tutorial – How to Add a Button to a Blog Post

This is a tutorial for those people who use WordPress as a blogging platform.  For a tutorial on adding a button to a blog post using Blogger, check out Shanna from Fiber of All Sorts, she has you covered!

Start by copying the code in the box for the button you want to add.

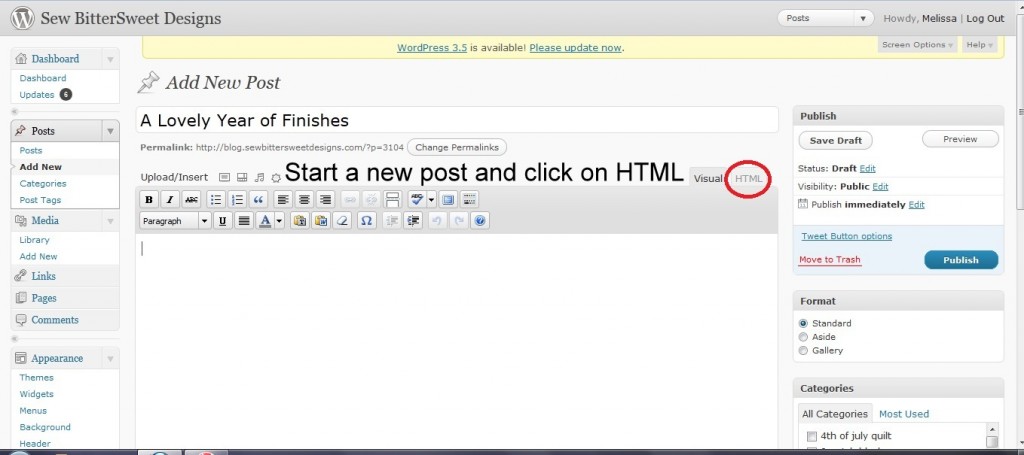
In order to add a button you will need to go into the HTML editor for the post.

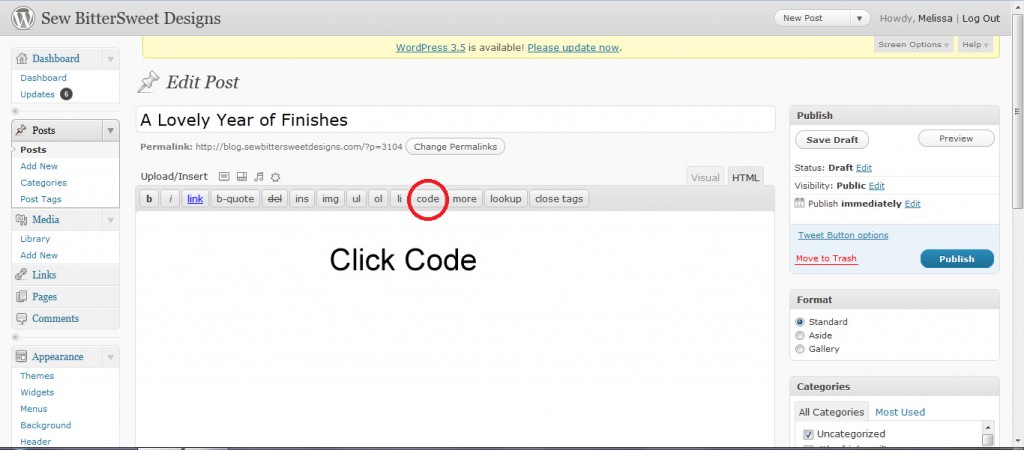
Next you will click on the tab labeled [code]

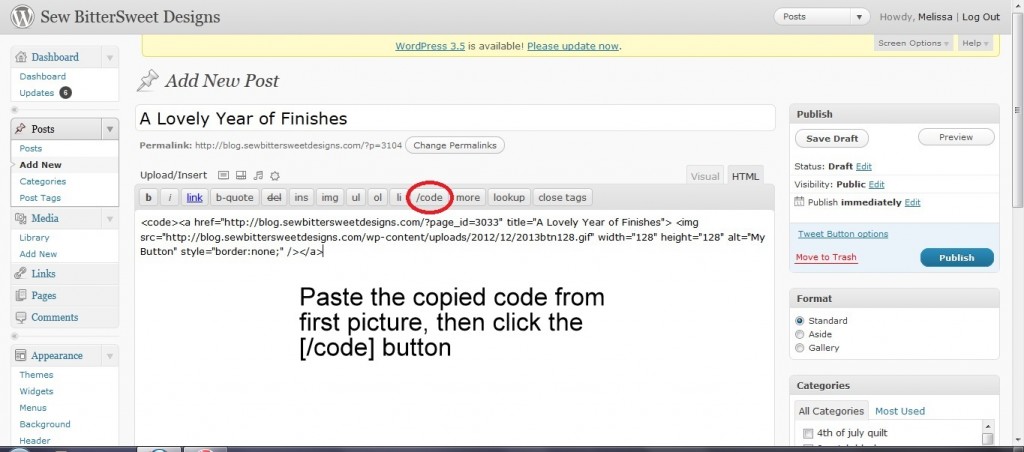
Next you will want to paste the code that you copied and then click on the [/code] button.

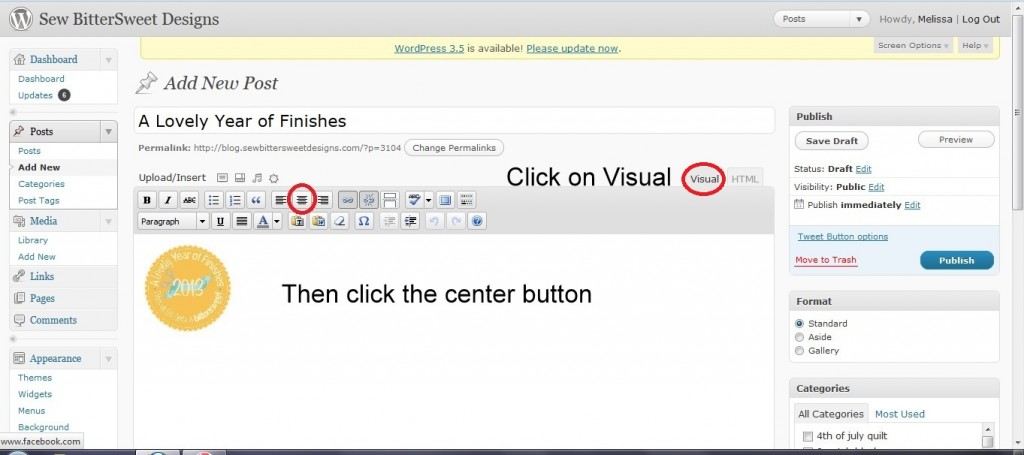
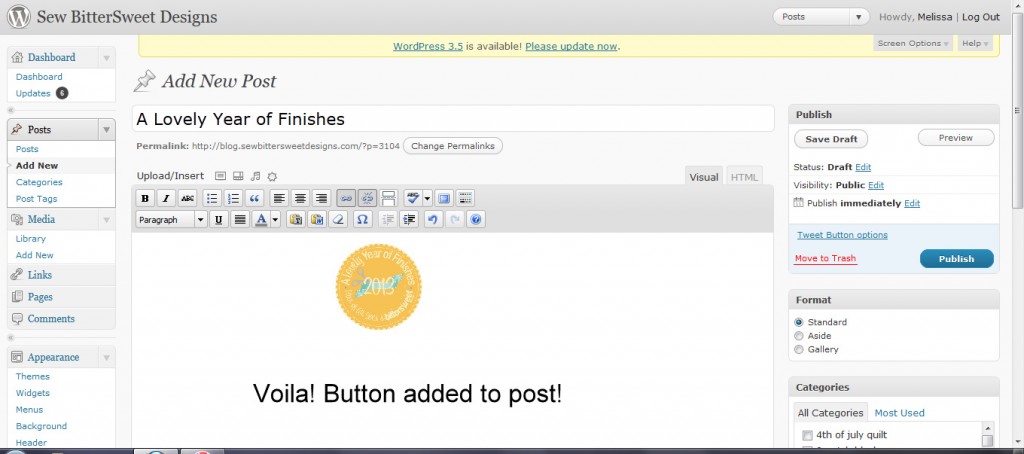
Next you will want to click on the Visual Tab at the top to go back to the normal editor.  Then click on the image and center it.

And….you’re done!

And now you know how to add a button to your blog posts!

If you are joining us in A Lovely Year of Finishes you will need to add the button to your link up posts – as we are trying to spread the love as far as possible. Can’t wait for the first linky party on January 1, 2013!

Tutorial – Add a Button to Your Sidebar

This is a tutorial for those people who use WordPress as a blogging platform.  For a tutorial on adding a button to your sidebar using Blogger, check out Shanna from Fiber of All Sorts, she has you covered!

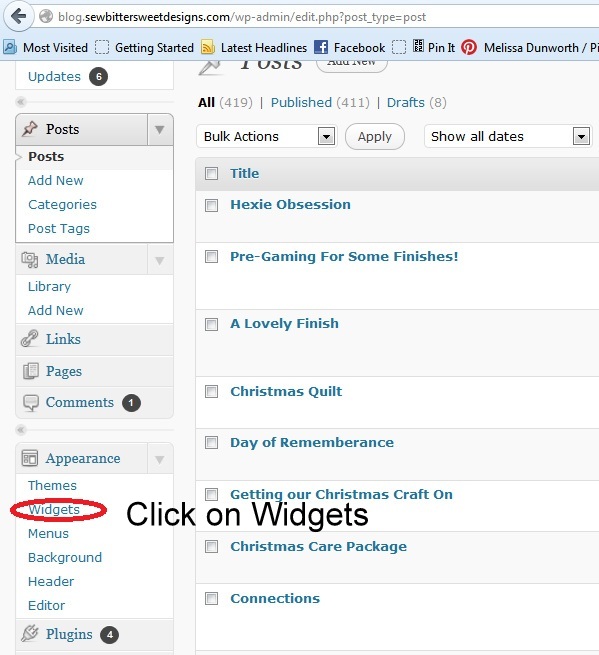
Next, go to your Dashboard and under “Appearance” Select “Widgets”

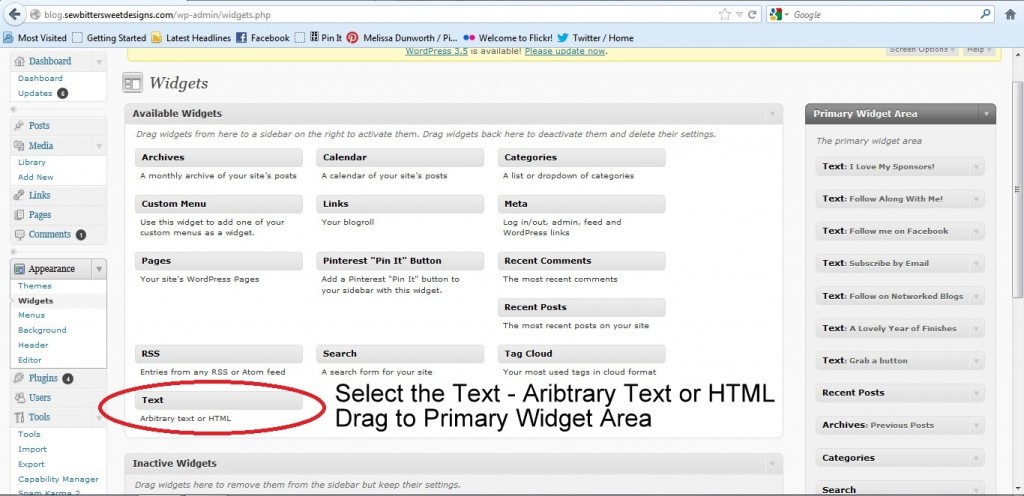
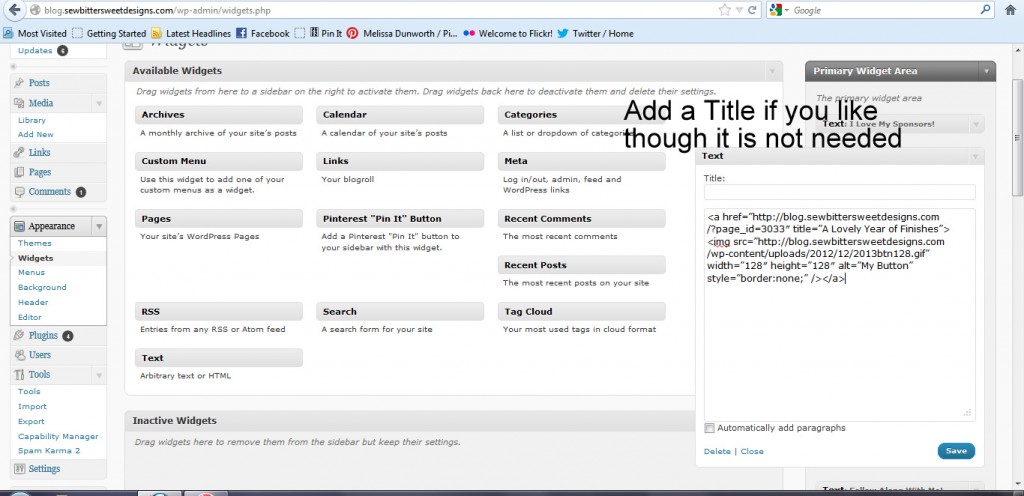
Next click on “Text – Arbitrary text or HTML” You will want to drag it over to your sidebar.

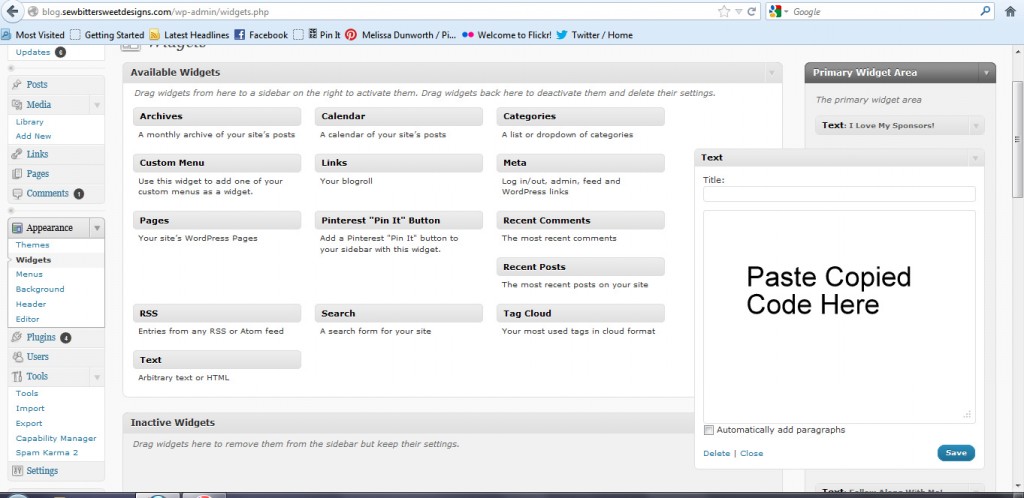
Paste the code you copied in the first step in the text box.

Next you can add a Title if you like, but it is not necessary.  Click Save and Close the box.

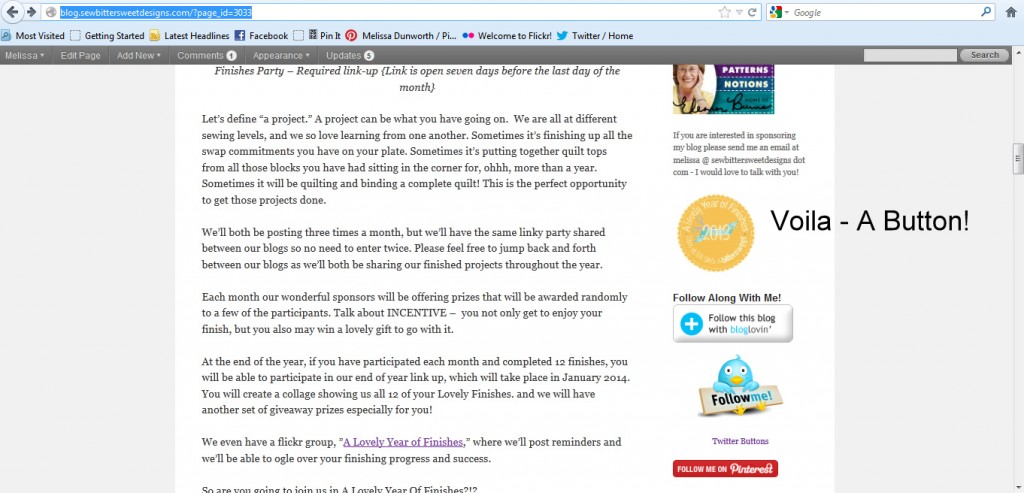
Go to your blog’s homepage and view your button!

Congratulations on adding a button to your sidebar!!!

Now go ahead and add ours today for A Lovely Year of Finishes!!!


Scroll to Top