product review

Ole Frog Eyes Review & Giveaway

(note: Snoodles from Lily Pad Quilting gave me a one month trial so I could give her my thoughts on her software, I then offered to do a review on my blog, the thoughts and opinions presented are my own – and PS. I will be signing up for a subscription when my trial is over!)

Have you heard of Ole Frog Eyes? Ole Frog Eyes is an online quilting tool for those of us who are not lucky enough to have a design wall. There are lots of different types of design walls. You can buy a fancy portable one – but those can run you upwards of $150.00. You can make one – if you have the space – with simple flannel or quilt batting. You can use your floor – but that is rather temporary…

This has been my solution since…well forever. I have never had the space for a design wall.  Well, this is not really convenient – especially when I am working on 4 or 5 quilts at a time. I can’t have all the blocks out at once; I can’t have more than one quilt out at a time. This is where Ole Frog Eyes comes in; they are a VIRTUAL design wall!

Click here to see my whole Vintage Christmas Sampler in Ole Frog Eyes.

There are several cool features that come with your virtual design wall.

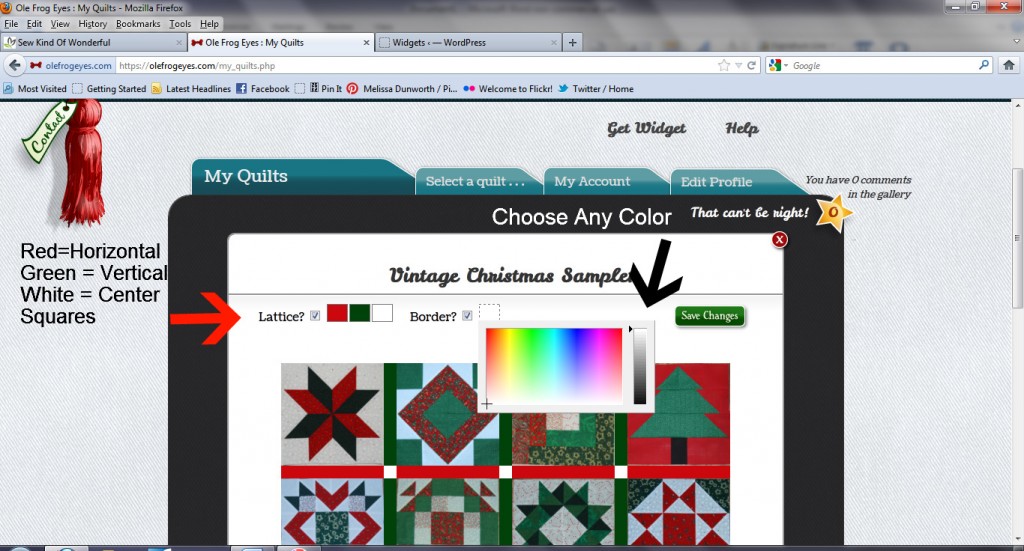
You can upload any block you want, then you can choose borders, in virtually any color, and also select colors for you lattice (sashing). The lattice allows you to select up to three colors: horizontal, vertical and what I will call the center squares – where the horizontal and vertical sections meet.

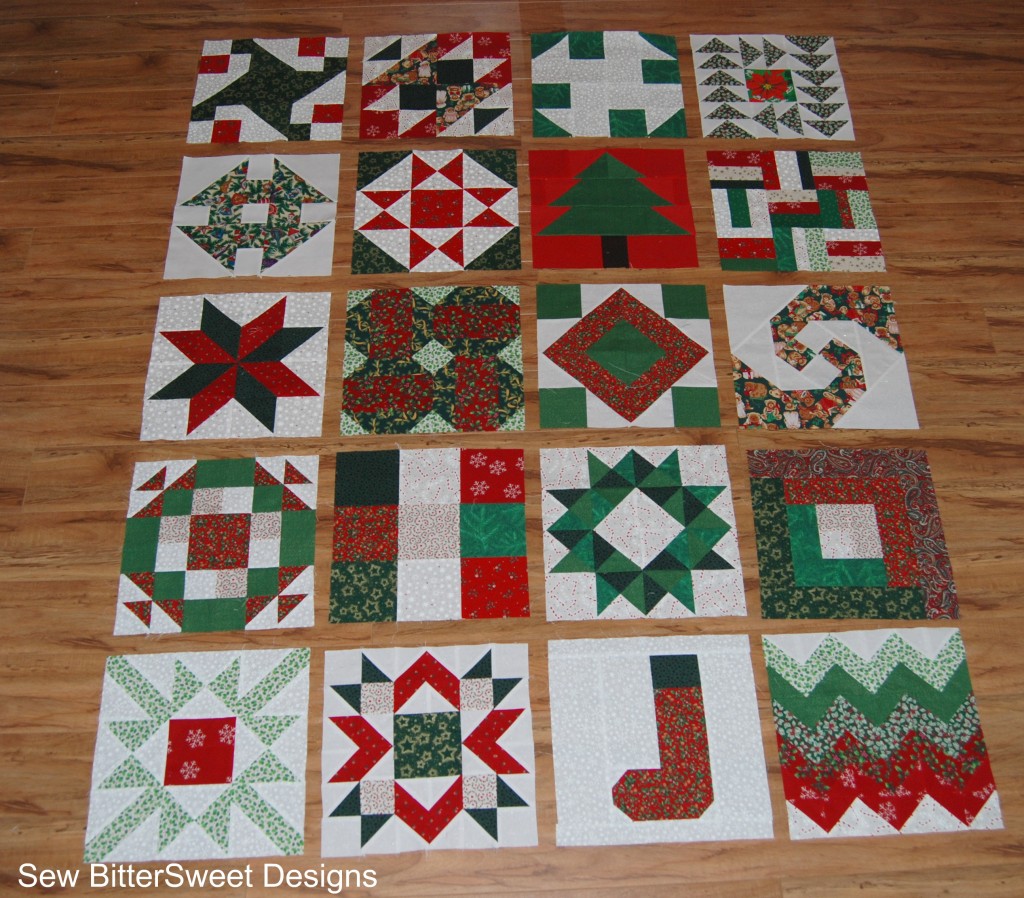
Do you remember my post last week of all the blocks I had completed from SewHappyGeek’s SewHappyQuilt QAL? I had to make a collage of my blocks because I just don’t have much space to lay out my blocks. Well here they are all laid out – with potential sashing and border colors!

Here are the basics for using Ole Frog Eyes:

  1. Your image must be a jpeg
  2. Crop your photo to a square – just like your block
  3. Make sure the file size is no more than 30 kb – there is an awesome video tutorial on Ole Frog Eyes on how to edit your photos and resize them
  4. Click on Create a Quilt
  5. Name It
  6. Select your template – classic or on point
  7. Enter number of columns
  8. Enter number of rows
  9. Check the box if you want to have a lattice (sashing)
  10. Check the box if you want to have a border
  11. Then start uploading your photos and select your colors for lattice (sashing) and border

Here is what it looks like when selecting your lattice (sashing) and border colors. As you can see, they offer every color under the sun.

Things I like about Ole Frog Eyes:

  • Virtual Design Wall! I’m not sure I need to say more about that. I have a 2 year old and limited space in my sewing room. Virtual anything is beyond welcome!
  • You will never have to pick your quilt blocks up again!
  • Lots of choices for the lattice (sashing) – up to three different colors – this allows more design options
  • Border – this allows me to visualize my end product and give me an idea of what colors will work well
  • Ease of use – after watching the video on making my image size smaller, I was off and running. I have 2 more quilts in the works that I am going to be uploading to Ole Frog Eyes
  • Visual progress: with each block I upload – I can see the progress I am making on my quilt. When I started uploading my Sew Happy Quilt blocks I realized that there were some prints that I had overused and some that I hadn’t used at all, this allowed me to even up my usage of the fabric line and my quilt is more balanced now.
  • Affordable! It is only $2.50 per month.  On almost any budget that is easy to swing.
  • If you have any issues – you just have to pull the red cord and an email window will open to message the website administrator for help! (makes me feel so luxurious to have a cord to pull for instant help)
  • You can display your quilts online and have people comment on them – and who doesn’t love positive feedback!

Area’s for Improvement:

  • I would love to see the next version of Ole Frog Eyes to have a drag and drop feature. That way after uploading you blocks you can easily move them around into a layout you like better. Right now you have to delete your blocks and reload them.  I have spoken to Snoodles about this and I do believe it is something they are working on for the next version.

Final Thoughts:

This is a great product for anyone who has the following limitations: limited space, pets (pet hair on blocks = more work cleaning later), toddlers (mine likes to play with my blocks), no sewing space (kitchen table double as your sewing area?).  It is also great for figuring out fabric usage, layout, lattice (sashing) and border colors.

Now for the giveaway! Snoodles and Padsworth (the Ole Frog Eyes mascot) have decided to give two of my wonderful reader’s free one-month subscriptions to test drive this awesome software!

So how can you enter?!? Two ways to enter:

  1. Check out the Ole Frog Eyes website and tell me why you would like to use it? Personally – I like being able to see my fabric/color distribution. (entry 1)
  2. Blog, Tweet, or Facebook about this giveaway, come back and give me the link. (entry 2)

Please make sure you are following my blog – there are lots of ways to do it (this is mandatory to enter but does not count as an entry).

Good luck! The giveaway will be open through 9pm Friday March 9th. I will announce the winner on Saturday March 10th.

Tri-Recs Tool Review & Mini-Tutorial

(Fat Quarter Shop provided me with this tool, the review is entirely my own)

When using the Tri-Recs Tool you will work primarily with strips – 1.5” to 6.5” wide by width of fabric (WOF). As seen in yesterday tutorial of my Scrappy Trees block – you can easily use this tool with scraps as well.

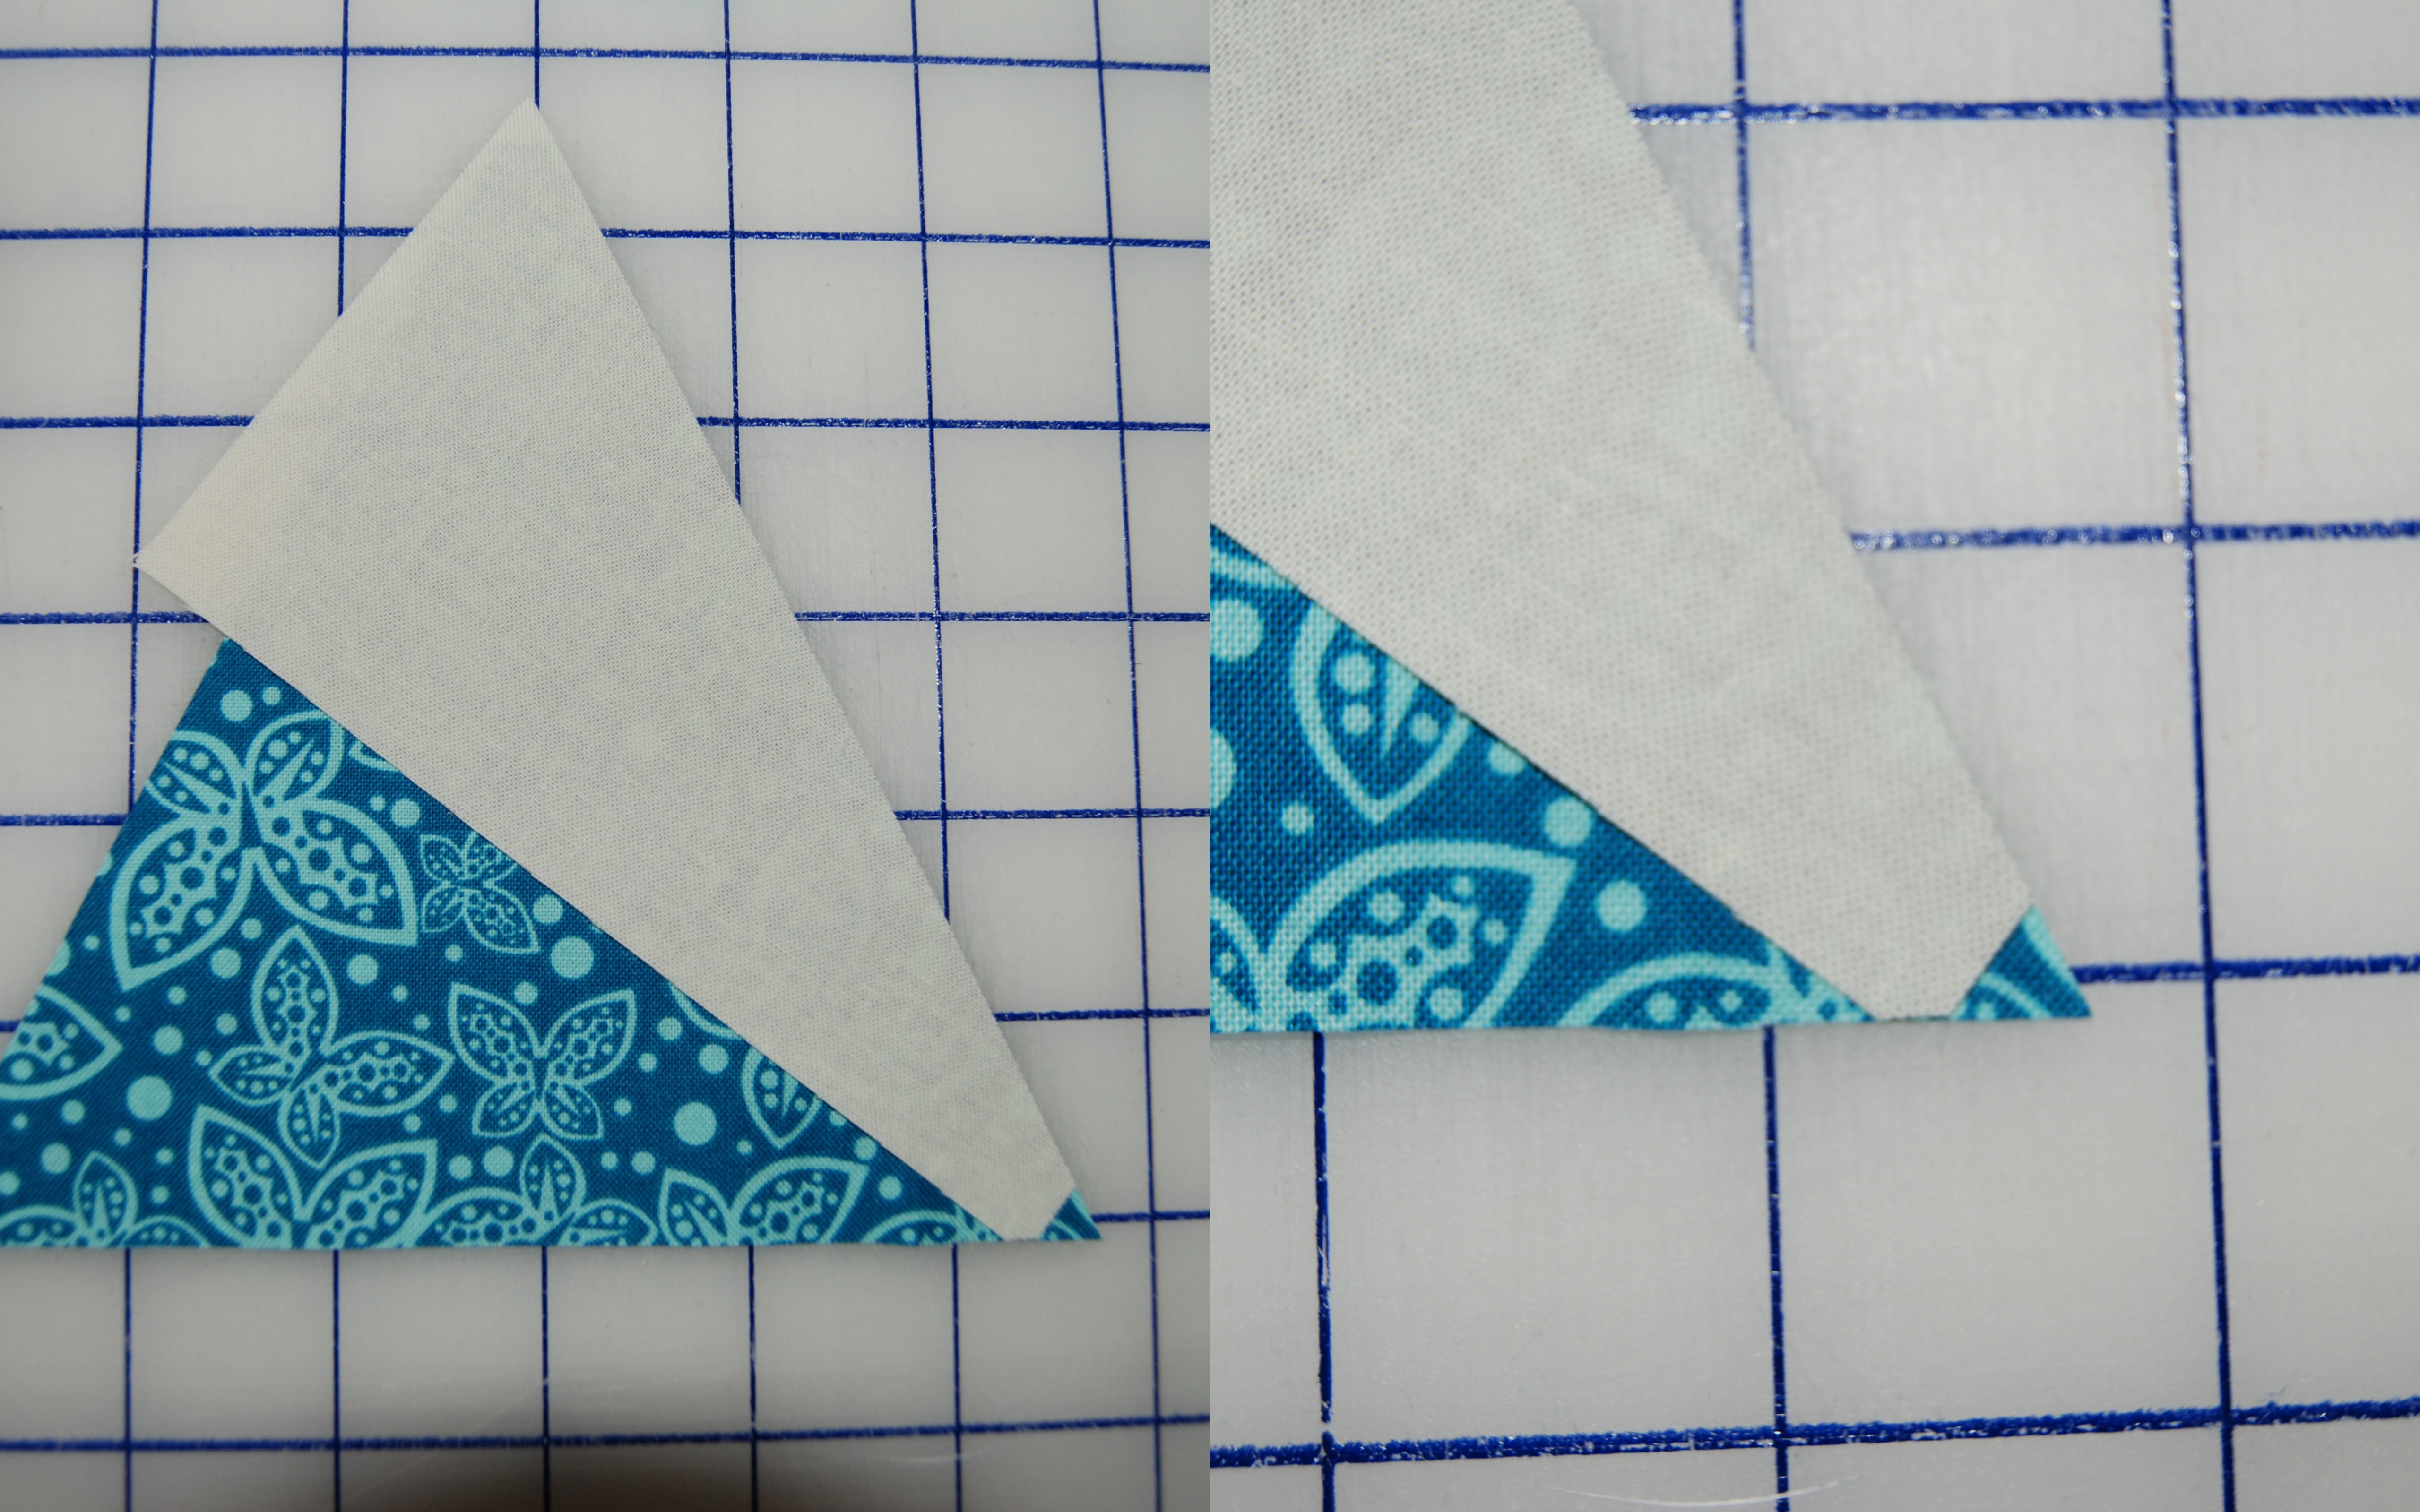
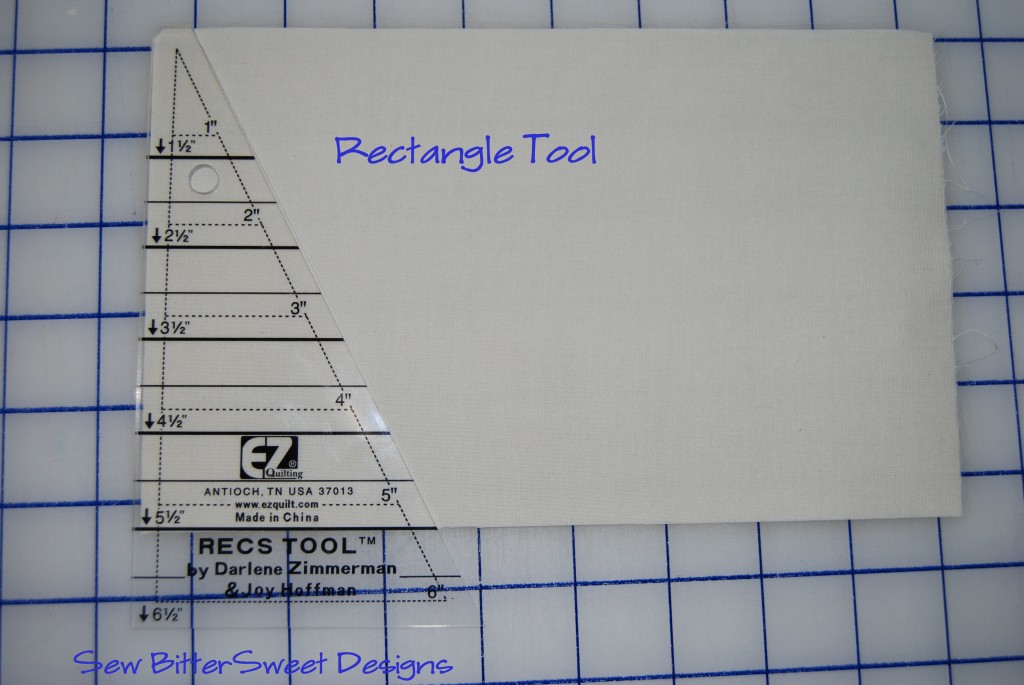
The Tri-Recs Tool comes with 2 acrylic triangles and 2 pamphlets full of instructions and block diagrams. The thing I love best about the tool is that it has notches in multiple spots for easy alignment of your fabrics.

When used correctly you will have 2 separate notches in your “rectangle” pieces.

It is these notches that allow for perfect alignment every time – which in turn helps to avoid unnecessary and tiresome trimming of your blocks.

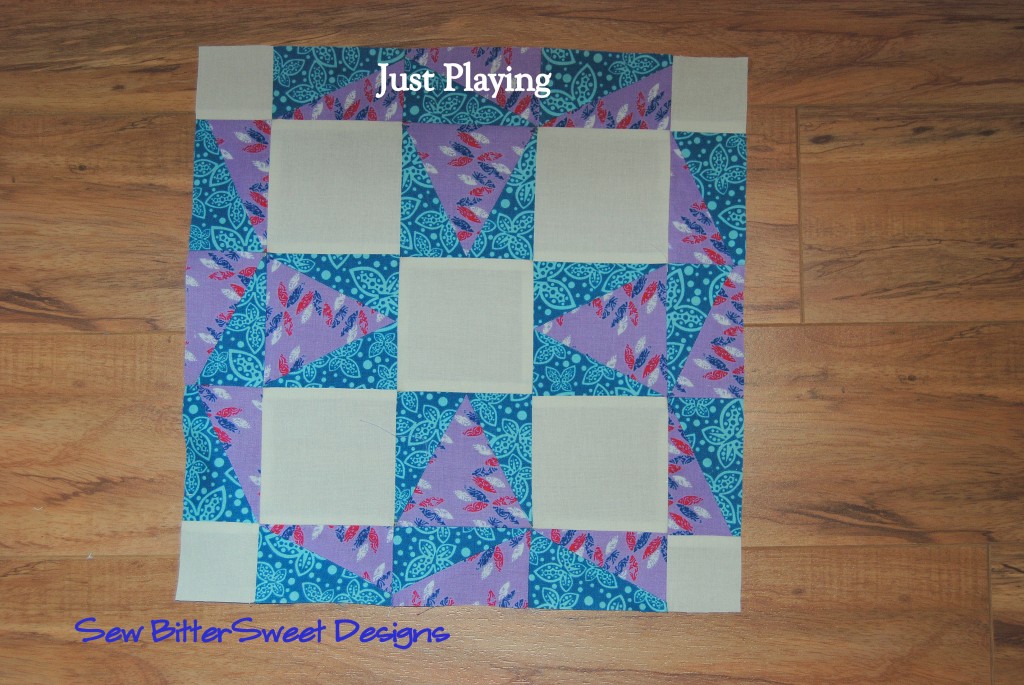
I started out with 2 strips of Imperial Pheasant measuring 3.5” by WOF and I started cutting and sewing, absolutely no plan in mind. I simply wanted to work with the ruler and see what it could do. I then proceeded to create a block that I had a hard time looking at without going cross-eyed (it would be better with different fabric placement choices!), but in creating it I realized that I didn’t trim a single piece and my block measure exactly 12.5”x12.5”! Now I ask you, how often does that ACTUALLY happen?!?

As you can see I incorporated both tools creating triangles in squares and rectangles in the block. The fact that I didn’t have to trim just astounds me.

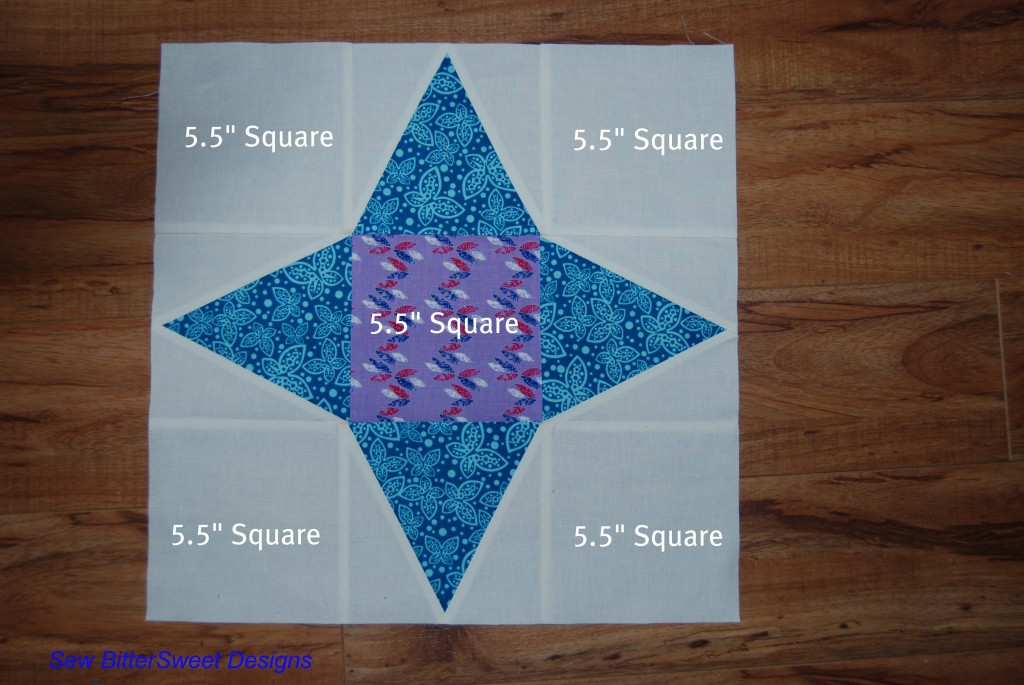
Next up, I wanted to create something that I dearly loved. Again, I had no real plan, but knew that whatever I made needed to be wall hanging size (Imperial Pheasant reminds me of my mom – especially these colors and Mother’s Day is coming…).

This time I cut 1 strip of the blue – 5.5” by WOF, 1 strip of cream 5.5” by WOF and I still had my 3.5” strips of blue and purple from the first block. I also cut 1 purple 5.5” square. I created this:

Using the 60⁰ Triangle Tool on the blue – I cut four 5.5” triangles. Using the Rectangle Tool and the cream, I cut 4 sets of 5.5” rectangle sections (8 total). I sewed those together and then pieced my block.

To make the borders I used the 60⁰ Triangle Tool only and cut alternating blue and purple 3.5” triangles. I pieced those together and added the borders. The border corners were 3.5” squares of the cream.

For more inspiration, my friend Michele from Quilting Gallery has made a gorgeous quilt using the Tri-Recs Tool. You can see her progress pictures here and you can see her finished quilt here. The versatility of the Tri-Recs Tool is beautifully demonstrated in Michele’s Quilt.

Things I like about the Tri-Recs Tool:

  • The notches make it exceptionally easy to sew your sections accurately – when sewing with a consistent ¼” seam, no trimming is required. There is ZERO guess work!
  • There is virtually no learning curve. The two pamphlets and the included diagrams are easy to use and follow – one quick perusal and I was off and creating.
  • You can create finished blocks measuring 6.5” square.  Guiding star before borders was 15.5” square – lots of flexibility with size.
  • This is a great ruler to make borders with – I have never done a triangle or rectangle border now (would never have considered it – too hard!) – now I think they will become a more regular design feature in my quilting projects.

Area’s For Improvement:

  • I really don’t have any…believe it or not.  For both projects I created, I didn’t have any plan, I just started cutting and sewing and the projects went together beautifully, seamlessly and QUICKLY.

Final Thoughts:

If you are ready to conquer triangles and create some wonderful border details then it is time to purchase the Tri-Recs Tool. I didn’t realize just how much I needed this ruler until I had it! I know I will be using it often in future projects.

Do you have the Tri-Recs Tool? You can purchase yours from Fat Quarter Shop and make sure you also enter their giveaway on Monday’s post too!

Superior Threads – The Bottom Line Review

Superior ThreadsThe Bottom Line

(Full Disclosure: Superior Threads provided me with samples of their threads and needles – the thoughts and opinions presented are my own)

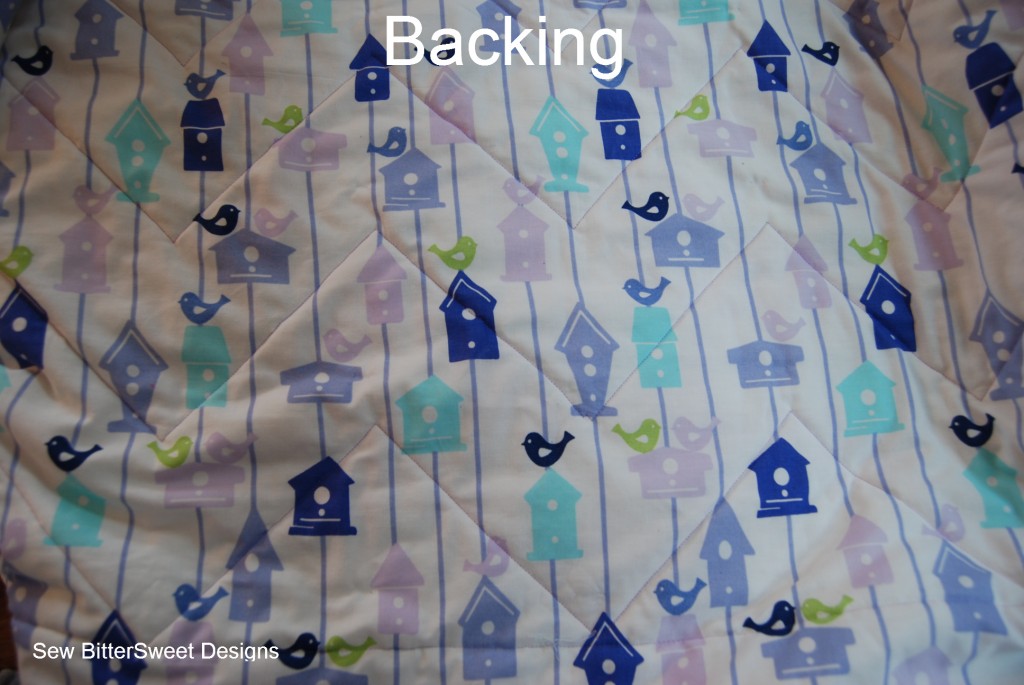
I was first introduced to The Bottom Line by Superior Threads at a quilting shop in Idaho. I was looking for thread to quilt my Fancy Flocks quilt, I had already found the perfect thread for the top and I was looking for a bobbin thread. I wanted something that would blend to the point of being virtually invisible but really strong.  I was shown a couple of quilting examples using The Bottom Line and I was sold. I purchased one spool to quilt Fancy Flocks in and didn’t think about it again.

As I’m hoping you can see, or not see as the case may be, the design of the quilting is there – the chevrons, but you can’t really see the thread it just blends in so perfectly. Exactly the look I was hoping to accomplish!

Later when Superior Threads asked me what I would like to review I suggested The Bottom Line because I wanted to see how it would look used throughout an entire quilt. On their website The Bottom Line is advertised as a quilting, embroidery, bobbin, binding, and applique thread. It is a 60-wt Polyester Thread and comes in 55 colors.

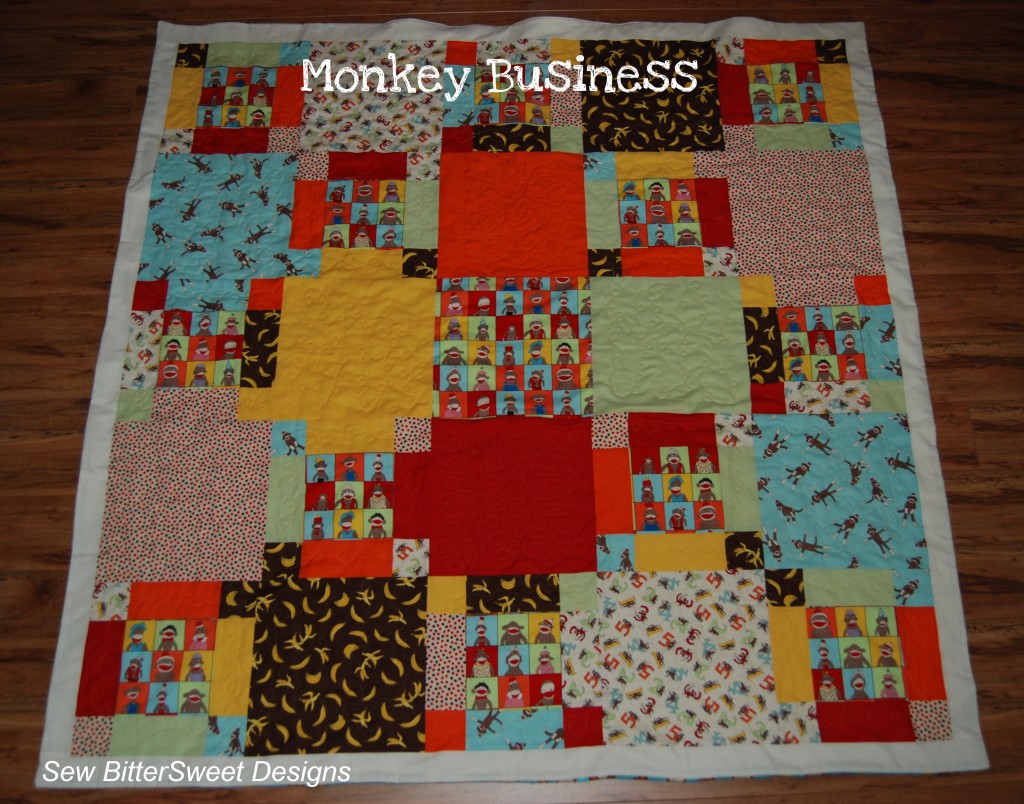
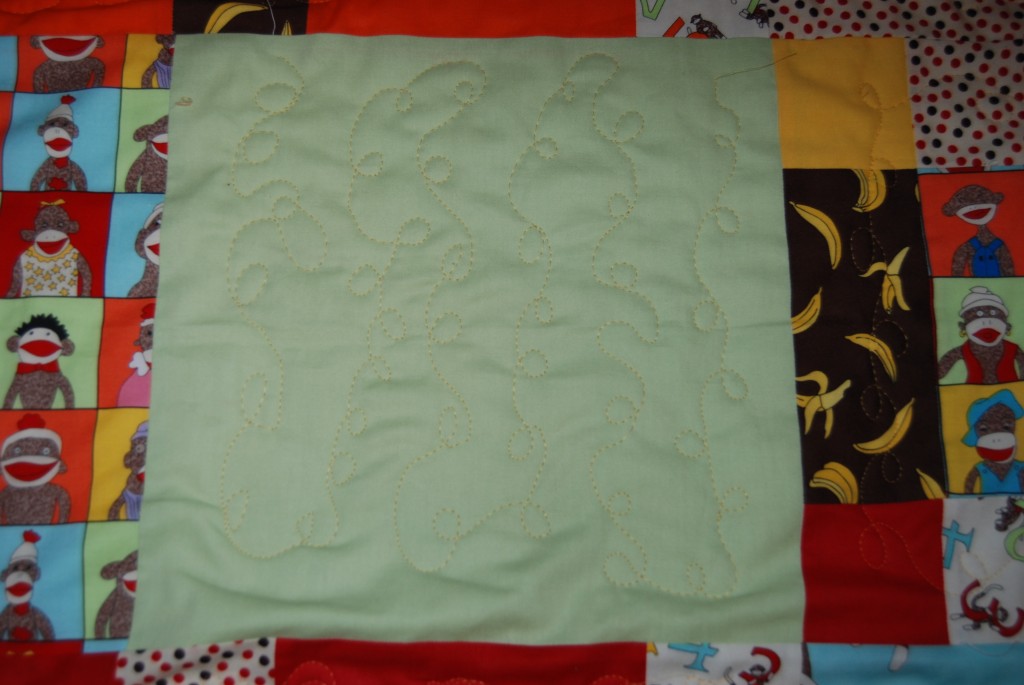
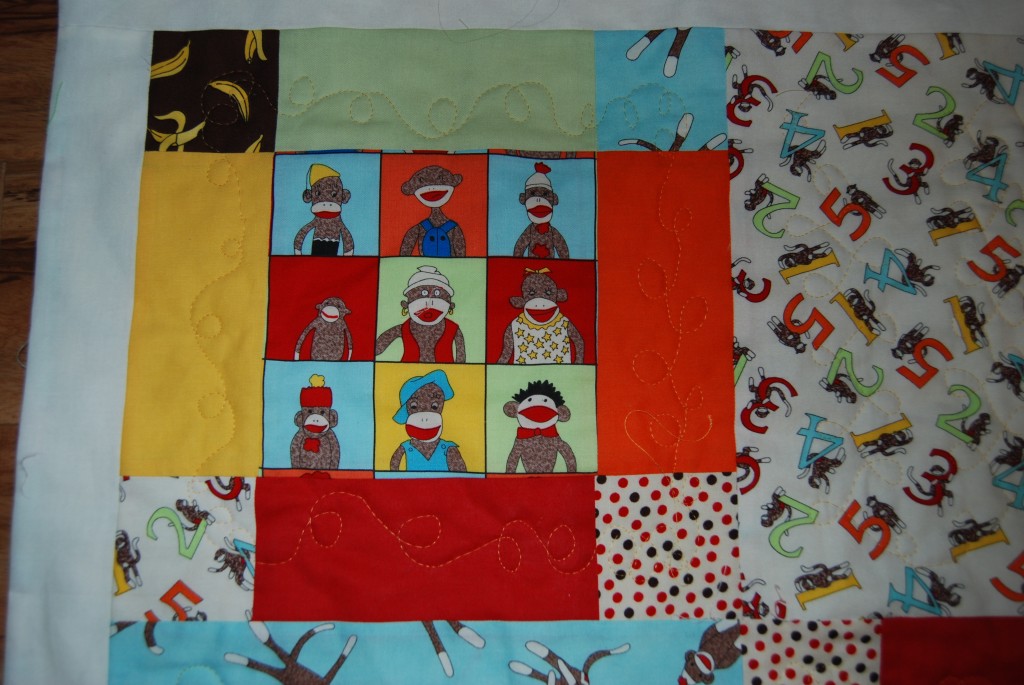
I knew exactly what project I wanted to use The Bottom Line in – Monkey Business – a quilt I designed for my nephew.

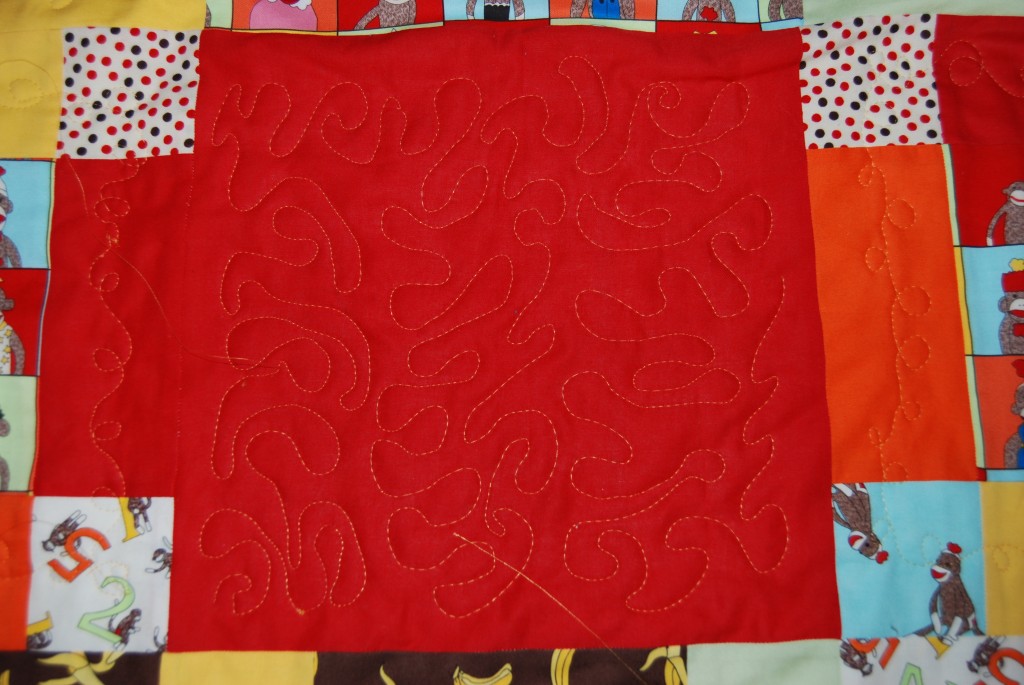
As always before starting a new project, I cleaned out my machine, then I referred to the Home Machine Thread Reference Guide – option 3. I wanted to make sure that I was sewing under optimal conditions. For The Bottom Line the guide suggests a 70/10 or 80/12 needle with a tension of 2.0 to 3.0. I put in an 80/12 needle, set my tension to 2.0 and got started.  I decided to do meandering FMQ on this quilt (and I should mention that this was the FIRST TIME I did FMQ on this machine and only my second time ever!).

The first thing I noticed was that I needed to change my needle, I needed a 70/10 – the 80/12 was simply too large for such a fine thread and it kept breaking. The second thing I noticed was that I needed to go all the way to a 3.0 on my tension setting.  After these two steps – smooth sailing.

As you can see The Bottom Line thread blends beautifully and almost shimmers against the fabric – I purposefully selected a color that would stand out on most of the fabrics as a design detail.

Things I Liked:

  • As a bobbin thread – The Bottom Line blends beautifully into your project – if you are going for a matching seamless look, this is the thread for you
  • As a bobbin thread – there was not a single break (I was using an 80/12 needle when I quilted Fancy Flocks and a cotton top thread)
  • There was no lint AT ALL – I did not have to clean out my machine when I was finished with either project – this is extremely rare with the threads that I typically use.
  • When using it in the top and the bobbin I love how it stands out and shimmers – the quilting becomes an important design feature of the quilt
  • Readily available at your local quilt ship – as I said the first time I used The Bottom Line was when I purchased it at a local shop in Idaho (I was on vacation). Being able to buy it in stores helps because I can match my colors perfectly!
  • The Bottom Line comes in 55 colors and in 3 different spool sizes – having such a range available is fabulous.
  • Education – not only is the Home Machine Thread Reference Guide available to help you get started with the right needle and tension settings, but there are also videos available to help you learn.

Recommendations:

  • Start with the smaller needle size (70/10) when using it in the top and bobbin. When using it in the bobbin go with the needle size you need for your top thread.
  • The 70/10 needle was hard for me to find in local quilt shops – at least the Superior Brand – I will be purchasing these in March at the Puyallup Sew Expo direct from the Superior Threads Booth.
  • Watch the video on The Bottom Line Thread – educating yourself about something you purchased is the smart thing to do. You wouldn’t buy a new washer and dryer without reading the instruction manual, so why would you do that with thread?
  • If you want to try out the thread but are not really sure if you will like it – try out the “Try Me Specials” that Superior offers – it is a great way to try out a new thread and see if it is something that you will want to use in the future.

I have no improvements to offer Superior Threads – except maybe to remove the recommendation of an 80/12 needle – from my experience that was just too large of a needle size when using it in the top and bobbin.  The Bottom Line is a durable thread which offers an additional quality of being beautiful. It adds great design detailing when quilting and it will not gunk up your machine with lint (one of my favorite features of this particular line).

Have you used The Bottom Line? If so, what types of projects have you used it on?

PS. Today is the last day to vote for the Valentine’s Day Showcase – After Party – so go get your vote one!

Lazy Angle Ruler Review & Tutorial

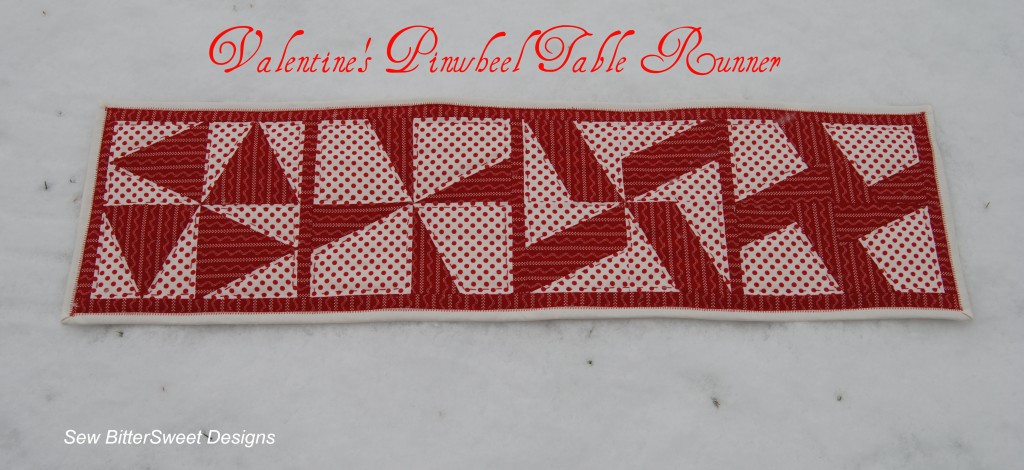
Have you been intrigued by the Lazy Angle Ruler? I was and when the opportunity to do a giveaway and review came up with Fat Quarter Shop, I jumped at the chance and here’s why…I created the 4 blocks for this table runner and 1 additional during Anne’s nap time – all of TWO hours!

Lazy Angle Table Runner

The first thing I did was head over to the Lazy Girl Designs website and download the “Getting Started” chapter from the Lazy & Lovin’ It book.  If you are going to invest in the ruler – I highly recommend printing out these 12 pages. After taking the time to read it and get a real understanding I was able to create these blocks by just cutting, sewing and playing.

I decided to make 8 inch finished blocks – mainly because I have recently been intrigued with that size block.  An 8 inch block requires 4 blocks measuring 4.5″ x 4.5″.

Start with two different fabrics measuring 4.5” by width of fabric.

(It is important to remember when piecing to use a ¼” seam)

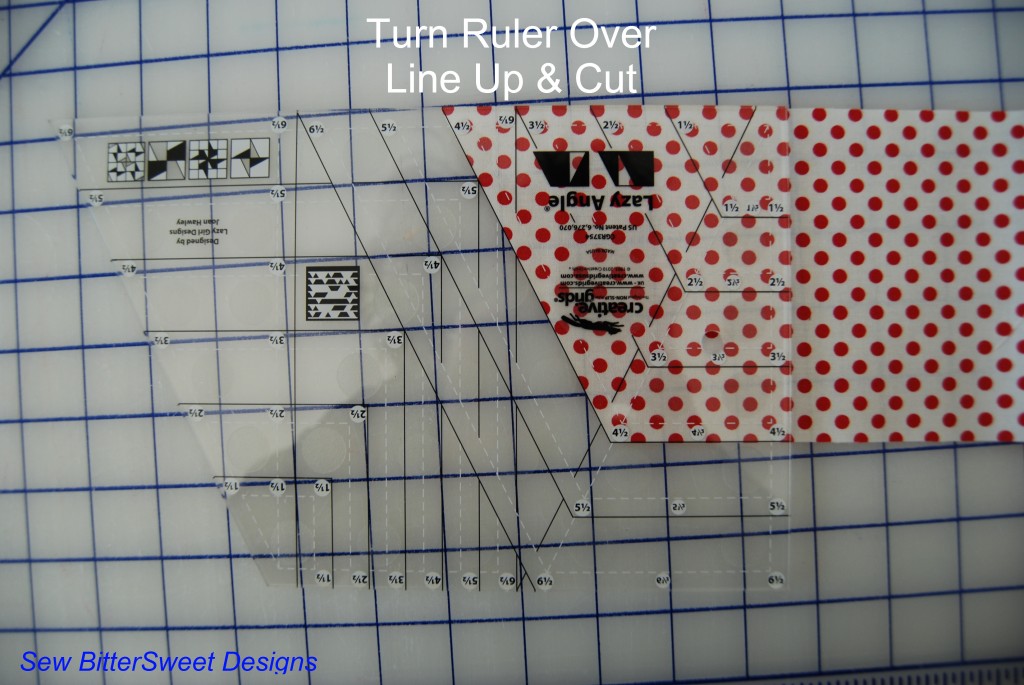
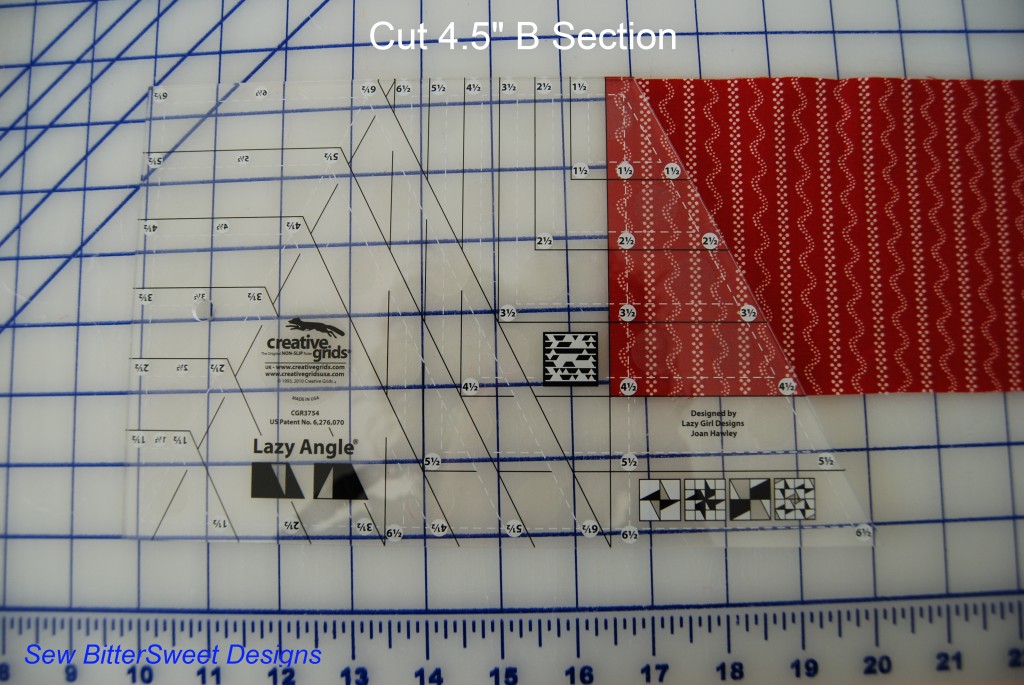
Lazy Angle Ruler

Lazy Angle Ruler

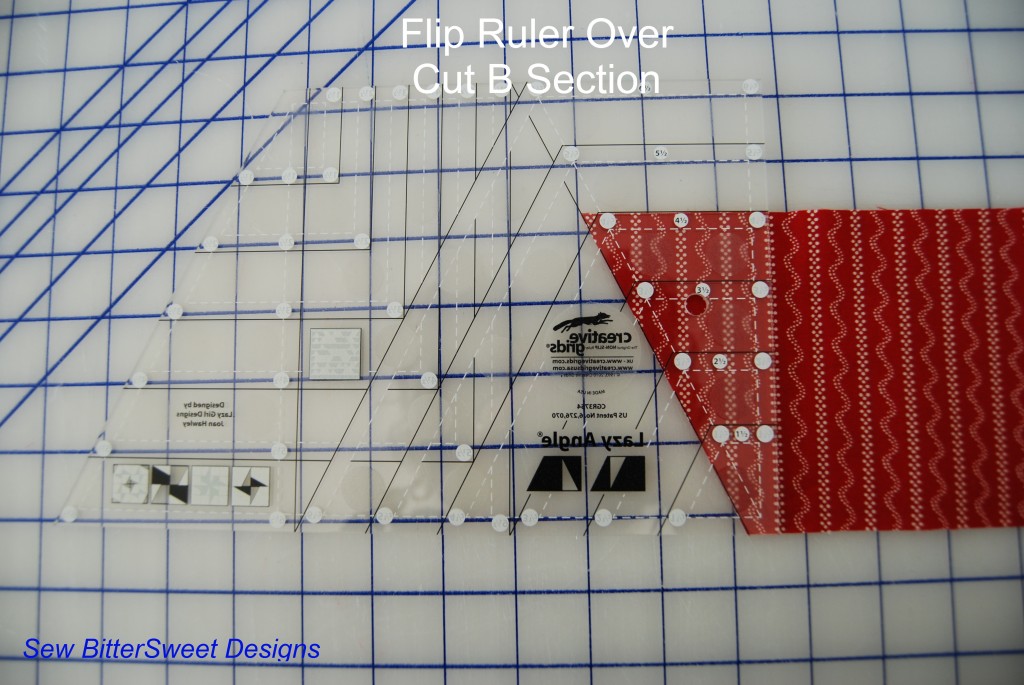
Start by cutting your A sections – for the 1st pinwheel block you will need 4 section A’s and 4 Section B’s.

Lazy Angle RulerLazy Angle Ruler

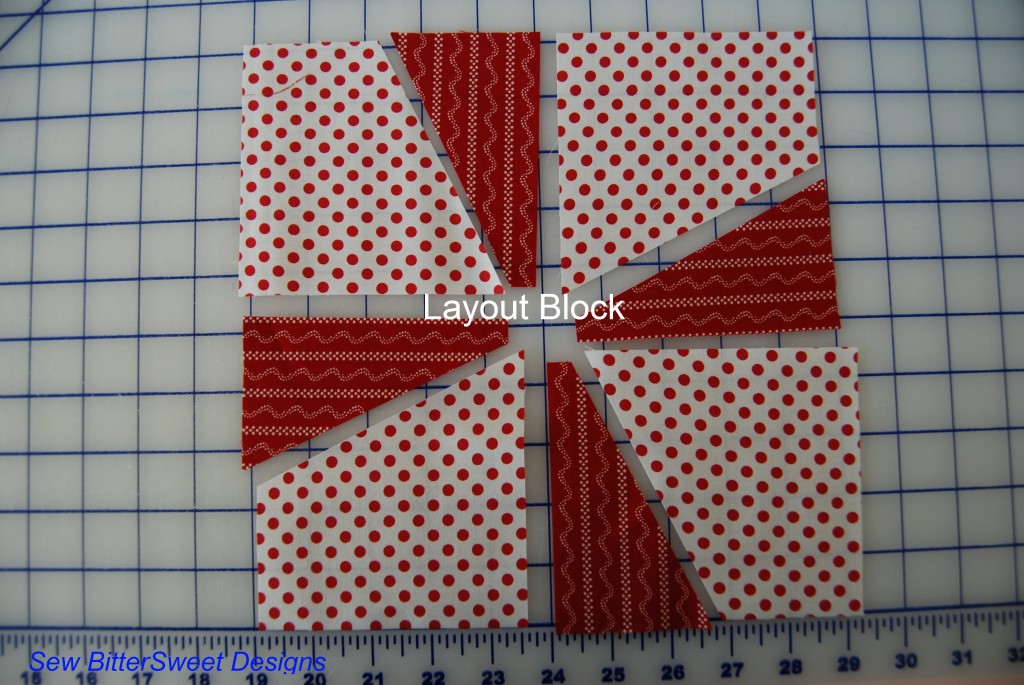
Lay out your block

Lazy Angle Ruler Pinwheel

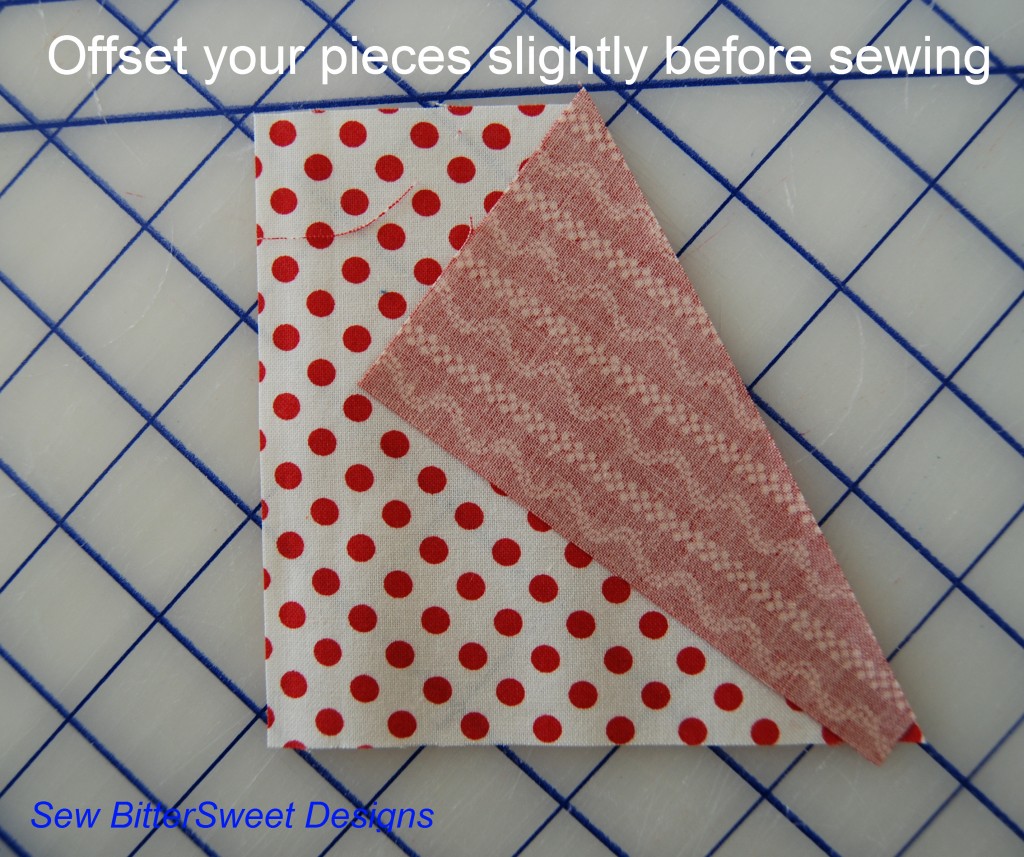
Next you will need to sew your sections together – make sure you slightly offset your pieces – the Lazy Girl Designs website describes this as making a bowtie at the bottom of your piece. Here is how my sections look:

Lazy Angle Ruler

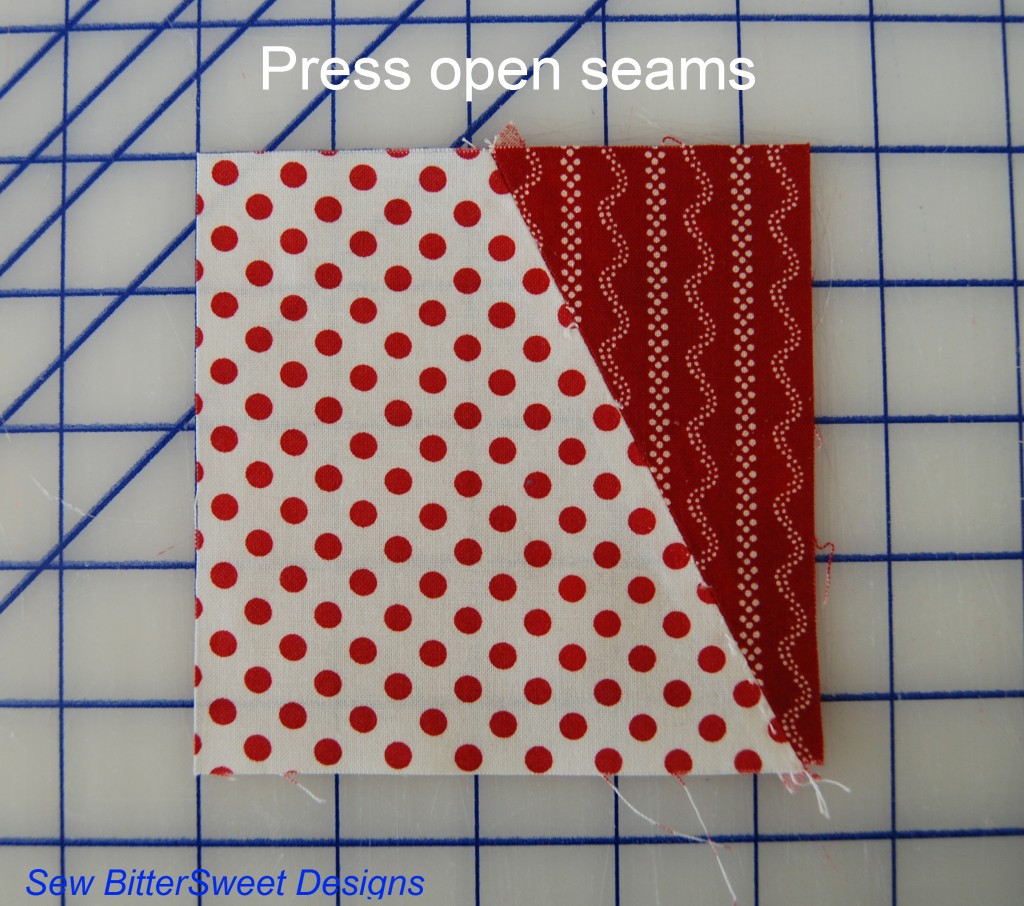
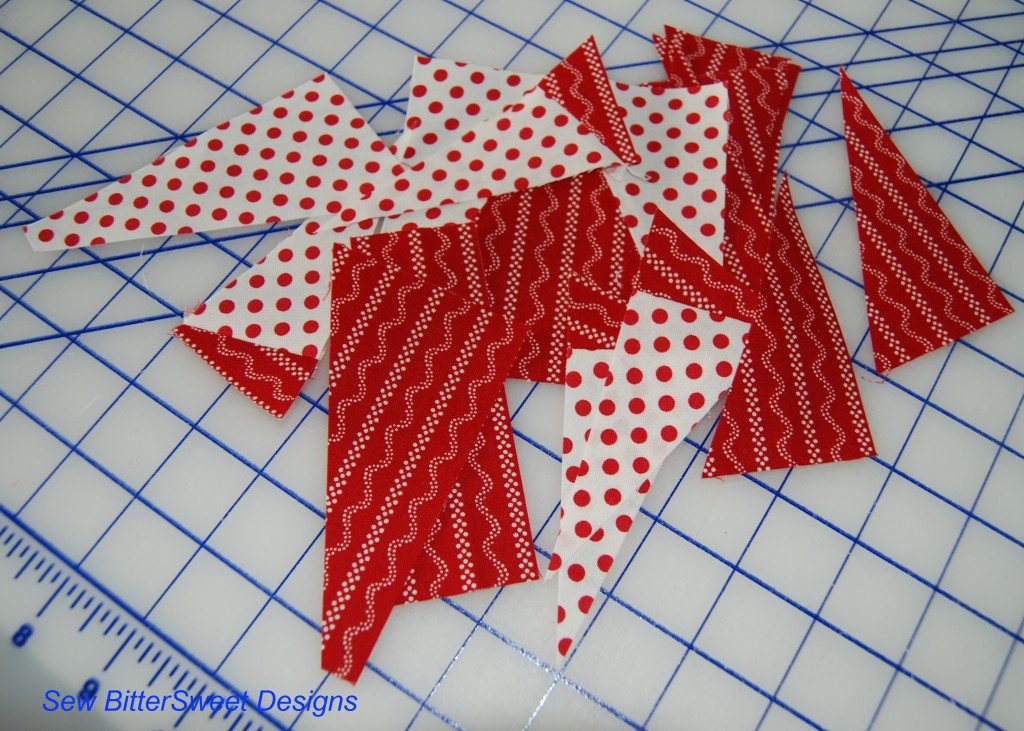
Press your seams open, trim dog ears and you have made your first section! Make 3 more and sew your block together.

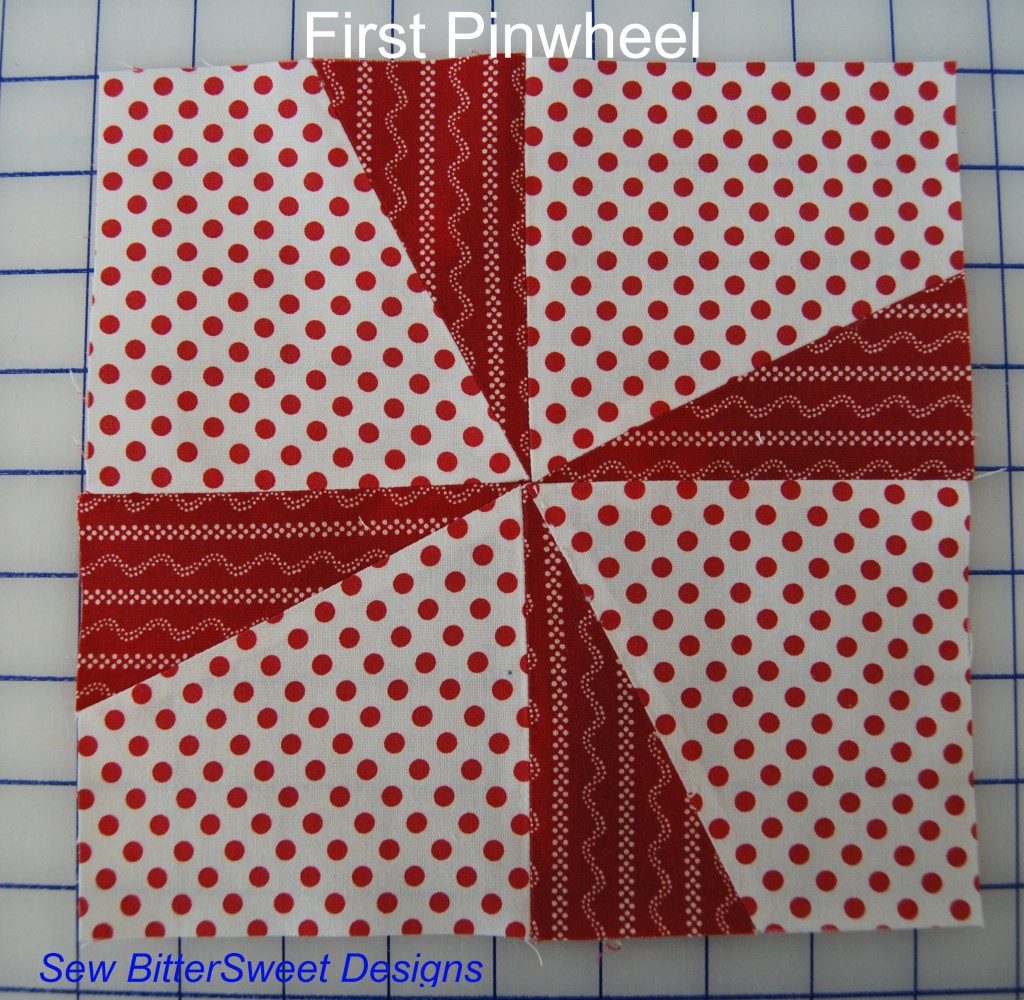
Lazy Angle Ruler Pinwheel Block

Things I like about the ruler:

  • Concise – Aside from trimming dog ears – I didn’t have to trim my blocks to size – they were consistently 4.5” each time (meaning – make sure your ¼” seams are ACCURATE! – if they aren’t you will cause yourself a lot more work!)
  • Once you master this first block the options are ENDLESS – after I had the proportions worked out I designed 10 or more blocks in EQ7 for this ruler
  • The 12 page free downloadable chapter is a wonderful font of information – READ IT!
  • You can create finished blocks measuring from 4” to 12”

Area’s for Improvement:

  • Learning curve – the pamphlet that comes with it was not enough for me to figure out how to use the ruler – however, the Lazy Girl Designs website had a great deal amount of information to help me figure it all out
  • If the pieces are not offset just right, then your square will not line up properly – it took me 3 or 4 tries and lots of quality time with Jack (a.k.a. The Ripper) to figure out the exact right alignment
  • There is quite a bit of waste when you are creating blocks with 3 or more sections – be prepared for a scrap pile

Final Thoughts:

I love this tool – I see myself using it quite a lot in future quilt designs.  While there is a learning curve, DO NOT let it intimidate you. Take the time to download the free chapter and read it. If you are still struggling feel free to send me a message – I would be more than happy to walk you through using this ruler.

Come by tomorrow (internet access willing – we are still having trouble in our neck of the woods) – and I will have up step-by-step picture tutorials for the other 3 blocks in the table runner and cutting instructions for the sashing and border. The day after that I will put up a tutorial on how to do a machine binding on this quilt.

Do you have this ruler? Do you want one? Head over to my Fat Quarter Shop Giveaway for your chance to win one!

NOTE: Don’t forget, I am one of the bloggers who is going to lose Google Friend Connect in March 2012, please take a moment and follow me via Bloglovin’, Facebook, RSS or networked blogs.  You are important to me and I want to be able to stay in contact with you!  Check my side bar for all the best ways to stay in touch after GFC goes bye bye!

Superior Threads – King Tut Review

Superior Threads – King Tut

(Full Disclosure: Superior Threads provided me with samples of their threads and needles – the thoughts and opinions presented are my own)

King Tut was the first thread from Superior Threads that I ever saw. It was in their booth at the International Quilt Festival in 2002. The sheer number of colors and variegated colors is what first caught my eye.  Then of course I got the chance to sew with it!

King Tut is advertised on the Superior Threads website as being “extremely low lint #40/3-ply extra-long staple Egyptian-grown cotton.”  The low lint part is what attracted me to the King Tut thread – I have a lint problem – mainly because I sew with a lot of pre-cut fabrics (ie. jelly rolls, charm packs and layer cakes).  According to the Superior Threads “Thread Reference Guide for Home Machines” – King Tut is recommended for quilting. I put King Tut through its paces on a project that required applique, quilting, and decorative stitching.  As always before trying out a new product – I decided to start with the most ideal conditions: I cleaned out my machine using the same pipe cleaner technique that I did the last time.

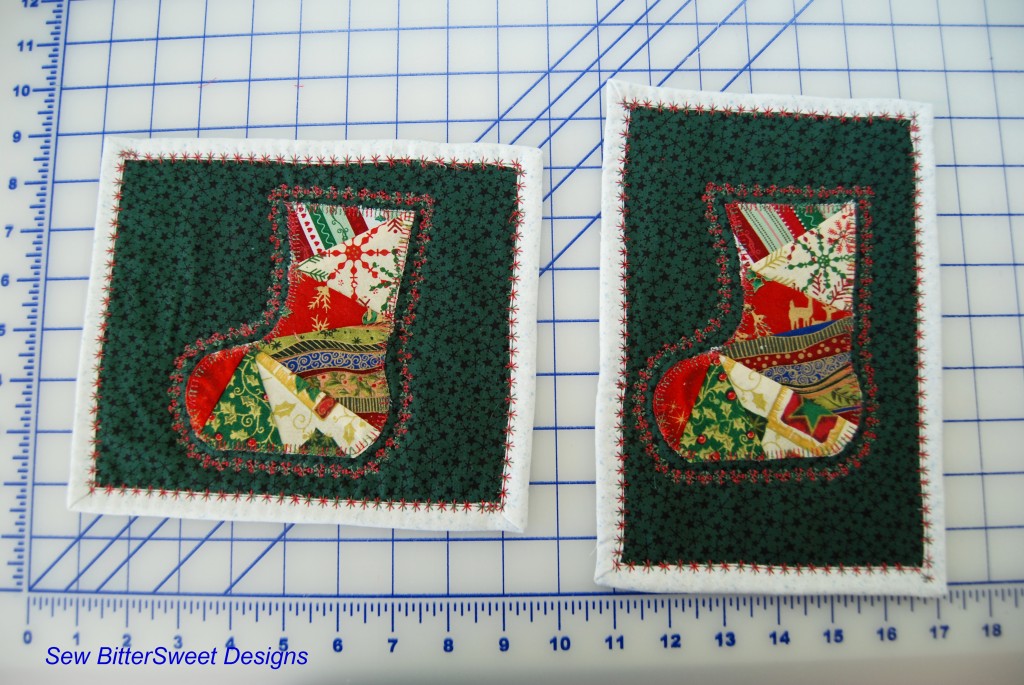
King Tut calls for a 90/14 Topstitch needle and a 3.0-4.0 Top Tension.  It recommends using MasterPiece or So Fine for a bobbin thread – I ended up using the King Tut in my bobbin because I wanted the nice variegated thread on the back of the mug rugs too.

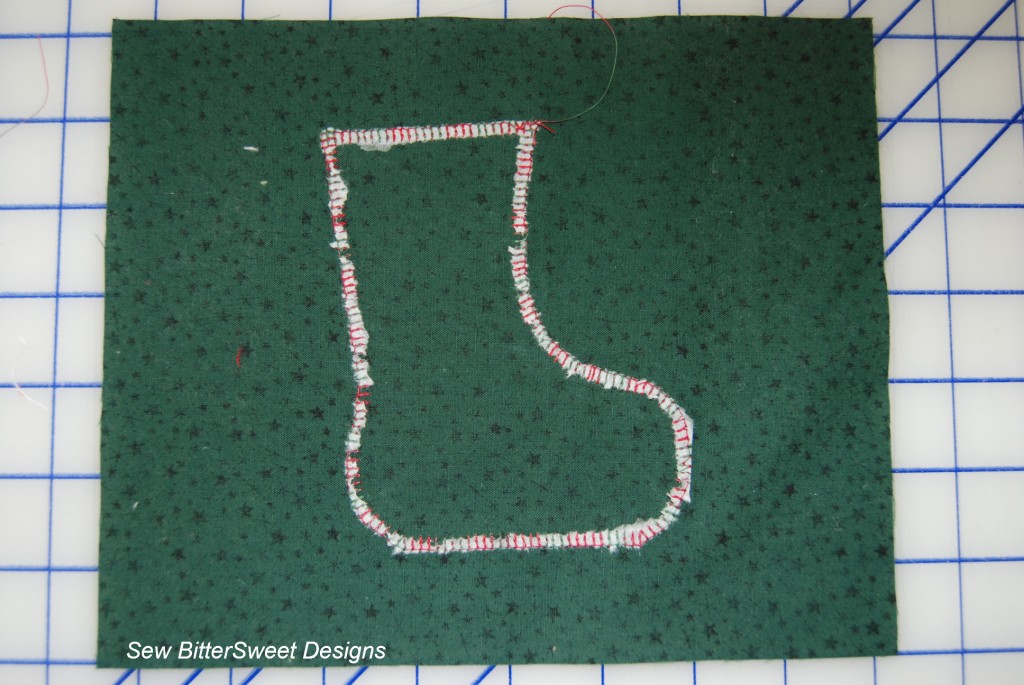
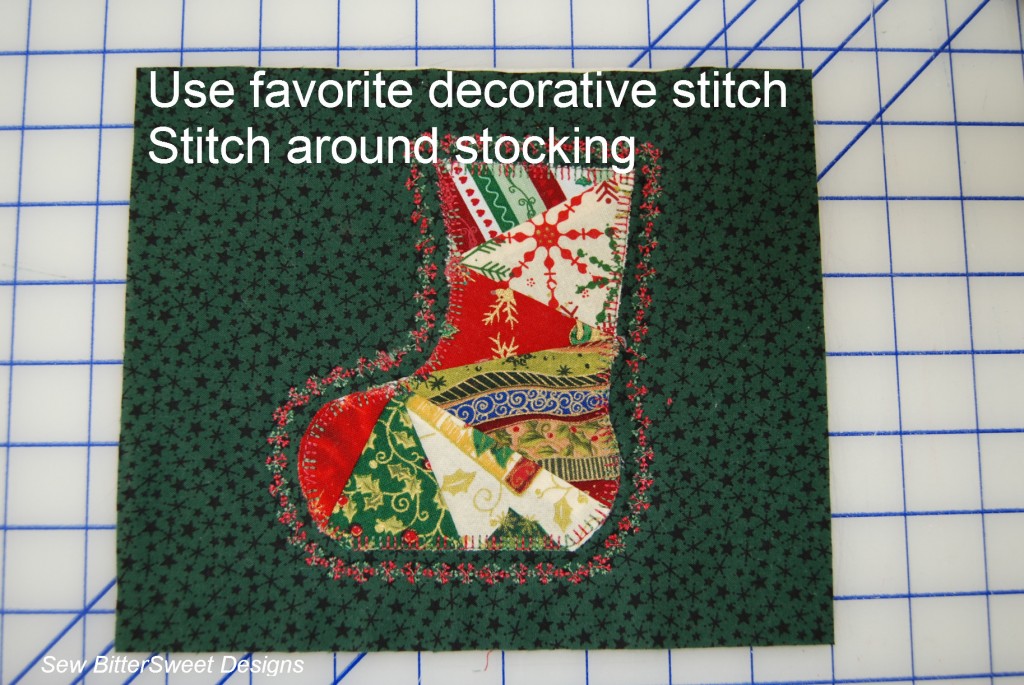
After I had my machine all set up with the ideal conditions suggested by Superior Threads – I got sewing. I started with appliqueing the stockings down, and I was really impressed with the thread, not a single break and the tension on the back was perfect.

When I do an applique project, it is important to me that the thread blend well with my project – and it is also important that the stitching on the back holds up – I want these projects to wash well and if I have tension problems that will never happen. King Tut worked beautifully for my applique project.

Next I decided to do a little quilting – I used a decorative stitch for quilting the mug rugs together – it is a snowflake stitch with lots of detail in it. I have had problems in the past with my thread breaking when doing decorative stitching in my quilting and I wanted to see if the King Tut would be able to stand up to the challenge.

As you can see I did almost 100 repeats of the decorative stitch and I did not have a single thread break. I was sewing through 2 layers of fabric and a layer of batting.

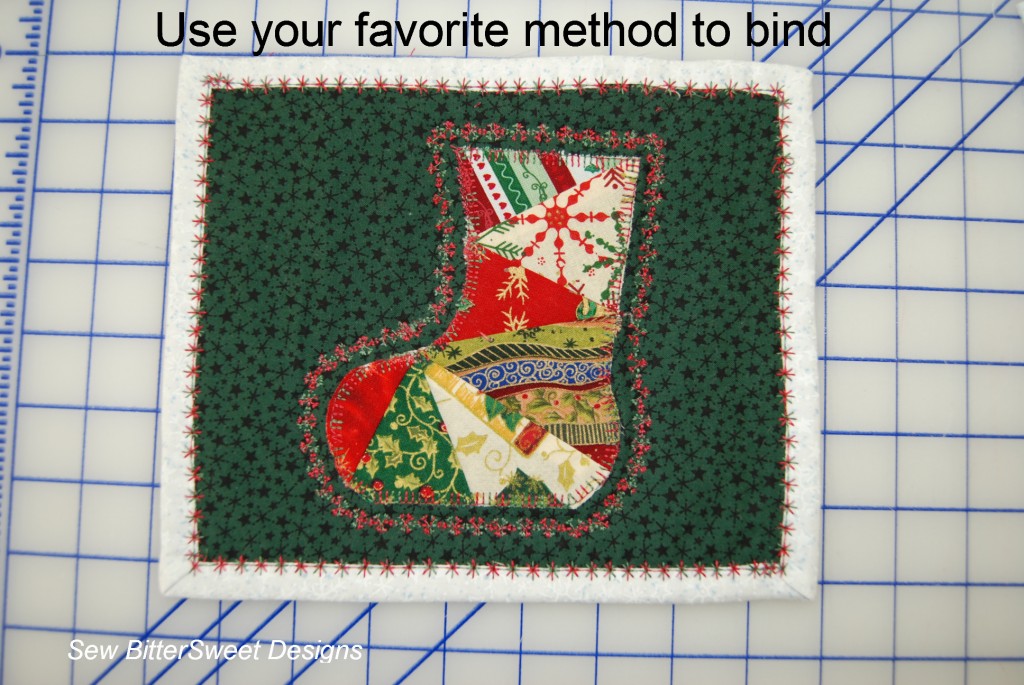
The final test I put the thread through was seeing how it would hold up sewing on binding. This means it had to sew through 6 layers of fabric and a layer of batting.

Again I used decorative stitch – which seems to put a strain on most threads and again, the King Tut held up beautiful, not a single fray or break.

Things I Noticed:

  • Starting with recommended machine and needle settings make all the difference when working with a new thread – take the time to find out what those settings should be for any thread that you work with – if one isn’t recommended then maybe you should consider a different brand of thread.
  • As with the MasterPiece Thread – there was virtually NO LINT – which is always a plus for me
  • While King Tut is recommended as quilting thread, it also worked quite nicely for applique and for decorative stitch work.
  • King Tut is a #40 thread and is strong and durable – this is important in quilting – it means the thread will stand the test of time. I make a lot of quilts for kids and I need a thread that can stand up to multiple washings and a toddler playing with the quilt. I believe King Tut will stand up to the toddler test.
  • King Tut is readily available at my Local Quilt Shop – this is important to me, when I run out I can easily get more.
  • King Tut comes in multiple size cones – you can buy a small amount when working with a specialty color variegated thread (like the Holly and Ivy I used in my project above), or you can buy 2000 yard cones when you know you will be using a lot of the same color thread.
  • There are FIVE videos on the Superior Threads website for King Tut – the fact that education is offered for thread is outstanding to me. Anything that will help keep my frustration levels low when I am sewing is wonderful.

Recommendations:

  • As with MasterPiece Thread – make life easy on yourself and take the time to put your machine on the right settings for the thread you are using. Sewing should be fun and if you are battling the thread and tension rather than working with it, it will never be fun!
  • Watch the videos for King Tut thread and also on cleaning out your machine – I can’t stress enough how much better your machine will run when it is clean.
  • If you want to try out the thread but are not really sure if you will like it – try out the “Try Me Specials” that Superior offers – it is a great way to try out a new thread and see if it is something that you will want to use in the future.

I have no improvements to offer Superior Threads on the King Tut thread – I like that it is so readily available and that it is offered in two different size spools. It is durable and strong, two of the most important things I look for when trying out quilting threads.

Do you use King Tut? What do you like about it? Do you have any improvements to offer?

Did you know that Superior Threads now has a daily deal that they offer? On their homepage and on their facebook page every day they advertise the deal of the day – and let me tell you it is always an awesome deal. Check it out!

PS. I have two active giveaways right now that you can still enter – my Blog Hop Party Giveaway and my SewMamaSew Giveaway!

NOTE: Don’t forget, I am one of the bloggers who is going to lose Google Friend Connect in March 2012, please take a moment and follow me via Bloglovin’, Facebook, RSS or networked blogs.  You are important to me and I want to be able to stay in contact with you!  Check my side bar for all the best ways to stay in touch after GFC goes bye bye!

Scroll to Top